How to Setup the Shopify POS App - Point of Sale System for Shopify
In this post, I’m going to show you step by step how to setup the Shopify POS app.
Firstly, in your admin panel, you have to set up the Shopify POS app and bring the Point of Sale settings up to date before you start using Shopify POS.
Related Post
Order fulfillment preferences
In your Shopify admin, you can set the fulfillment status for each order manually in your online store. Under some circumstances, setting the status of an order to fulfilled will be conducted automatically right from the Shopify POS application when your customers make purchases and pay money.
Enable automatic order fulfillment in Shopify POS for iPad
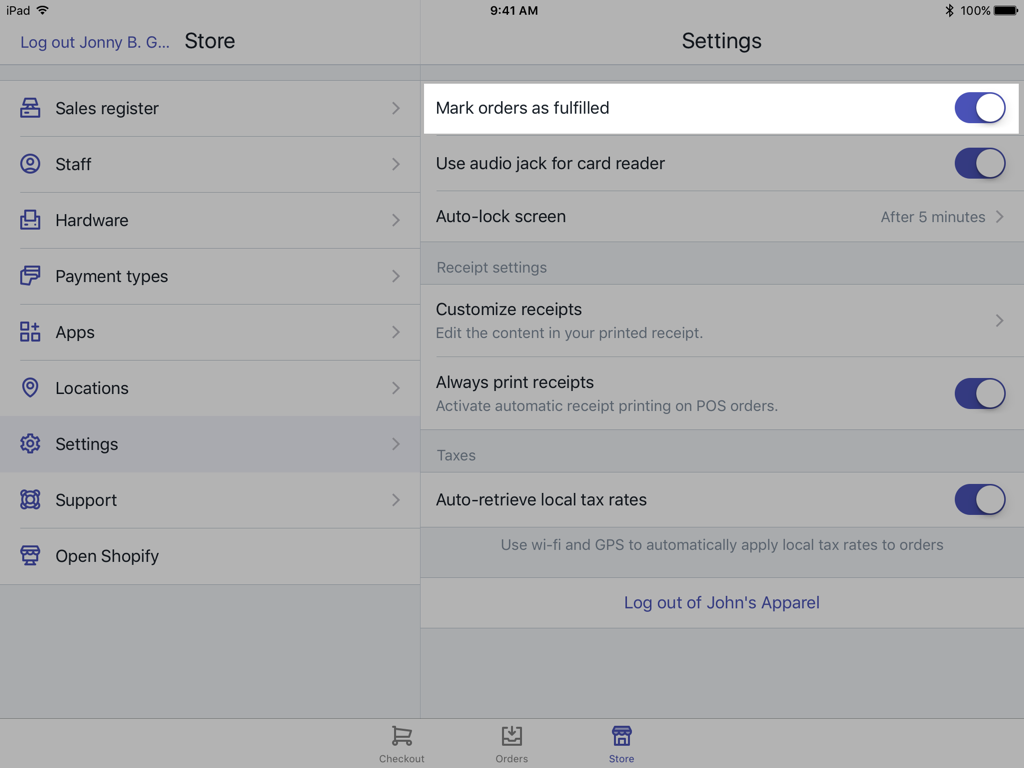
To mark a Shopify POS order as fulfilled:
- Step 1. Select
Store, and then chooseSettings - Step 2. Click the Mark orders as fulfilled option
Location settings
In your Shopify admin, you will see the Locations page easily which includes the name and address of stores, headquarters, and pop-up shops. Tax rates are applied to in-person orders based on the location assigned by the POS device. However, you should assign the Shopify POS to a location after installing this app.
Add a store location as the following:
- Step 1. From
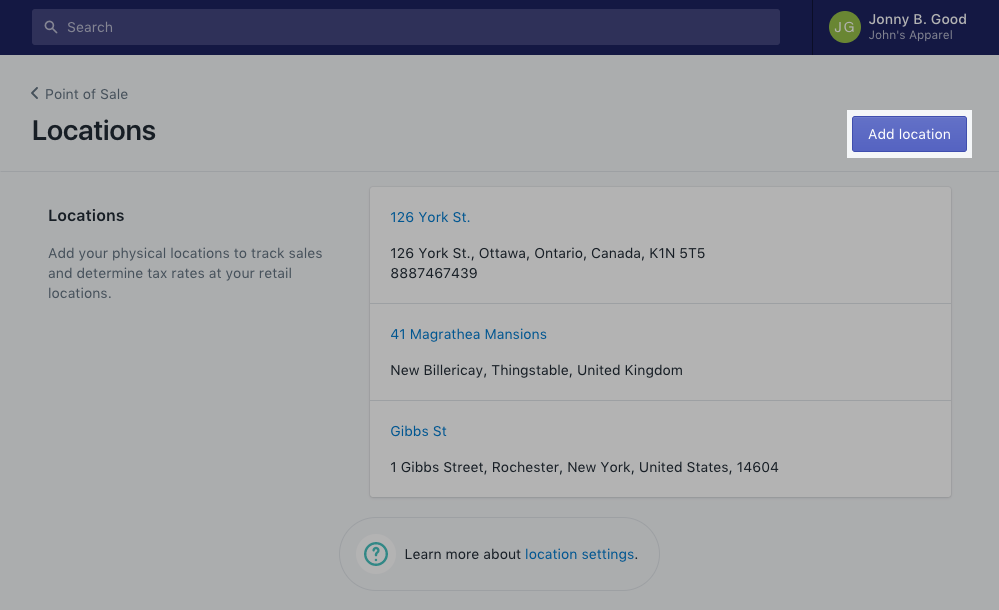
Shopify POS, tapPoint of Sale > Locations - Step 2. Select
Add location
- Step 3. Fill in the details of your new location.
- step 4. Click
Save.
To edit a store location
- Step 1. From your Shopify admin, go to
Point of Sale > Locations. - Step 2. Choose the name of the location that you want to change.
- Step 3. Update the location’s information such as the name, address, or telephone number.
- Step 4. Click
Save
To delete a store location
- Step 1. From your Shopify admin, go to
Point of Sale > Locations. - Step 2. Choose the name of the location that you want to delete.
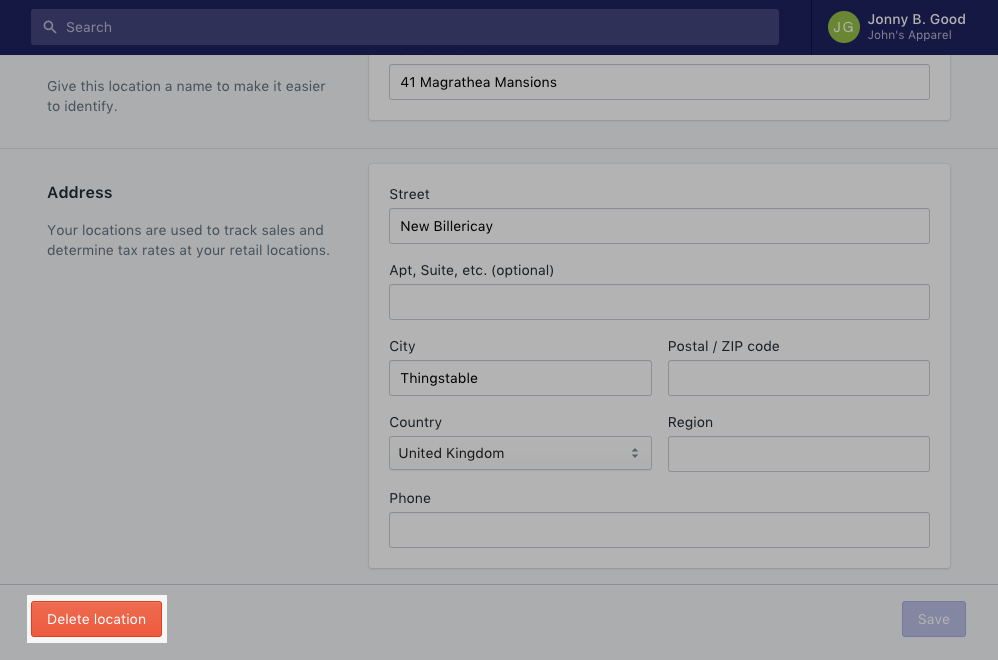
- Step 3. Click
Deletelocation
- Step 4. Click
Deleteto confirm
Staff settings on Shopify POS
The Shopify POS with the retail package on an iPad supports the staff settings while the Shopify POS for iPhone or Android is not.
From the Staff settings screen, it is easy to add or remove members of staff. A unique four-digit PIN code will be provided to each individual member to access the Shopify POS application. With this code, they can also check out their customers.
The staff member name tied to the orders they processed through Shopify POS. In the Shopify admin, you can easily check them on the order’s detail view and Timeline. Nevertheless, users having the limited access can only manage their own account.
To add a new Shopify POS staff PIN
In case of staff members want to access to your Shopify admin beyond the Shopify POS, you need to add them in the Shopify admin. They are given full access to utilize the Shopify admin and POS app.
You can add a new staff member by the following steps:
- Step 1. From
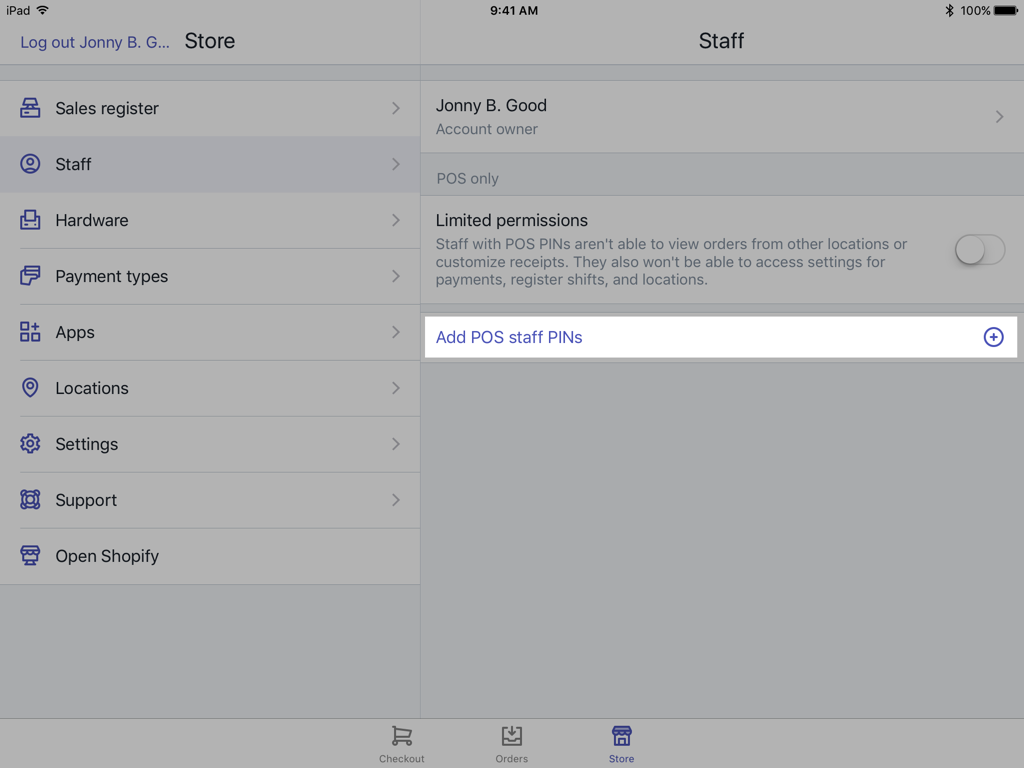
Shopify POS, selectStore, and then selectStaff. - Step 2. Tap
Add POS staff PINsin the POS-ONLY section
- Step 3. Fill in the name of the staff member, and then give them a four-digit PIN code to log in to Shopify POS
- Step 4. Click
Add PIN
Edit a staff member’s details
- Step 1. From
Shopify POS, go toStore > Staff. - Step 2. Click a staff member’s name.
- Step 3. Edit the staff member’s name. Your changes will be saved when you leave the screen. (optional)
- Step 4. Tap
Change PIN CODE, enter a new PIN code and confirm by tappingChange PIN. (optional)
Set limited permissions for staff with POS PINs
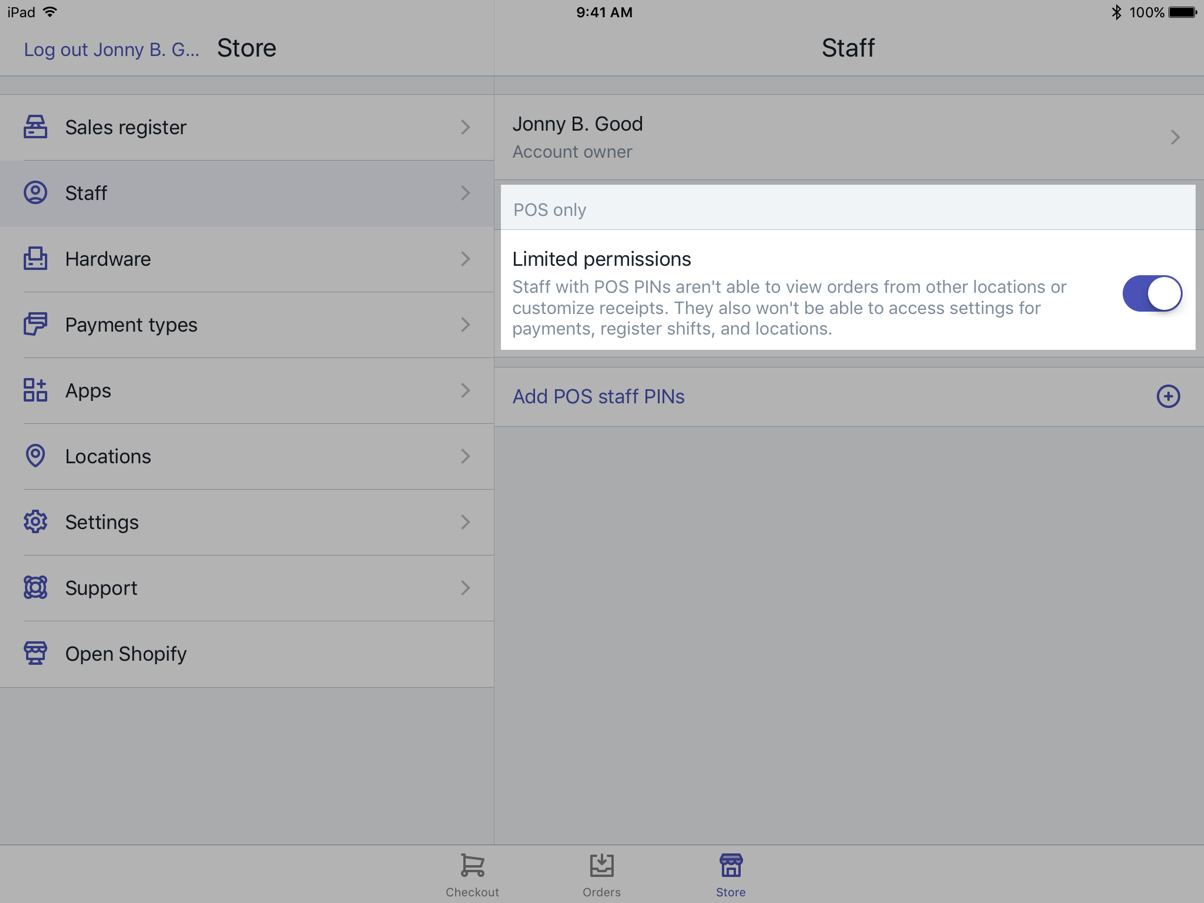
You can limit staff members access permissions with POS PINs from the in-app settings. By this way, they will not be able to see orders from other locations, access register shift, payment, or locations settings, and change receipts.
To enable limited permissions, you have to:
- Step 1. From Shopify POS, tap
Store > Staff - Step 2. Enable the
Limited permissionsoption
Delete a staff member
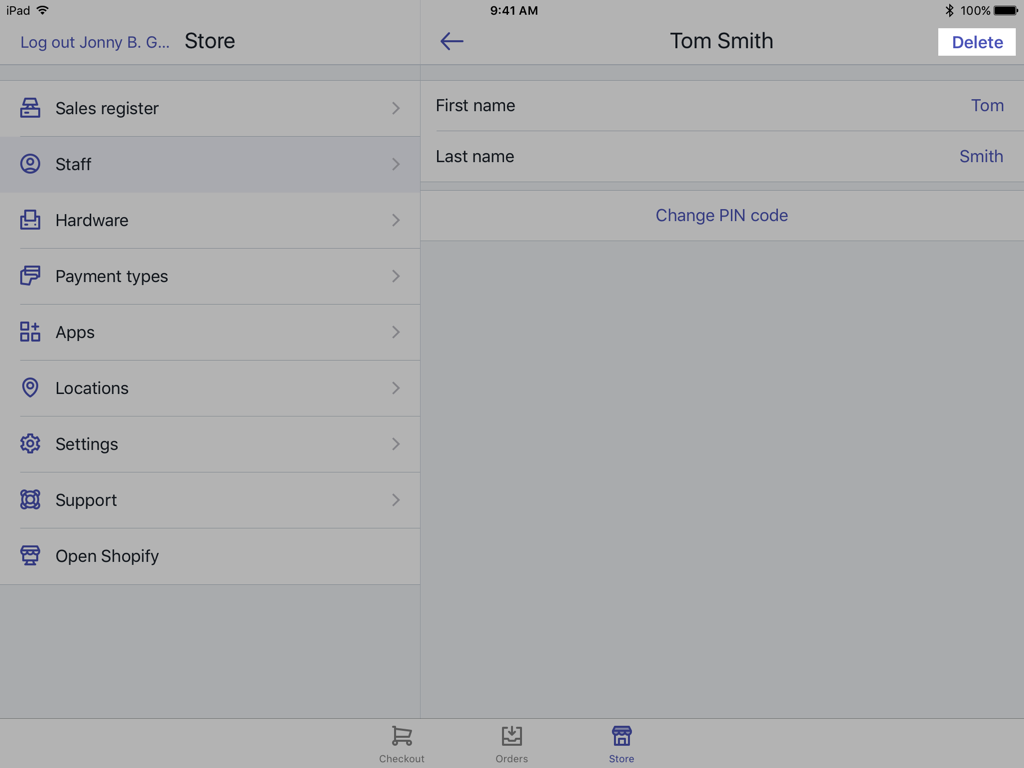
- Step 1. From Shopify POS, tap
Store, and then tapStaff. - Step 2. Choose a staff member’s name.
- Step 3. Tap
Delete
Set staff permissions for Shopify POS
From the Account settings page of Shopify admin, you can change your staff members’ account permissions so that they are able to login to Shopify POS.
Required staff permissions
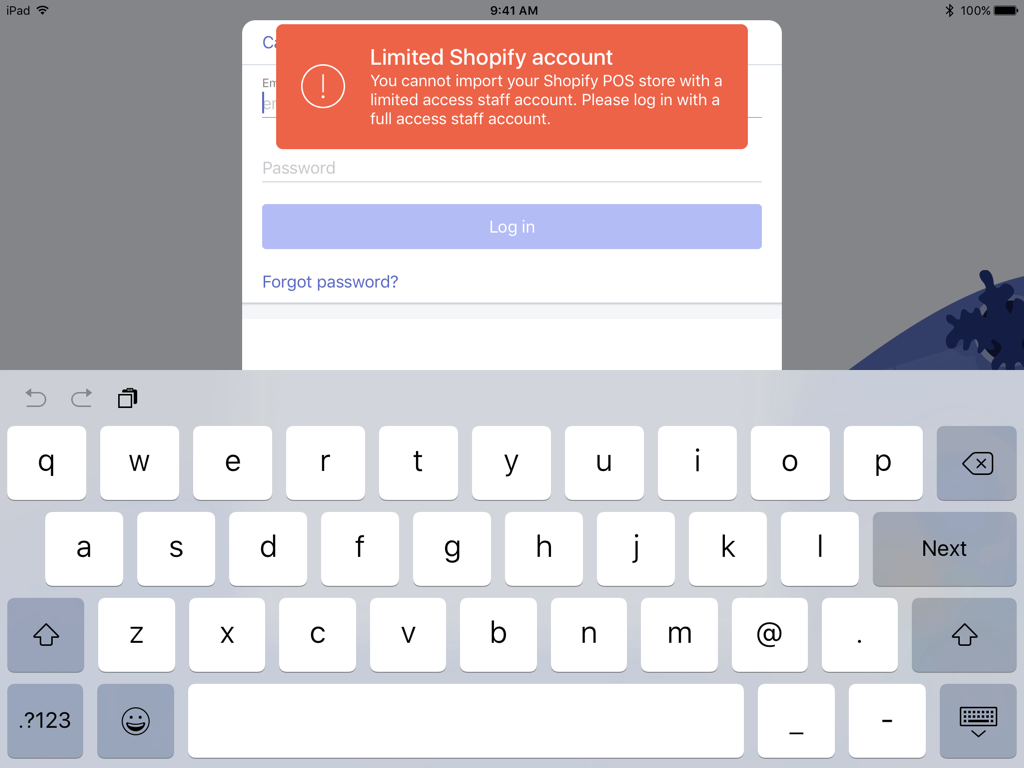
If staff members’ account is not given full access permissions, they will receive the following error when logging in to Shopify POS for iPad:
Register shifts
When transactions happened in your online store, register shifts help you balance the cash drawer easily and hold staff responsible for the money they’ve processed.
The register settings are only available in Shopify POS with the retail package on an iPad. The device’s saved register shift data will be lost if you re-install the Shopify POS app, or upgrade to a newer iPad.
The Register screen
The Sales register screen gives you the possibility to generate and keep the track of register shifts in your web store. You can track your daily total sales and refunds for particular payment methods, and all the cash in your cash drawer as well.
To open Sales register screen in the Shopify POS app on your iPad, tap Store, and then tap Sales register
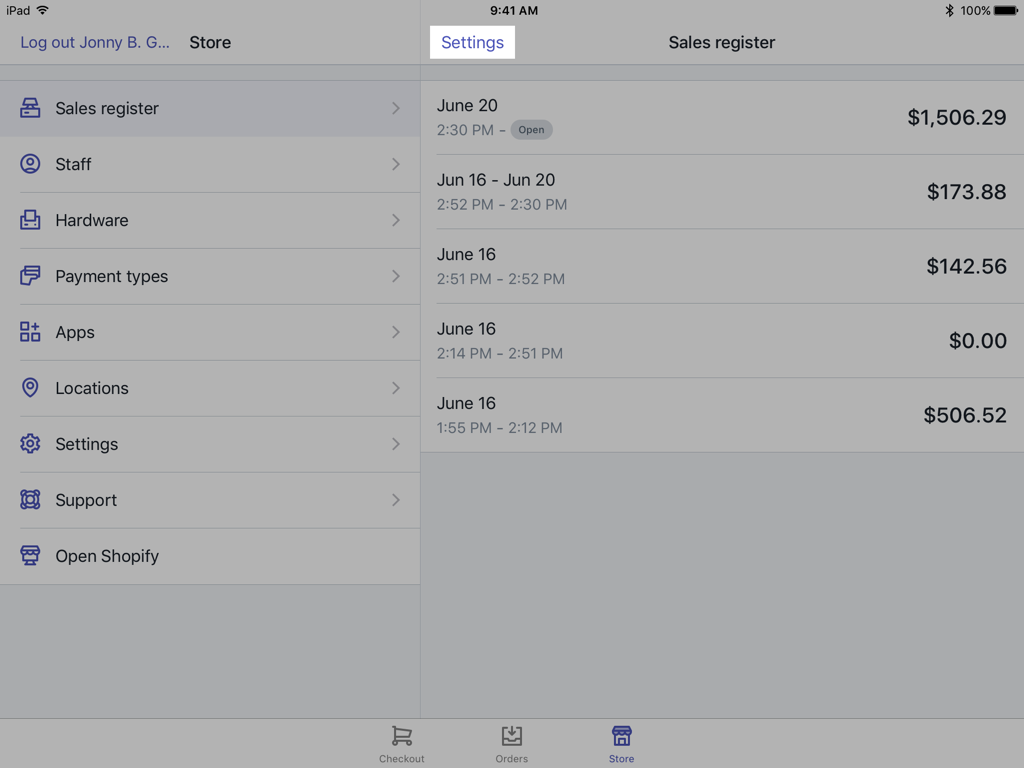
To cash register settings
- Step 1. From Shopify POS, tap
Store, and then tapSales register. - Step 2. Tap
Settings
-
Step 3. Tap the toggle buttons to
enable/disablethe following options:- Enable sales register This feature helps you track your takings, total sales for each payment method, and the cash in your cash drawer.
- Track cash This feature lets you track your cash float based on a per-shift. This option is not available if Enable sales register is disabled.
Open a new register shift
You can create a new Shopify POS register shift in two ways:
Opening a register shift manually
You need to specify the value of your initial cash float for the register shift if you want to generate a new register shift manually.
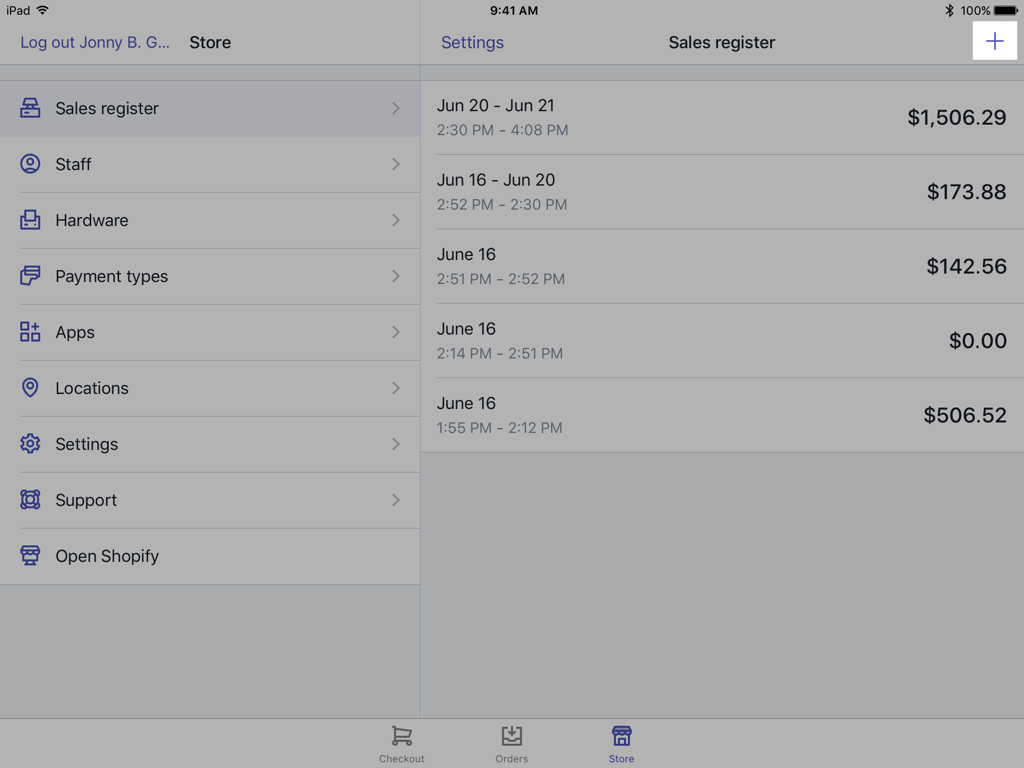
- Step 1. On your iPad, go to the Shopify POS app Register screen.
- Step 2. Tap the
+button
- Step 3. Enter the cash float amount
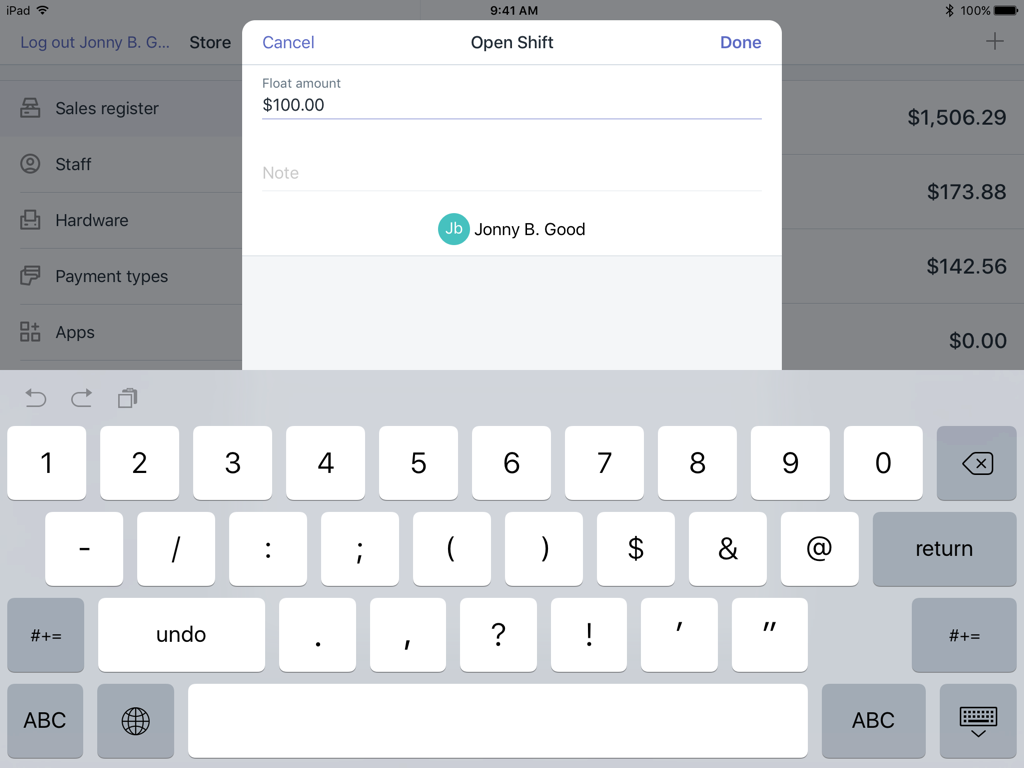
- Step 4. Enter a note (optional)
- Step 5. Tap
Done.
Opening register shifts automatically
Shopify opens a new register shift automatically in case of you had closed a register shift and you don’t open another before handling the next order.
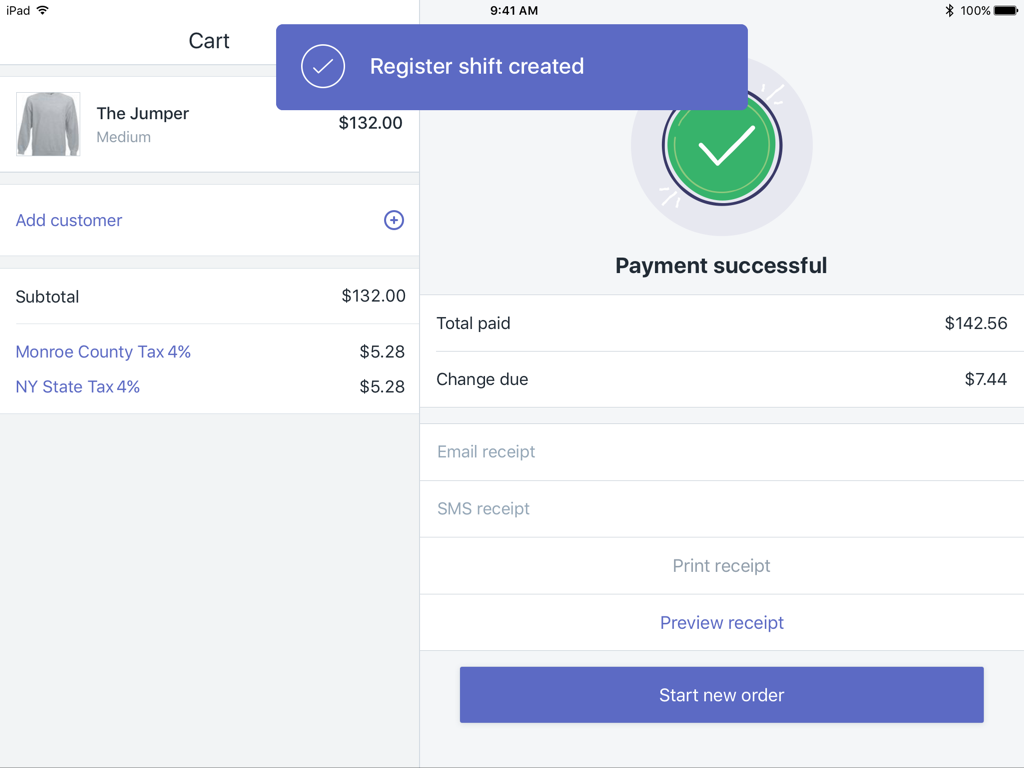
Automatic shifts without cash tracking
You will receive this message after completing the first transaction in the new register shift if you do not enable the cash tracking in your register settings.
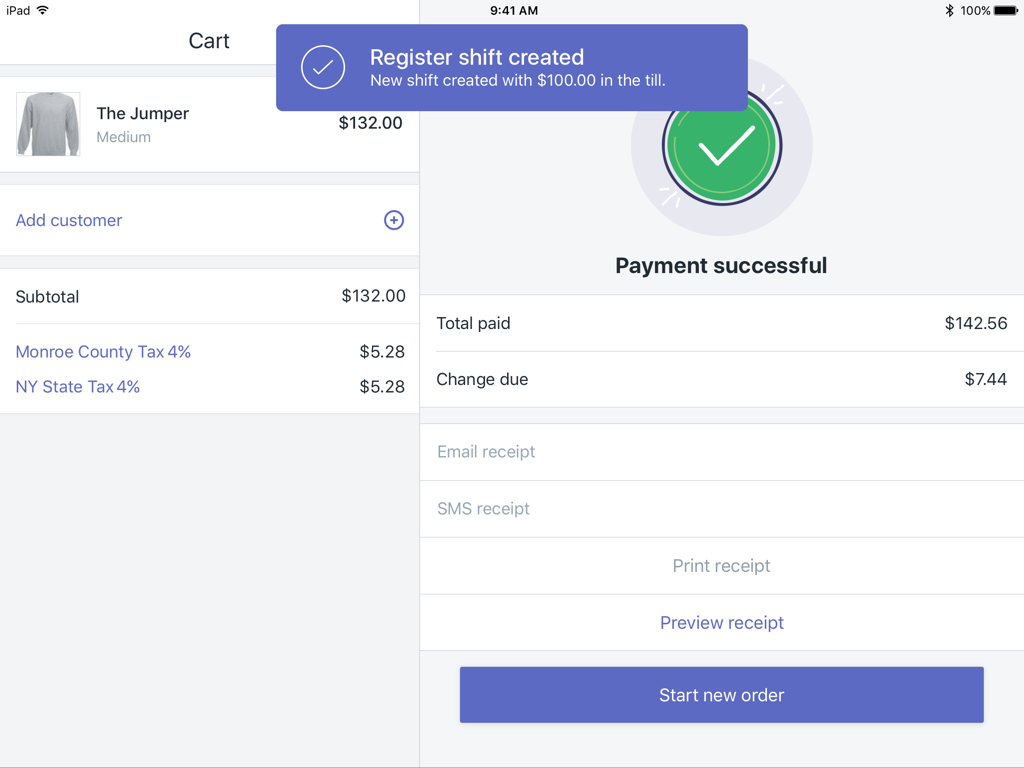
Automatic shifts with cash tracking enabled
With the cash tracking enabled, the float (or opening) amount is the calculated cash balance at the close of the previous register shift. The float is auto-set to $0 when you process the first register shift.
If you do not accept cash payments
You do not need to enter a cash float amount during a register shift if you turn off the cash tracking in your register settings. However, if you do not enable the Open and save shifts option in your register settings, your register shift will not keep the track of all sales made using other payment methods.
View details about a register shift
You can view the register shift history and the detailed information about sales for certain payment methods.
To view a summary of activity during a register shift:
- Step 1. On your iPad, go to the Shopify POS app Register screen.
- Step 2. Tap the register shift whose history you want to view.
View the history of a register shift
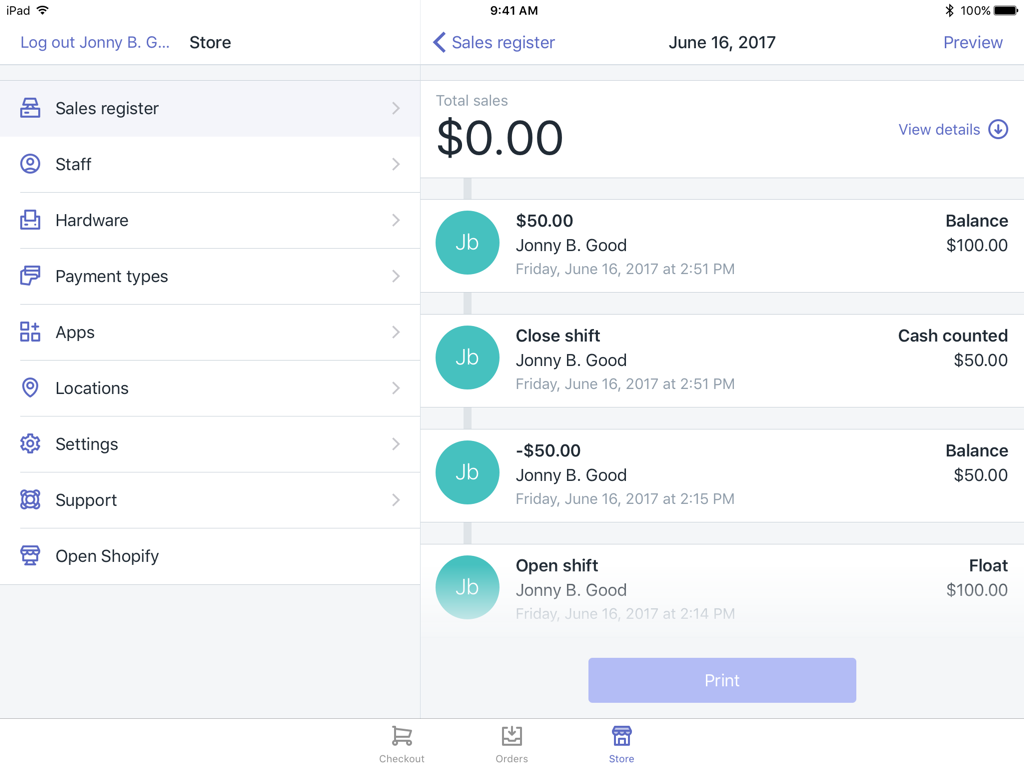
If you’re viewing an open or a closed register shift or you enable the cash tracking settings, the information changes slightly. However, the date, the total sales of the shift, the name of the staff member who opened the shift, the initial float amount, any changes that staff members have made to the total cash in the drawer is always displayed.
You will see the name of the staff member who closed the shift if the shift you are viewing is closed.
If the cash tracking is enabled before the shift was closed, the cash counted at the end of the shift, the cash in the drawer which was expected when the shift was closed, and the cash left in the float after you processed the final balance of the cash drawer is also displayed.
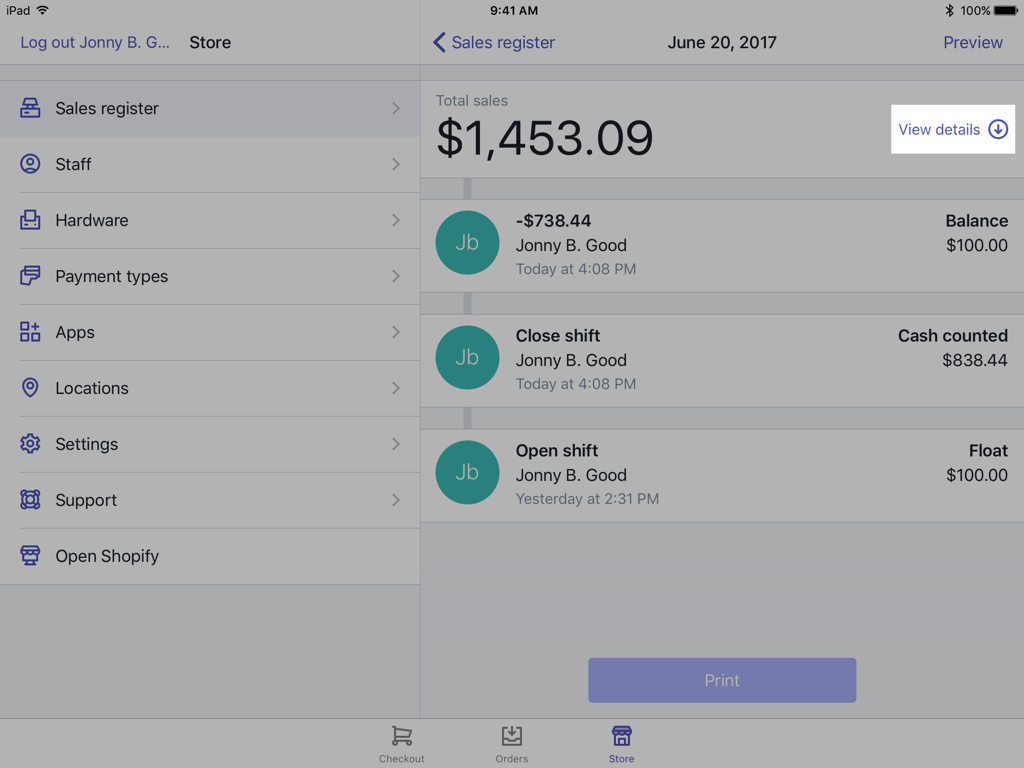
View detailed sales information for a register shift
- Step 1. Go to the Shopify POS app Sales register screen.
- Step 2. Tap the register shift you want to view.
- Step 3. Tap
View Details
Adjust the float
If a staff member cannot make the exact change with the cash currently in the drawer, he or she needs to temporarily remove cash from the till, and the cash in the drawer has exceeded your imposed limit, the float adjustment is necessary. Notably, you should record any adjustments made.
To adjust the amount available in the register:
- Step 1. Go to the Shopify POS app Sales register screen.
- Step 2. The register shift which you are viewing is currently open
- Step 3. Tap Make adjustment
- Step 4. Tap either Add or Remove
- Step 5. Enter the amount added or removed.
- Step 6. Enter a note, if necessary.
- Step 7. Tap Done.
Close a register shift
You should close register shifts at regular intervals balance your cash drawer accurately. The cash counted at the end of the shift, the expected value of the cash in the drawer, and the cash left for the float are added to the register shift history after closing a register shift.
The expected balance and the amount of cash in the cash drawer should be the same.
To close a register shift:
- Step 1. Go to the Shopify POS app Sales register screen.
- Step 2. The register shift which you are viewing is currently open
- Step 3. Tap Close shift
(Tap
Store > Sales register > Settings, toggle Enable sales register off and on to close the register shift if it takes a long time for the shift to close). - Step 4. Enter the amount of cash in the drawer
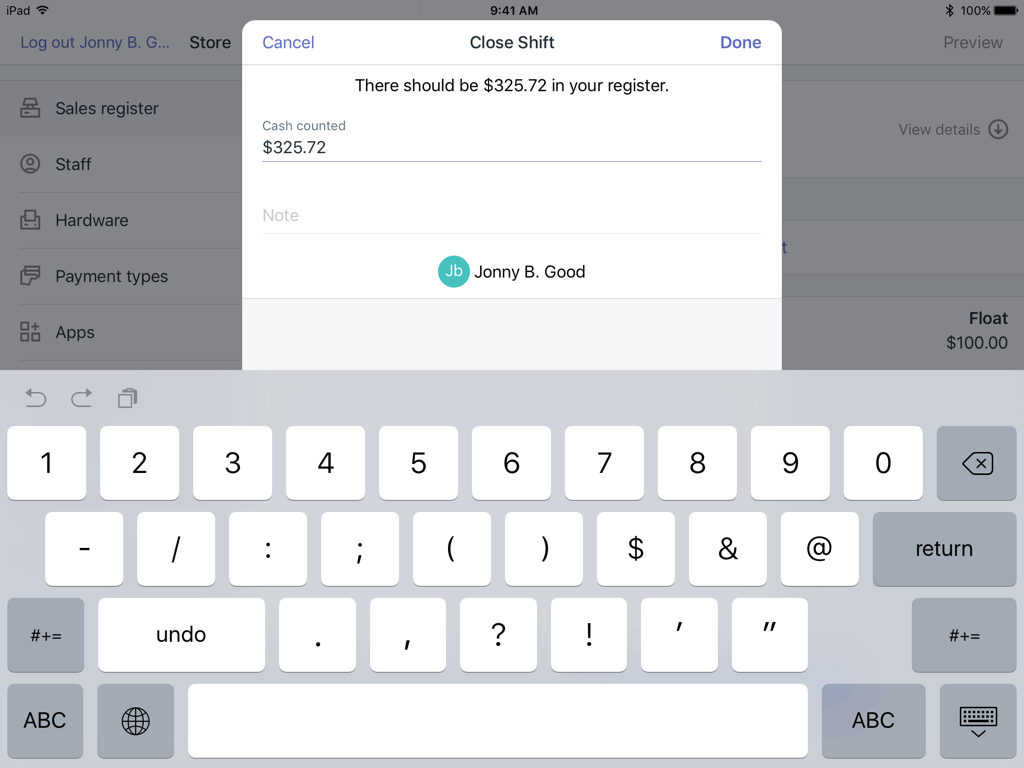
- Step 5. Enter a note (optional)
- Step 6.Tap
Done - Step 7. A Final adjustment dialog will display:
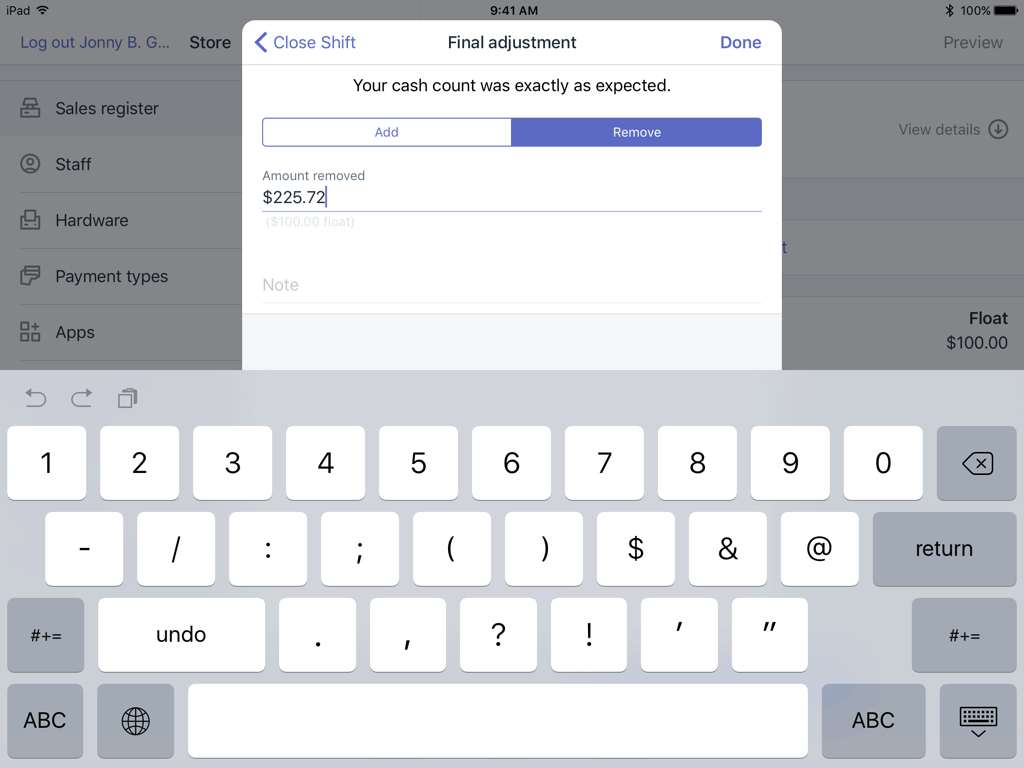
If the expected cash amount did not match the cash counted, you can adjust the amount to add or remove.
- Step 1. Tap
Done. - Step 2. You can print the register summary lists by tapping Print
Point of sale receipts
- Tap Email receipt to enter an email address, then tap Send to send an email receipt to your customers.
- Tap
Text receiptto type a phone number, and then tapSendto send a text receipt. - Tap
Print receiptto print a receipt. - Tap
Doneto return to the products and the cart screen.
Print receipts automatically
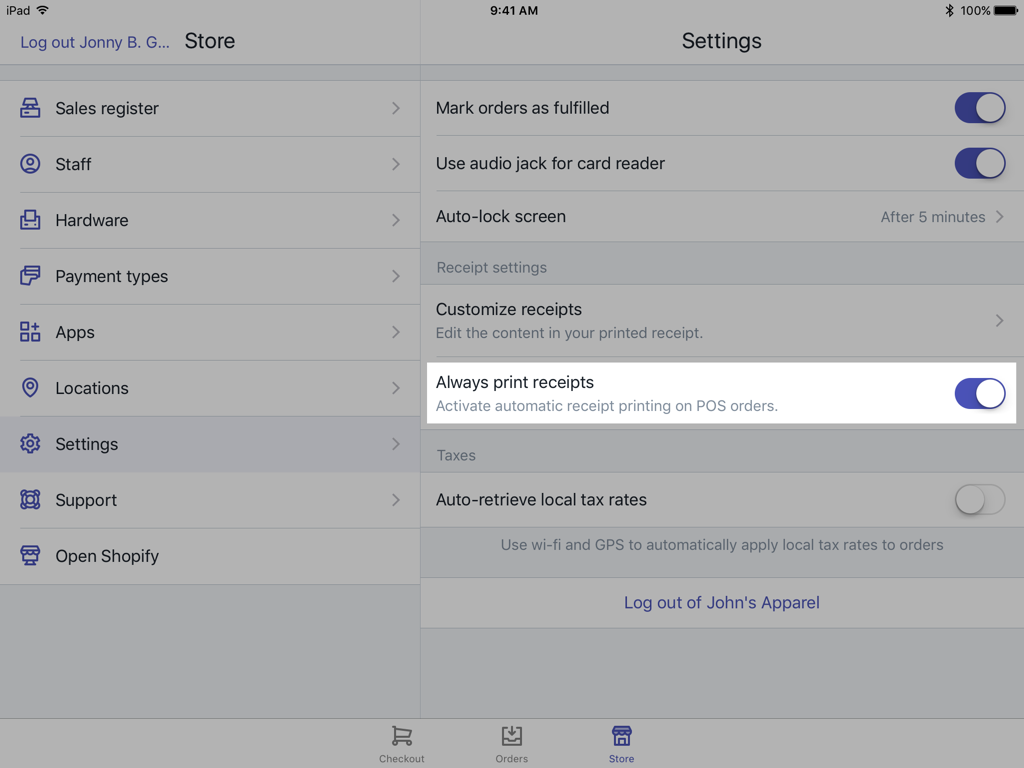
To activate automatic receipt printing:
- Step 1. From Shopify POS, tap
Store, and then tapSettings. - Step 2. Enable the Always print receipts option in the Receipt settings section
Reprint a receipt
- Step 1. Tap
Orders. - Step 2. Choose the order that you want to print a receipt for.
- Step 3. Tap
Receipt, and then tapPrint receipt.
Produce gift receipts
You can print a gift receipt only if you have the receipt printer
- Step 1. On the Orders screen, select the order you want to view.
- Step 2. Tap Print Gift Receipt.
Auto-lock the iPad screen
You can lock your iPad after a period of inactivity by entering a 4-digit PIN. However, your screen will auto-lock based on the timeout settings you have set for your iPad if you are not using Shopify POS with retail package.
To set your iPad to auto-lock:
- Step 1. Tap Store, and then tap Settings.
- Step 2. Tap Auto-lock screen.
- Step 3. You maybe do either or both of the following:
- Choose a time option to lock the screen after a period of inactivity.
- Enable the Auto-lock after sale by tapping the toggle button to lock the screen
- Step 4. Tap the left-arrow to return to the General settings screen.
POS embedded apps
POS embedded apps run in Shopify POS which allows you to customize your in-store checkout by streamlining purchases, offering sophisticated sales, wholesale pricing, and other promotions in-store, and adding new payment methods, loyalty programs, and custom receipt printing at the checkout.
To install POS embedded apps
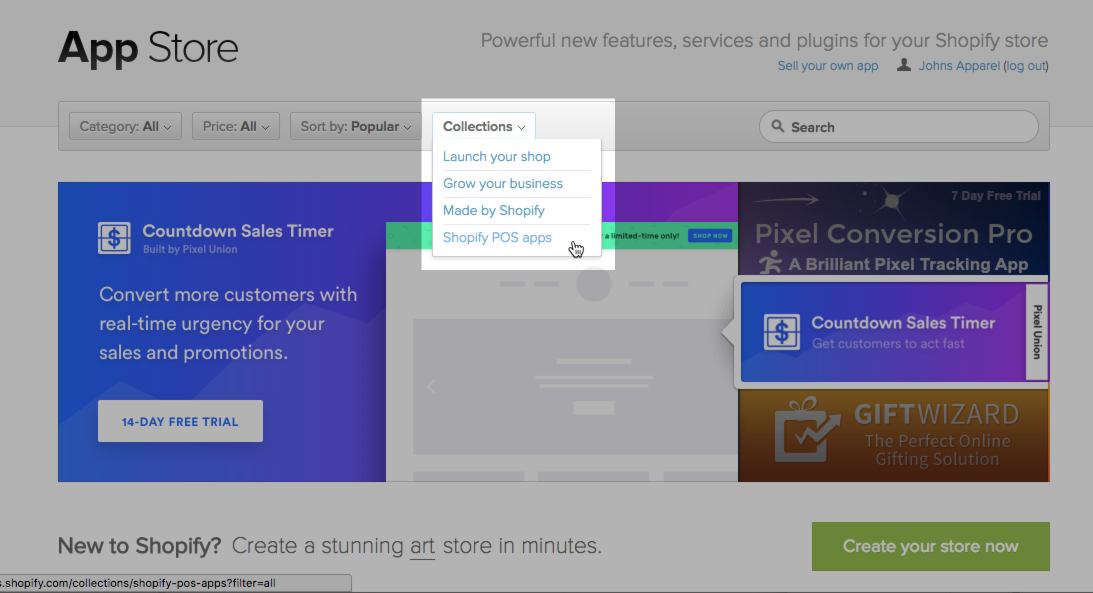
To install POS embedded apps, you must find and install them on the Shopify App Store.
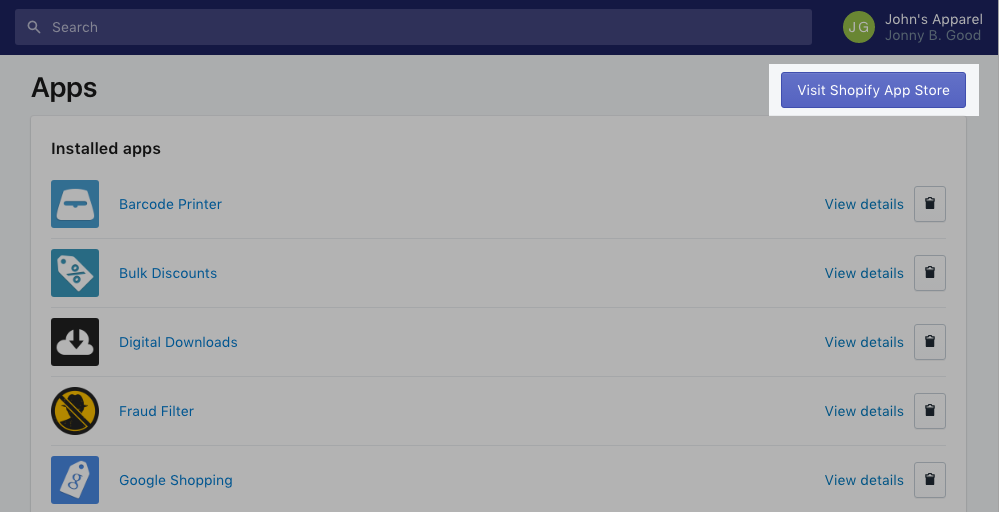
- Step 1. From your Shopify admin, go to Apps.
- Step 2. Tap Visit Shopify App Store
- Step 3. Tap Collections, and then tap Shopify POS apps
- Step 4. Click
Getto install which app you want.
The POS embedded app will appear on the Apps page of your Shopify admin and on the Apps screen in your Shopify POS app.
Use embedded apps in Shopify POS
You can edit the current cart and add finishing options by tapping the ··· button. Moreover, from the Shopify POS, tap Store, and then tap Apps to run full-screen embedded apps.
To view or change the settings of the POS embedded apps:
- Step 1. Tap Store, and then tap Apps.
- Step 2. Tap the icon of an available app to change its settings.
Conclusion
So there you have it. That’s pretty much everything you need to know in order to setup Shopify POS app. Hope that this guide is going to be helpful to you and let me know if I missed anything.


