How to Email the Invoice on Shopify: A Step-By-Step Guide
As an owner of an online store on Shopify, your job when you have the orders is to email the invoices to your customer. The invoices that you sent will take your customers to the checkout page for their recent orders. They will fill in the information for the method of payment, shipping services, and other information needed. After this process, the draft order will be transferred to an official order and marked as paid. Be cautious not to mark a draft order as paid, this action will cause trouble to the checkout process.
This is a writing on how to email the invoice on Shopify which provide you with the detailed guideline. Please read it carefully to learn how to email the receipt.
Exclusive Offer: Get Shopify 33 days for just $1 + The Online Store Starter Kit
Start your 3-day free trial, and enjoy your first month of Shopify for 1$ plus the premium package designed especially for new Shopify merchants!
Related Post:
- How to Check If Email Templates Have Been Customized on Shopify
- How to Manually Add the Order Status URL to your Email Templates on Shopify
- How to Email a Customer a Link to Their Abandoned Checkout Manually on Shopify
- How to View an Order’s Timeline on Shopify
- How to Import CSV Files into Google Sheets
How to email the invoice
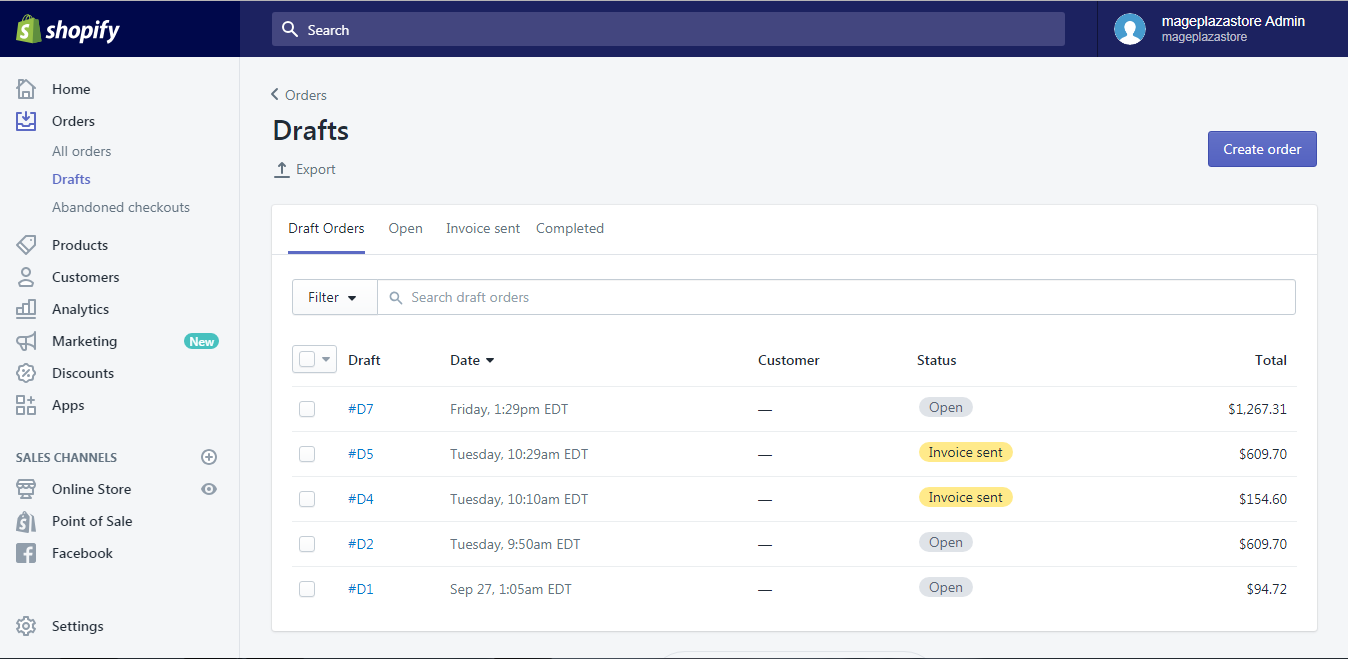
Step 1: Go to the Draft order
From your Shopify admin screen, you can see the Order button on your left-hand side, click on it and select the Draft section to see the draft orders.
Step 2: Go to the Email invoice
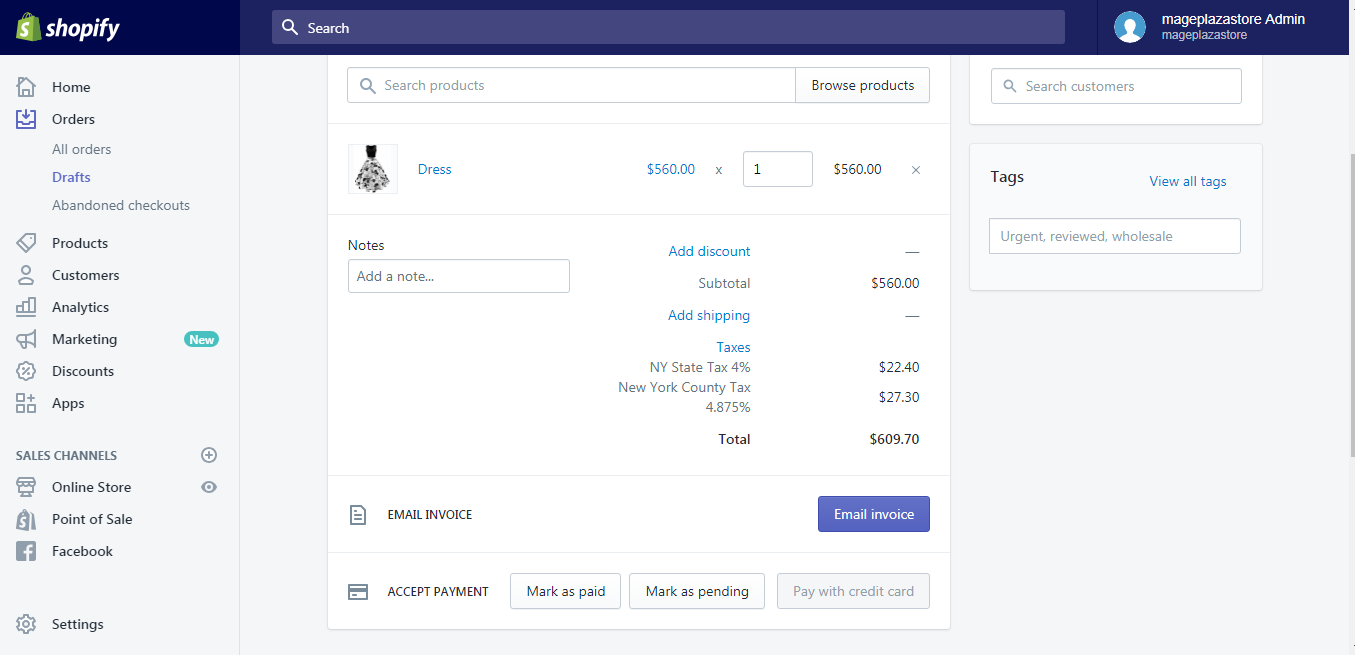
In the Draft page, you can see all the draft orders, choose a draft order you want and click on it to go to the Order details section.
From the Order details area, click on the blue button named Email invoice.
Step 3: Enter the message
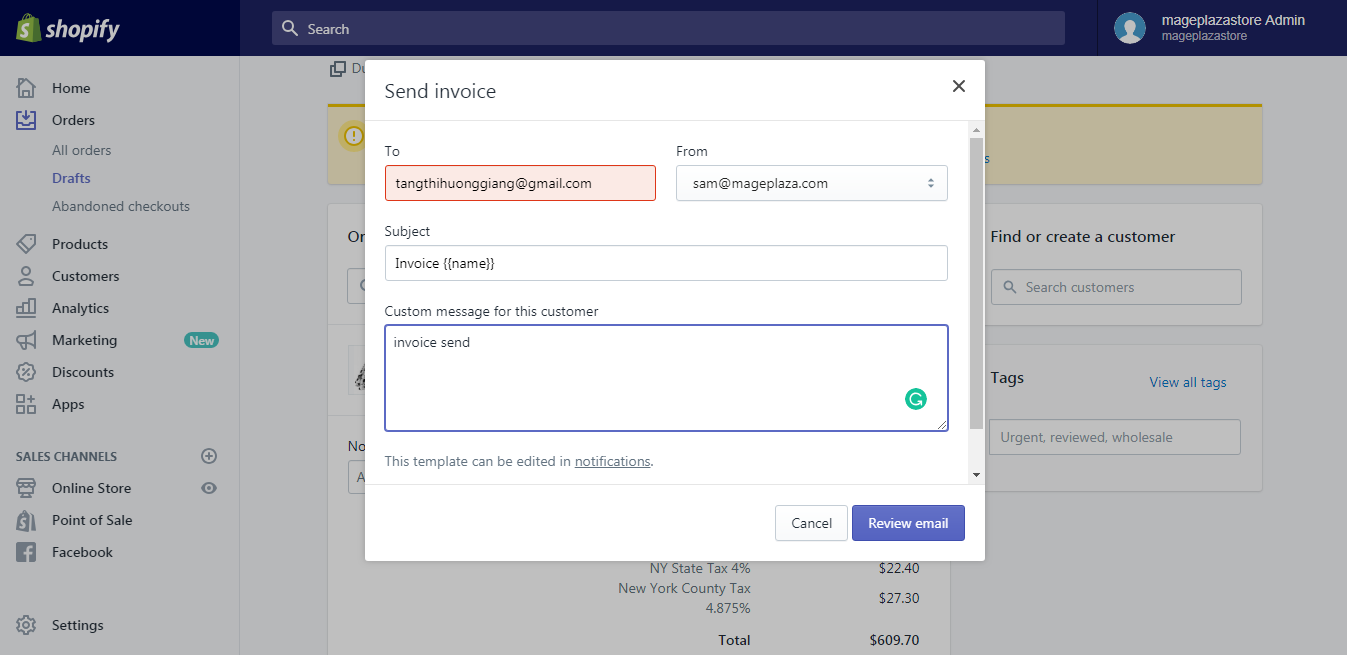
A dialog box called Send invoice will pop out. In this dialog, fill in your message for that customer in the Custom message for this customer field.
Step 4: Check your email
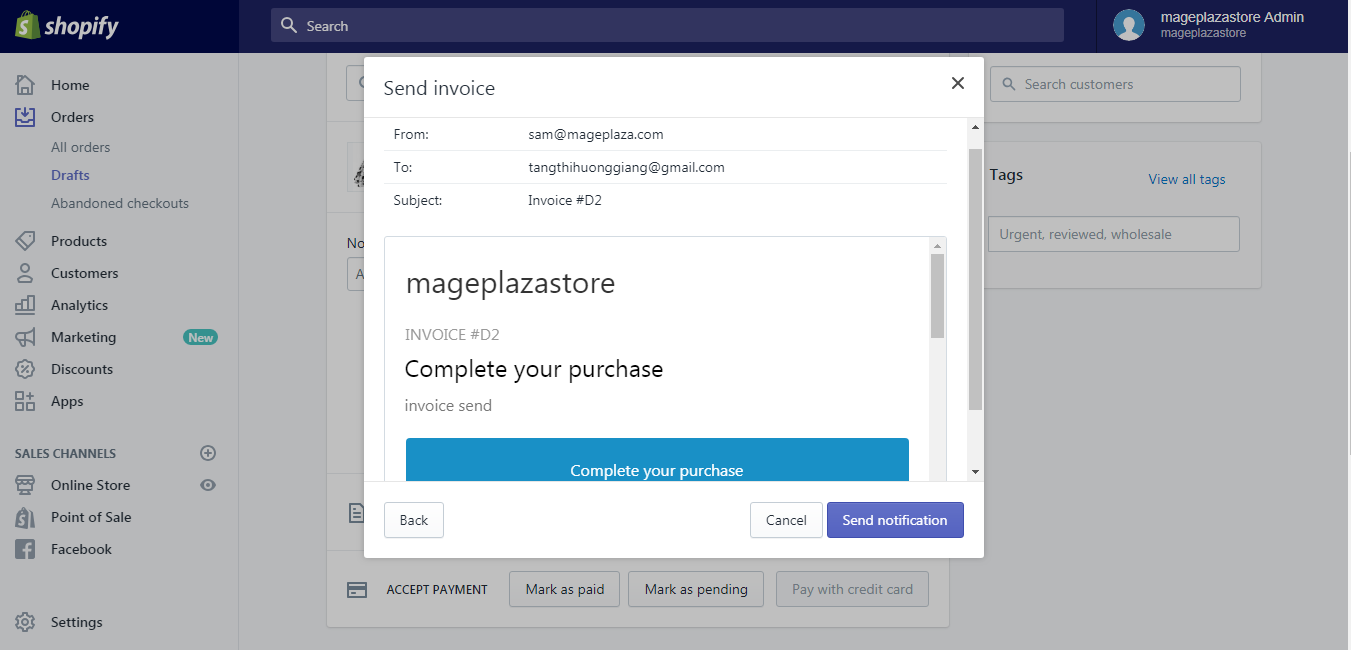
After you finished the previous step, hit the Review email to check your email.
Step 5: Email the invoice
When you finished your checking, hit Send notification and your work is done.
To email the invoice on iPhone (Click here)
- Step 1: Go to the Draft order
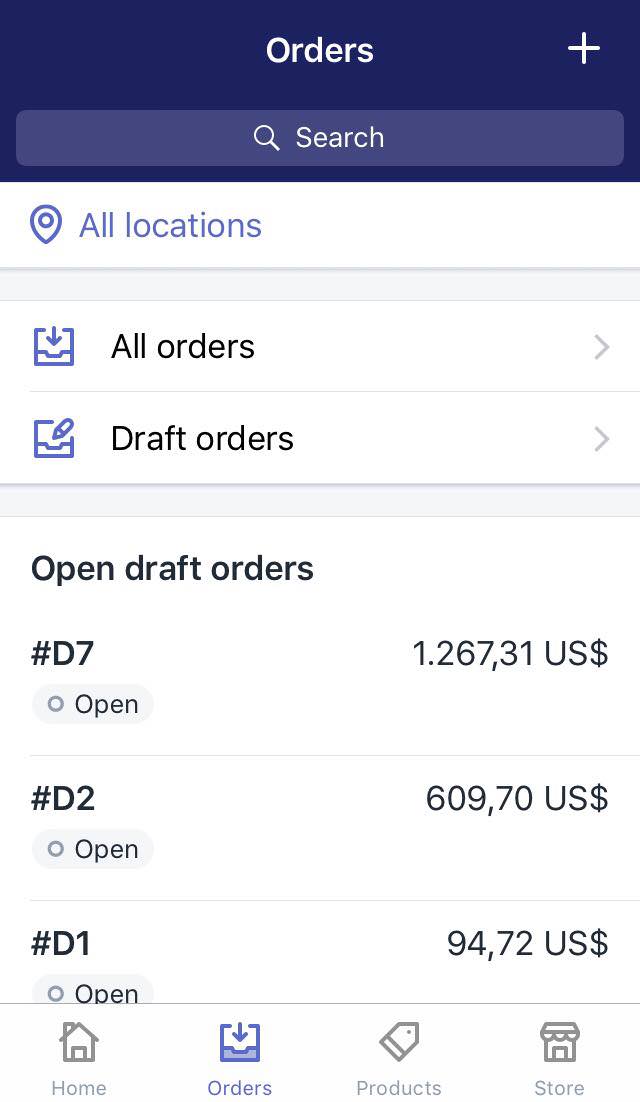
After signing in your account on the app, go to the Orders button at the end of the screen.

Tap on the Draft orders section to see all the draft orders.
- Step 2: Choose an order
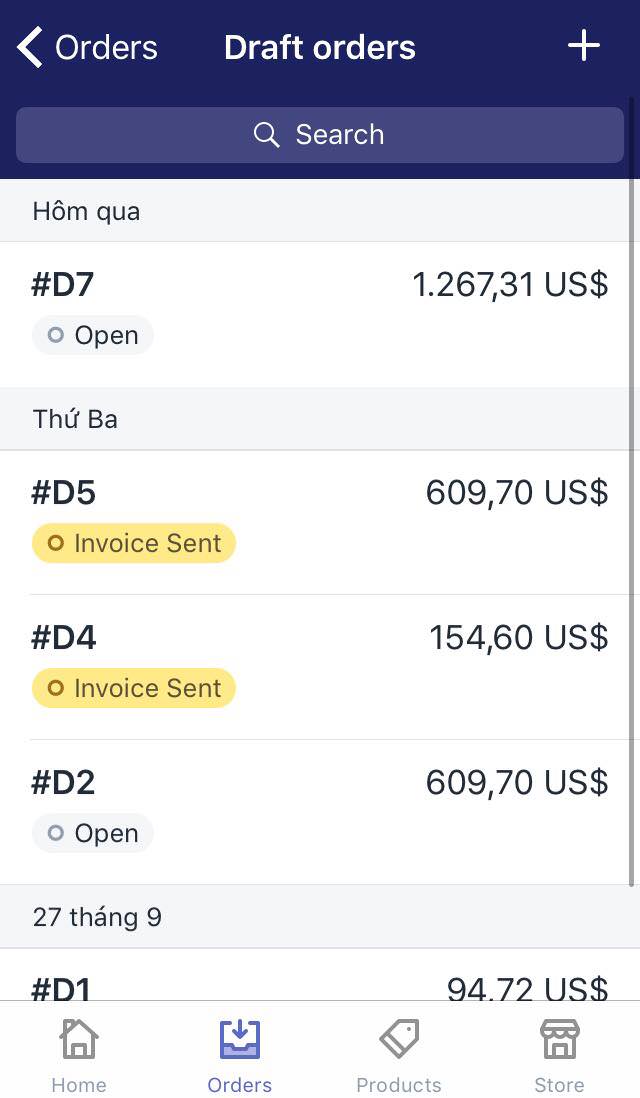
From the Order page, choose one order to email the invoice to.
- Step 3: Tap Email invoice
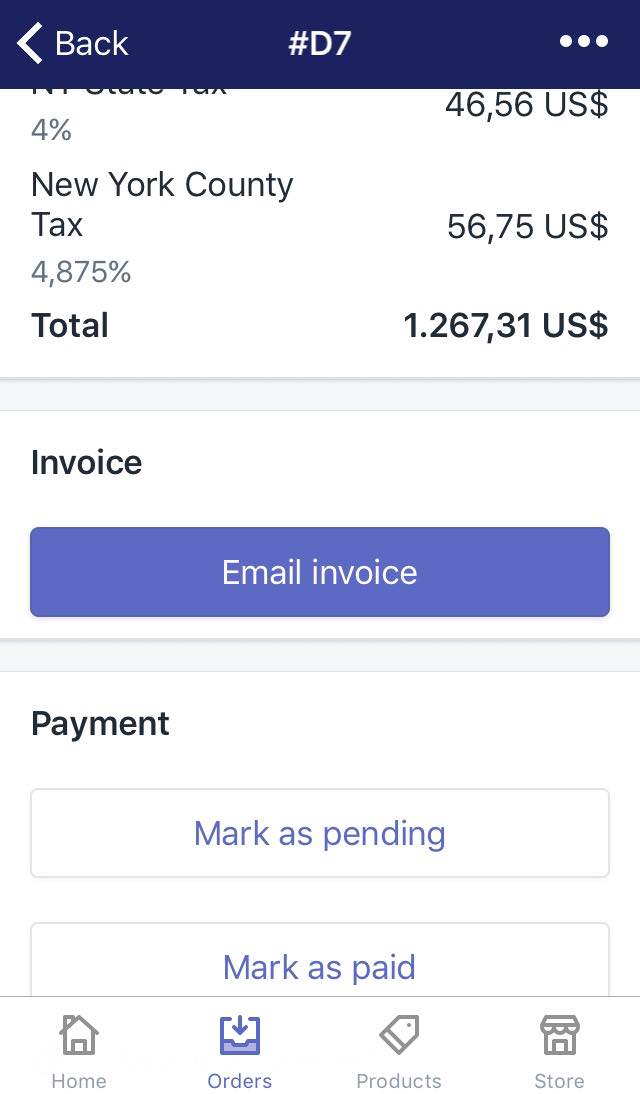
Inside the order details, scroll down until you see the Invoice section, tap the Email invoice button.
- Step 4: Enter the information and review
In the Send Invoice box, notice the Custom message for this customer field. It is used to enter the message to your customer.
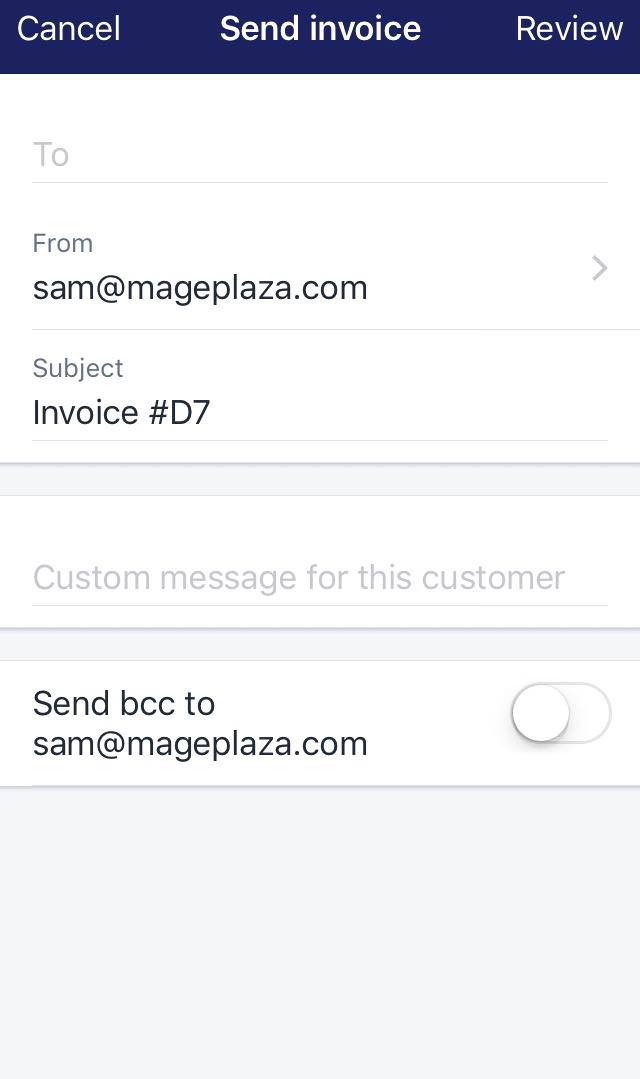
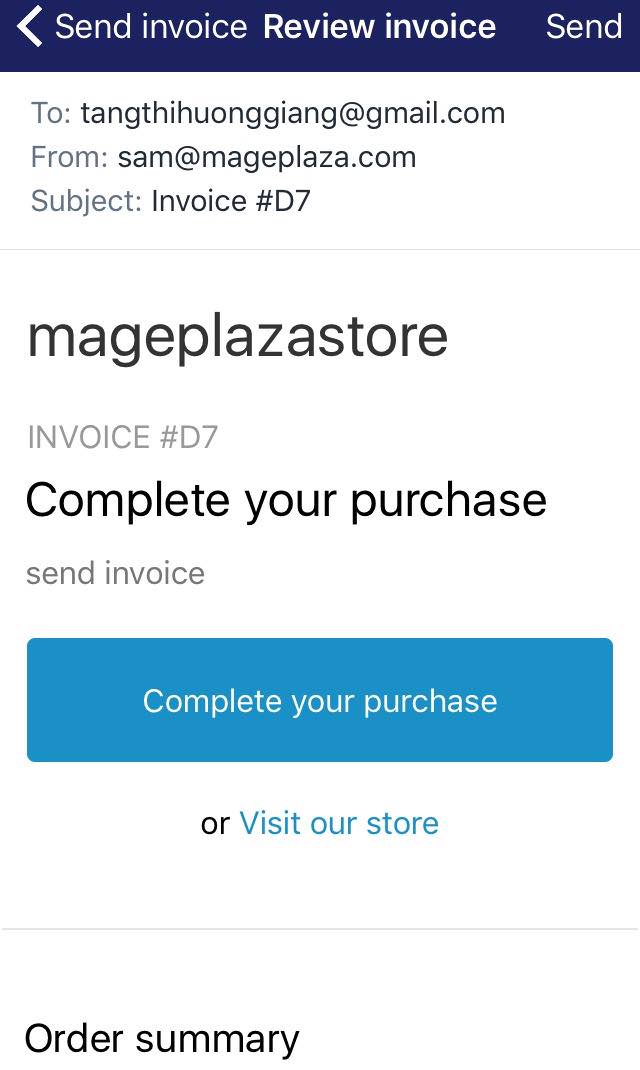
After filling in your message, click Review to check your letter.
- Step 5: Send the email
After you finished checking, tap Send to deliver your invoice.
To email the invoice on Android (Click here)
- Step 1: Go to the Draft order
After signing in your account on the app, go to the Orders button at the end of the screen.
Tap on the Draft orders section to see all the draft orders.
- Step 2: Choose an order
From the Order page, choose one order to email the invoice to.
- Step 3: Tap Email invoice
Inside the order details, scroll down until you see the Invoice section, tap the Email invoice button.
- Step 4: Enter the information and review
In the Send Invoice box, notice the Custom message for this customer field. It is used to enter the message to your customer. After filling in your message, click Review to check your letter.
- Step 5: Send the email
After you finished checking, tap Send to deliver your invoice.
Conclusion
To sum up, I hope you take your time to read my instructional writing on how to email the invoice on Shopify and follow it. Check out our other posts if you’re interested in managing orders.


