How to View the Shopify Sales Reports
Every business owners know that reports are necessary. Out of all the reports that a business owner has to look at, some are extremely important. The sales report is one of them. When it is properly reported, the owners can be proactive, analyzing their businesses and making the necessary change to adapt to the current situation. Understand that, Shopify gives you a helpful feature to see all of your sales reports in detail so that you can easily keep track of them. If you want to know how to view your sales reports, read on.
Related Posts:
- Shopify Sales Tax Report: A Complete Guide
- Set A Date Range For A Report on Shopify in 3 Steps
- Add or Remove Columns in Your Reports on Shopify
- Filter your Reports on Shopify in 5 Minutes
How to view your sales reports
Step 1: Go to Reports
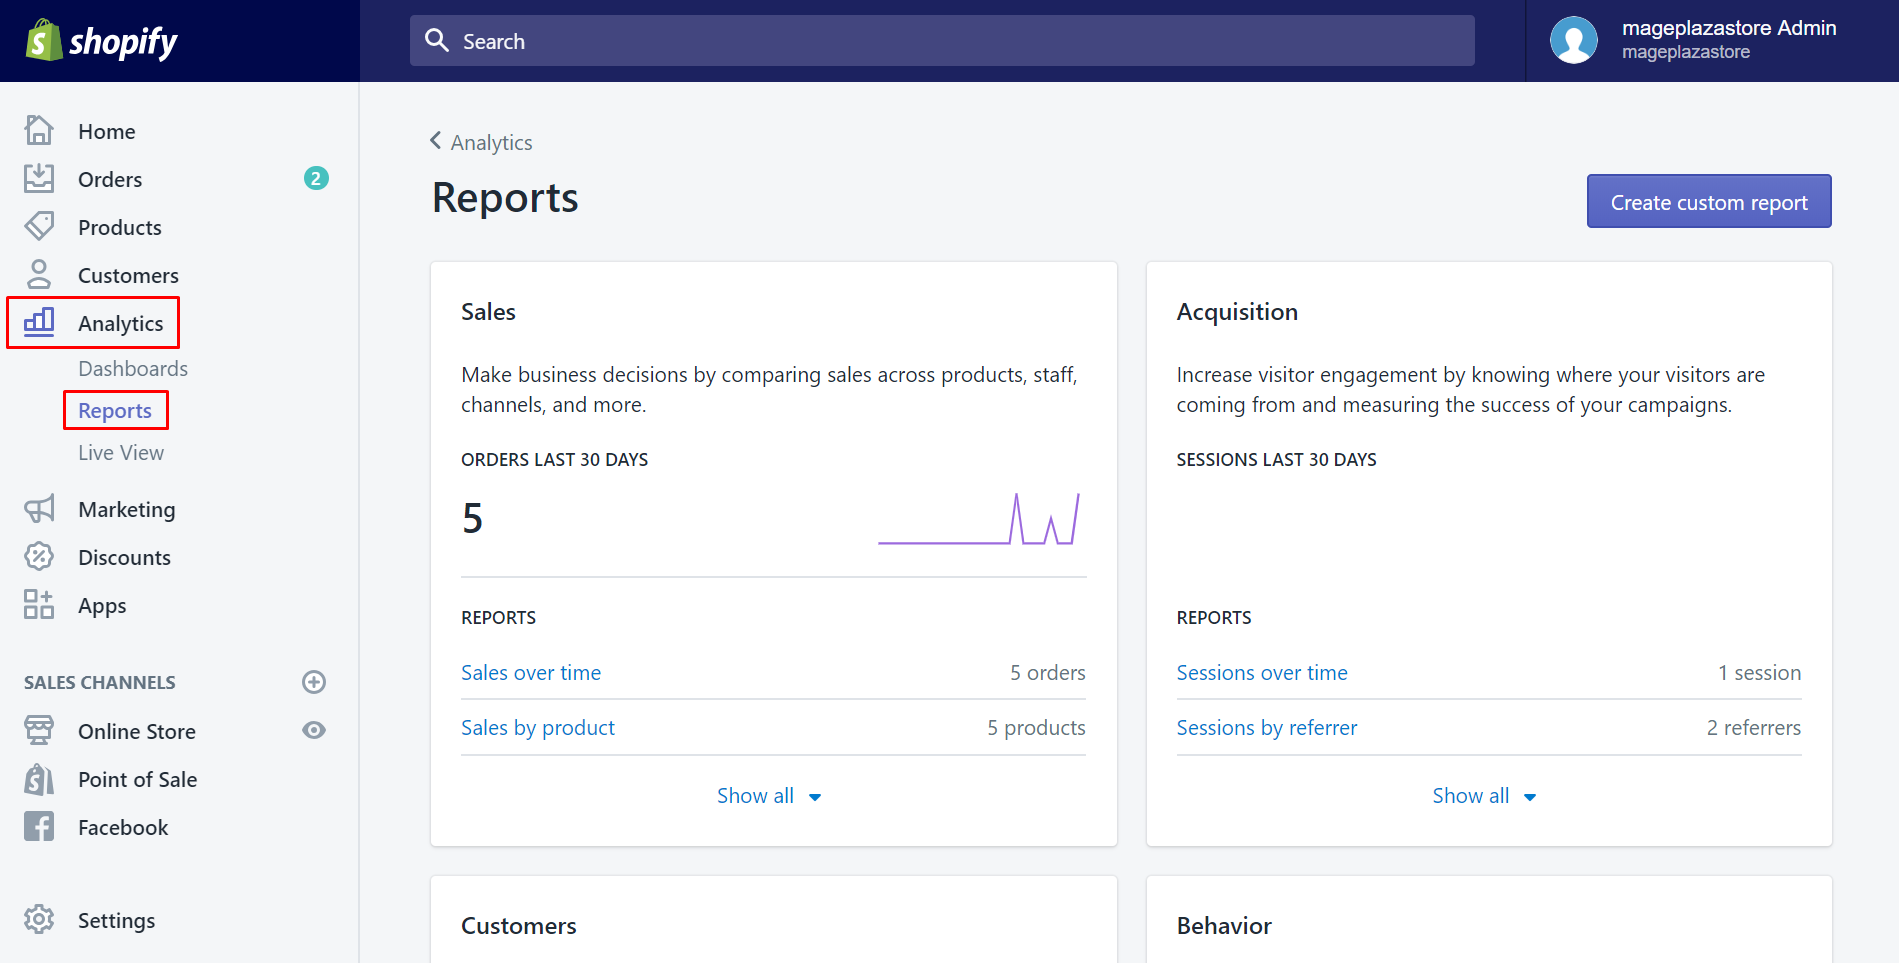
After logging in your Shopify account, click on Analytics which is on the left-hand side of the screen. It will automatically go to the first section called Dashboard. Make sure that you take a look at the second section Reports and tap on it.
Step 2: Click Show all
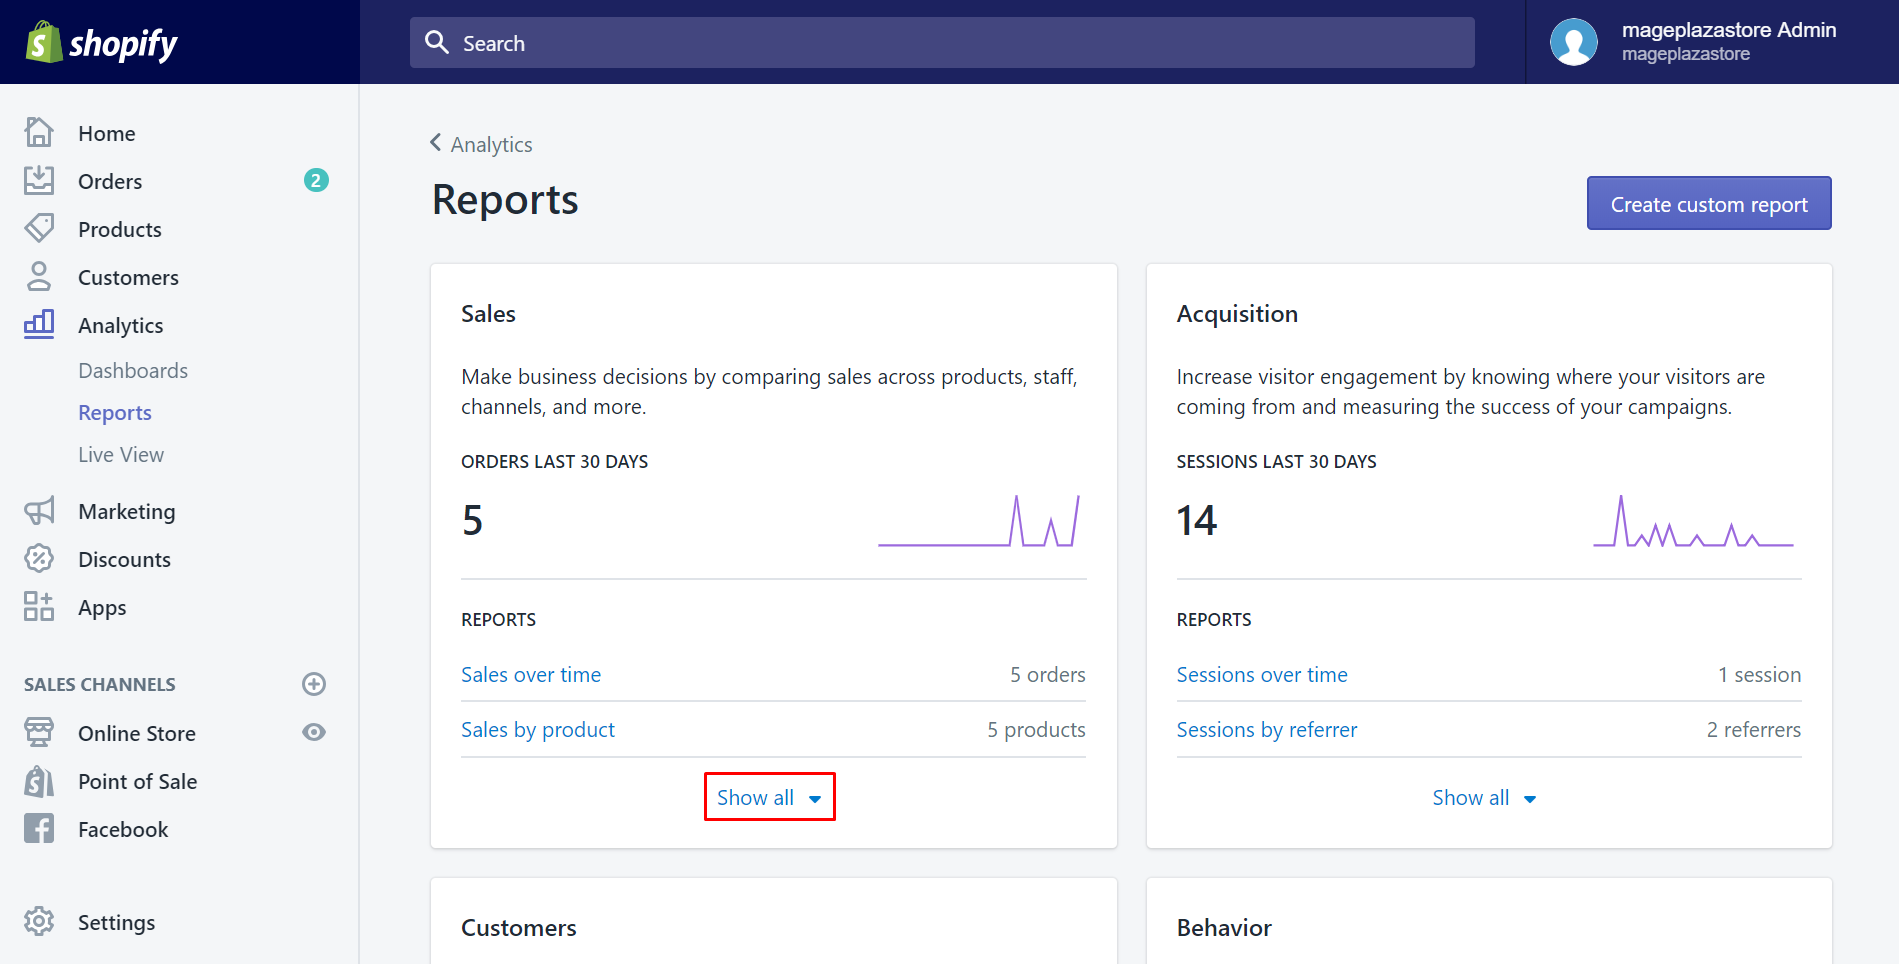
Afterward, you will easily see the Sales section. However, it only displays a brief overview of your sales situation, not much data to work with. Hence, in order to see more detail, click Show all with the down arrow symbol.
Step 3: Choose the sales report
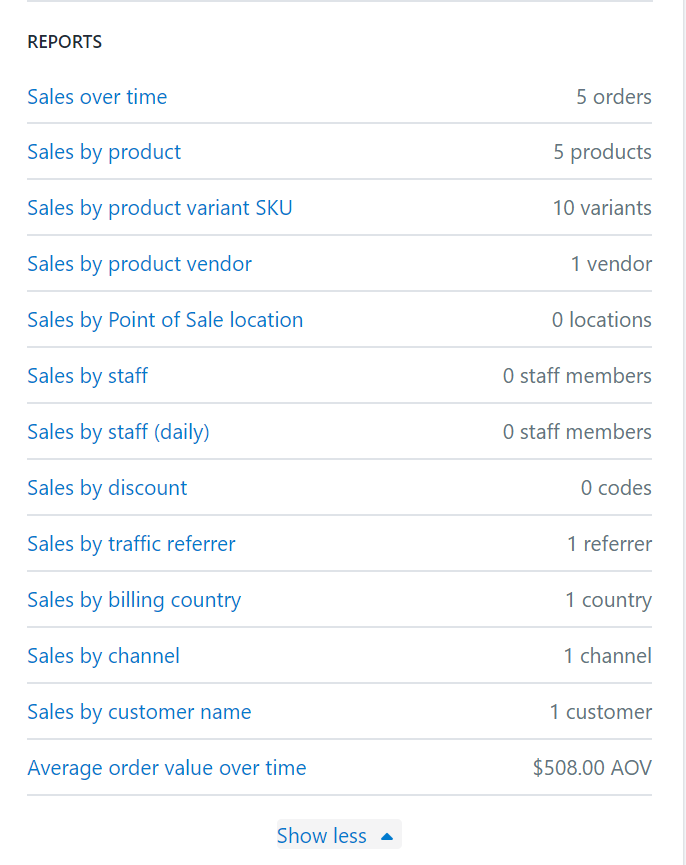
In this step, you will work with your own thoughts. After clicking the Show all button, the sales report is divided into many smaller sections which are more transparent for you to observe and evaluate. They are displayed by a list. You can choose each one of them by clicking on its name.
To view your sales reports on iPhone (Click here)
- Step 1: Go to Analytics
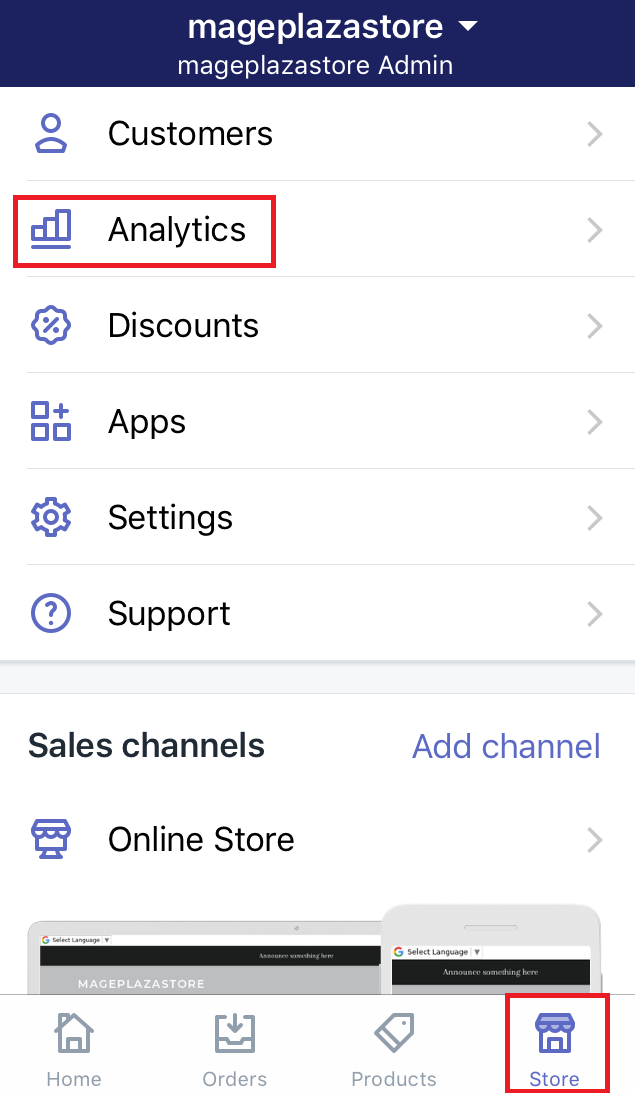
After logging in your Shopify account in the app, go to theStoresection at the bottom of the screen. Afterward, selectAnalytics. Then, the overview dashboard will come out automatically.
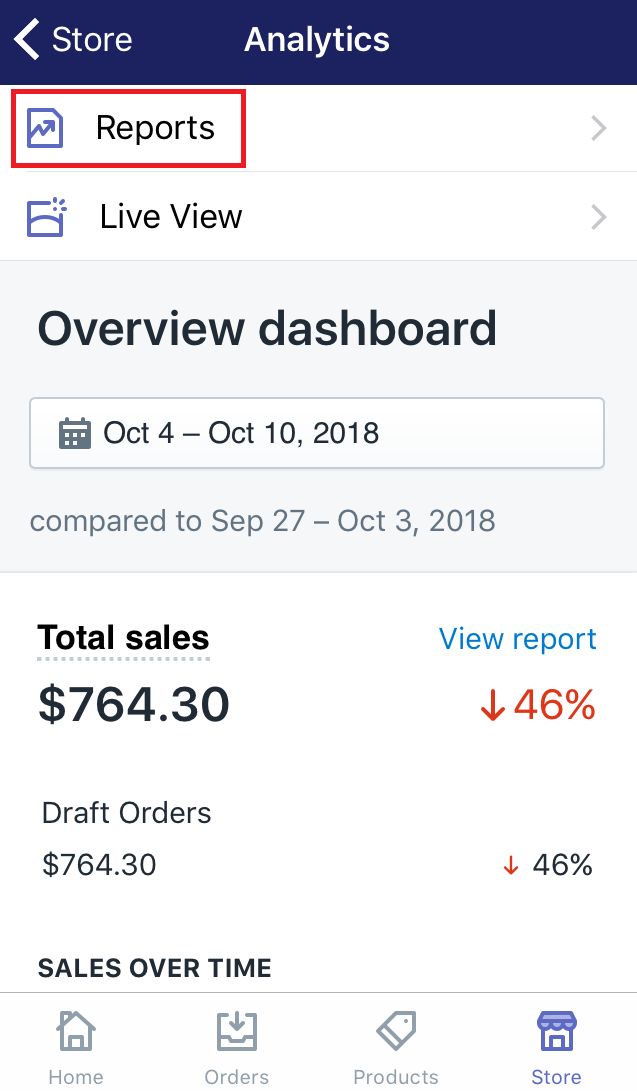
- Step 2: Click Reports
In order to view the sales report, clickReports.
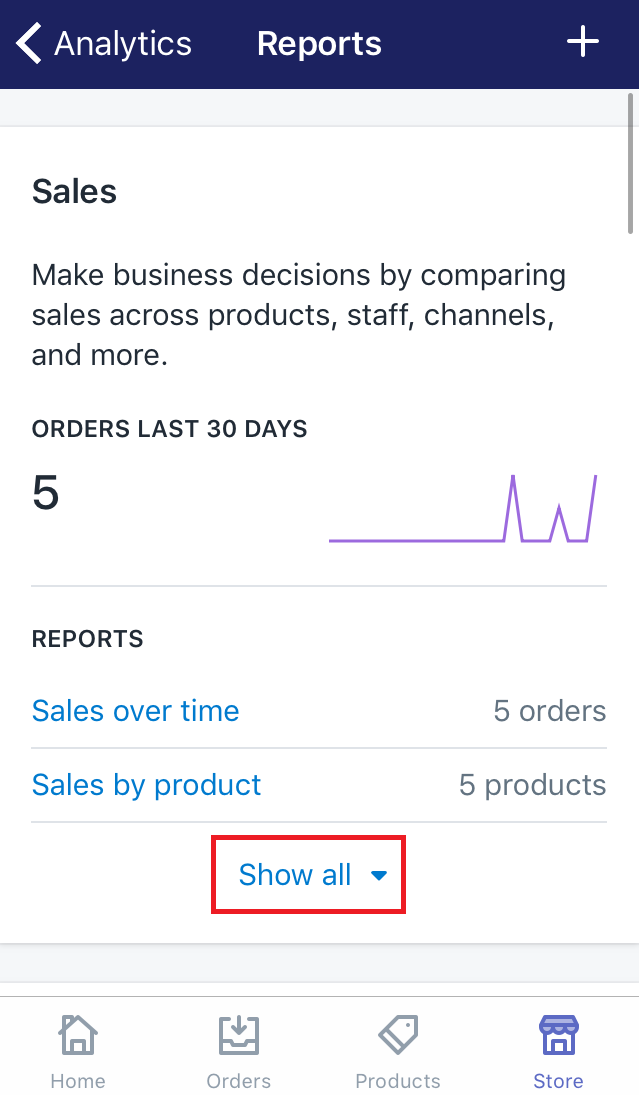
- Step 3: Click Show all
Afterward, you will see theSalessection right away. It displays a brief data about sales. In order to see more detailed, selectShow allwith the down arrow symbol.
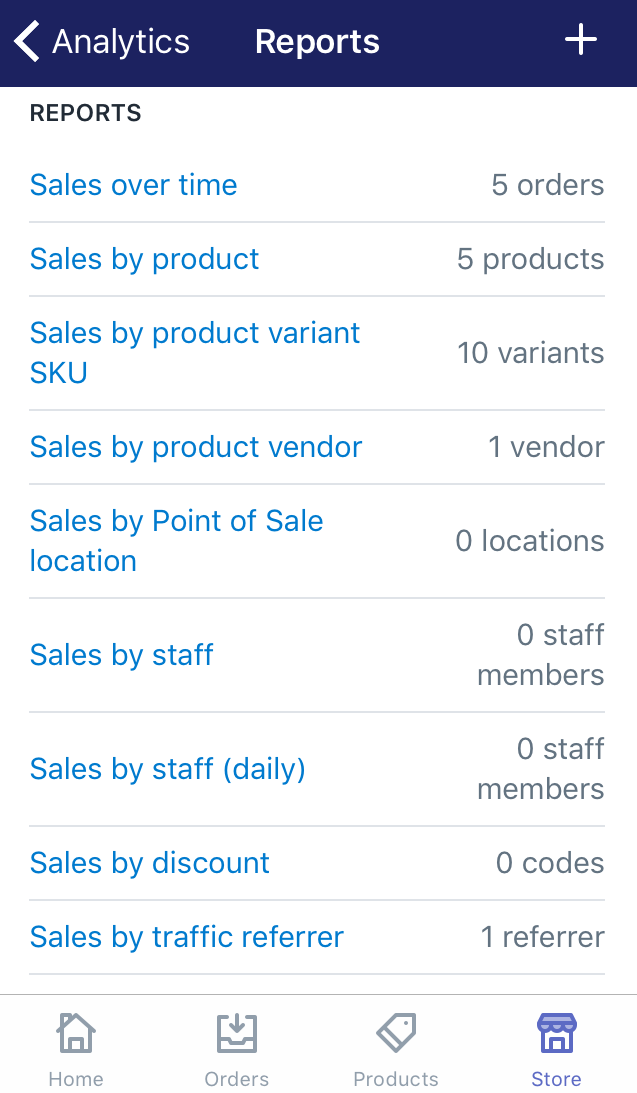
- Step 4: Choose the sales report
In this step, you will work with your own thoughts. After clicking theShow allbutton, the sales report is divided into many smaller sections which are more transparent for you to observe and evaluate. They are displayed by a list. You can choose each one of them by clicking on its name.
To view your sales reports on Android (Click here)
-
Step 1: Go to Analytics
After logging in your Shopify account in the app, go to theStoresection. Afterward, selectAnalytics. Then, the overview dashboard will come out automatically. -
Step 2: Click Reports
In order to view the sales report, clickReports. -
Step 3: Click Show all
Afterward, you will see theSalessection right away. It displays a brief data about sales. In order to see more detailed, selectShow allwith the down arrow symbol. -
Step 4: Choose the sales report
In this step, you will work with your own thoughts. After clicking theShow allbutton, the sales report is divided into many smaller sections which are more transparent for you to observe and evaluate. They are displayed by a list. You can choose each one of them by clicking on its name.
Summary
Above is a step-by-step tutorial on how to view sales reports. With this report, you can assess things like your business’s financial health or even the behavior of your customers so that you would know how well your store is doing. If you want your store to do even better, you can read many other posts about how to run your Shopify store on our website.


