How to Filter your Reports on Shopify
Sometimes, your report might show too much information and you don’t need all of them. If that’s the case, you can filter your report to display only the data you want. If you use Shopify plan or higher, the system will allow you to practice this action by completing a process. To know the steps, keep reading because in this post I will show you how to filter your reports on Shopify.
Before going into details, let’s learn about the components of a filter. It consists of three main parts: name, operator, and values.
- The
namerelates to a column and distinguishes a filter. - The
operatorcompares your chosen value with the actual data, which is currently available: is and is not. - The
valuesare the specified words or numbers you want to use for filtering.
How to filter your reports
Step 1: Open a report
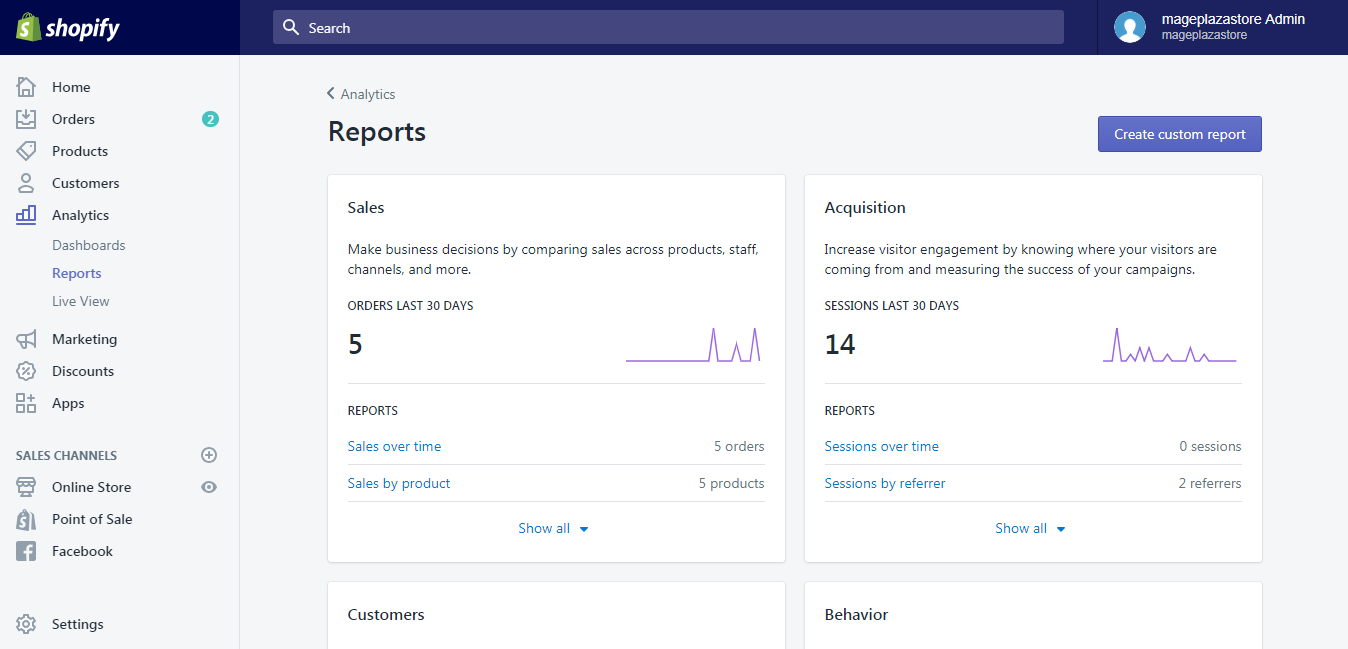
From the admin page of Shopify, head to Analytics and Reports respectively. Next, choose one out of the reports list to open.
Step 2: Select Manage filters
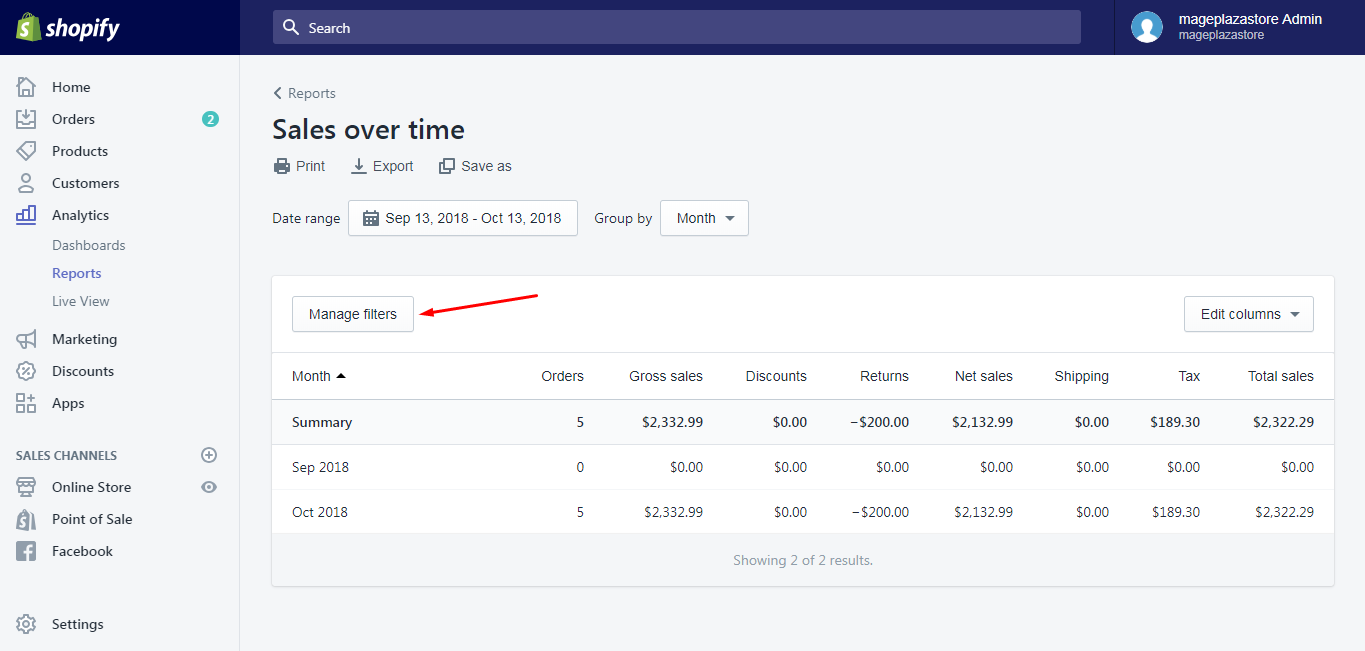
After opening a report, the statistics will appear on the screen. The Manage filters button is right above these statistics and below the Date range then click on that button.
Step 3: Pick a filter
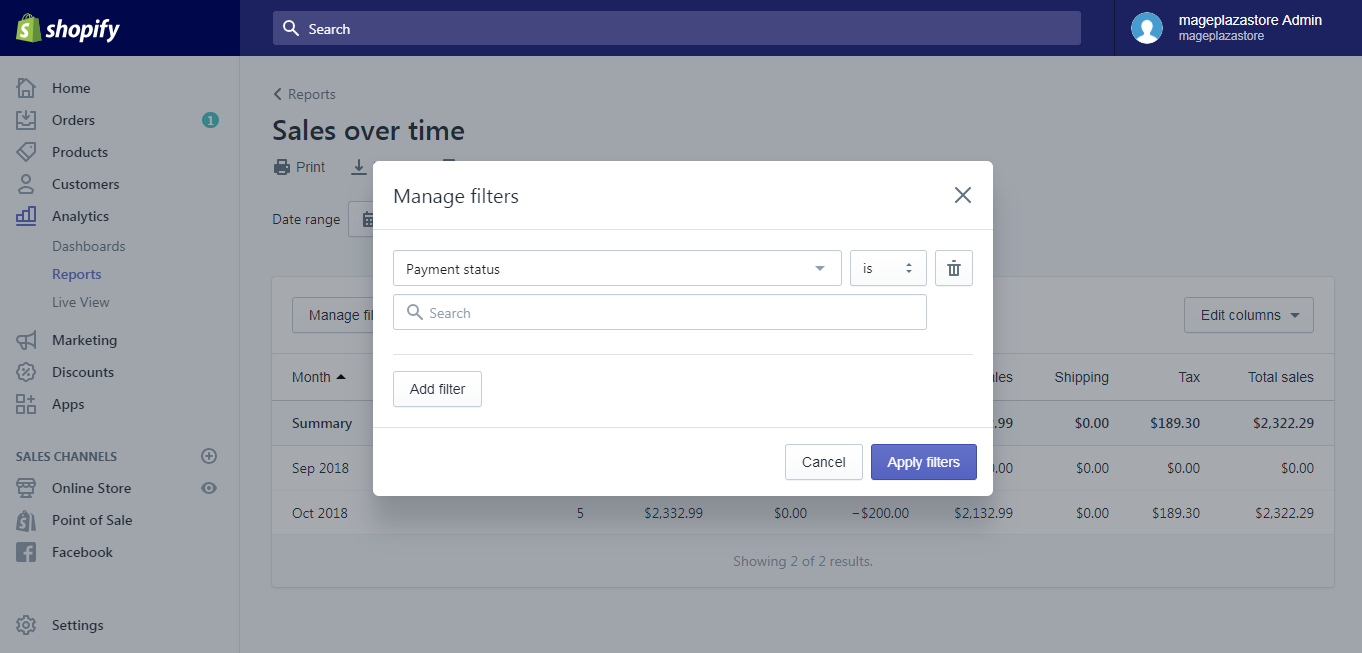
You will see a new dialog box with a Select filter drop-down menu appear on your display. In the menu list, it also divides options into groups, such as ORDER, BILLING ADDRESS, CUSTOMER, etc. to help users find the filter they want more easily. Under the capitalized group name is the filters for that section. You can choose a filter from that list like Payment status for instance.
Step 4: Set up the filter
At this step, you will build up your filter more detailed. Firstly, you can find another drop-down box next to the Select filter then click on that box. Select one of the two operators is or is not to continue.
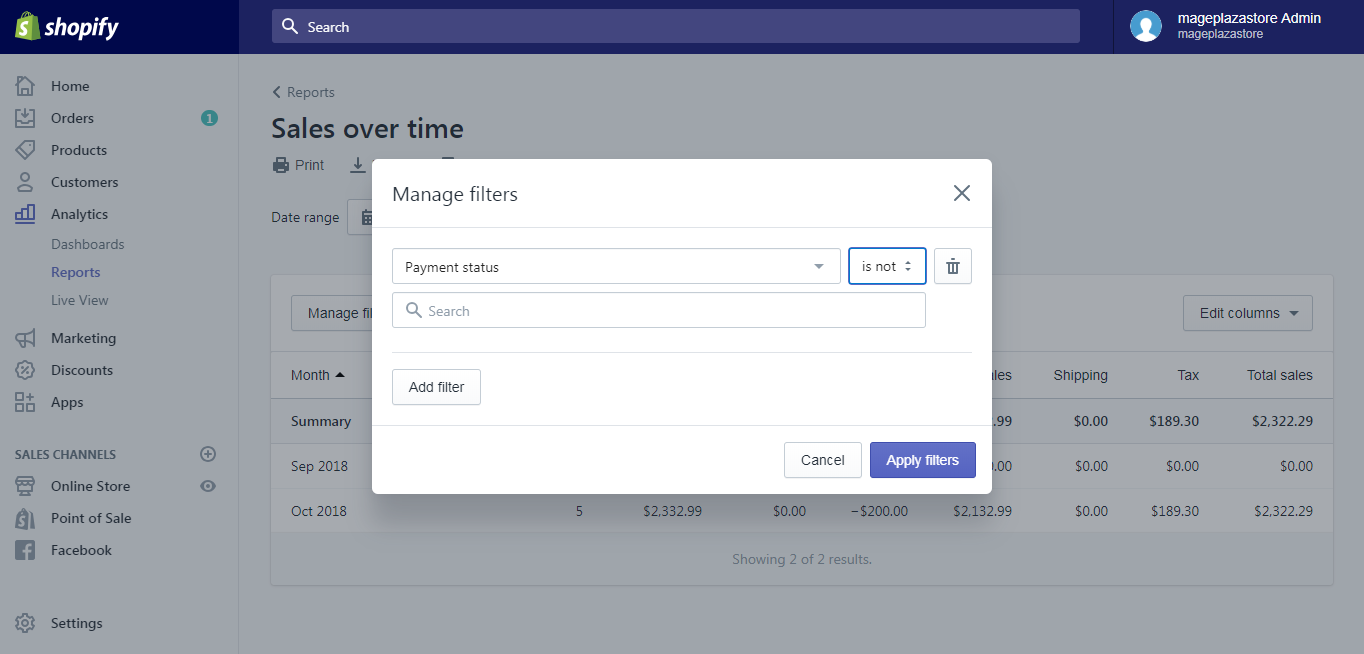
Next, below the Select filter, there is a Search box that enters the value you want to filter in or you can click on that box and choose from the suggestions. If you want to find empty value, select Filter on empty. You can also choose more than one value to filter. After your selection, the filter characteristics will appear below the Search box. For example, I want to filter the item that is not paid or is not refunded, it will look like this:
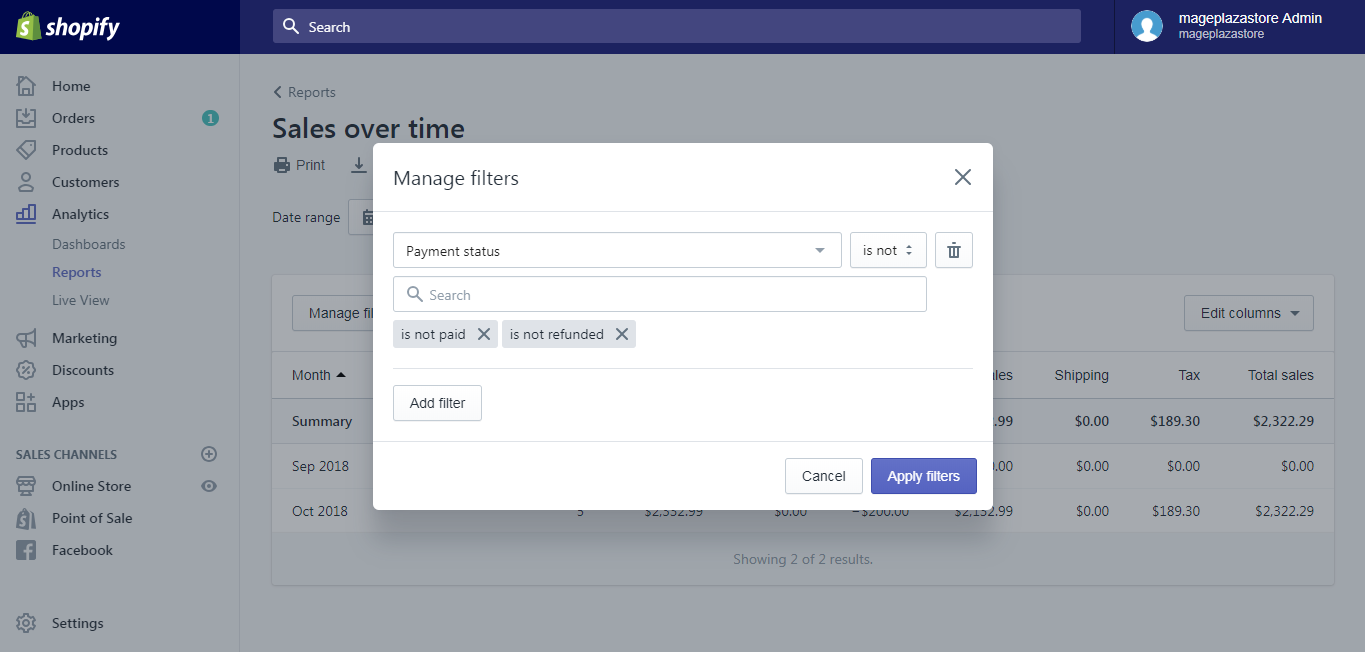
If you want to delete any value, press on the X next to your filter conditions. Moreover, you can set up more filter by clicking on Add filter. There is a note that if a filter uses the same name operator, data is included in the report if any of the values match. Meanwhile, it is included in data only if all the filters match for the case that the name operator is different.
Step 5: Click on Apply filters
If you are satisfied with the filter, select Apply filters to finish. In case you want to save the file for later use and you are on Advanced Shopify plan or higher, choose Save as, add a name and press Save. After that, to open the report, select Reports and Custom reports respectively.
Conclusion
In short, I have shown you how to filter your reports on Shopify. If you stick to my instructions, it will take you about five minutes to complete the process and receive your result. Hope that you find this post interesting and helpful. If you enjoy this post, there’s a good chance you will like another post I wrote named How to custom reports as well. Give it a read.
Related Posts:


