How to Set Up Automatic Tax Rates on Shopify
Setting up automatic tax rates makes things very convenient for Shopify store owners. As far as you know, every shop owner must be in charge of paying the tax while they are selling their products regardless of the kind of business they choose. Many issues involved in tax make the shop owner feels confused. For example, when you calculate the tax rate in a country, it will apply in every township and states also.
Related Posts:
- Set Tax Rate for New POS Location on Shopify - A How-to Guide
- How to set up tax rates in countries other than the United States on Shopify
- How to Include Taxes in Product Prices on Shopify
Shopify provides you a wonderful feature to solve that problem. It’s called Shopify’s automatic tax settings. Thanks to this, the rates will be updated steadily and accurately. To be more clear, I will choose a particular country which is the United States to illustrate.
Below are a few steps you can take to set up automatic tax rates.
Step 1: Make sure your store is in the United States
Firstly, you need to sign in your Shopify and get access to the admin page. To set up automatic tax rates in the United States, your store address must be in there. Go to the Settings section and choose General. Scroll down to take a look of the Store address field. If your store is based in the United States for sure, go to the next step.
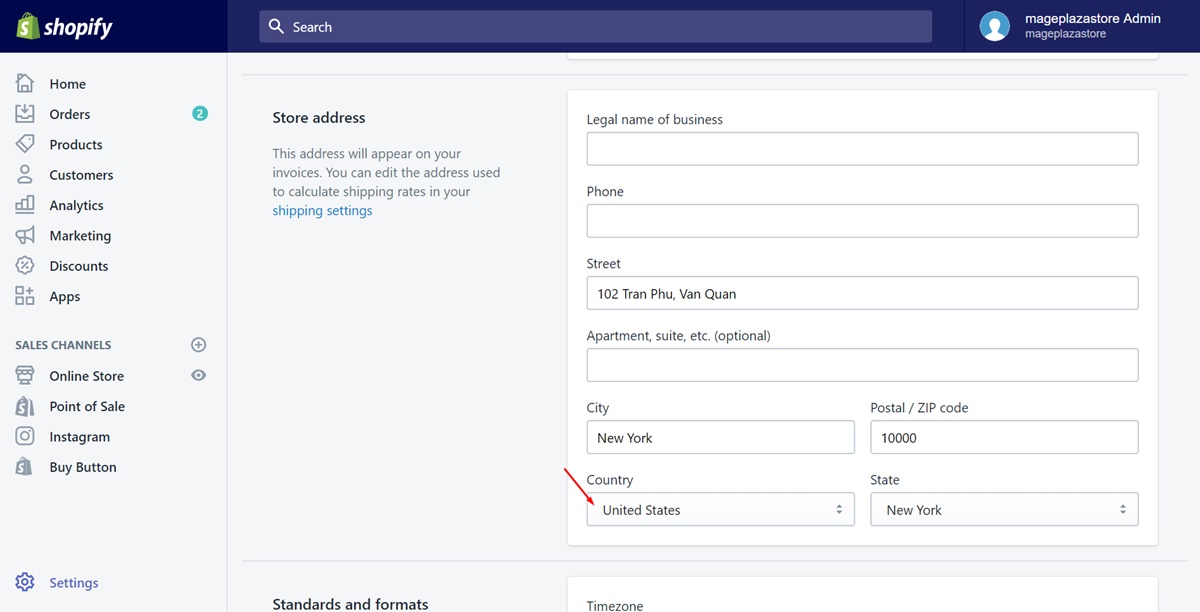
Step 2: Go to Settings and Taxes
On the left of the admin page, choose the button named Settings. Then, go to Taxes.
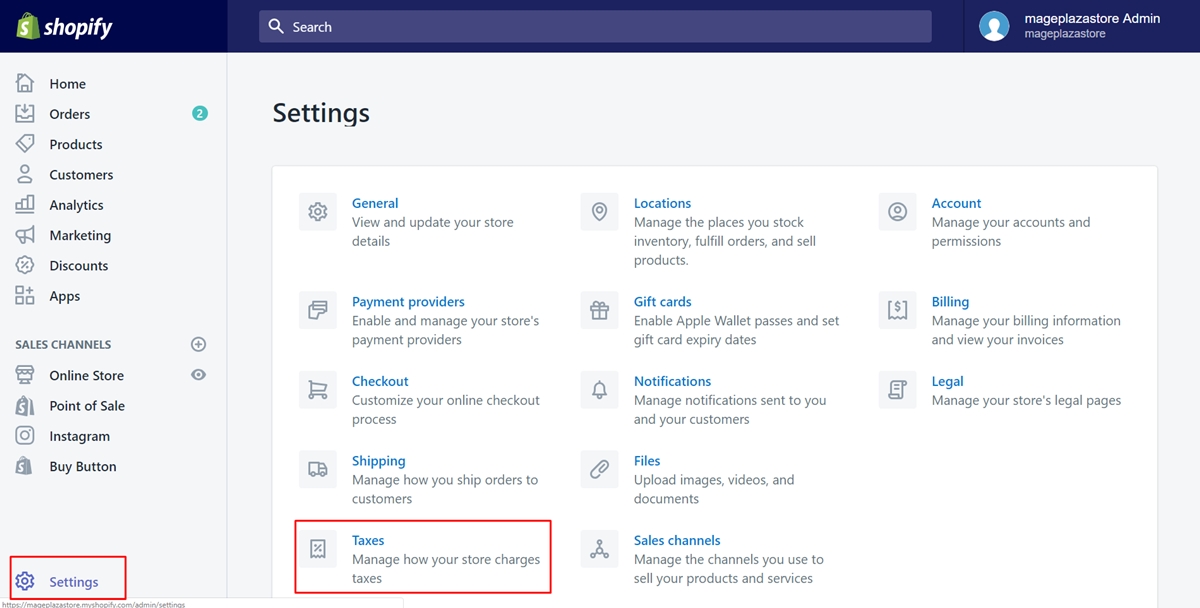
Step 3: Tap on United States
Scroll down the see the whole field of Tax rates. There is a list of all the destination you’ve had. Make sure to choose United States.
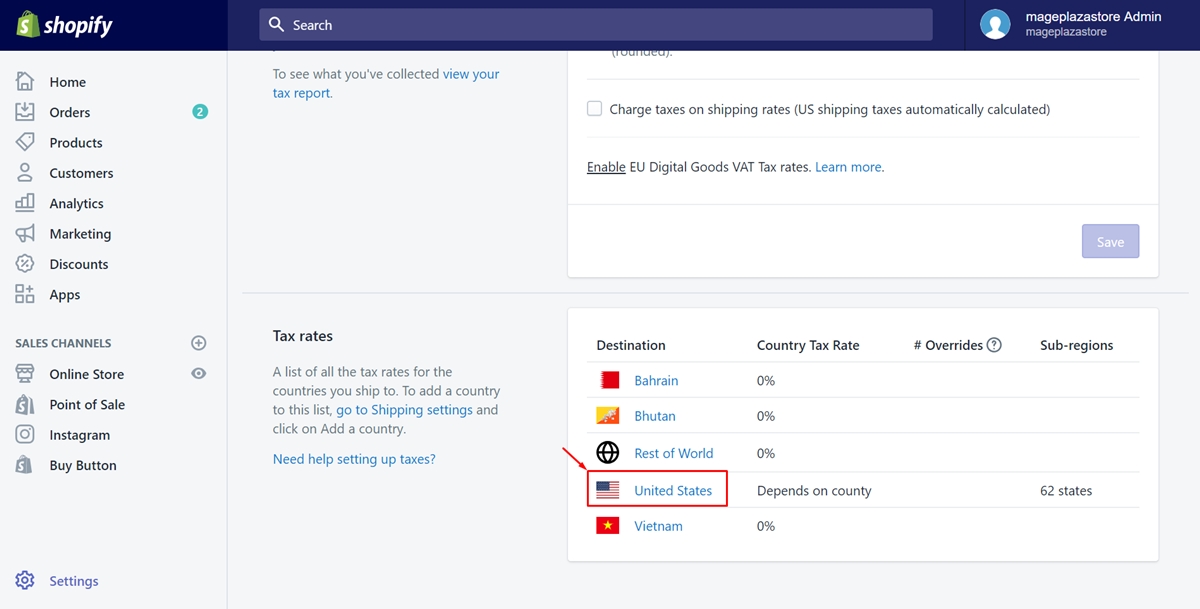
Step 4: Check Calculates taxes automatically
In the Calculating taxes section, you need to check the checkbox which is Calculates taxes automatically.
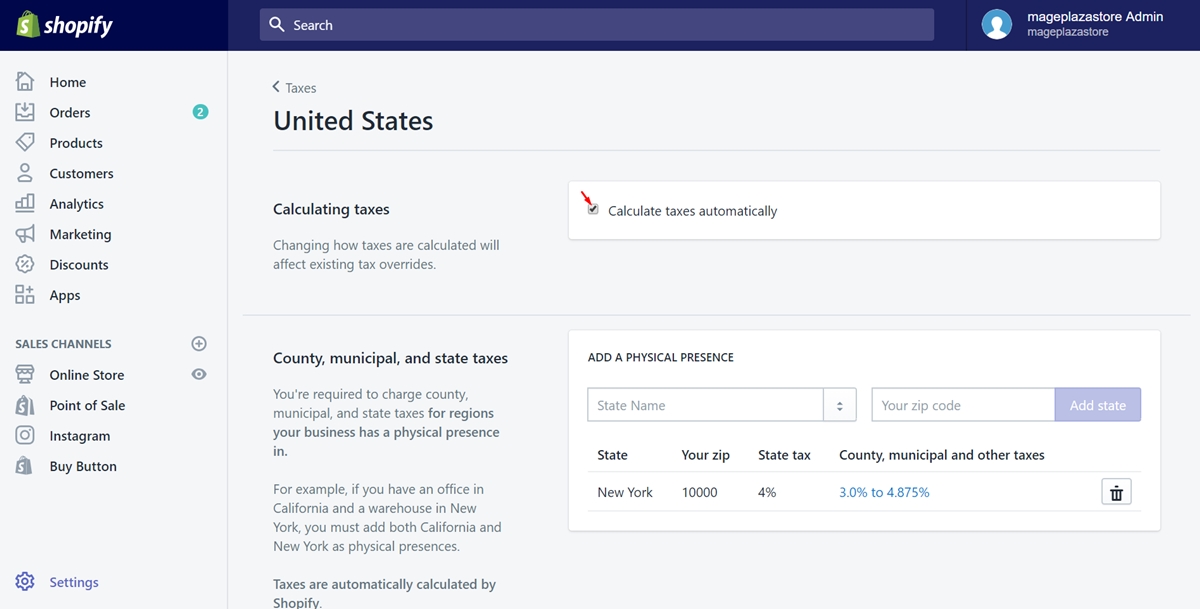
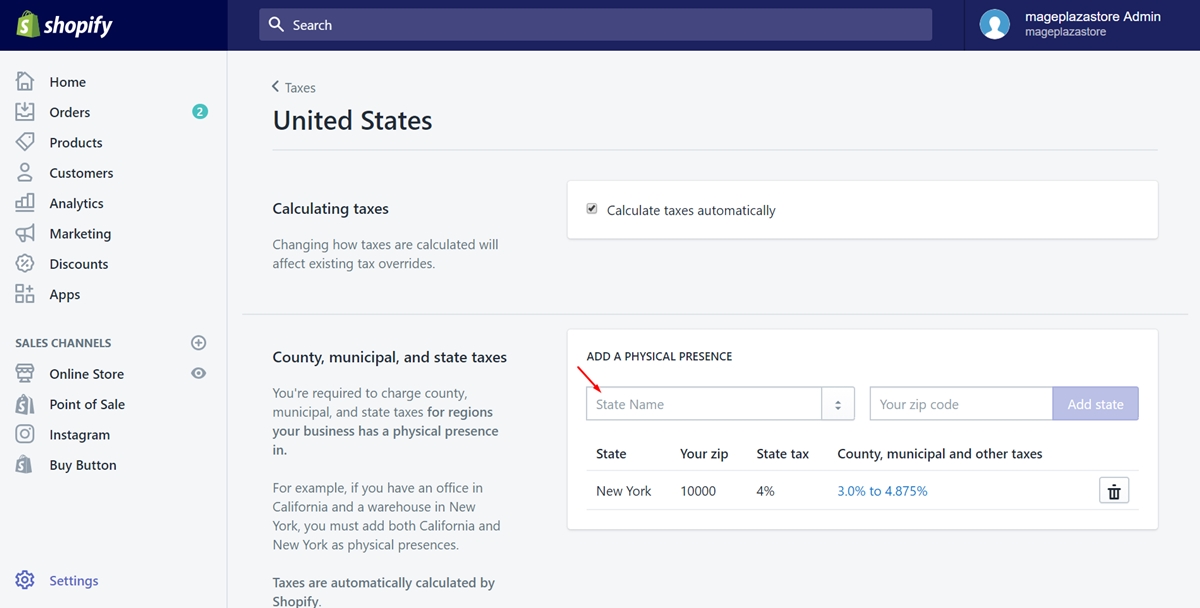
Step 5: Enter a state
Afterward, take a view of the County, municipal, and state taxes. Then, type the state name that you want to calculate the taxes rate automatically in the textbox called State Name.
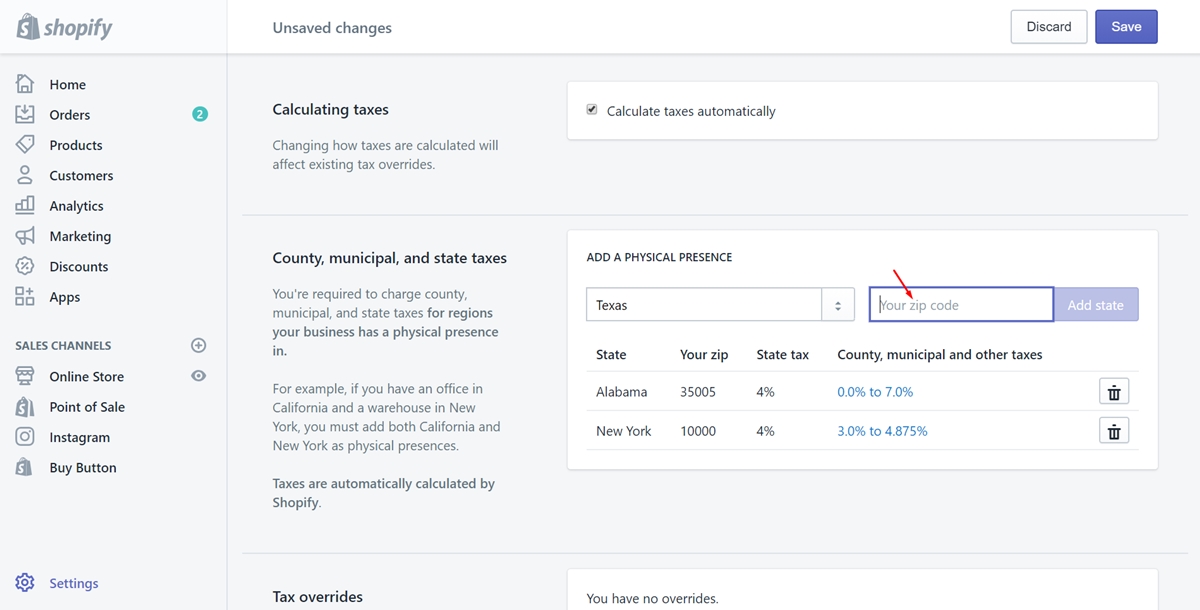
Step 6: Type the zip code
In this step, you have to enter your zip code in the text box next to the State Name.
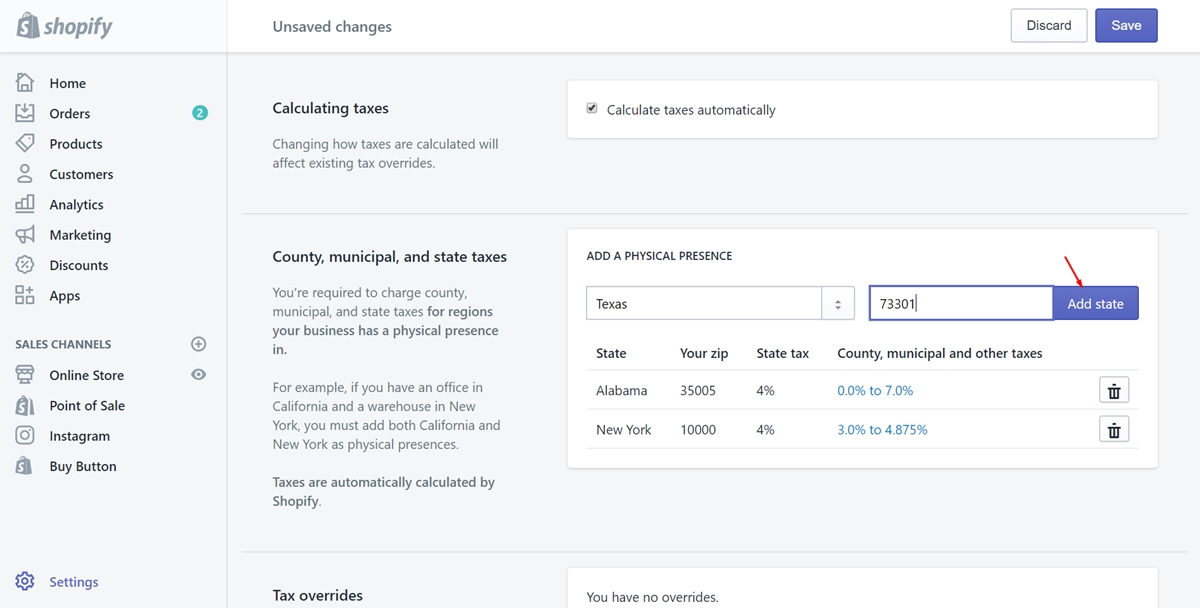
Step 7: Click Add state
Finally, press on Add state to add the state which has set the automatic tax. When you’ve done, it will be shown in the list of all physical presences.
To set up automatic tax rates on iPhone (Click here)
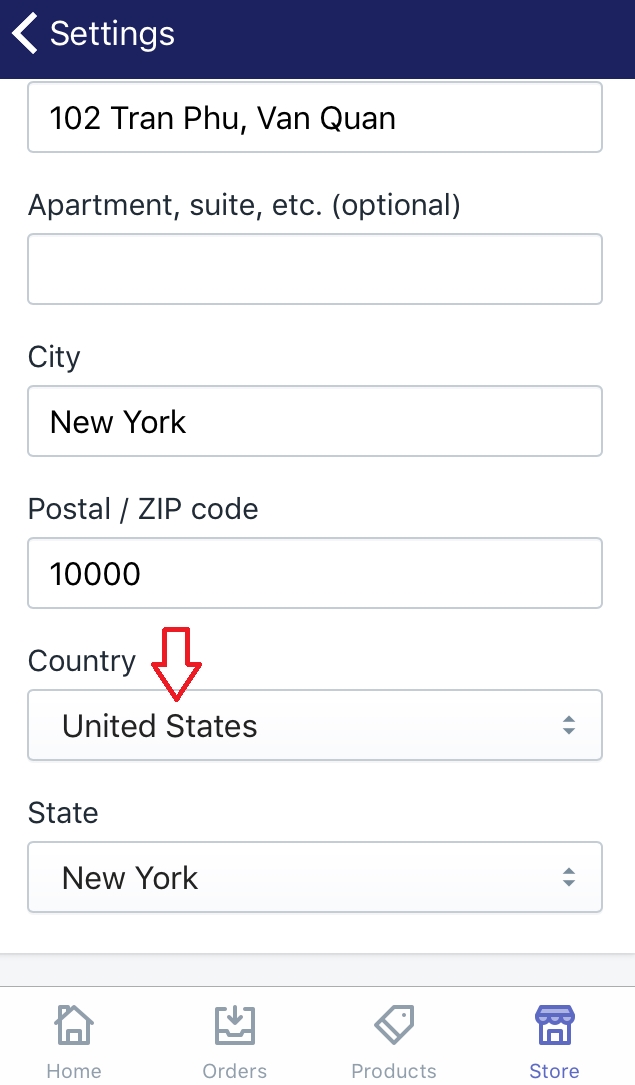
- Step 1: Make sure your store is in the United States
Firstly, you need to sign in your Shopify and get access to the admin page. To set up automatic tax rates in the United States, your store address must be in there. Go to theSettingssection and chooseGeneral. Scroll down to take a look of theStore addressfield. If your store is based in the United States for sure, go to the next step.
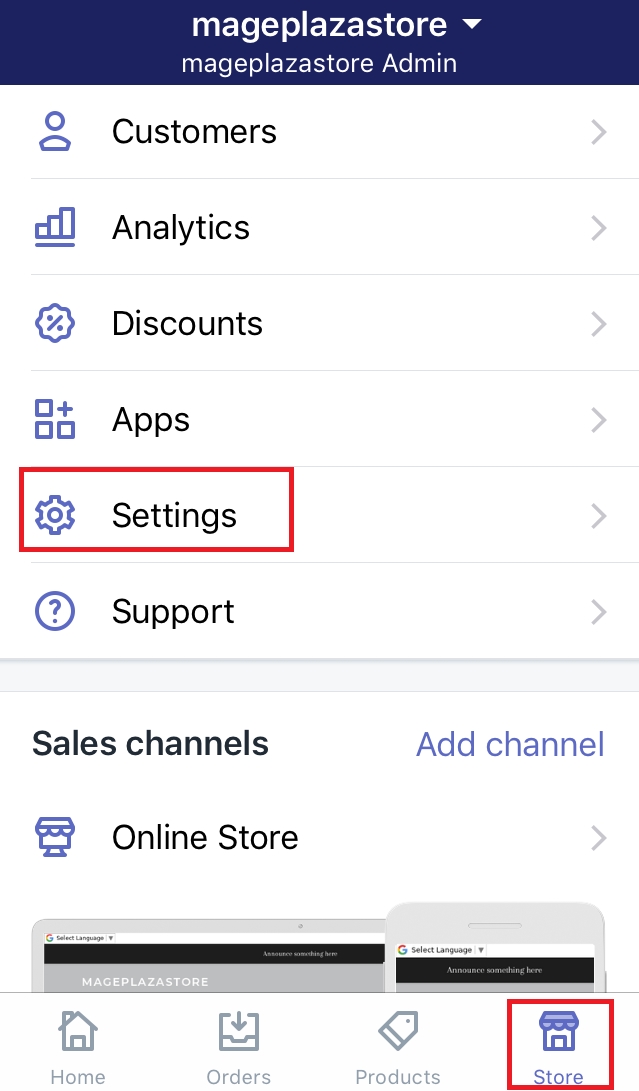
- Step 2: Select Store and Settings
Back to the admin page. Then, choose theStorebutton at the bottom of the page. Go toSettings.
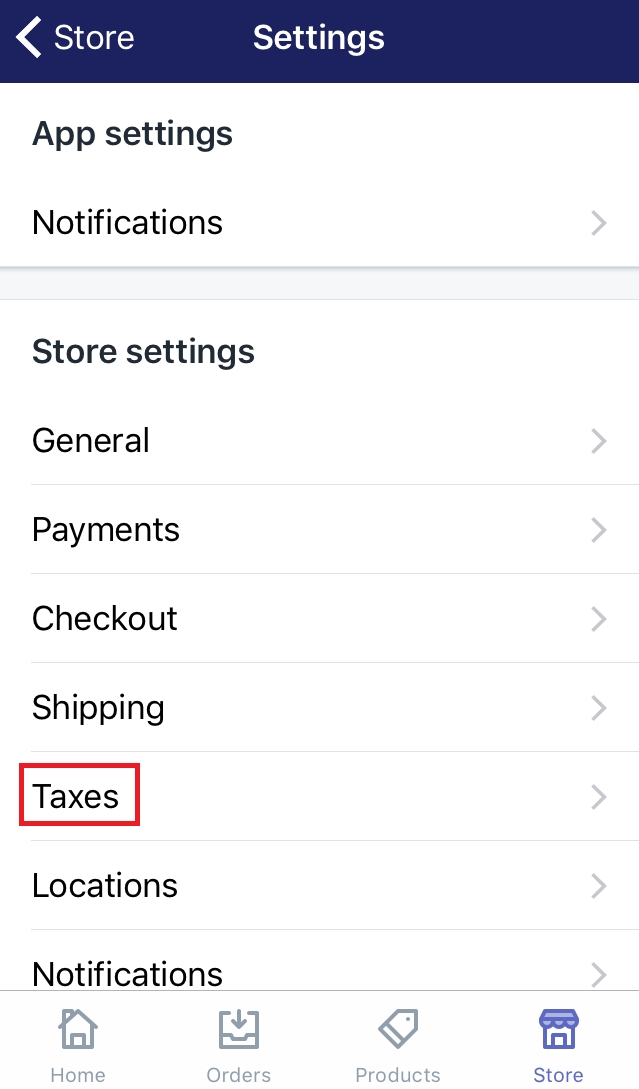
- Step 3: Choose Taxes
Press onTaxeswhich is under theStore settingssection.
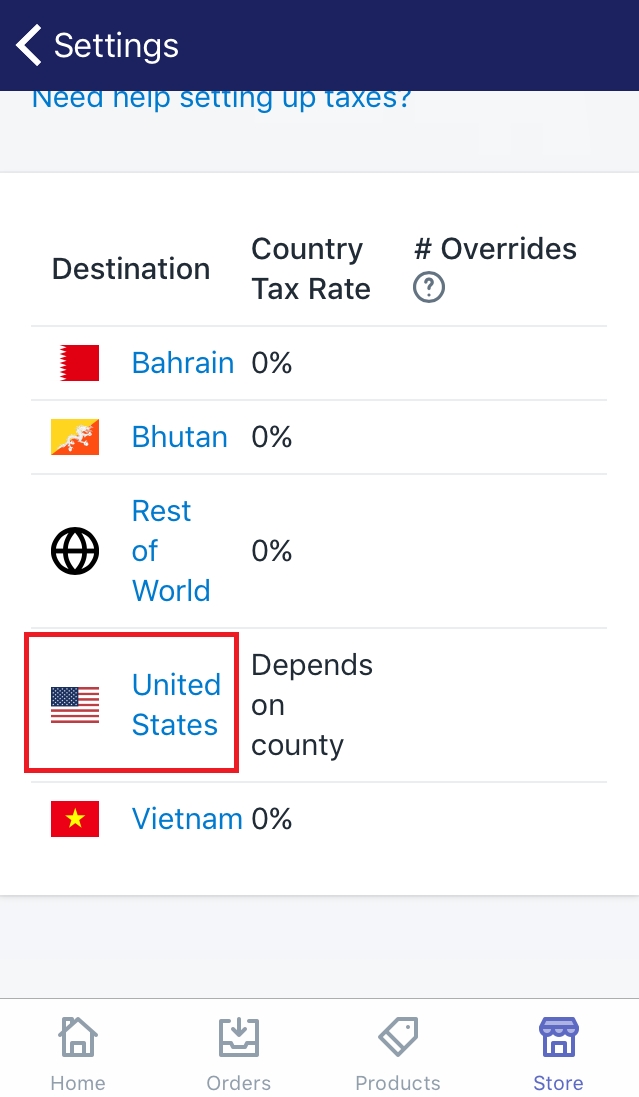
- Step 4: Select United States
Afterward, look for theTax ratesfield by scrolling down. Then, you will see a list of all the destination. Make sure to tap onUnited States.
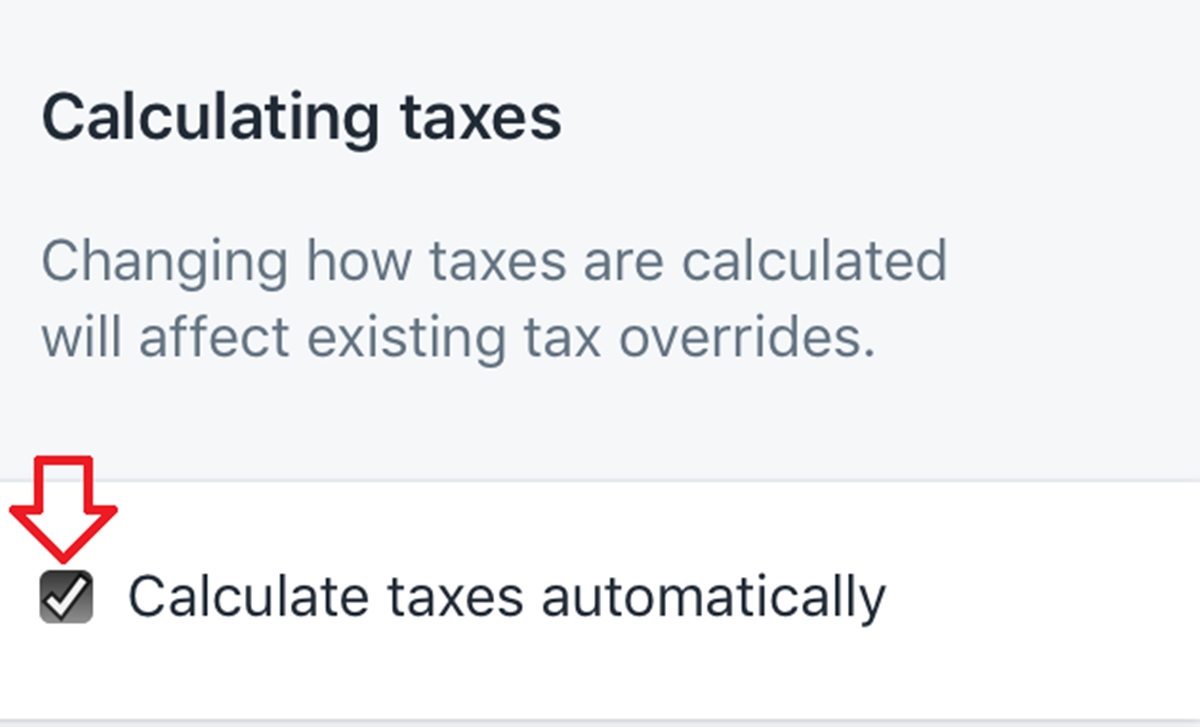
- Step 5: Check the checkbox
The first section will appear is theCalculating taxes. Besides its name, there is a checkbox calledCalculate taxes automatically. Check it to continue.
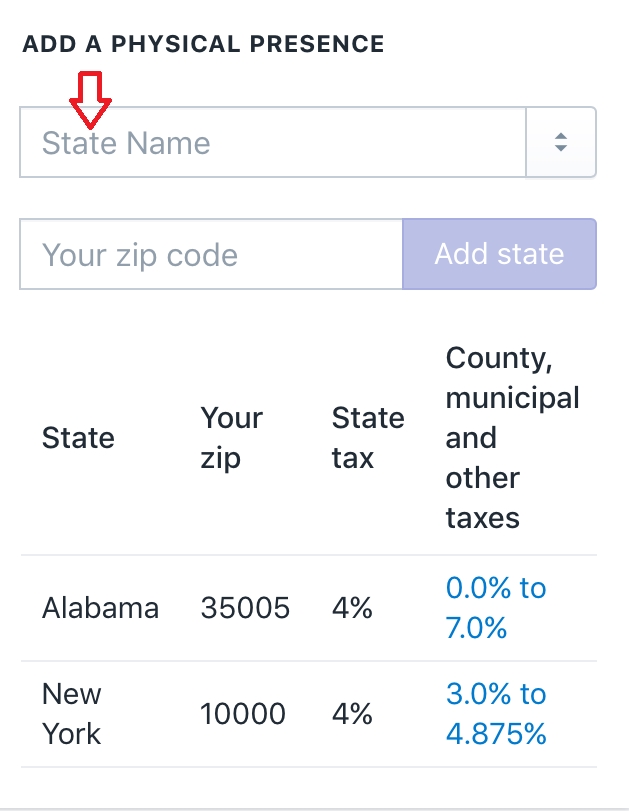
- Step 6: Enter the state
You must have thought of the state you prefer to add the automatic tax. Type that name in theState Nametextbox.
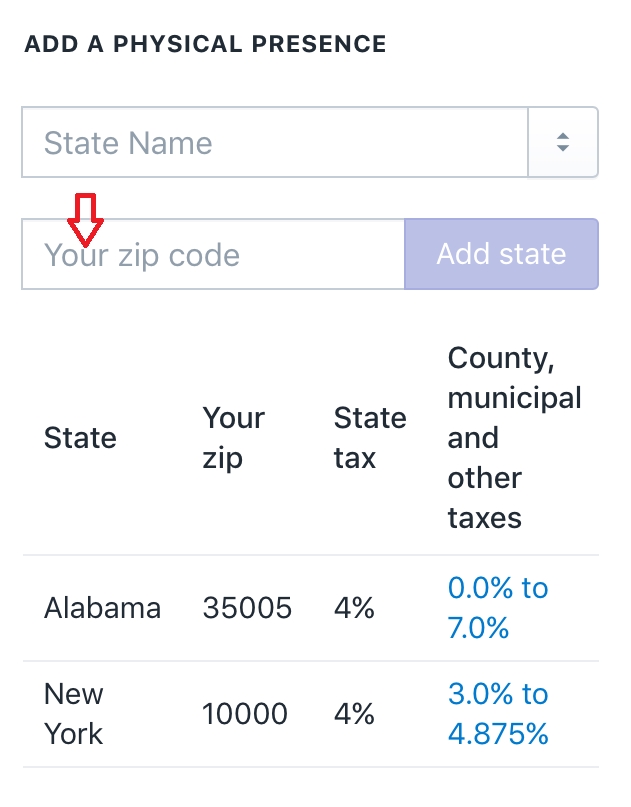
- Step 7: Enter the zip code
Type the zip code in the text box under theState Name.
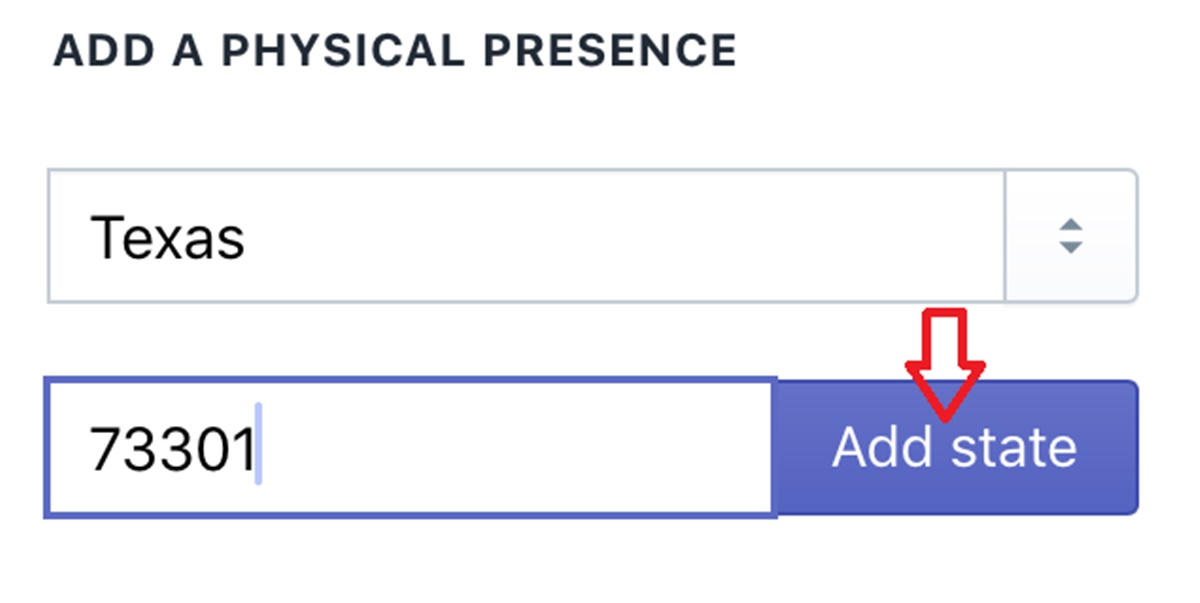
- Step 8: Click Add state
After all, selectAdd stateto complete. The physical presence you’ve added will be displayed in the list.
To set up automatic tax rates on Android (Click here)
-
Step 1: Make sure your store is in the United States
Firstly, you need to sign in your Shopify and get access to the admin page. To set up automatic tax rates in the United States, your store address must be in there. Go to theSettingssection and chooseGeneral. Scroll down to take a look of theStore addressfield. If your store is based in the United States for sure, go to the next step. -
Step 2: Select Store and Settings
Back to the admin page. Then, choose theStorebutton at the bottom of the page. Go toSettings. -
Step 3: Choose Taxes
Press onTaxeswhich is under theStore settingssection. -
Step 4: Select United States
Afterward, look for theTax ratesfield by scrolling down. Then, you will see a list of all the destination. Make sure to tap onUnited States. -
Step 5: Check the checkbox
The first section will appear is theCalculating taxes. Besides its name, there is a checkbox calledCalculate taxes automatically. Check it to continue. -
Step 6: Enter the state
You must have thought of the state you prefer to add the automatic tax. Type that name in theState Nametextbox. -
Step 7: Enter the zip code
Type the zip code in the text box under theState Name. -
Step 8: Click Add state
After all, selectAdd stateto complete. The physical presence you’ve added will be displayed in the list.
Conclusion
This writing has taken you through how to set up automatic tax rates with the concise words and the illustrated images. I hope that you find it helpful and if you want more information, check out our Shopify Tutorials.


