How to Import Inventory on Shopify
In the previous post, I’ve talked about exporting inventory, now it’s time to talk about how to import your inventory. Before importing your inventory, it is important that you make sure your CSV file is saved in the right format.
Don’t forget to remove the location column, including its heading, from the CSV file if you don’t want to update the location quantities.
Note: To import inventory quantities, don’t mistakenly use the product CSV file instead of the inventory CSV file.
Importing the quantities of inventory would overwrite your inventory data, so only when other adjustments in inventory, for examples ongoing sales, are not taking place should you import your inventory.
For a detailed guideline on How to import inventory on Shopify, read the instructions below:
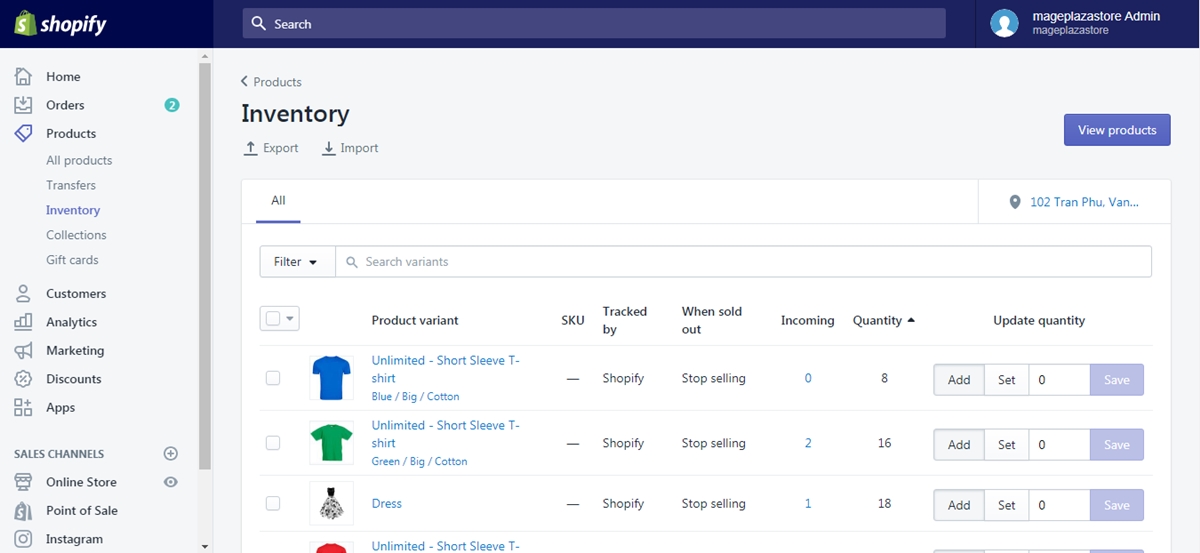
Step 1: Go to Products, then visit Inventory
First of all, log in to your Shopify admin account, then visit Products. In Products, go to the Inventory section.

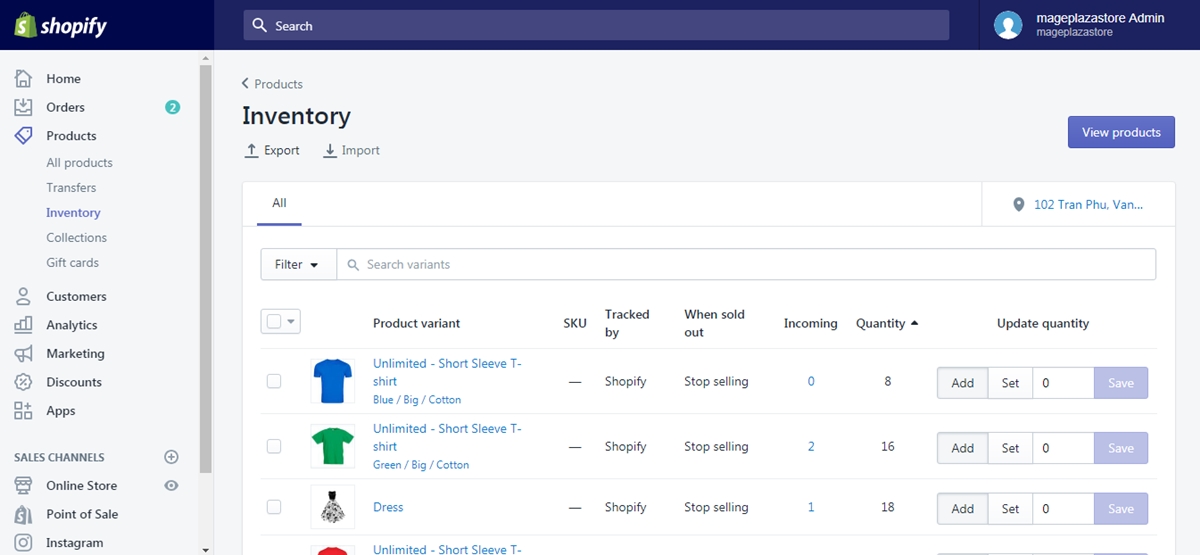
Step 2: Click Import
On top of the page, click Import right under the Inventory title.

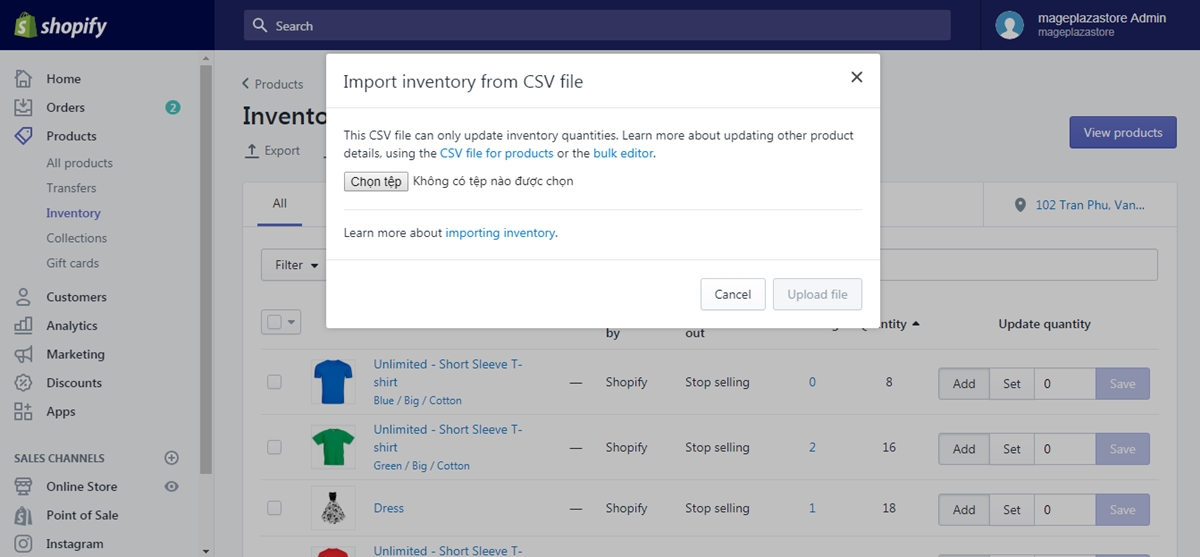
Step 3: Choose the CSV file to be uploaded
Browse your browser and select the CSV file you want to upload.

Step 4: Click Import inventory
When the file is uploaded successfully, click the Import inventory button.
Step 5: Click Start import
Click the Start import button to begin the importing process.
Conclusions
Above are the simple guideline aims to show you How to import inventory on Shopify. I hope it was helpful to you and your crew.
Under the same category, you might as well be interested in other instruction like How to export inventory on Shopify.
To view a series of articles like this, visit our Help Center.
Related Posts:


