How to insert social media buttons in Shopify
That integrate social media with your online shop is a smart way to increase the traffics access to your store. There are a lot of actions you can take to do this effectively. In this tutorial, I’ve prepared for you one of the best customizations which is to insert social media buttons. You can complete this in two different ways. Take a view of them and decide to do the one that suits you the most.
To insert social media buttons
Insert social media buttons in an effortless way
Step 1: Access to the Shopify App Store
First of all, you need to access to the Shopify App Store. You can tap here to go to the website directly.
Step 2: Go to Marketing
In this step, look at the top field and find the Categories section. Then, press on it. A drop-down list will be shown. Make sure to click Marketing.

Step 3: Select Social media marketing
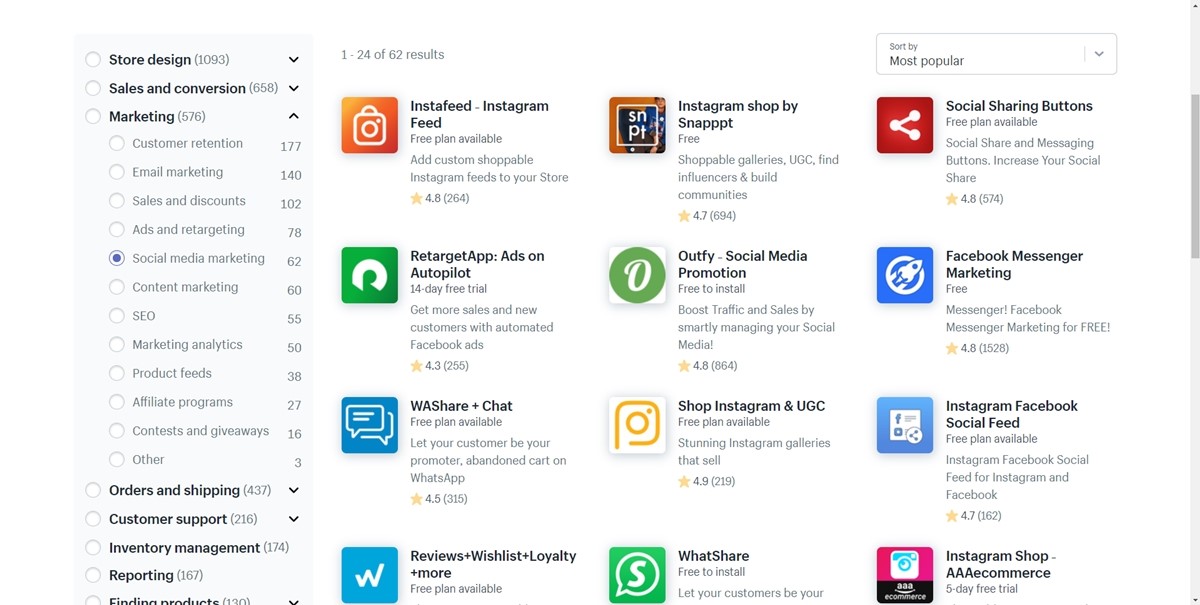
Now, tap on the Social media marketing button to view all the social media buttons which the App Store has.
Step 4: Add the app
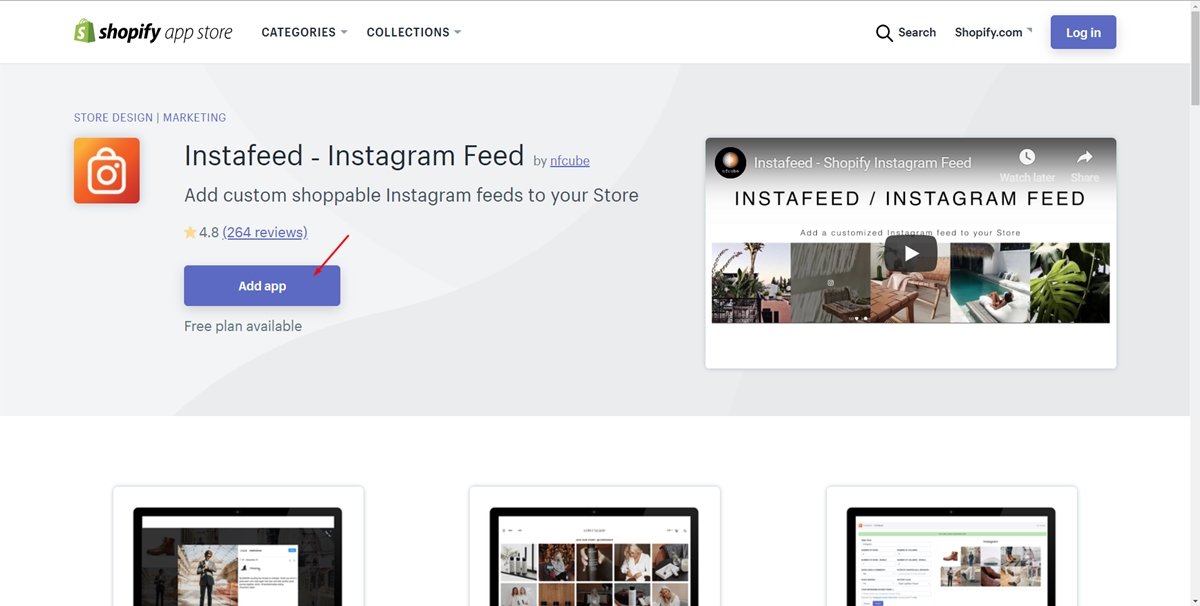
Choose the ones you expect and click on the name of them. For example, I’ve chosen Instafeed in the following picture. Finally, tap on Add app to add the app. There’s nothing you have to do because the app will do all of the rest.
Insert social media buttons in an advanced way
Step 1: Select Themes
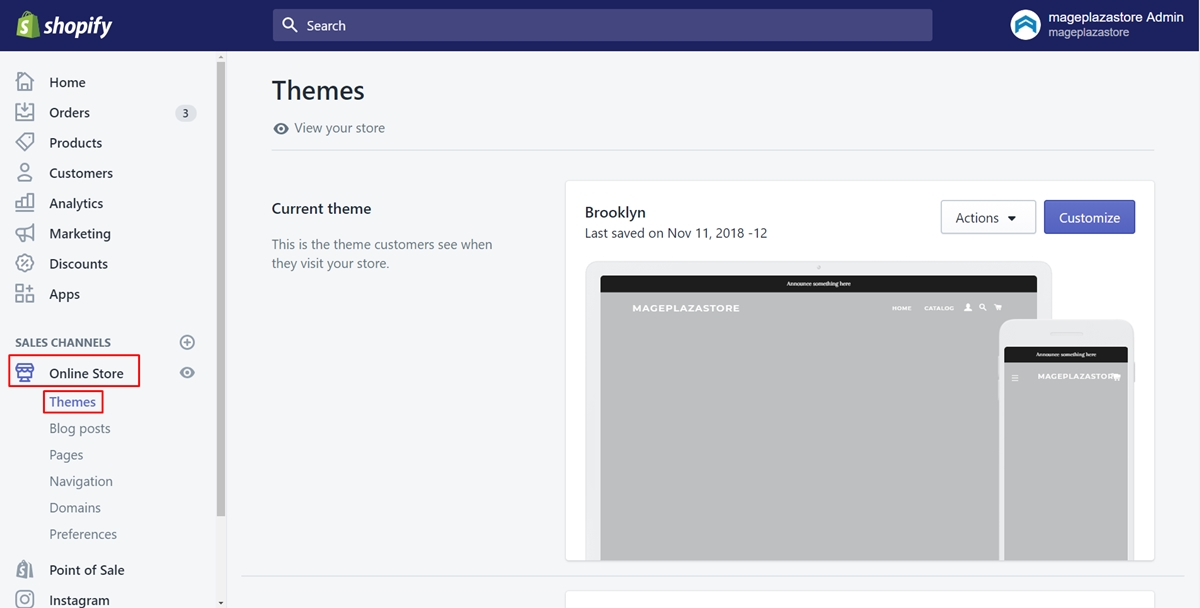
In the first action, make sure that you’ve logged in your Shopify account. Then, tap on the Online Store section in the left-hand side menu. It will automatically go to the Themes field.
Step 2: Tap on Edit code
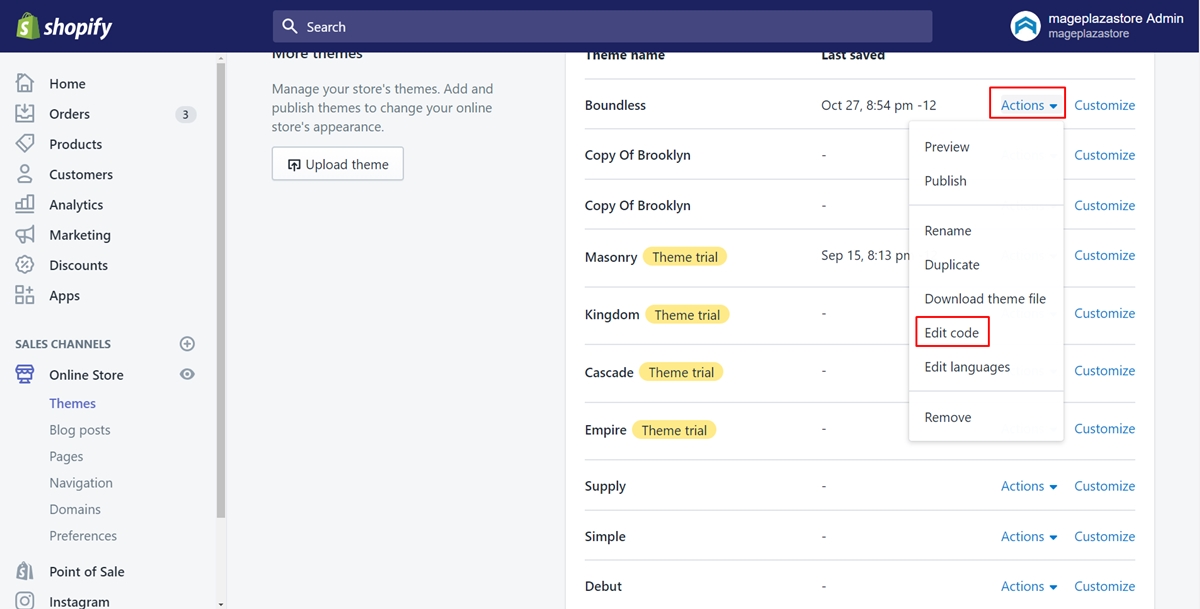
There are lots of themes you have. Select the theme which you expect to edit. Afterward, click on the Actions button next to its name and tap on Edit code in the drop-down list.
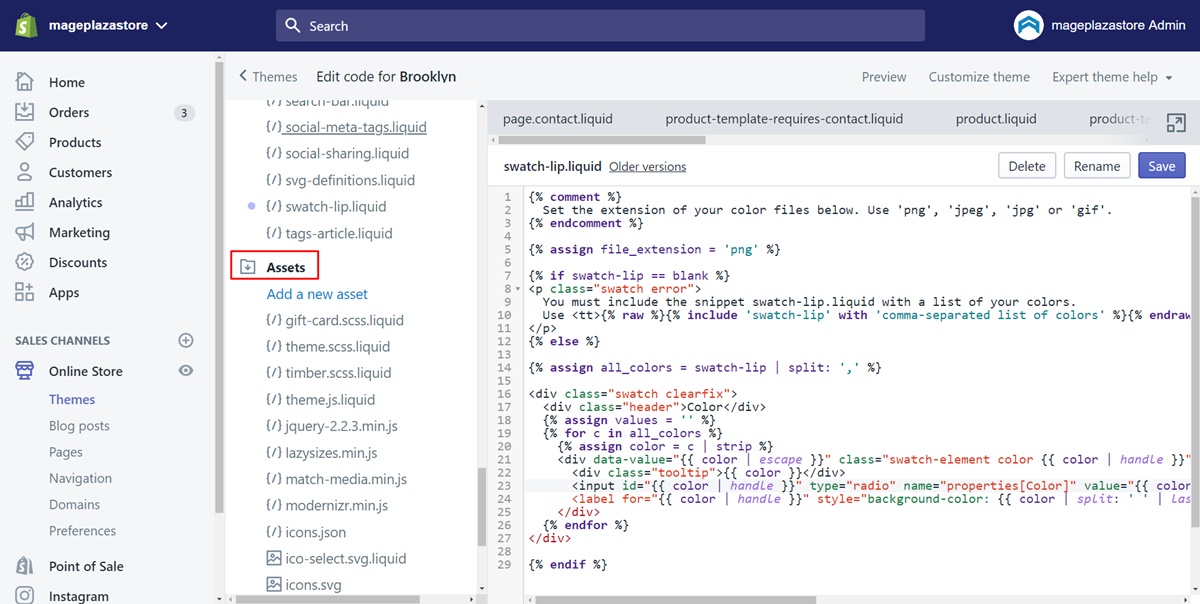
Step 3: Go to Assets
To get the social media button on your site, you need to upload its icon image to your theme. Make sure to go to the Assets directory to do the next step.
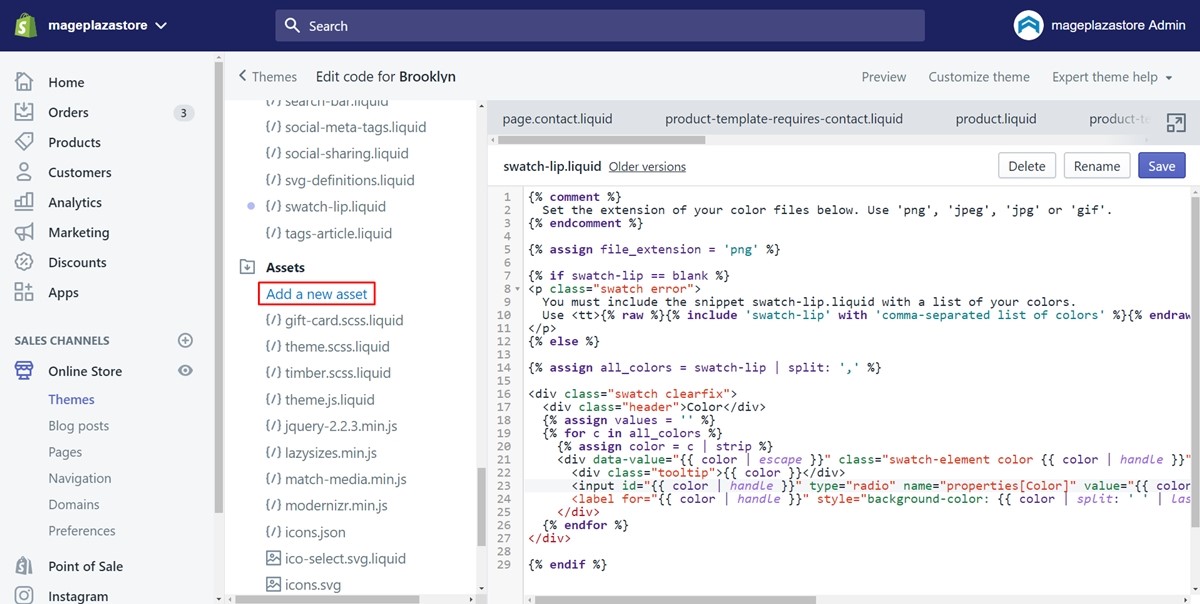
Step 4: Select Add a new asset link
Under the Assets heading, you will see a link called Add a new asset. Press on it.
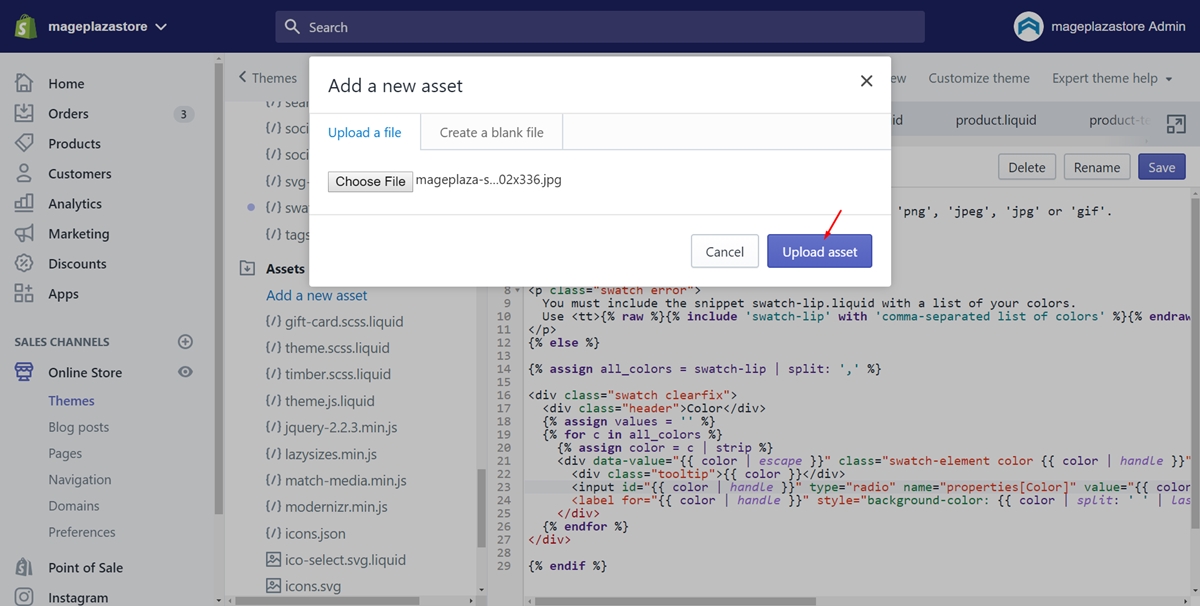
Step 5: Upload the icons file
In this step, you will upload the icons file as I said in the third step. To do this, tap on Choose File. Click the file on your computer and select Upload asset.
Step 6: Open the theme.liquid file
To make the button icon really work, you have to add in the code. Make sure to open the theme.liquid file by tapping on it. Next, the online code editor will appear.
Step 7: Enter the code
The location that the buttons display depends on where you paste in the code. Take a view of the code carefully and decide to put it in the most suitable location. Below is an example code for Twitter but it also works for Pinterest, Facebook, etc.
{{ 'my-twitter-button.png' | asset_url | img_tag | link_to: 'https://twitter.com/iamawesome', 'follow me on twitter' }}
Alternate button code with HTML:
<a href="https://twitter.com"><img src="my-button.jpg" alt="Follow on Twitter"/></a>
Step 8: Save
Finally, tap on Save to complete.
Summary
Above is a detailed guide for you to insert social media buttons. With the carefully worded text and illustrated images, hope that you find it easy and comfortable to take steps. By doing this, hope there will be more and more traffics to your online store. If you’re concern about how to insert a Pinterest button to your store, tap on it to visit the post.


