How to Set up Currency Switcher in WooCommerce
A hard truth for every online seller is that it is challenging to sell globally. For this reason, showing pricing in the currency preferred by your visitors is a difficulty you will face in your SEO work. When consumers are browsing your store with foreign currencies displayed, it may be confusing and even off-putting. They’ll be uncertain whether you even ship to their area, and they won’t know the actual prices of each goods. Fortunately, you have come to the right place because we have just the right solutions for this problem!
In today’s article, we will be introducing you to a promising feature for online businesses - WooCommerce currency switcher along with a tutorial on How to set up a currency switcher for your WooCommerce store. Keep reading if you are interested!
Why should you use a WooCommerce currency switcher for your online business?
Suppose you are engaged in foreign commercial endeavors or you just need to conduct private transactions overseas. In that case, it is most probable that you will need to utilize a currency converter. This kind of converter is used for determining the current value of a particular national currency compared to the current value of other national currencies. All you need to do is input the amount they need to look up and the kind of currency. The results will be ready in seconds.
What a useful tool for eCommerce retailers nowadays, right? Here are some other advantages of using WooCommerce currency switcher:
- Eliminating currency conversion issues, which gain better experience for users.
- The ability to widen target customers to many countries in the world without establishing new brick-and-mortar locations.
- Specify a minimum for discounts, shipping, and free delivery based on the currency your customers use.
- Allows each product to have set pricing regulations
- Assists consumers in being able to do their shopping in the currency of their choosing
- Use WC_Geolocation in PHP class to automatically convert currencies
- Gives the ability to add geo-located rules for each product
How to set up a WooCommerce currency switcher?
At this point, you may have understood the definition of WooCommerce currency switcher and how it normally works. Therefore, we will guide you through a tutorial on how to set up one for your store. Carefully follow the instructions to successfully install the feature:
Step 1: Fulfill the requirements
Before getting started, there are several things you need to know about whether you are eligible enough to use a WooCommerce currency switcher. It is required that you use a WooCommerce version 3.8+ and PHP in the 5.3 version or higher. The best scenario for using this plugin is 4.0+ WooCommerce and PHP 7.0+ version.
Step 2: Install the plugin
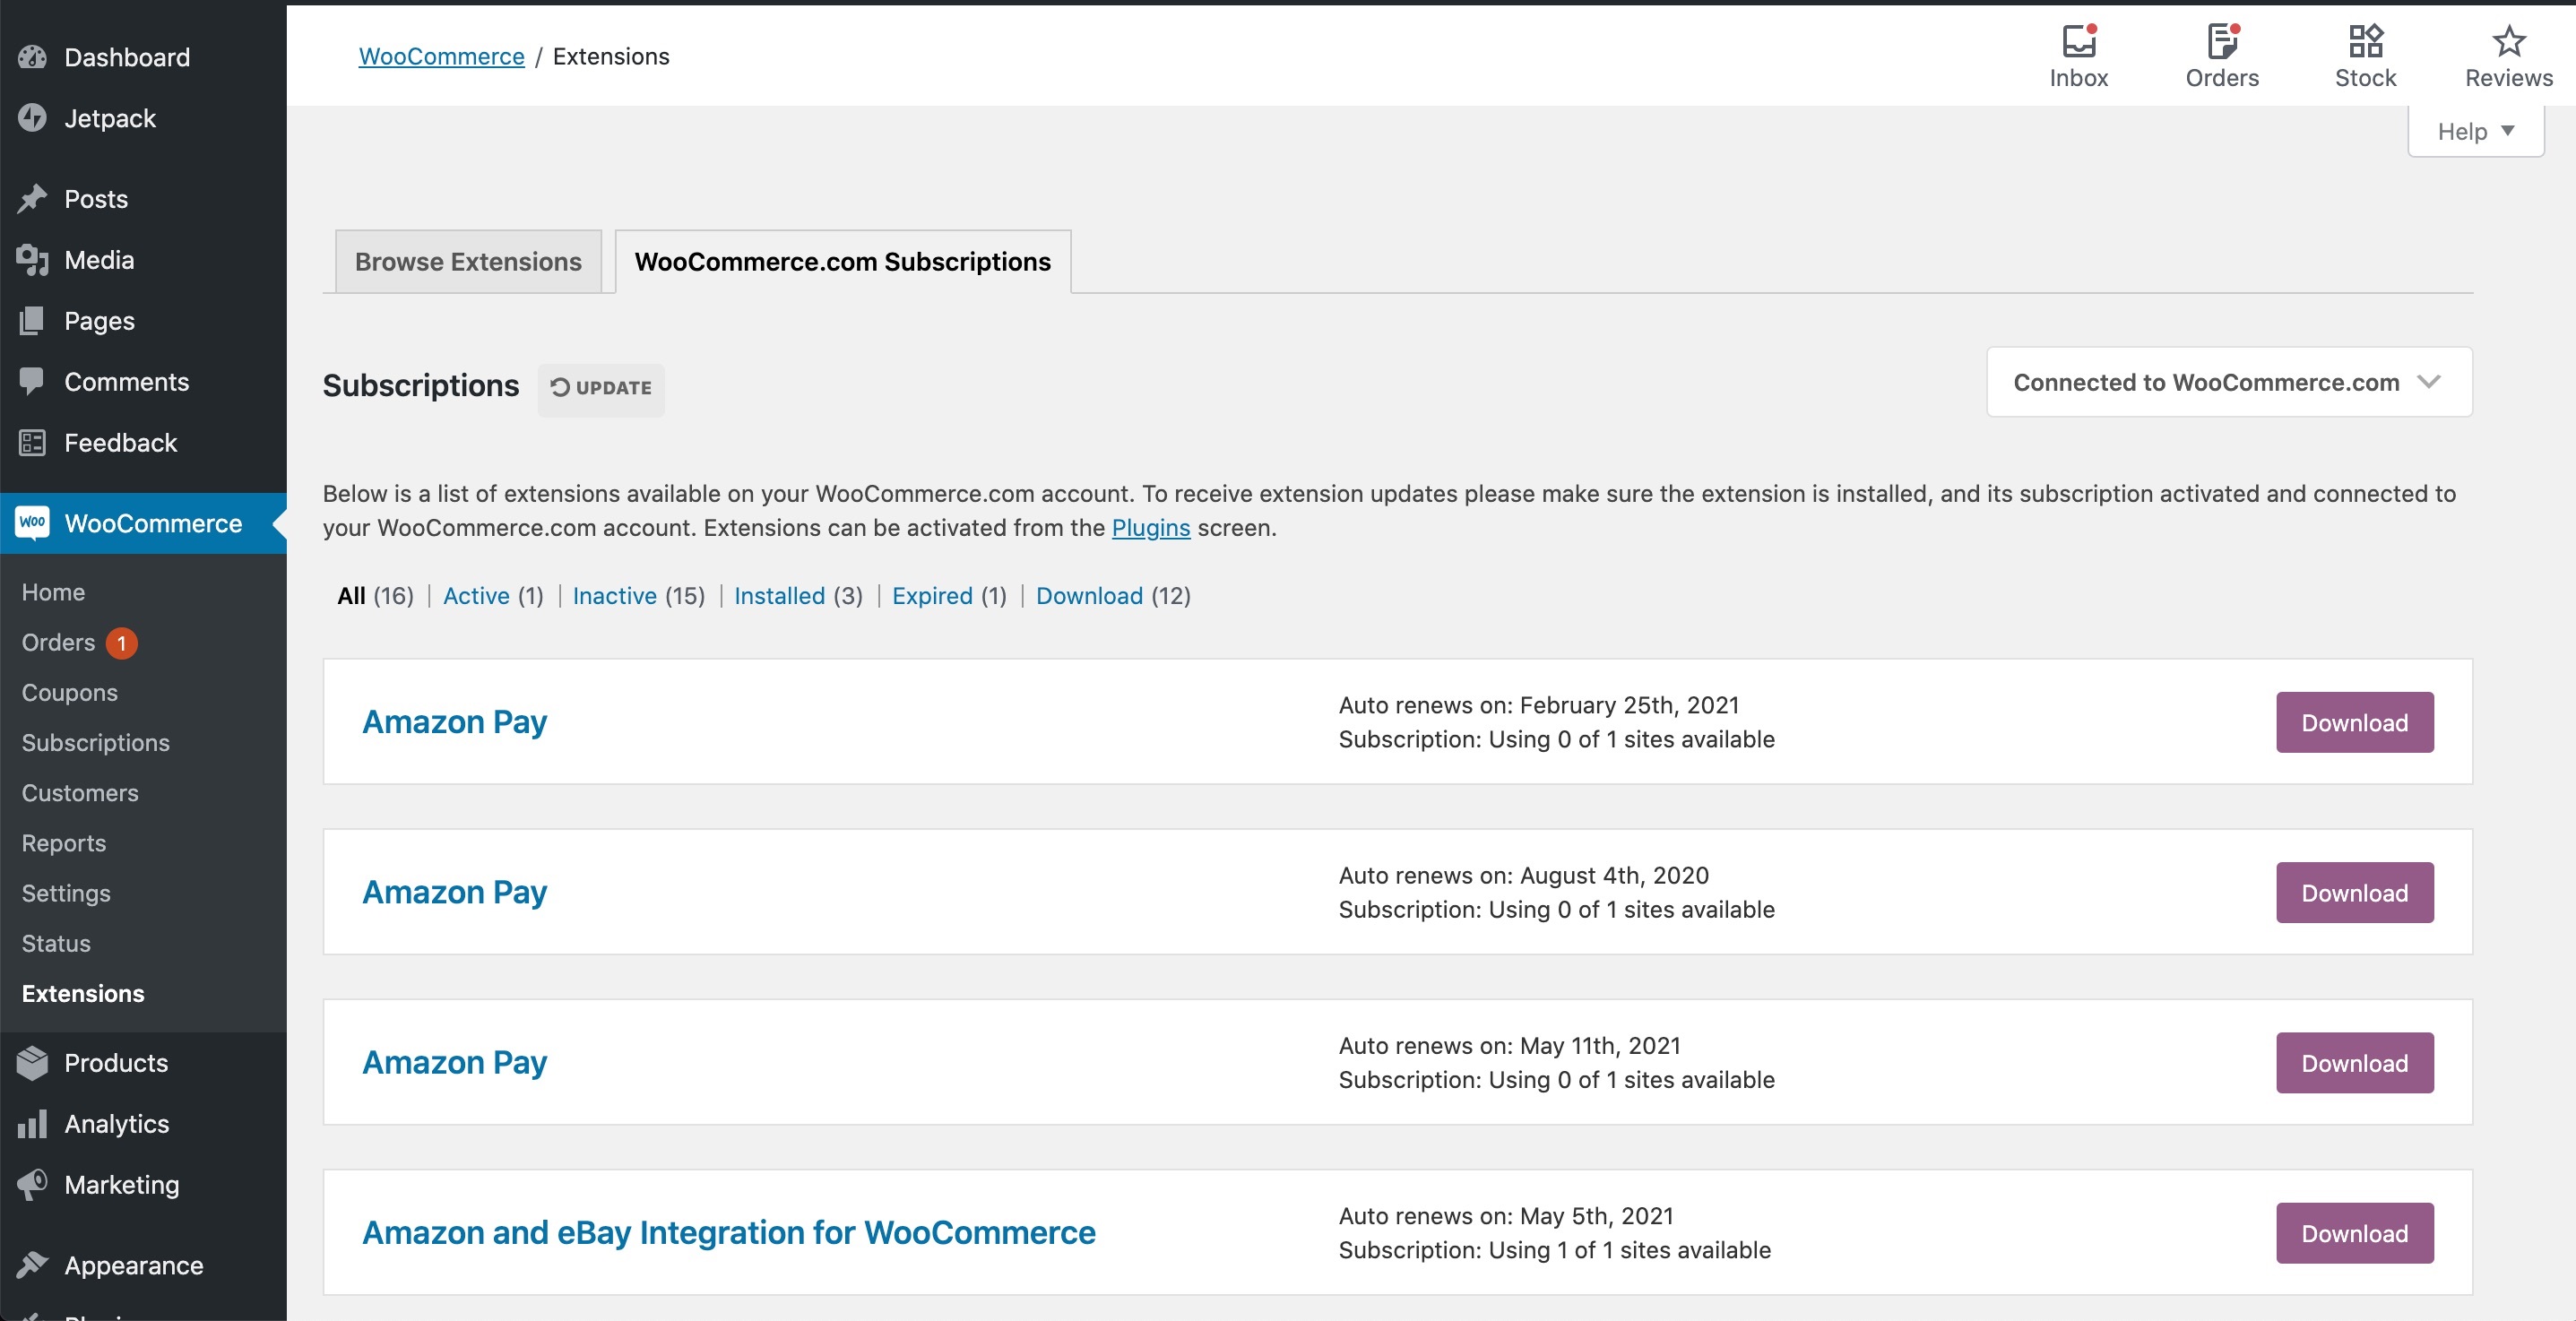
At your WooCommerce Dashboard, navigate to the WooCommerce > Extensions > WooCommerce.com Subscriptions on the left-hand side of the screen and click on “Download” button next to the plugin:
After that, we will switch to the Plugins > Add New panel and upload the downloaded file by selecting the “Choose File” button:
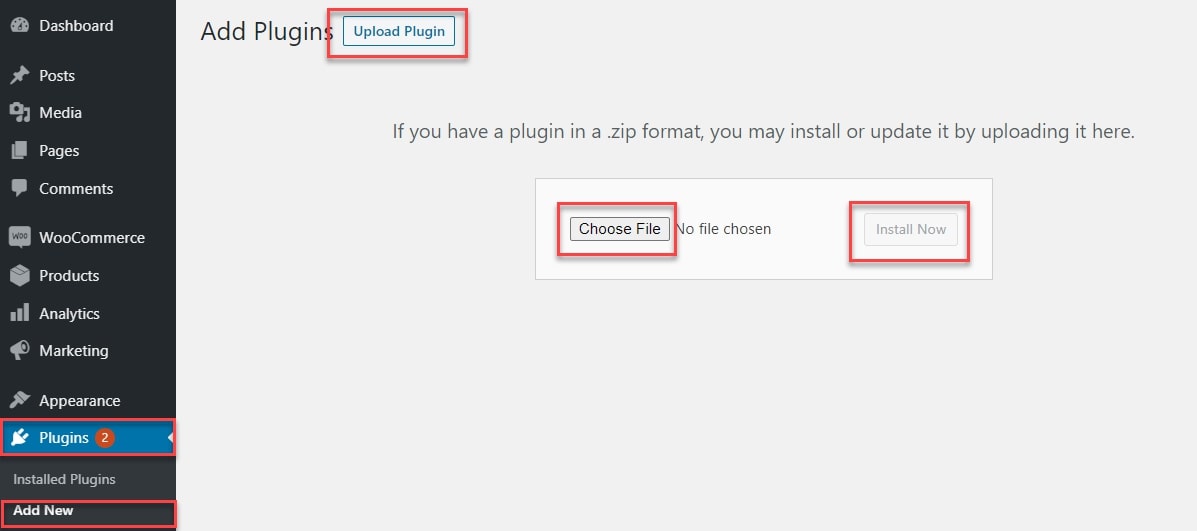
Once you are done with the uploading steps, the system will ask for authentication by choosing the “Install Now” and “Active” options to officially make use of the extension!
Step 3: Configuring your currency switcher
Now, it’s time to make some real changes so that the new WooCommerce currency switcher works well with your website. First thing first, we will be deciding the appearance of currencies by going to WooCommerce > WCCS Settings and start selecting the wanted currencies for your website in the dropdown menu:
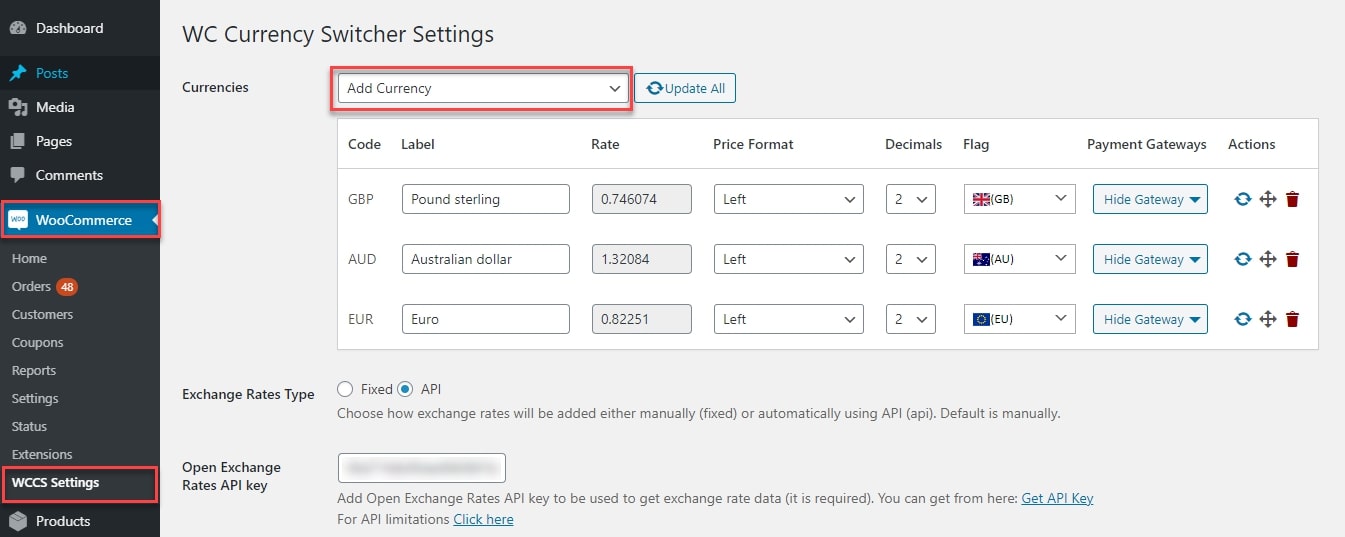
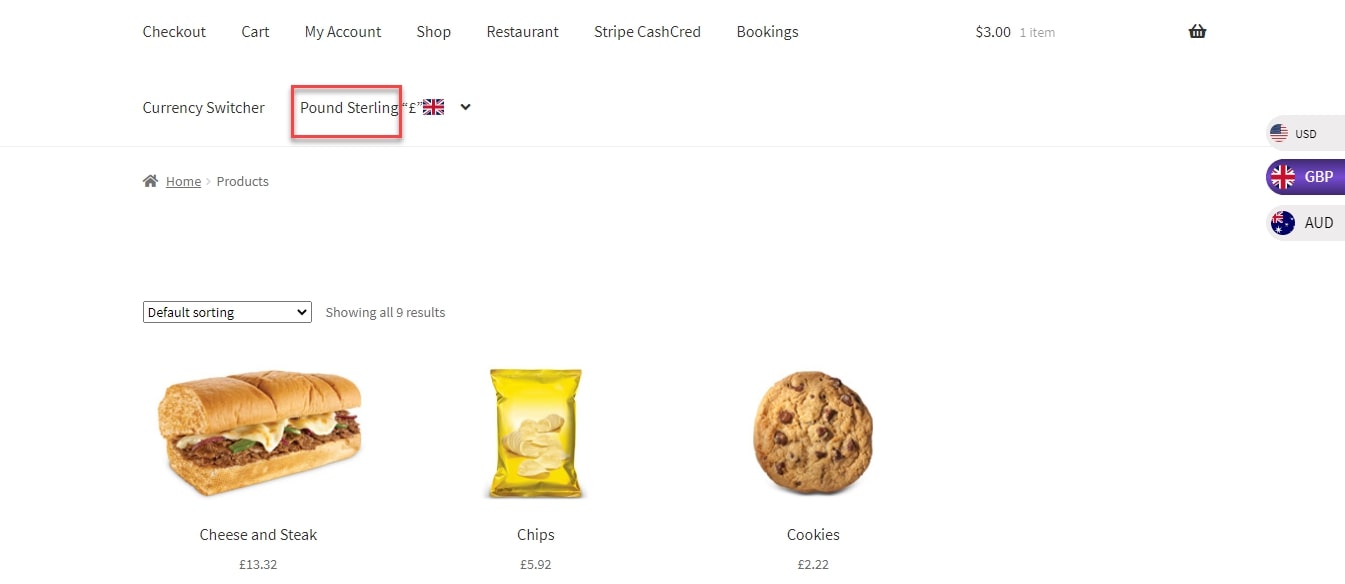
You may also change the label for each currency based on your preferences too:

And here’s the result:
Instead of setting the exchange rate of each currency automatically, set it manually. Value “1” of your WordPress environment’s default currency will be determined by the exchange rate. The exchange rate is obtained via the API, and will thus be shown automatically:

Feel free to customize the alignment of your available currency with the “Price Format” dropdown:

As you can see, after making changes, your value of the currency has been shown on the left-hand side:
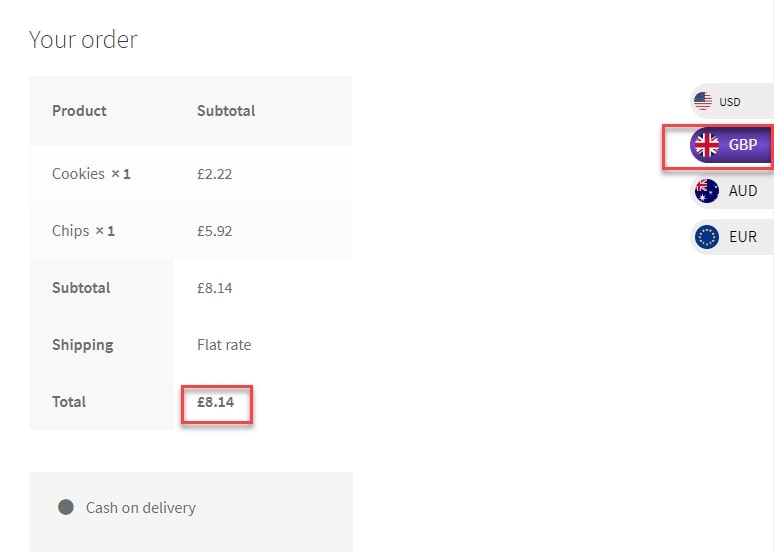
With the “Decimals” selection, select the number of decimal places you wish to display for traded currencies:

In case you chose English as flagged, your frontend will appear as below:

In the dropdown specifying Payment Gateway configuration, you will see the available payment gateways for installations. Hide those currencies for which you have checked off the choices:

Perform the sequence of shuffling of all the currencies. During the first period of operation, all frontend currencies will be displayed in the same order following the default currency:

Finally, click on the “Trash can” icon to get rid of any particular currency:

Step 4: Automatically change the currency
For this step, it is a must for users to purchase the API Access Key to turn on the feature. If you have already had that, access the WooCommerce > WCCS Settings from the Dashboard:
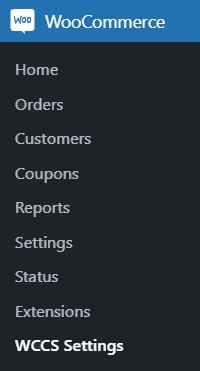
Tick on the checkbox for “Currency by Location” and there will be a title called “Location API Access Key” will be evident:

Click on the hyperlink Get API Key to get the API key. This will take you to the ipapi dashboard. Sign up if you don’t already have an account. Then, choose a plan that matches your needs. You will get your API Access Key after the registration procedure is complete:
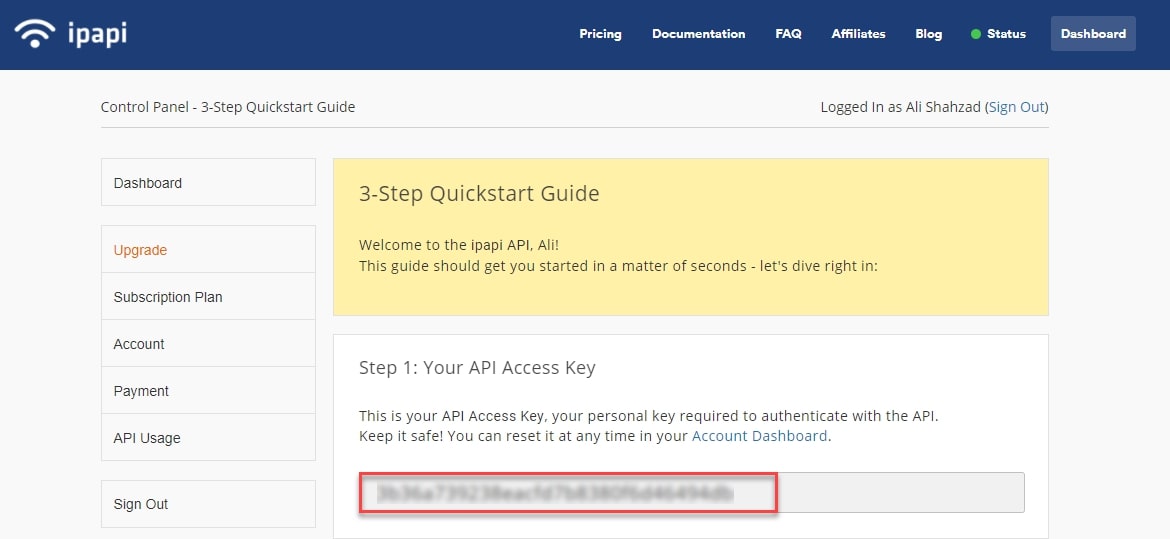
Copy and paste the API Access Key into the field on your WCCS Settings page:

At this moment, your currency on the webpage will quickly be changed on the basis of the consumers’ locations:
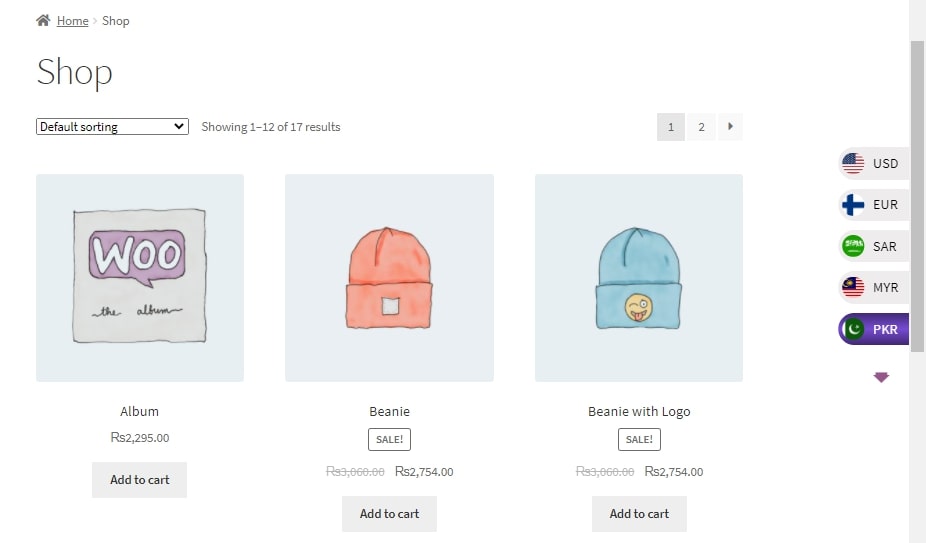
You can select from a choice of settings that dictate whether to display the currency symbol or the currency ISO code. With the Currency Symbol, enter the WooCommerce > WCCS settings and move your mouse over the “Symbol” alternative in the “Currency Display Type” section:
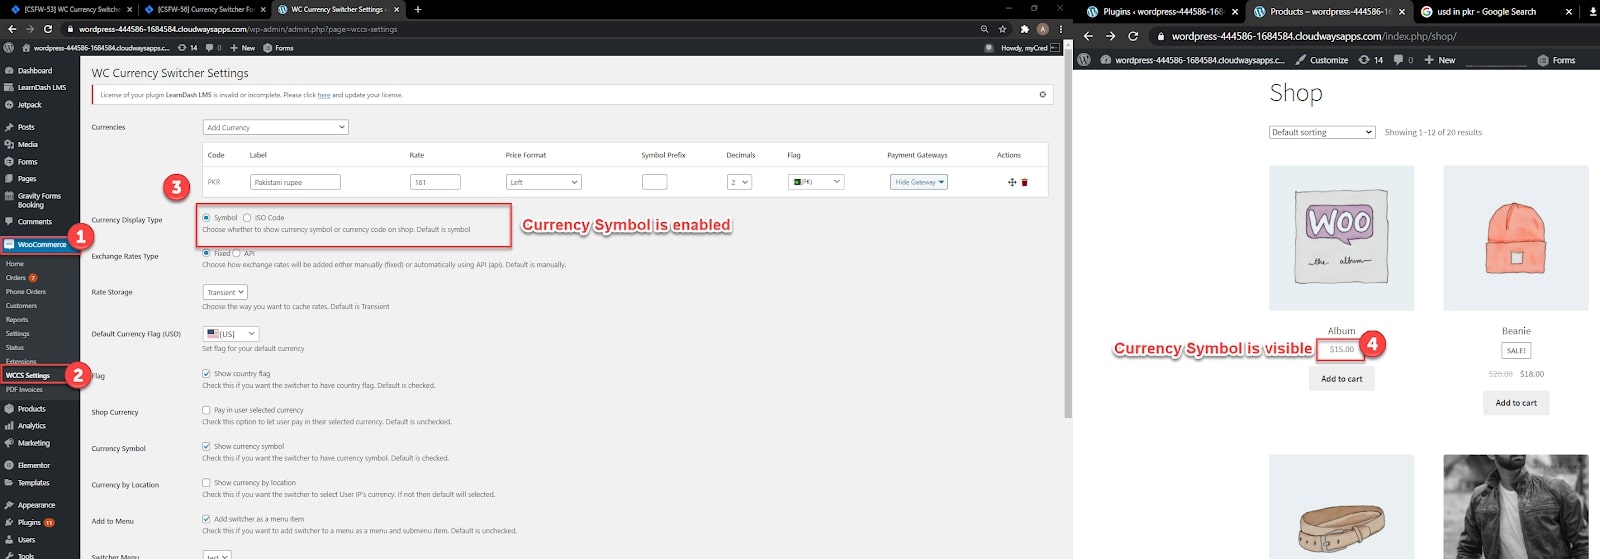
On the other hand, move over the “ISO Code” in the same section if you wish to use the Currency ISO Code:

Additionally, online retailers can also add a prefix before their Currency Symbol by following the instructions in the image below:

Select “Transient” or “Session” time for rate storage. Session time will be retrieved from your browser, whereas Transient time will be 24 hours:

Besides, in the “Default Currency Flag” drop-down box, choose the “default currency” option:
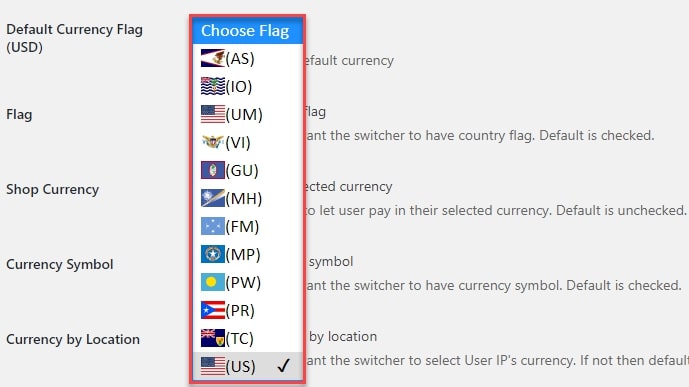
If you want to show the flag of each country next to their currency, tick on the checkbox for “Flag”:

Indicate if you wish to allow consumers to make the purchase if they’ve chosen a different currency, regardless of whether or not they’ve ticked the box:

Also, tick on this checkbox to imply if you want the currency sign to be shown on the front end:

Moreover, make sure the following checkmark is selected if you want to change the currency from your customers’ current location’s IP address. Let’s say that your current base currency is USD and they checked in from Singapore, which means the store will automatically select ‘Singaporean Dollar’ as the base currency:

Step 5: Widget settings
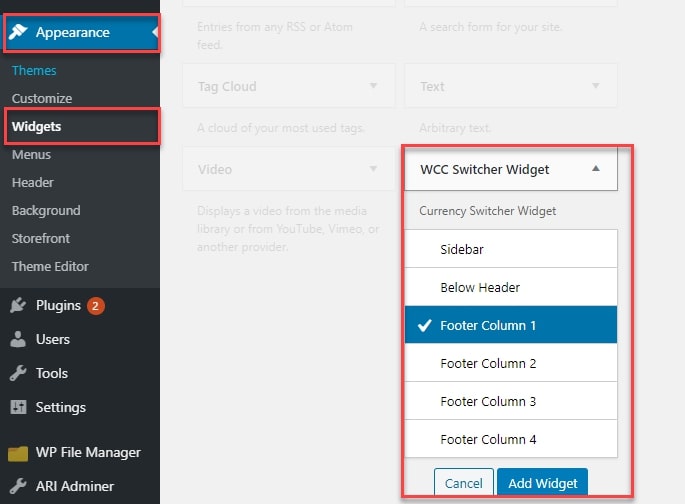
Locate the Appearance > Widgets tab and scroll down to the “WCC Switcher Widget” section. By clicking on this, you will be able to change the style for displaying your WooCommerce currency switcher on the website. Then “Add Widget” to save your changes:
Next up, we will be determining a “Title” as well as a “Style” for our widgets:
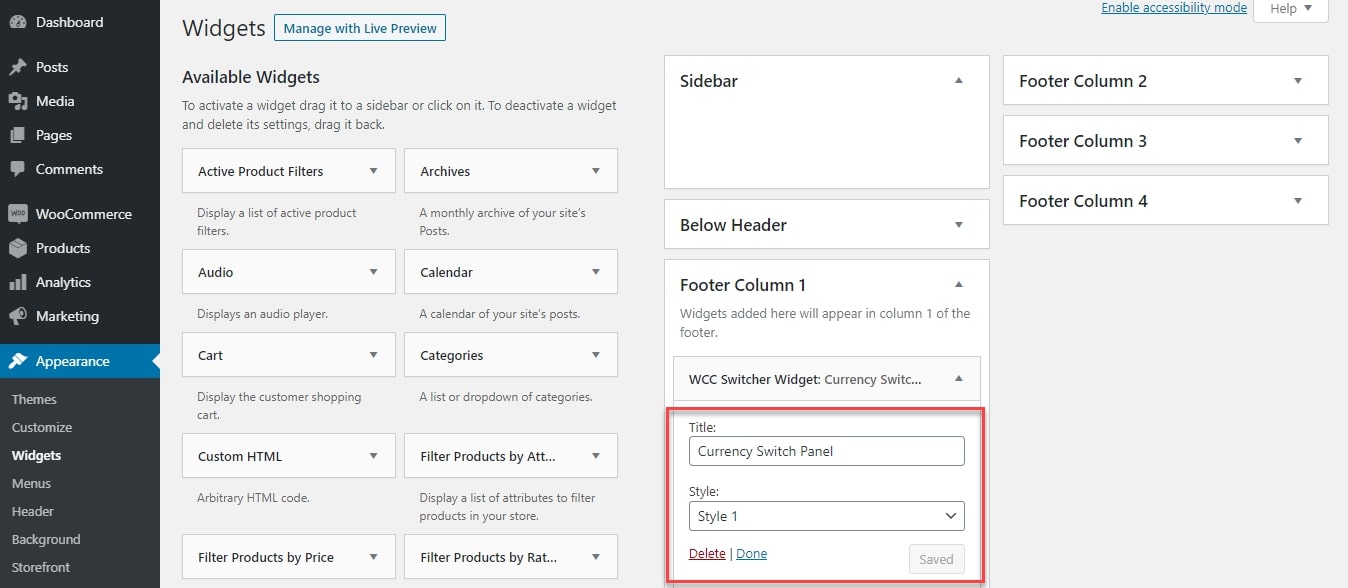
If the footer area is your choice, just like ours, here is the location of your WooCommerce currency switcher:

Best 4 plugins for setting up WooCommerce currency switcher
There are multiple extensions online merchants can use to set up their own WooCommerce currency switcher. We have picked out the top 4 best plugins according to their popularity, customer reviews and efficiency. Read the features thoroughly and choose the most suitable one for your online business:
WooCommerce Currency Switcher

WooCommerce Currency Switcher, or WOOCS, enables your customers to choose their chosen currency for their purchases. This WooCommerce currency switcher comes with both a shortcode and a widget, making it easy to include into your theme. WooCommerce GEO IP also adds the geolocation functionality, meaning that your site can automatically identify the visitor’s area and preferred currency.
It may take time to set up the WOOCS plugin, since it packs in many useful features. To access the various settings menus, go to the upper-right-hand corner of the home screen and tap “Accounts & Settings.” There, you will see several currency-specific menus where you can decide which currencies you accept, set the exchange rates, and decide which payment methods may be used for each currency. In addition, you can set GeoIP rules to control which countries use which currency. Among the particularly interesting features of this extension is the page statistics tool, which provides a bar graph demonstrating how much each currency is being utilized on your site.
WooCommerce Multi Currency
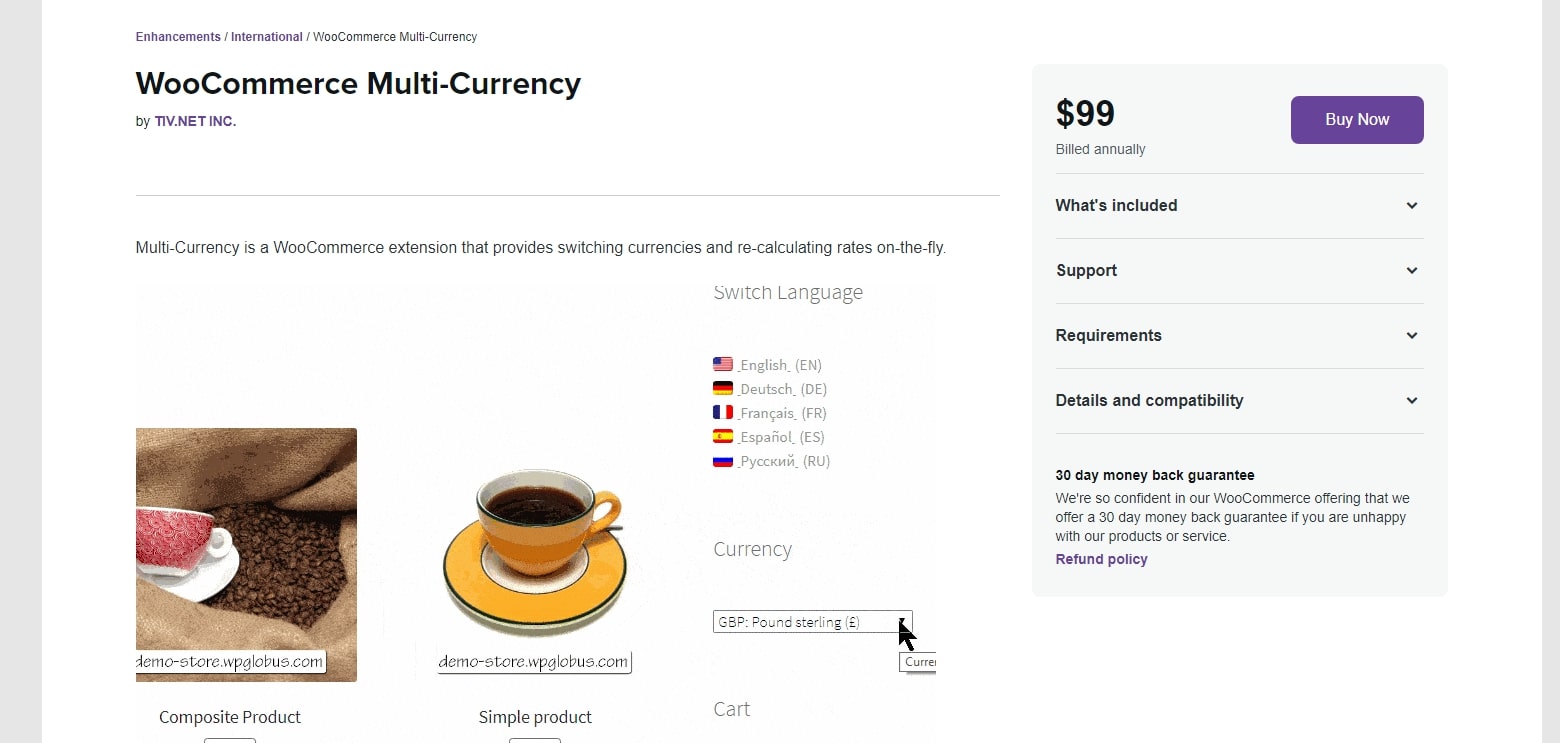
This very complete WooCommerce solution handles currencies from across the globe. WooCommerce Multi Currency comes with the essential features to serve customers from all around the world.
It can first identify the visitor’s location and automatically adjust the website using its own local currency. This has a greater impact beyond the checkout page. It affects the product price shown throughout the site as well.
The next thing this plugin can help you with is that it enables the option to select the currencies that you accept. From your exchange rate to the currency symbols to employ are completely within your control. In addition, the option to specify which payment methods are available for each currency is a very valuable tool.
Currency Converter Widget
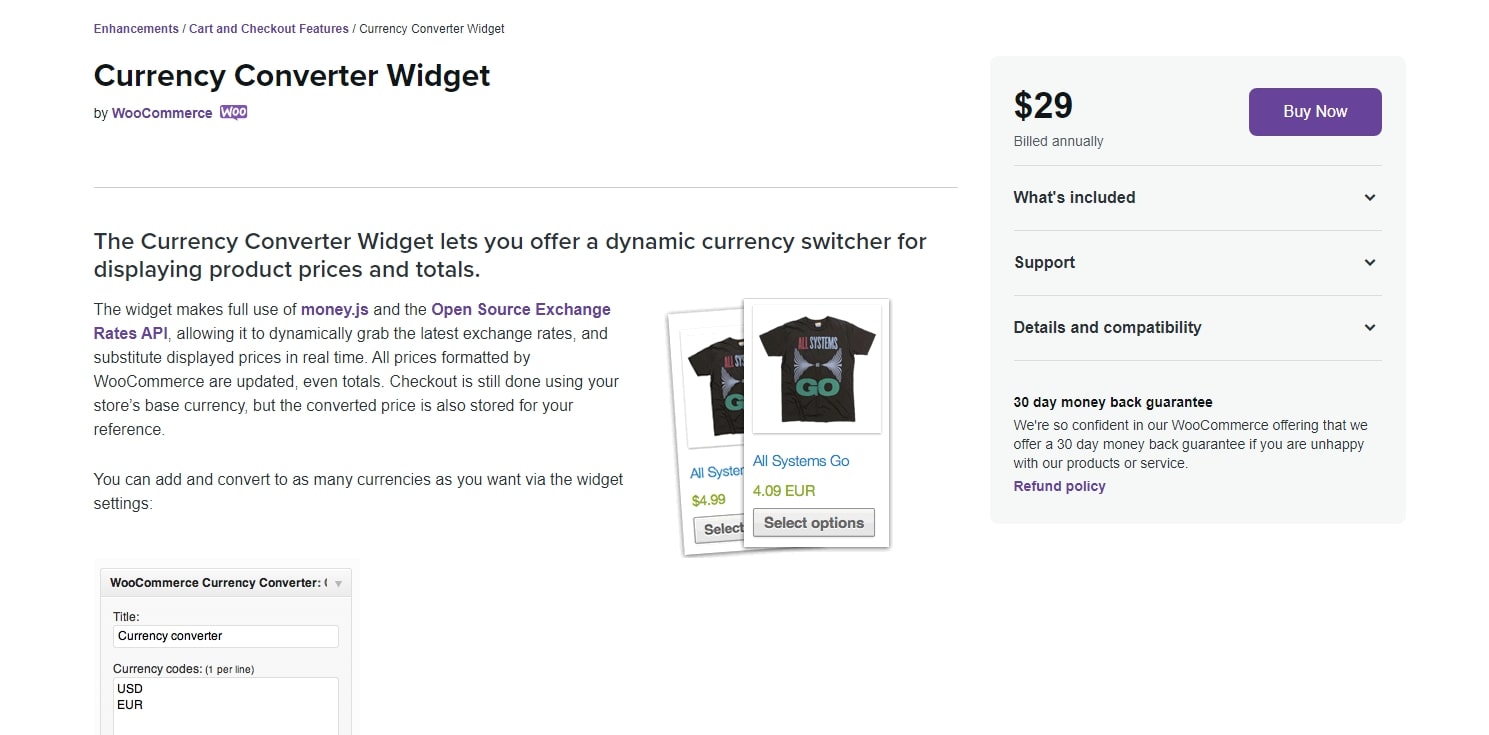
Currency Converter Widget is another option that online merchants can hardly miss out on. This is a useful gadget that gives your clients the ability to easily switch the website’s currency display. Because the plugin updates product pricing across the whole site, all payments are still processed in your store’s default currency. Alternatively, your USD pricing is shown as Euros, making it easier for guests to comprehend costs when shopping, but the payment is still done in USD. The great thing about it is that all of these awesome features only come in at a very affordable price, which suits both small and large-sized companies.
YayCurrency
At YayCurrency, you will be offered a simple interface while still offering many feature options. Advanced settings are straightforward to use with easy to set up on/off switches. Startup time is very quick.

When the exchange rates are automatically updated, you may activate the process yourself. Additionally, conversion costs are computed and applied while you’re using the app to help limit the amount of money you lose as a result of currency conversion. Also, you may drag and drop rows of currencies on the storefront backend to arrange them the way you like.
Summing up
In conclusion, if you are attempting to advertise your brand to many regions in the world, using a WooCommerce currency switcher would be extremely beneficial. We hope that our article not only provides you with How to set up a WooCommerce currency switcher but also how to maximize its functionality to gain higher benefits in the long run.


