How to Move Products from a Collection to Another
There are times when you may need to move products from a collection to another when you manage a Shopify store. The task might require your time and patience; therefore you must not ignore this writing.
We will help you figure out how to move products from a collection to another by providing a step-by-step guide to make it SUPER easy for you to follow. Let’s get straight into the details right now. Please do not go anywhere.
Related posts:
- How to Remove Products from a Manual Collection
- How to Add Products to a Manual Collection
- Add a Product to Existing Collections from Its Details Page
Using manual method
Remove products from a manual collection
To move products from one collection to another, the first thing you might need to do is to remove products from a manual collection. You can follow the simple steps below:
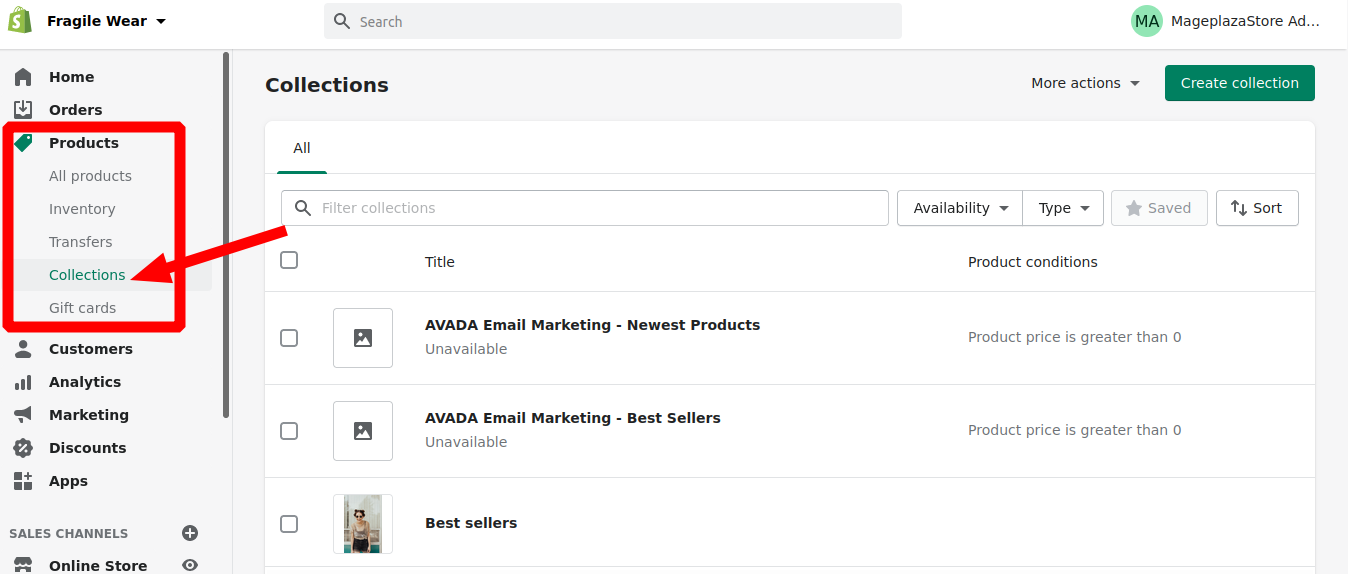
Step 1: Click Collections
In your Shopify admin, browse to the Products section, then click Collections.
Step 2: Tap on the collection’s name
Tap on the name of the collection that you intend to update.
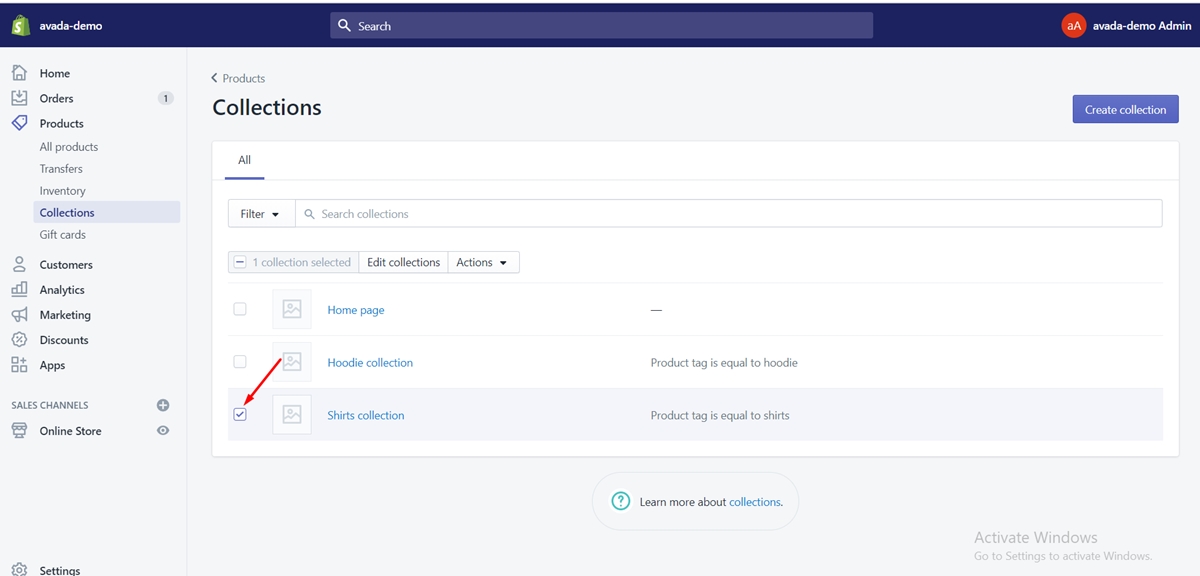
Step 3: Tap on the x button
From the Products section, you tap on the x button next to the item that you want to eliminate from your collection, which will not remove it from Shopify.
Add a product to existing collections from its details page
After removing products from a manual collection, you can add a product to one or more existing manual collections in the product’s details page. Check out the following steps to do it:
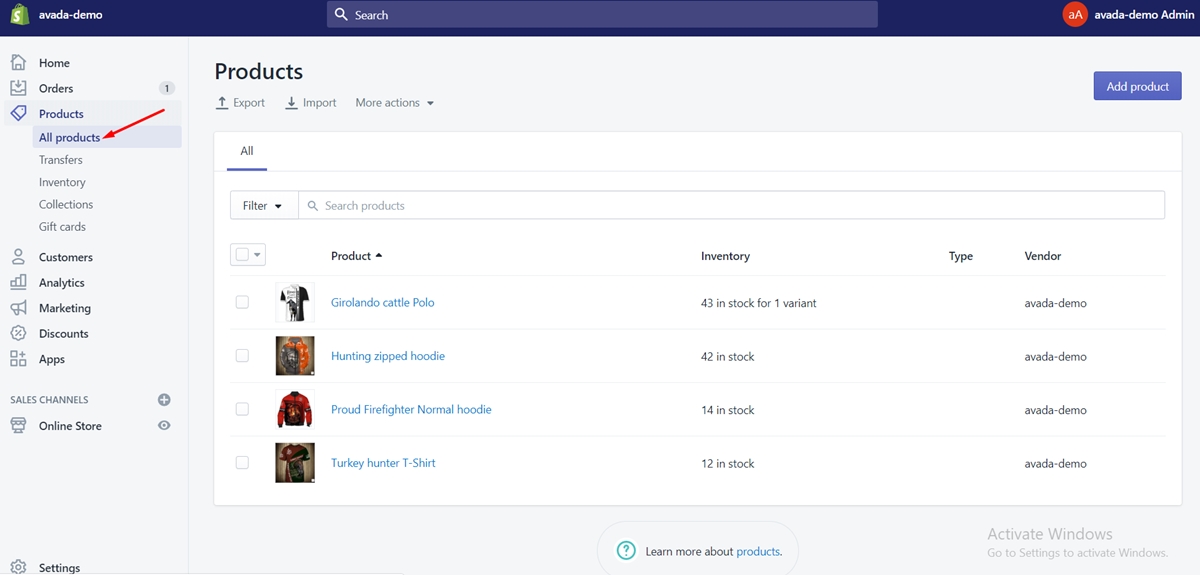
Step 1: Click All products
In your Shopify admin, head to the Products section, then click All products.
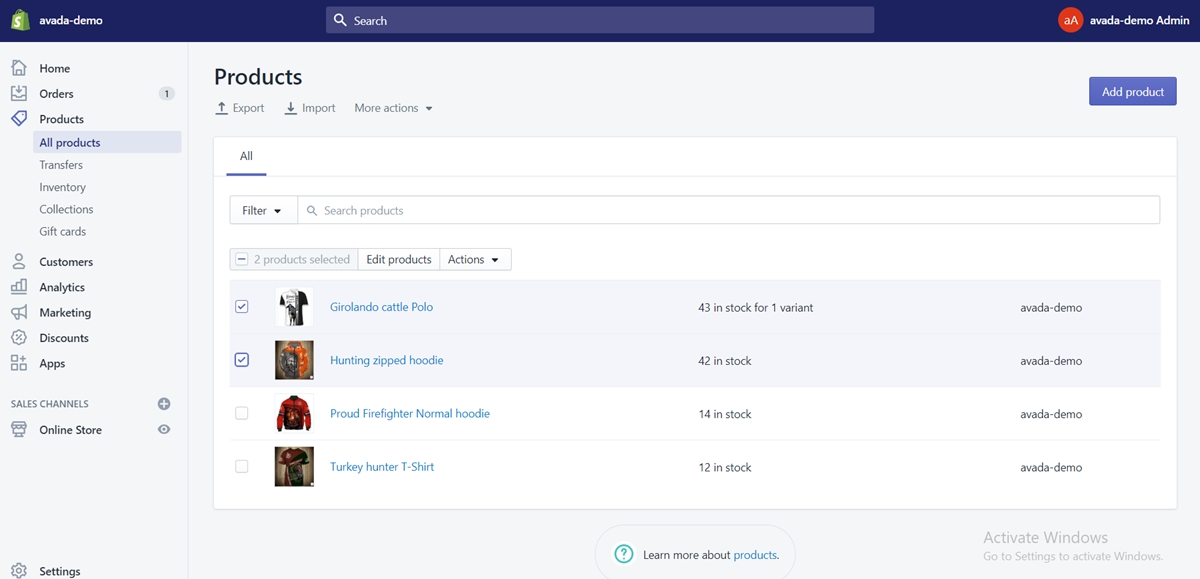
Step 2: Tap on the item that you want to add
Click the item that you intend to add to a collection.
Step 3: Pick one or more existing collections
In the Collections section, pick one or more existing collections.
Step 4: Tap on Save
Tap on Save to add the item to all the chosen collections.
Using automated method
In addition to the manual method, you can use the automated method. More specifically, you can change the contents of an automated collection by adjusting the conditions or by changing an item that does not fit.
Step 1: Click Collections
In your Shopify admin, head to the Products section, then click Collections.
!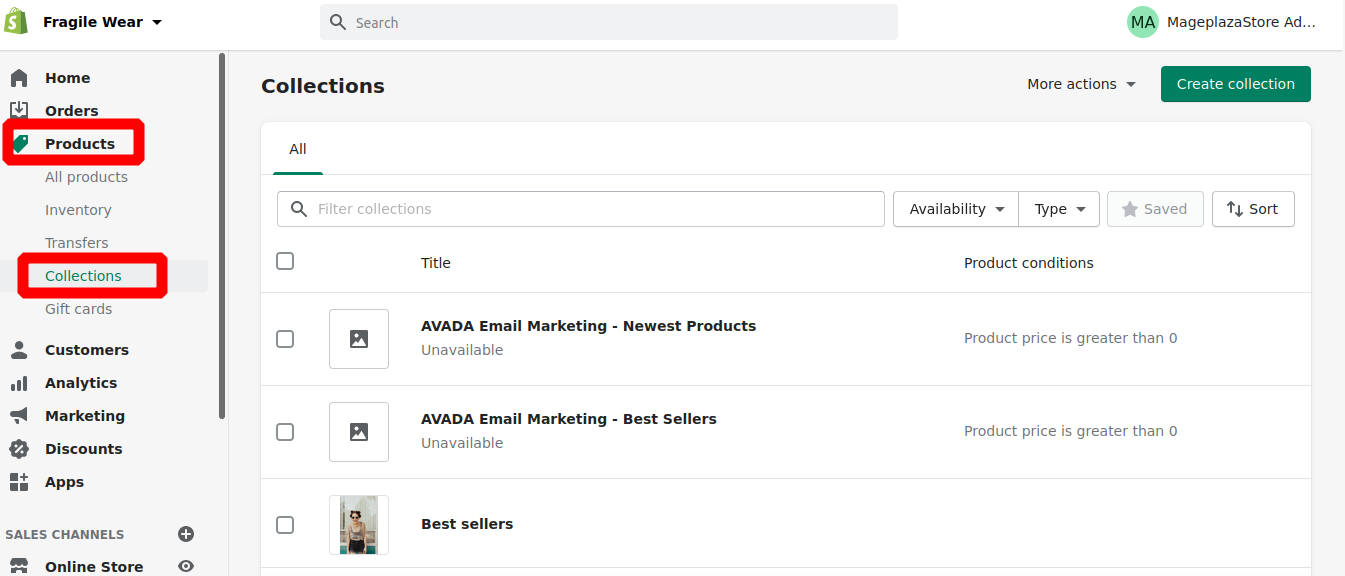
Step 2: Tap on the collection’s name
Tap on the name of the collection that you want to edit.
Step 3: Edit the conditions
From the Conditions section, modify the conditions.
Step 4: Tap on Save
Tap on Save to add relevant items and remove the items that are not suitable.
Using Excelify app
If you are ready to experience an app, then you can try using Excelify to move your products between collections.
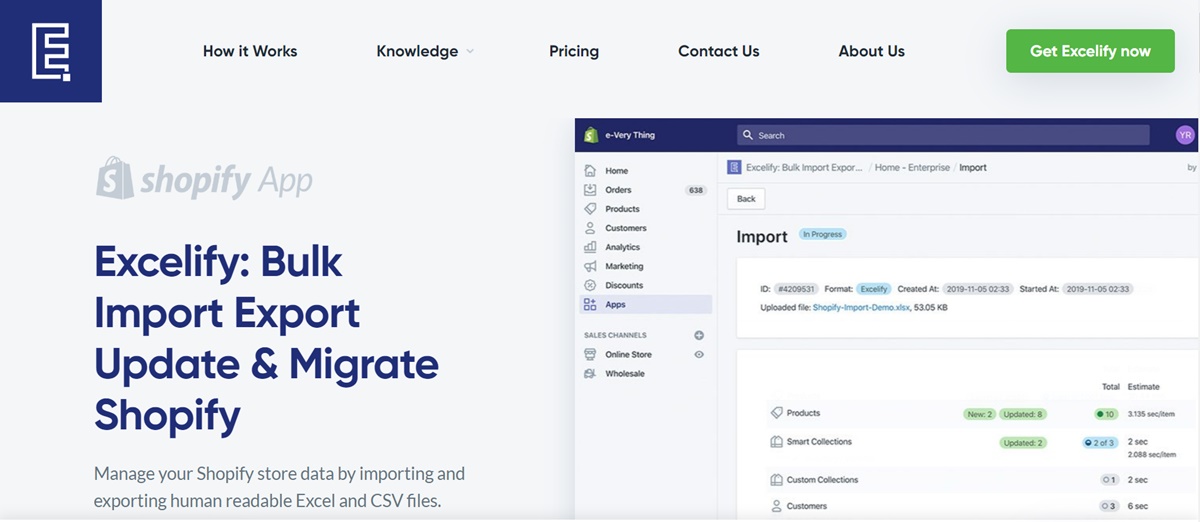
With the app, you can export all your Automatic Collections and change the Rules in the exported Excel file and import those collections back. The Excelify app will update those collection rules and Shopify will automagically move your items according to new Rules.
Or, you can export all your Products to Excel and modify product data to make them fit the rules conforming to your automatic collections. When you import back the updated products, Shopify will automatically move them to their collections following the automatic collection rules.
Note that you can utilize both methods to swap your items among automatic collections. More importantly, with those imports, it is unnecessary to execute the task of substituting existing products. Your single job is only updating necessary columns for them and importing only the columns that you intend to modify.
Conclusion
In conclusion, moving products from one collection to another will not be a daunting task now. We hope that you can do it smoothly and manage your store on the Shopify platform effectively and efficiently.
In case you need anything, you can contact us for more information. If you find our post useful, we will appreciate it when you share the post on your social network.


