How to Integrate WooCommerce with Zapier
Managing an online business might cost you a large amount of time and money, from sending emails, processing orders, and packaging. This requires most e-tailers to hire many people to do everything manually. If you are a small-scale business, then it will not work for long. Fortunately, we have just the right answer to your problem!
In today’s article, we will be introducing you to Zapier, everything about this outstanding application and How to set up WooCommerce Zapier integration for your website. Keep reading because it is worth it!
Why should you use WooCommerce Zapier integration?

Zapier is an internet tool that connects different applications and services to help you automate processes. You don’t have to create this integration manually since it automates processes. Up to the present, Zapier has attracted up to 1,300 clients thanks to its flexibility, user-friendly interface and especially the efficiency. Here are how WooCommerce Zapier is going to help you and your business:
- Time-saving: Help you connect, transmit data automatically, and eliminate human mistakes as well.
- Business scaling: Even if team members are spending more time on administrative duties than on the tasks you’d prefer they’re working on, growing a company may be difficult.
- More testimonials: The valuable contribution of customer testimonials is crucial in obtaining new customers and consumers.
- Automated processes: Help reduce chores that can be automated and save time.
- No more manual administration: Help online retailers to track their administrative chores.
How to integrate WooCommerce with Zapier?
Now you have had a grasp of how WooCommerce Zapier can benefit your online business, it’s time to figure out how to integrate the two apps and make full use of it. Following are some quick steps for the installation of the integration:
Step 1: Fulfill the requirements
Before getting to the point, there are several things you need to be aware of. It is required that WooCommerce store owners need to make sure that they are using these versions for their applications:
| ITEM | REQUIREMENT |
|---|---|
| PHP | Version 7.0 or higher (We recommend using PHP 7.4 or greater ) |
| WordPress | Version 4.9 or higher (We recommend using WordPress 5.6 or later ) |
| WooCommerce | Version 3.7 or higher |
| WooCommerce/WordPress Account | Account needs to be an administrator role |
| WordPress Permalinks | Pretty permalinks enabled |
| HTTPS | Site needs to be accessible via https:// |
| WooCommerce REST API | Running and operational |
| WordPress cron | Running and operational |
| Zapier Account | Free or paid plans |
Step 2: Download the plugin
The process for downloading the plugin is super simple. From your WooCommerce Dashboard, navigate to the WooCommerce > Extensions > WooCommerce.com Subscriptions:
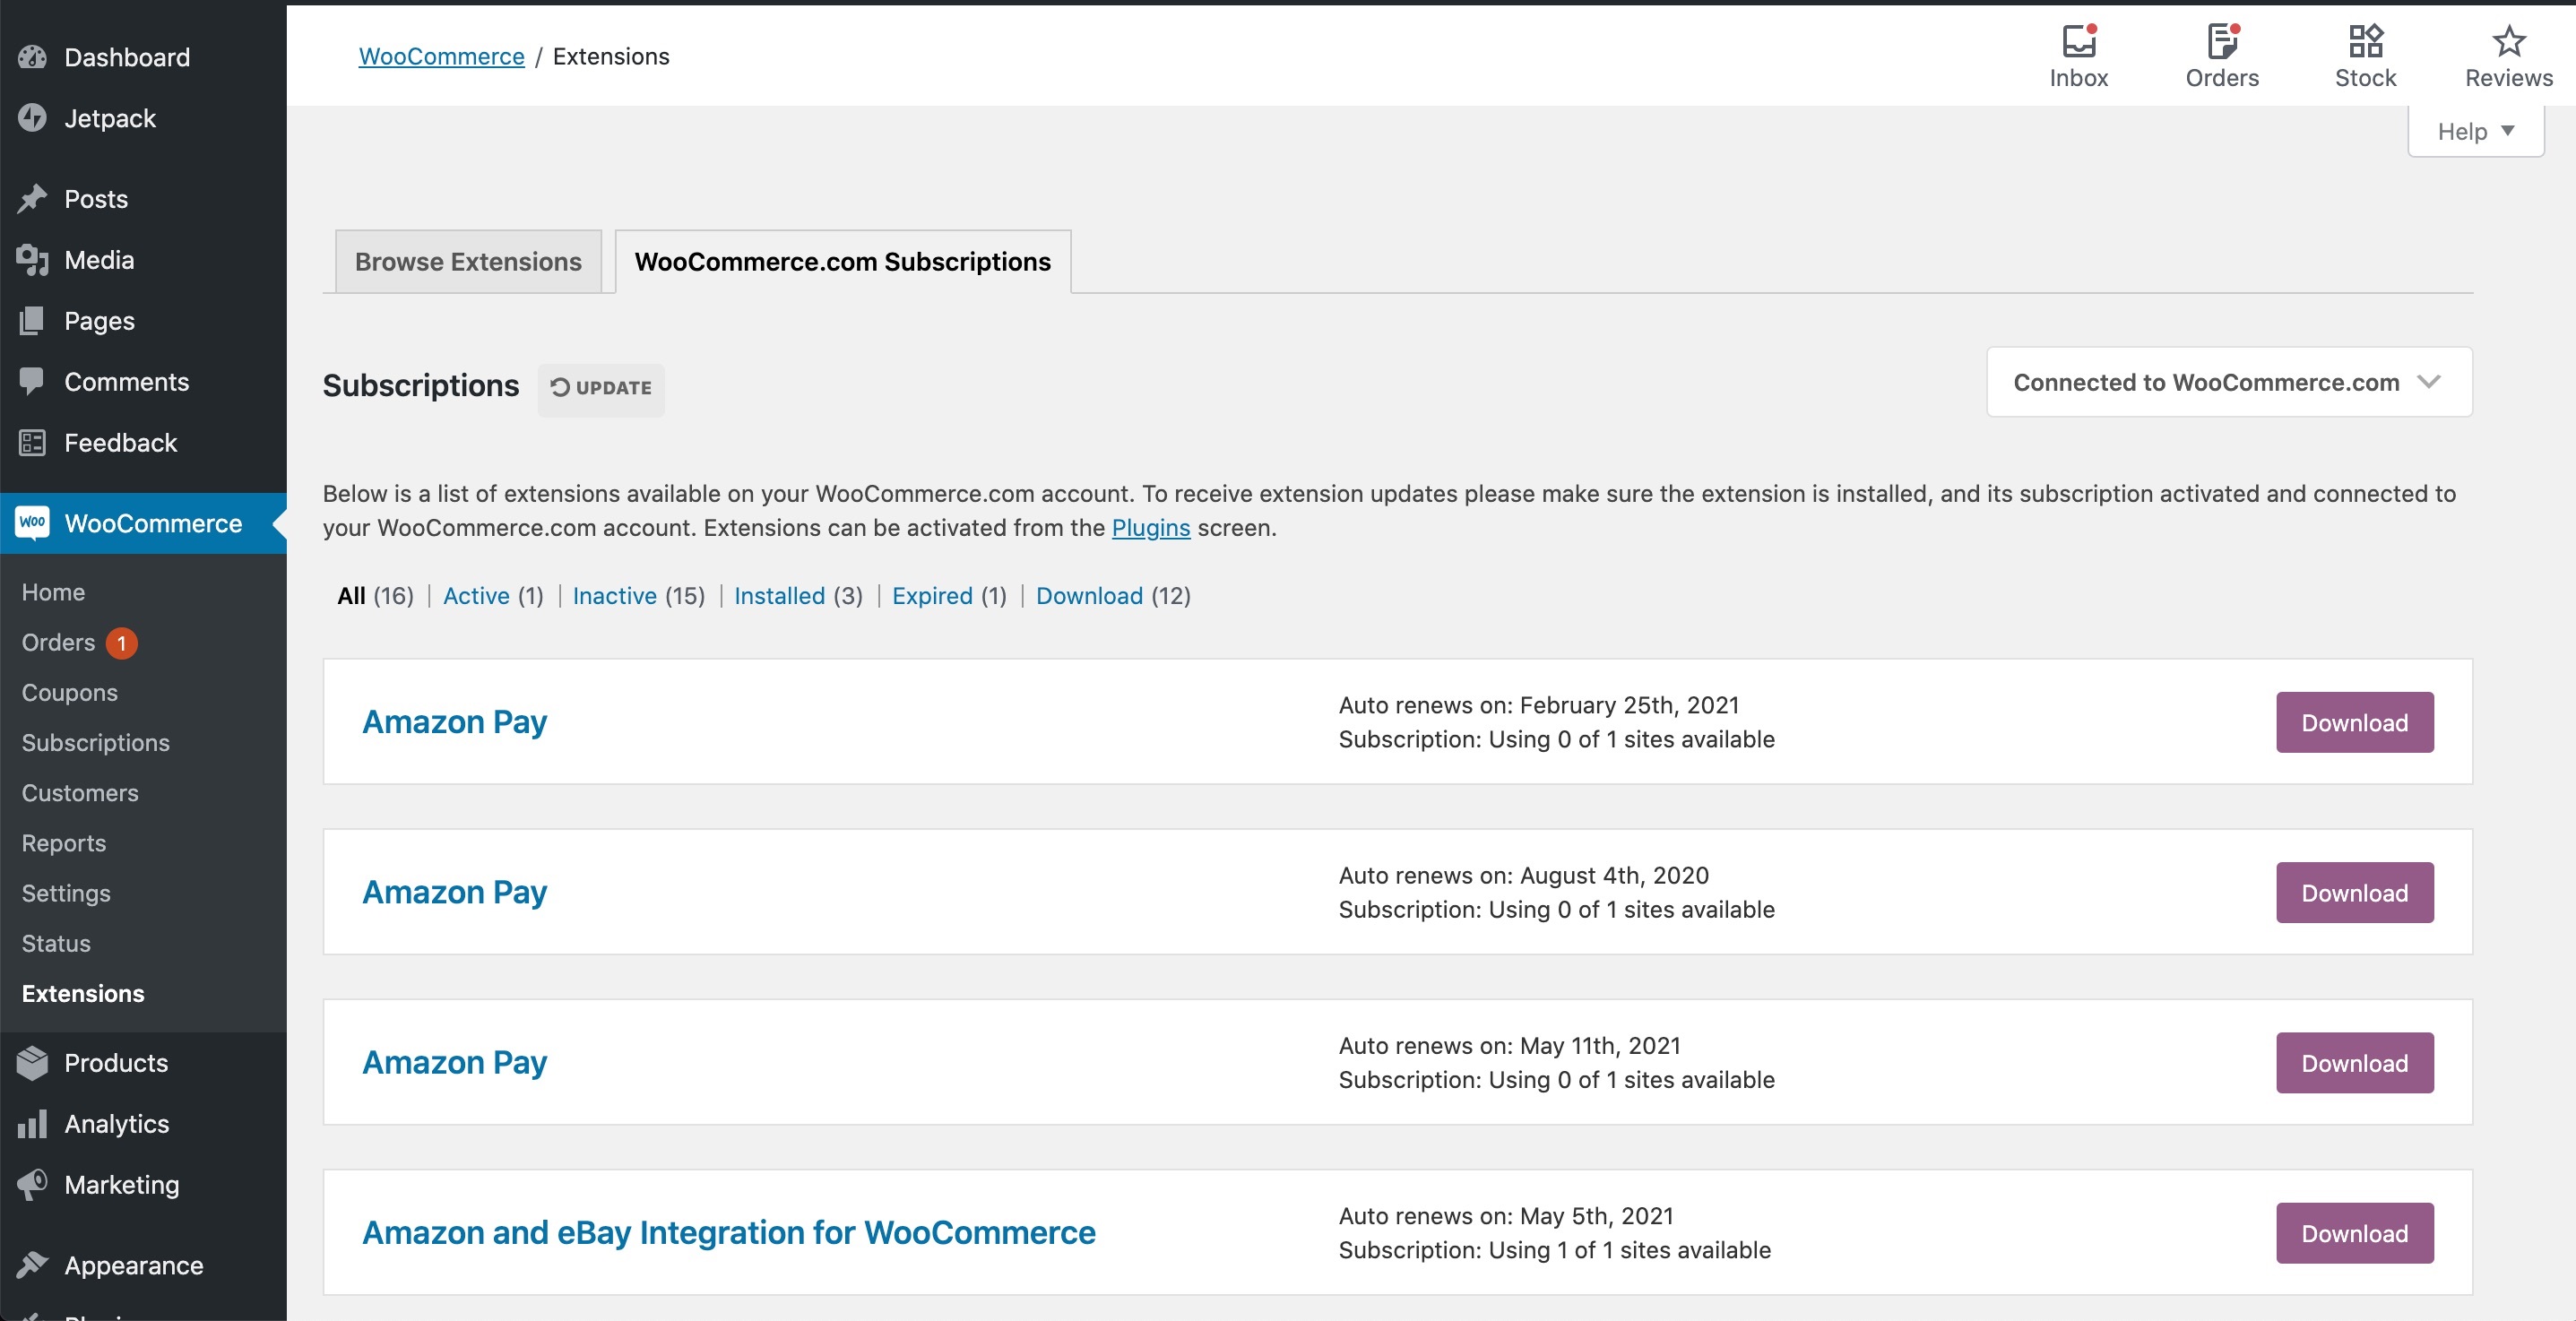
Search for the WooCommerce Zapier plugin and click on the “Download” button next to its icon. In this way, the .zip file will be downloaded into your device. If it is finished, move on to the next step!
Step 3: Upload the .zip file
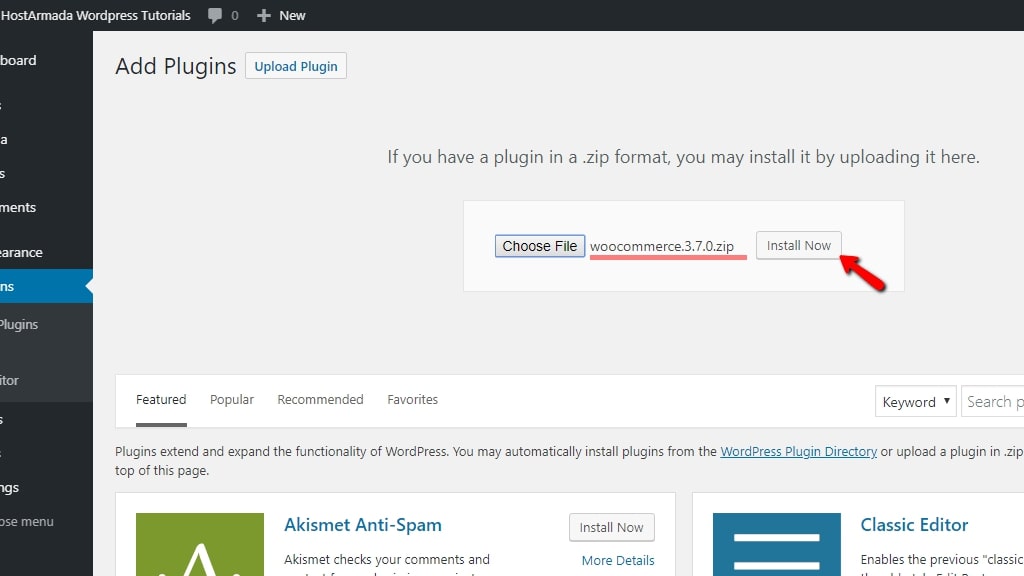
Within your file, go to Plugins > Add New and select the “Upload Plugin” button and drag in the file that we have just downloaded previously. After that, “Install Now” and “Activate” to start using the extension:
Step 4: Check out the result
In order to ensure that you have successfully installed the WooCommerce Zapier integration plugin, just go to WooCommerce > Status then check for your current Active Plugins section.
How to configure your WooCommerce Zapier integration?
If you have done setting up the integration for your WooCommerce account, we will guide you through the detailed settings for your account. This might take some time, so please take a careful look at the steps or you may have to start over:
Step 1: Create a Zap
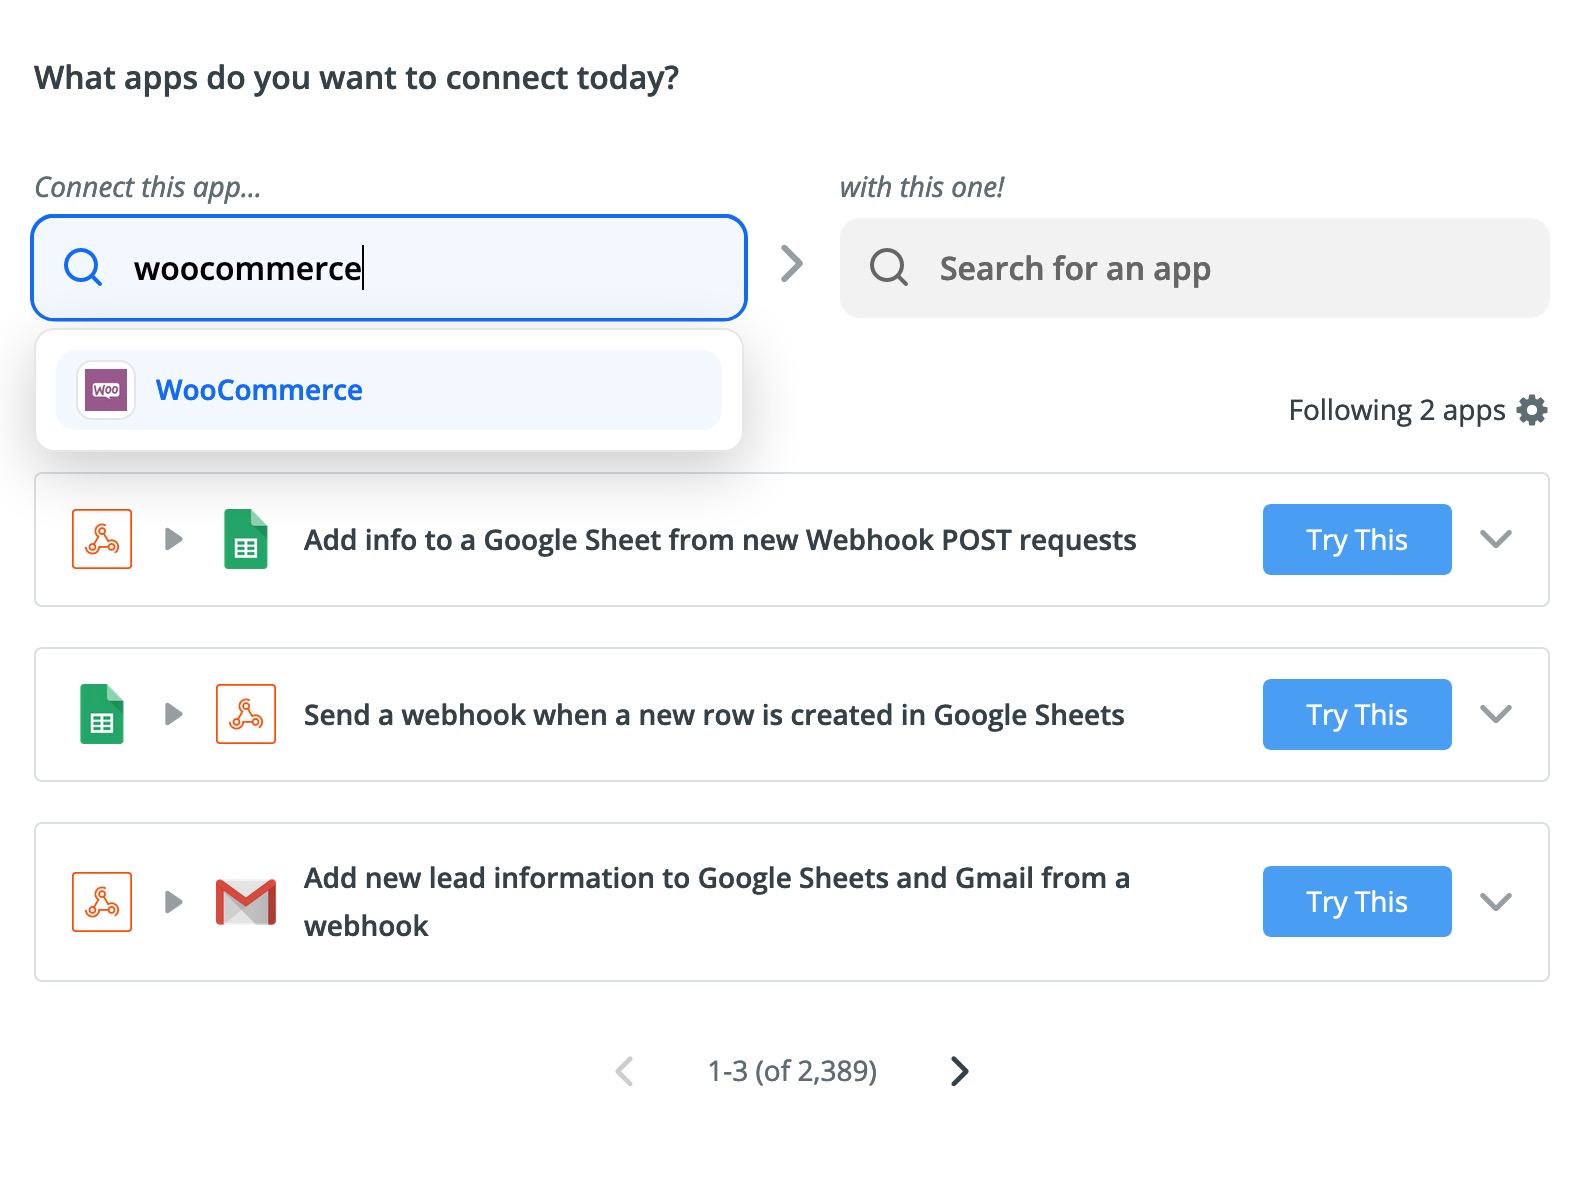
The first thing you need to do is enter your Zapier Dashboard and locate the “Make Zap” button on the left-hand-side of the screen. Following that, type “WooCommerce” into the search bar and transfer to step number 2:
Step 2: Confirm the connection
After creating the Zap, WooCommerce Zapier will require the user to authenticate their identity. In another way of putting this, you may have to fill in the form like in the image below:
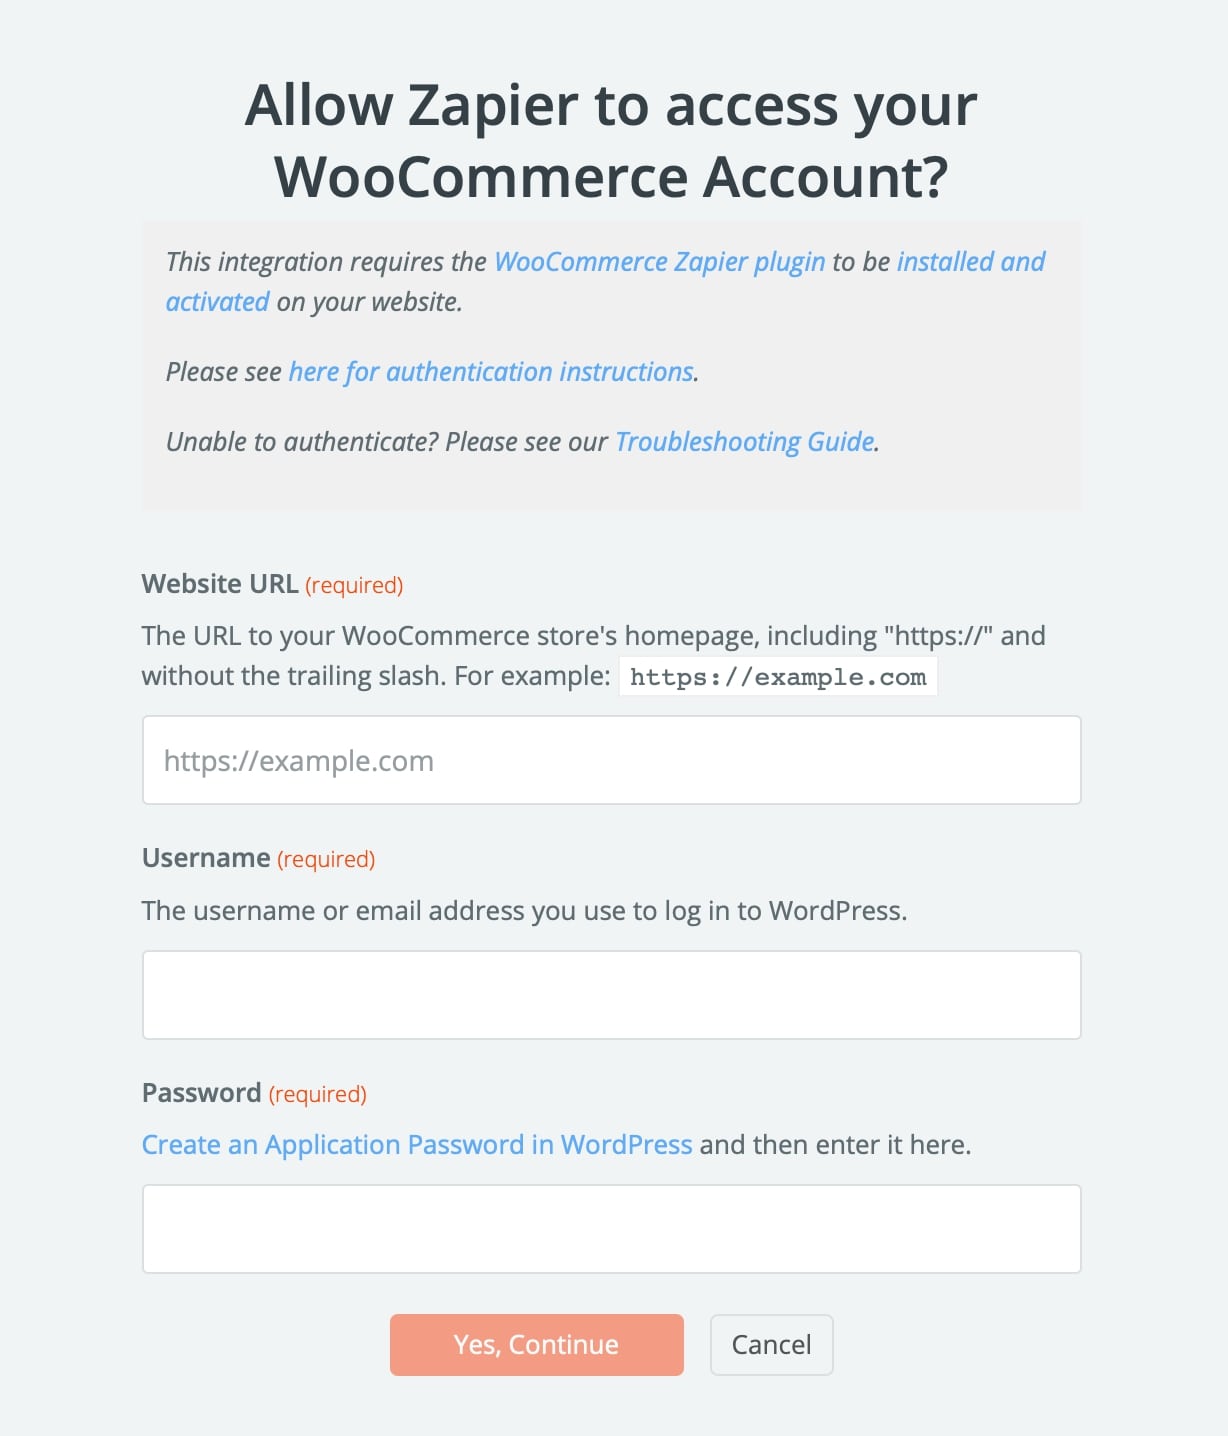
“Yes, Continue” to save your information and you are good to go!
Step 3: Send data from WooCommerce (using Trigger)
This feature gives you the opportunity to transmit your WooCommerce data to a Zapier Zap using Trigger.
You will be taken to the “Choose App & Event” step, where you will seek for the application of WooCommerce and click on it. If you want to transmit WooCommerce orders to Zapier, you need to choose a Resource in the Choose Trigger Event menu.
To verify your Zapier account with your WooCommerce shop, click on the Sign in to WooCommerce button. If you are already authenticated, you may utilize the WooCommerce account dropdown option to choose the already used login.
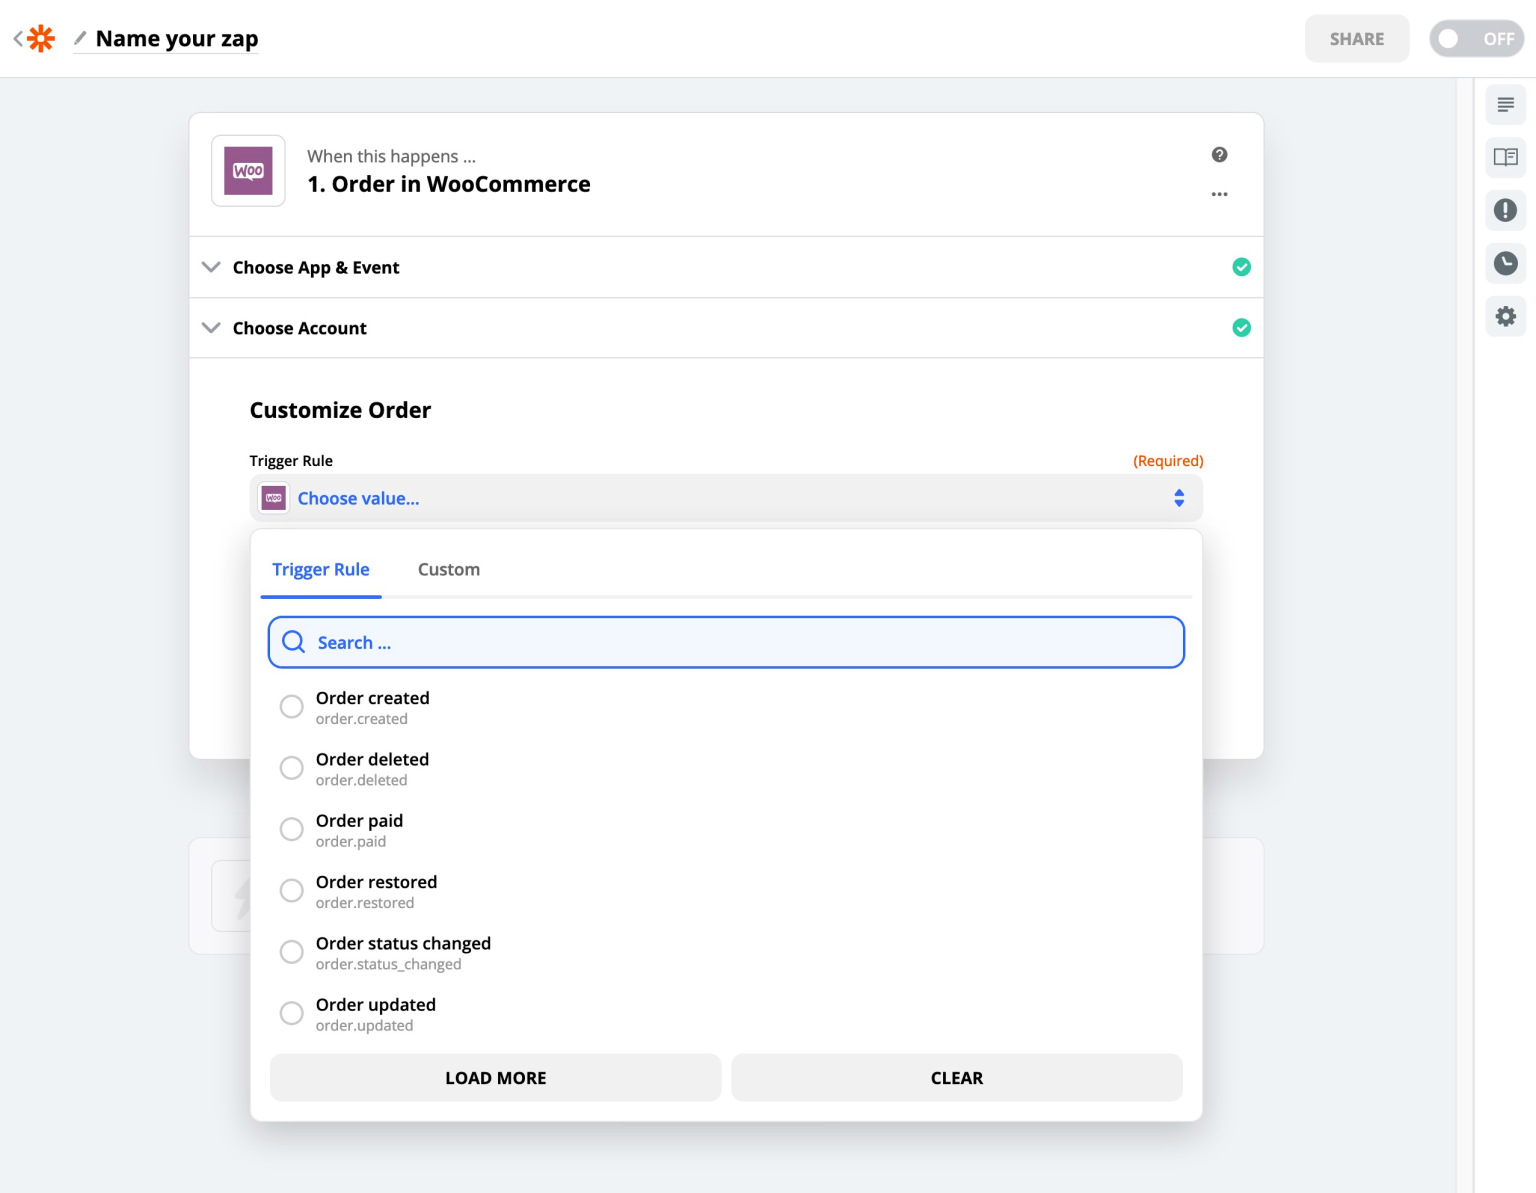
Pick out a Trigger rule here and click the “Test & Continue” button in the “Find Data” step. At this point, feel free to customize, label and turn on your Zap based on your preferences.
Step 4: Update new data from Zapier Zap (using Action)
A slight difference in this step is that online merchants are going to use Actions to directly create new or update the WooCommerce data on their Zapier Zap, instead of transferring them like step 3.
Also at your “Choose App & Event” section, find the WooCommerce app and pick out an appropriate Action from the “Choose Action Event” dropdown.
With the “Choose Account” steps, do the exact same thing like what we did for the Triggers. Next, it is highly recommended that you complete all of the WooCommerce input forms that you wish to send data to. You may enter hard-coded values, or you can select data fields from the Trigger section of your Zap. Finally, “Test & Continue” to turn the Action into reality.
Common issues when integrating WooCommerce with Zapier
We have covered everything you need to know about setting up WooCommerce Zapier integration. However, as a beginner, it is inevitable that you might run into several problems during the process. Don’t worry because we are here to help:
Installing problems
This might be caused by forgetting to update your WooCommerce Zapier plugin to the newest version. Therefore, you can try out one of these tips to avoid such issues:
-
Verifying your connection and WooCommerce Zapier license by going to WooCommerce > Extensions > WooCommerce.com Subscriptions
-
Double-check your version of the plugin in the Updates > Check Again. If you have not updated it yet, doing this will automatically solve the problem. If you want to update your WooCommerce Zapier integration manually, just enter the “Update” section from the WooCommerce.com Subscriptions page.
-
If these are not the correct answer, then you may have to disconnect the two applications by clicking on the “Disconnect” button while going through the WooCommerce > Extensions > WooCommerce.com Subscriptions. Wait for a few hours and then select “Connect” in the same page again.
-
The worst scenario could happen here is that none of the steps above could help you, then send a Help ticket to WooCommerce here and choose the “Help with my account” option.
Authentication
As you still remembered, new users have to fill out a form of Authentication to officially create a Zap on their Zapier account. Due to some stumbling blocks that your authenticate process might be unsuccessful, here are messages you may get and how to deal with them:
-
The username and/or password you supplied is incorrect: It’s very important that you use the proper username and password when you’re logging in. We suggest using a WordPress Application Password or the password for your WooCommerce Dashboard.
-
This user does not have the correct permissions: There might be two reasons leading to the appearance of this problem. It is either because of your limited permissions to WooCommerce webhooks or a security firewall has been installed which prevents your authentication attempts. Checkout WooCommerce’s documentation about Roles and Capabilities and you may find the explanation that you have been looking for.
-
Sorry, you cannot list resources: This is largely caused by your WooCommerce REST API. Scroll down to our last section about related issues.
-
The WooCommerce Zapier plugin is missing or WordPress pretty permalinks may not be configured correctly. 404 File Not Found: Please double-check the authentication dialogue window before submitting your form and ensure the WooCommerce Zapier plugin has been installed in the newest version. Other than the default, you need to make sure you have your WordPress permalink settings. Head to the Settings > Permalinks screen and “Save to flush your permalinks” at your WordPress Dashboard.
REST API issues
The Zapier REST API serves as the bridge that connects your WooCommerce shop to the Internet and ensures that your WooCommerce store’s REST API is functioning. The problems with REST API might be attributable to:
-
Maintenance mode: The most frequent reason is a simple one: you have a “Coming Soon” or “Maintenance Mode” plugin enabled on your WooCommerce shop, making it inaccessible to the public. Please give it a go and see whether it works before reactivating it, and make sure everyone can access your website without having to register into WordPress.
-
Invalid SSL certificate: it is a must for WooCommerce Zapier plugin users to get a trustworthy SSL certificate. If your screen appears the “Certificate verify failed” message, there is a higher chance that you are using an SSL certificate that was issued from a Certificate Authority that Zapier doesn’t trust. Take a look at the Zapier guide for more detailed information!
-
Failed to check SSL: If “Sorry, SSL is not configured correctly” or “Sorry, you cannot list resources” is what you get, then quickly consult the WooCommerce Zapier logs of your online store and get in touch with your web host for further assistance.
-
Debug output: When WP DEBUG DISPLAY is false, debug information in your WordPress configuration may invalidate REST API replies, therefore make sure the WP DEBUG DISPLAY constant is not set in your wp-config.php file:
define( 'WP_DEBUG_DISPLAY', false );
Final thoughts
To sum up, we hope that our article today will help you with How to set up WooCommerce Zapier integration for online business and make good use of automatic features to improve your store’s performance in the long run.


