How to Install WooCommerce Extensions
Due to its free cost, extensive feature set, and extensive extensibility, WooCommerce is the largest and most popular eCommerce platform on WordPress. WooCommerce is likely to be the first plugin you download if you plan to create an online store.
It already includes a number of features at no cost to you, not even a percentage of your sales. However, the elements it contains are general and can be used on a wide range of websites. WooCommerce extensions are required if you want to create a specialized store with unique features. Extensions allow you to customize the platform to your specific needs, and there are dozens of them available, adding almost any function you can imagine.
In this article, I will show you How to install WooCommerce extensions to upgrade your online store ultimately!
What are WooCommerce Extensions?
WooCommerce extensions, which you can buy through WooCommerce.com, are simply little plugins that increase WooCommerce’s capabilities. While you can install them via the WordPress plugin installation, WooCommerce -> Extensions is where you should manage them.
They are also now subscription-based, which means you’ll have to pay an annual fee to receive support and the most recent updates. You can still use the plugin if your subscription expires, but you will no longer receive updates. Despite the cost, we frequently recommend WooCommerce extensions above other plugins with equal capabilities.
How to install WooCommerce extensions
Step 1: Set up the WooCommerce plugin
The first step is to download and install the plugin. Navigate to Plugins in your Dashboard and select Add New. Now, in the search bar, type WooCommerce. Click Install Now once you’ve found the plugin. After the installation procedure is completed, activate the plugin.
Step 2: Basic Information
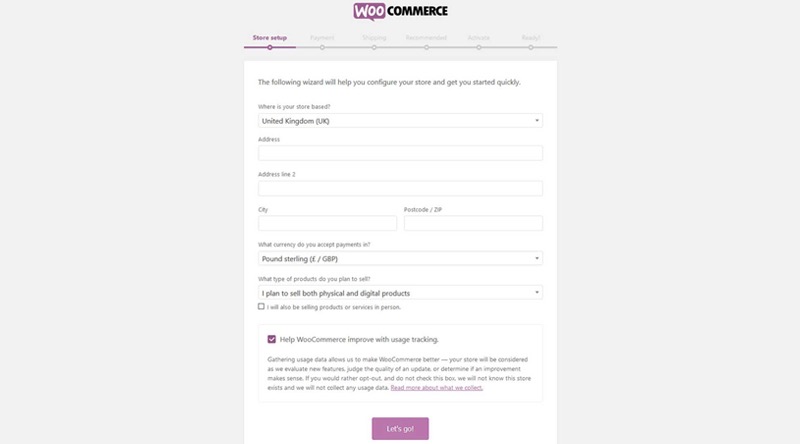
You must configure the plugin after it has been installed and enabled. You will be directly routed to the plugin’s setup wizard, which is simple and easy to use. You will be required to provide some basic information., such as the store’s location, address, currency, and the types of products you plan to offer, among other things.
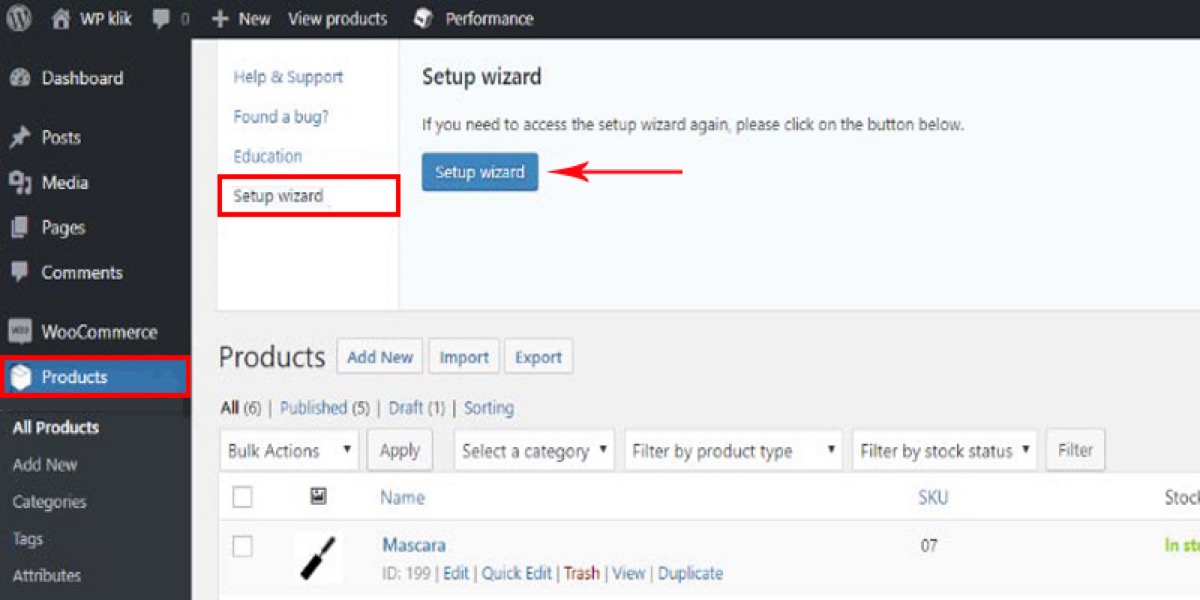
The process will not begin automatically if you have previously used WooCommerce and have uninstalled it for whatever reason. You’ll have to manually start it by going to Products > Help > Setup wizard and clicking on Setup wizard.
Step 3: Payment Options
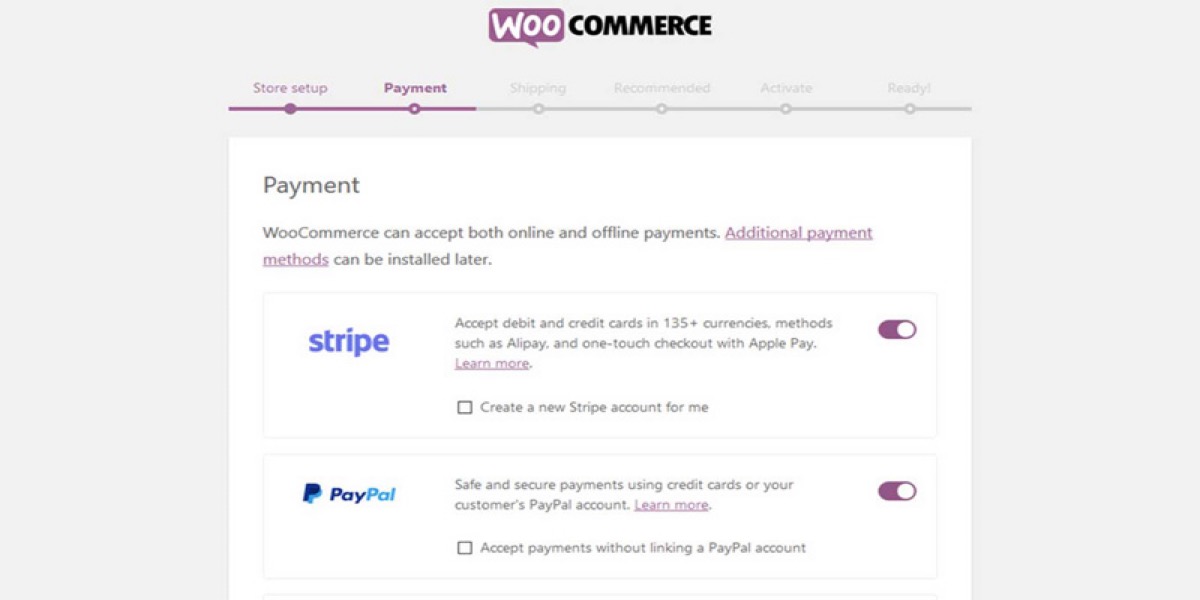
The next step is to set up your preferred payment methods. Remember that you can constantly adjust things later if necessary. Choose the payment gateways you would like to utilize, such as Stripe or PayPal. These payment plugins will be downloaded and installed by the WooCommerce plugin. After you’ve completed these steps, click Continue.
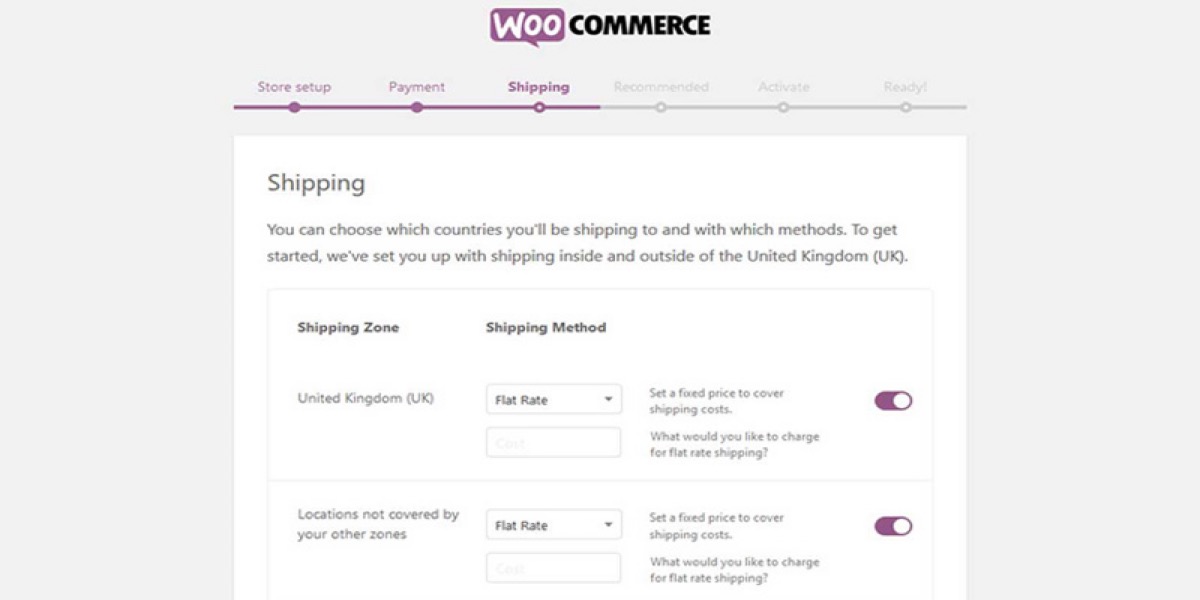
Step 4: Shipping Options
You will now have to set everything up for your selected shipping methods. Choose your shipping zone and method, as well as the countries you want to send to.
If you choose the Flat Rate option, you must specify a fixed price to cover your shipping costs, both for your shipping zone and for other zones. For example, if your location is in the United Kingdom, it will be your shipping zone, and one charge will apply, but shipments to other zones, such as the United States or Greece, will have a different rate.
You should also choose your desired units for weight and measurements (kg, cm/pound, inch, etc.).
Step 5: Recommended Plugins
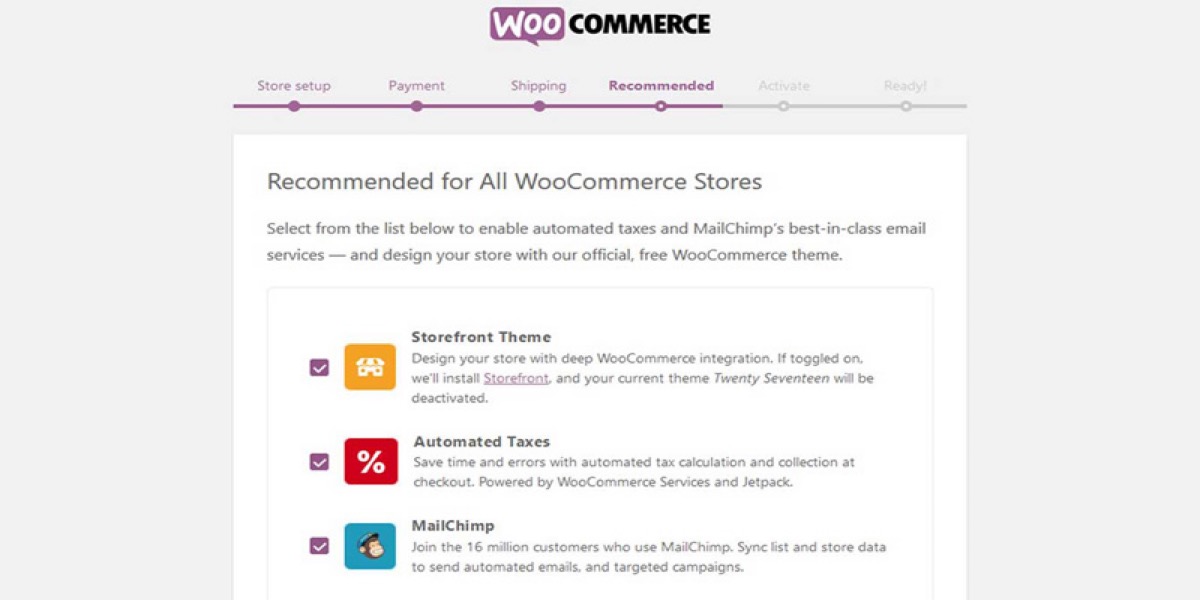
The WooCommerce installation wizard’s following step will suggest some recommended plugins that you can use but aren’t required to utilize. Select the ones you require and press the Continue button.
Step 6: Connect with Jetpack
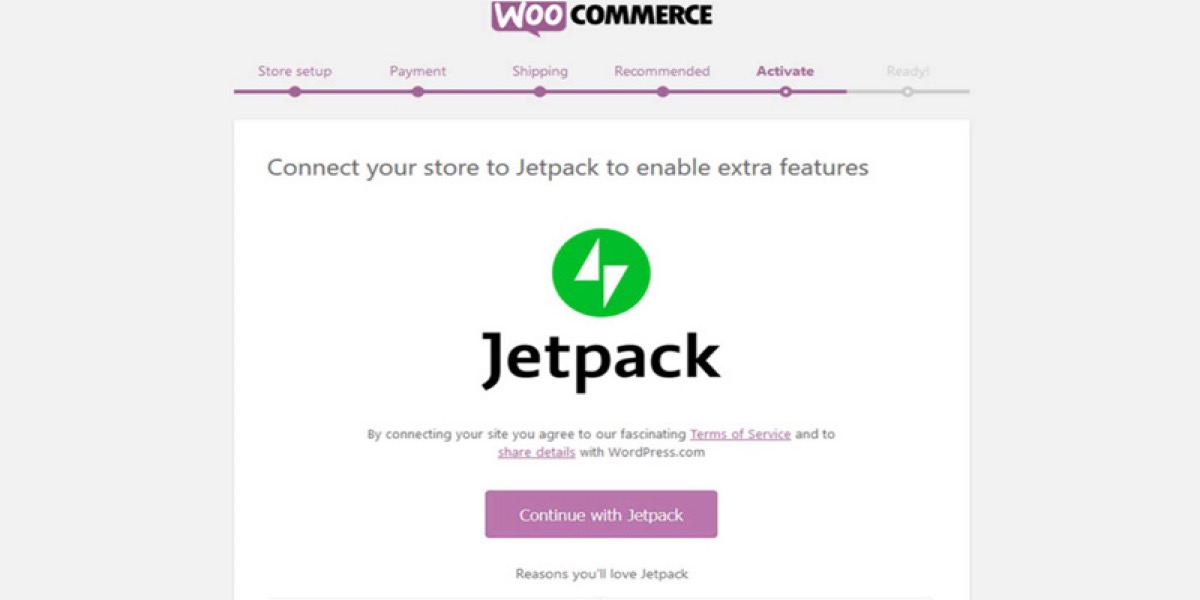
The plugin will ask you if you wish to link your store to Jetpack at this point. You can either click Continue with Jetpack or Skip this step, depending on whether you require this plugin or not.
Step 7: Complete the setting procedure
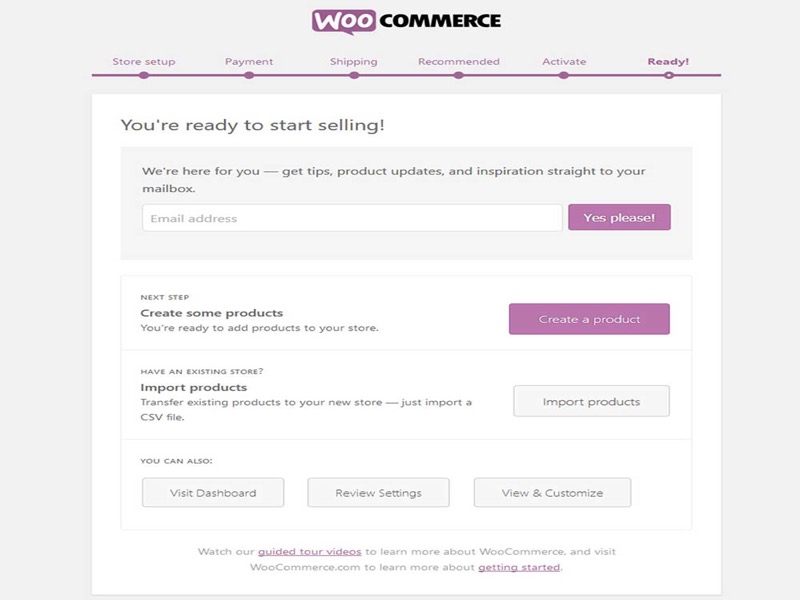
The final step in the WooCommerce plugin installation and setup procedure is to submit your email address so that WooCommerce can keep you up to date on all the latest news and changes. You’ll also have to choose whether or not you wish to add products right away. However, we recommend returning to your Dashboard by selecting Visit Dashboard or, better yet, Review Settings from the drop-down menu.
WooCommerce extensions installation issues
If you have a WooCommerce site with a lot of plugins, you can have some troubles. Because of the quantity of changes involved and/or running, there may be a delay. Furthermore, if not fixed, WooCommerce sites with outdated plugins or themes are more vulnerable to security breaches. When using an e-commerce platform like WooCommerce for sales, customers expect websites to protect their data. These problems can be avoided by first testing your plugin and theme changes on a staging site, then updating your live site with the confidence that everything will work as expected.
Select a low-traffic volume time window for updating the live site once You have tested the WooCommerce plugin and other associated plugin upgrades on the staging site and everything is operating properly. After you have updated the staging site, go through the same regions you went over before. Check your WooCommerce dashboard’s order list page to see if you can still see new orders being placed successfully, with the payment gateway information saved in the order notes.
Conclusion
The WooCommerce plugin is used by 28% of all active online retailers. This makes it the most widely used e-commerce platform on the planet. Not only that, but this fantastic plugin is just growing better. Installing a plugin on your WooCommerce site is straightforward and may be done in a variety of ways. WooCommerce.com extensions are installed and maintained differently than WooCommerce.com extensions.
I hope that you find this topic about How to install WooCommerce extensions fundamental!


