How to insert a quantity selector by editing your theme code for non-sectioned themes
Liquid is known as one of the best functionalities in Shopify. With this Liquid applications, online sellers enable creating a professional and beautiful website. In addition, because Shopify are using the latest version of Liquid, it is easy for the Shopify store owners to contribute the content of their websites. There are three types of Liquid codes including objects, tags, and filters, which helps the users to load all the dynamic data. With the Liquid objects, the Shopify store owners can display their product’s description and website introduction. While Liquid filters allow online merchants to change the output of objects. Therefore, such a flexible and safe language, Liquid is used popularly in other websites and applications.
How to insert a quantity selector by editing your theme code for non-sectioned themes
About quantity selector
Because of the convenience of Liquid in Shopify marketplace, it is possible for the Shopify buyers to add several products to their cart at once. Especially for the Shopify shops with the multiple products, this quantity selector will helps the store owners to maximize the sales. This feature will simplify the customer’s shopping process so they can buy or add any items at the last minute.
Firstly, the Shopify store owners have to make sure that the theme has this option. If the Shopify store that has not to install with sectioned theme, it is necessary for online sellers should follow all steps of this article How to insert a quantity selector by editing your theme code for non-sectioned themes which has simple steps to add this functionality.
How to insert a quantity selector by editing your theme code for non-sectioned themes
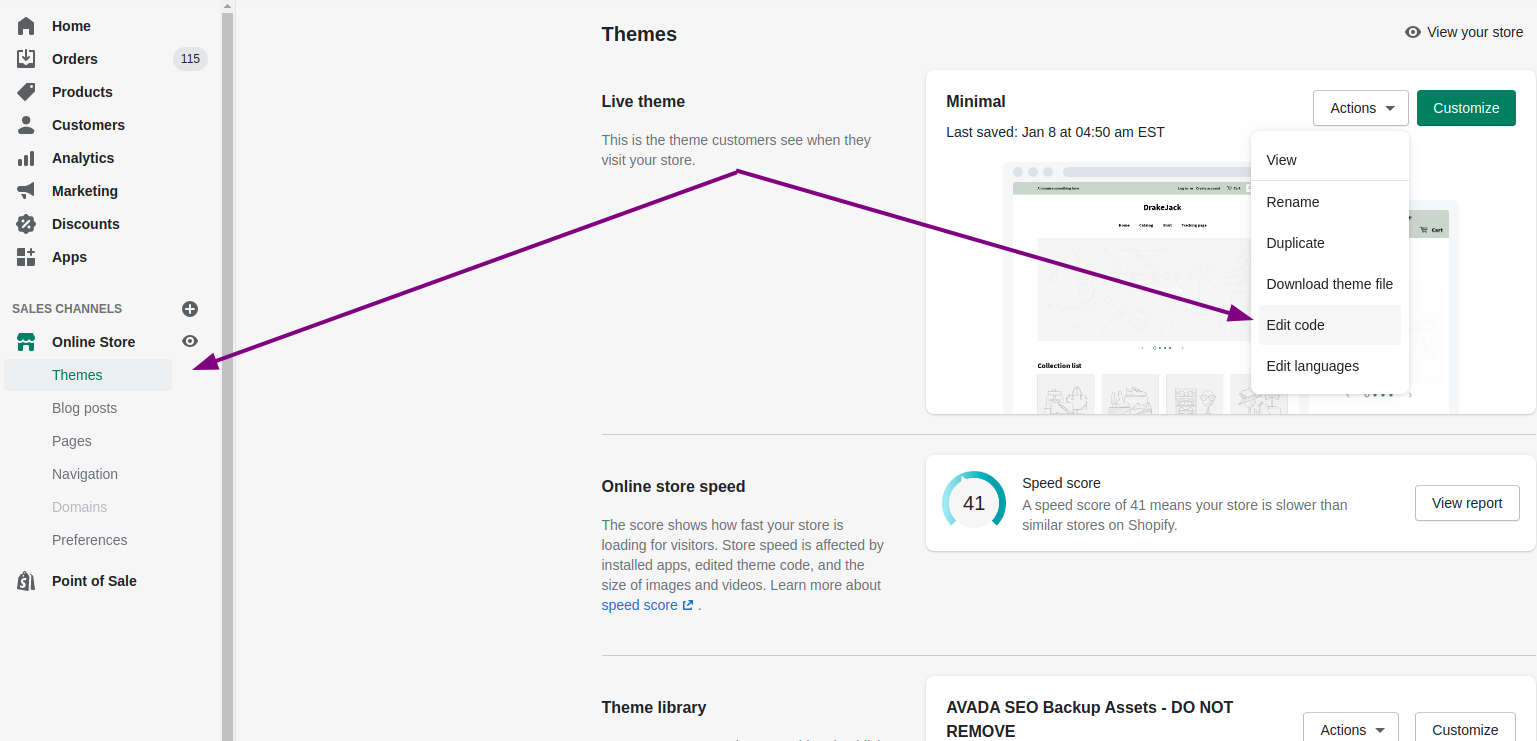
Step 1: Go to the Themes
After logging in to Shopify store app, the Shopify store owners will access to Shopify admin dashboard.
And then they go to Online Store and click to Themes.
Step 2: Edit code
At that step, all the things the users need is choosing the theme they want to edit and then tap Actions.
The users can choose Edit code to continue.

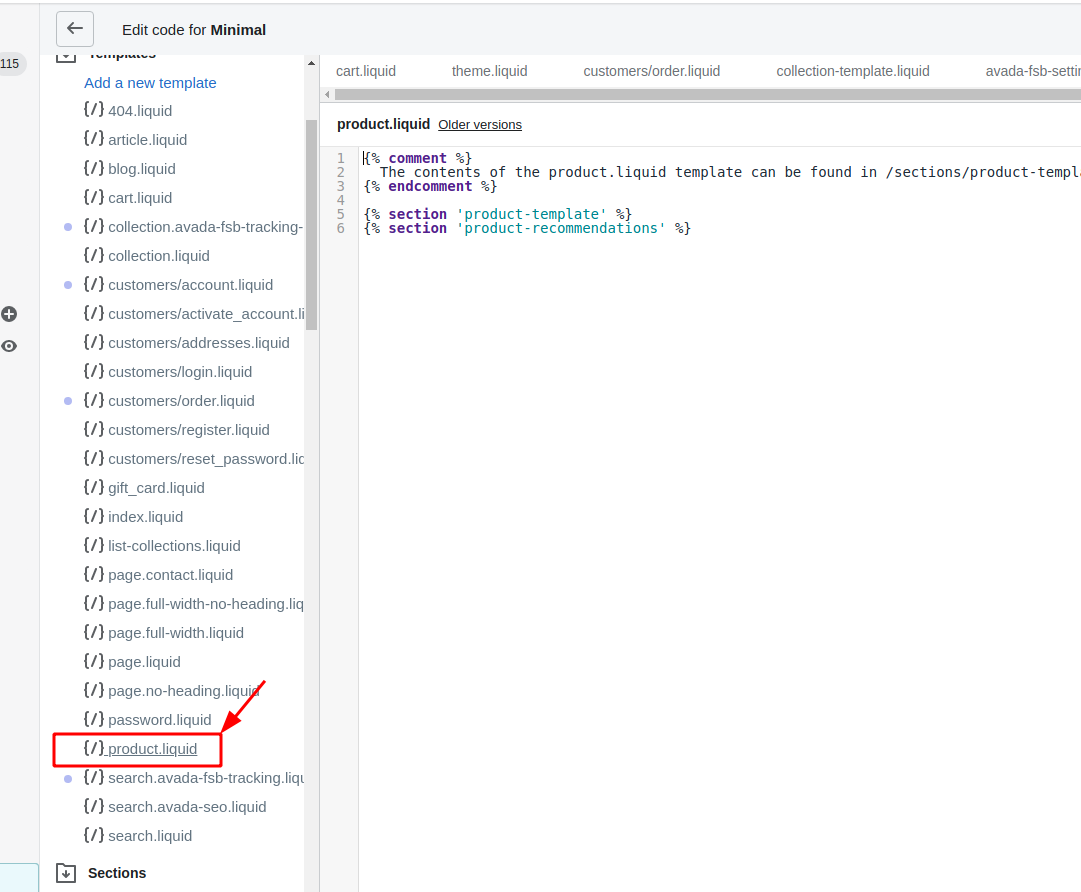
Step 3: Go to product.liquid
At the Templates section, the users can click product.liquid.

Step 4: Open <form> tag
After the code settings are opened, the store owners click to open <form> tag.
Step 5: Paste code
In the middle of openning and closing of </form> tag, online sellers copy all these below codes and paste them:
<label for="quantity">Qty: </label>
<input min="1" type="number" id="quantity" name="quantity" value="1" />
<style>#quantity { padding:5px; width:35px; border: 1px solid #555; }</style>
Step 6: Save the changes
To finish the process, the users click Save.
Conclusion
The notice for this guides is that the Shopify store owners should paste the code at the exact position of the theme. This article How to insert a quantity selector by editing your theme code for non-sectioned themes which includes simple steps, so the users can easily add the quantity selector on their own. In addition, we hope that online sellers can have more understanding of Shopify as well as Liquid through our chain of articles like the following list:
- Liquid strip_html: How to Remove HTML Tags from String
- Liquid strip_newlines: How to Remove New Line from String
- Liquid truncate: How to Cut Down String to Number of Characters
- Liquid upcase: How to Convert String to Uppercase
- Liquid replace: How to Replace Specified String with New String
- Liquid slice: How to Get One Character in a String
- Liquid strip: How to Remove Whitespace tabs, spaces, and newlines


