Use Emojis on Timeline on Shopify - A Simple Guide
You’ve known how to add comments to Timeline. However, just entering the comment by words seems to be really blase and unimpressive. So, you are looking for something to make the comment better and more creative. If you do, this article is the best one. It will show you how to use emojis on Timeline, which means you can add emojis to make your Timeline become lively and lovely.
Here come the details.
Related Posts:
- How to mention staff members on Timeline on Shopify
- How to attach files to your Timeline on Shopify
- How to add a profile photo to appear on your Timeline on Shopify
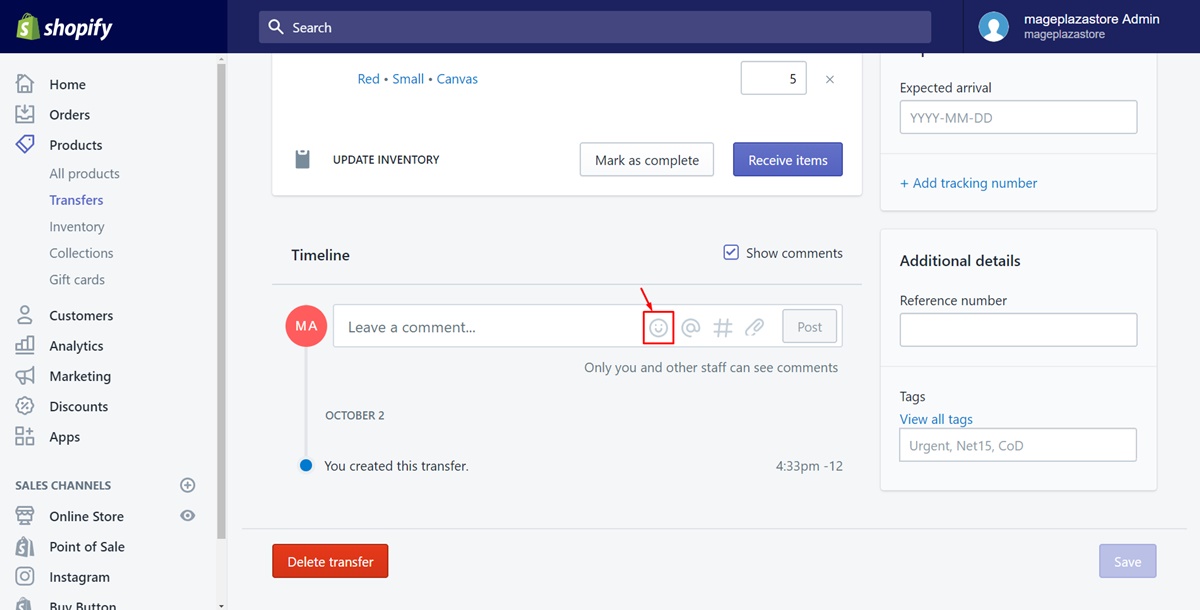
Step 1: Click the ☺ button emojis
While you are typing the comment, you can add an appropriate emoji by tapping on the icon ☺ in the textbox.

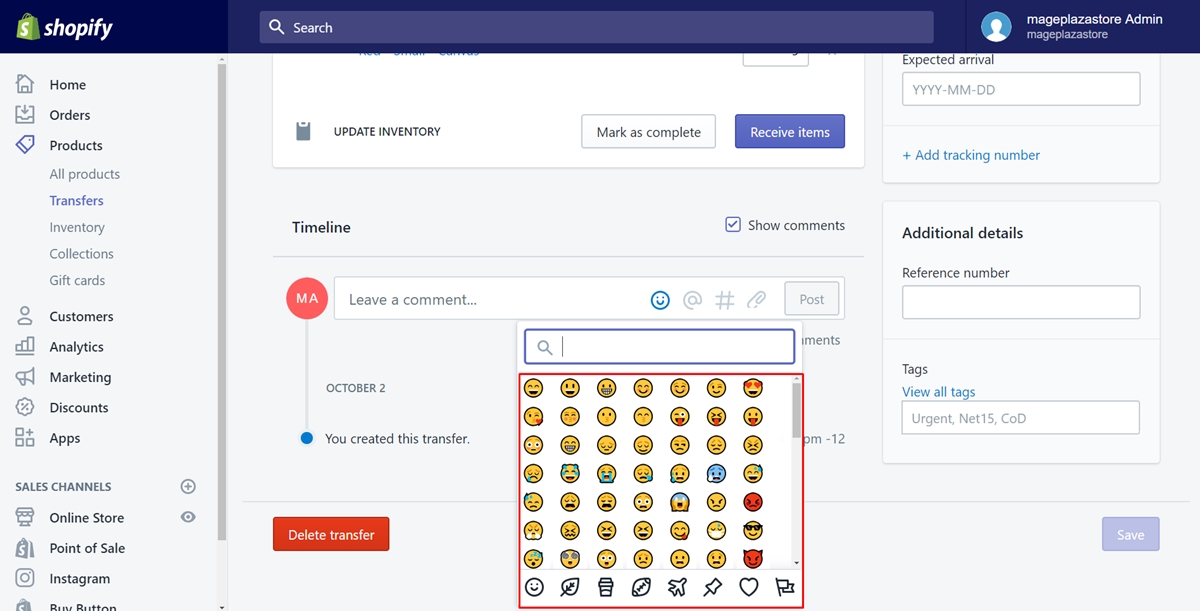
Step 2: Choose the emoji
In this step, you can decide to choose the emoji by your own feelings. This will show a little emotion of you to the comment. Moreover, when your staff members see that lovely emojis, they will feel more comfortable. It also reflects the sense of humor of you.

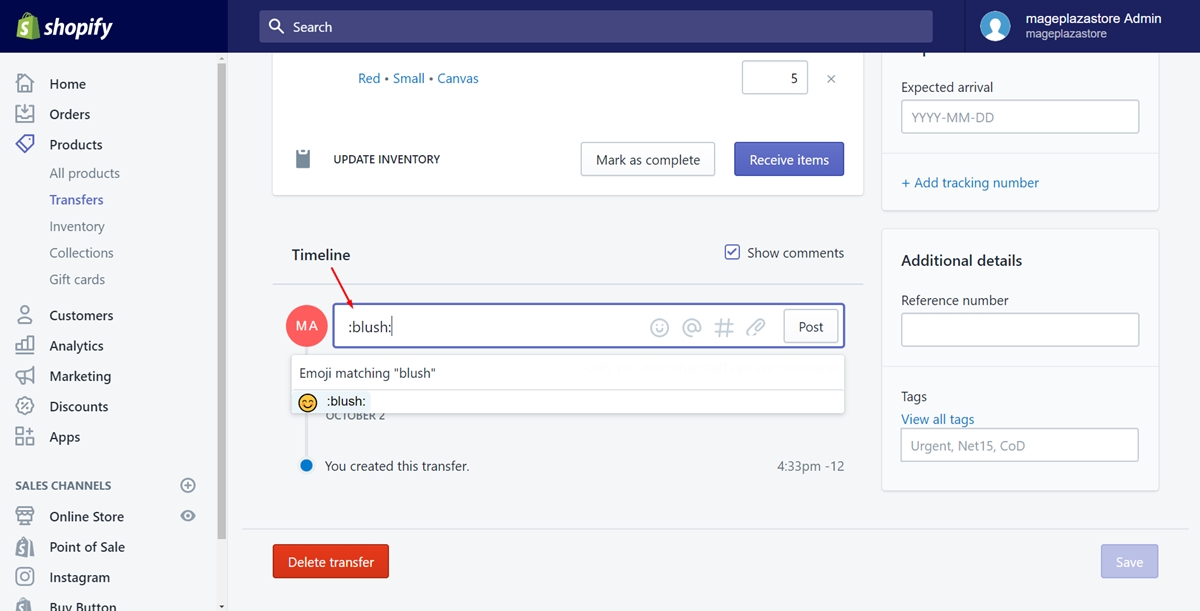
You also have another choice to add the emoji to the comment by entering the emoji name along with the colons such as the following photo.

Conclude
Above are the two steps which are just like pieces of cake for you to do. Hope you will find it funny and somehow useful. In addition, you may feel more cheerful while working. For more tips on using the Timeline in Shopify, check out our post on productivity tools on Shopify.


