Use Authorize.net in Test Mode on Shopify - A Simple Guide
Authorize.net is a credit card payment provider that you can use it to accept credit card on your online store on Shopify. Like Shopify payment, you can also use test mode to track for its setup and configuration. If you have already enabled the use of Authorize.net and you want to allow test mode on your store, you can follow the steps mentioned below to know how to use Authorize.net in test mode on Shopify. In case you haven’t activated Authorize.net yet, we have a guide on how to activate Authorize.net that you might want to check out.
How to use Authorize.net in test mode
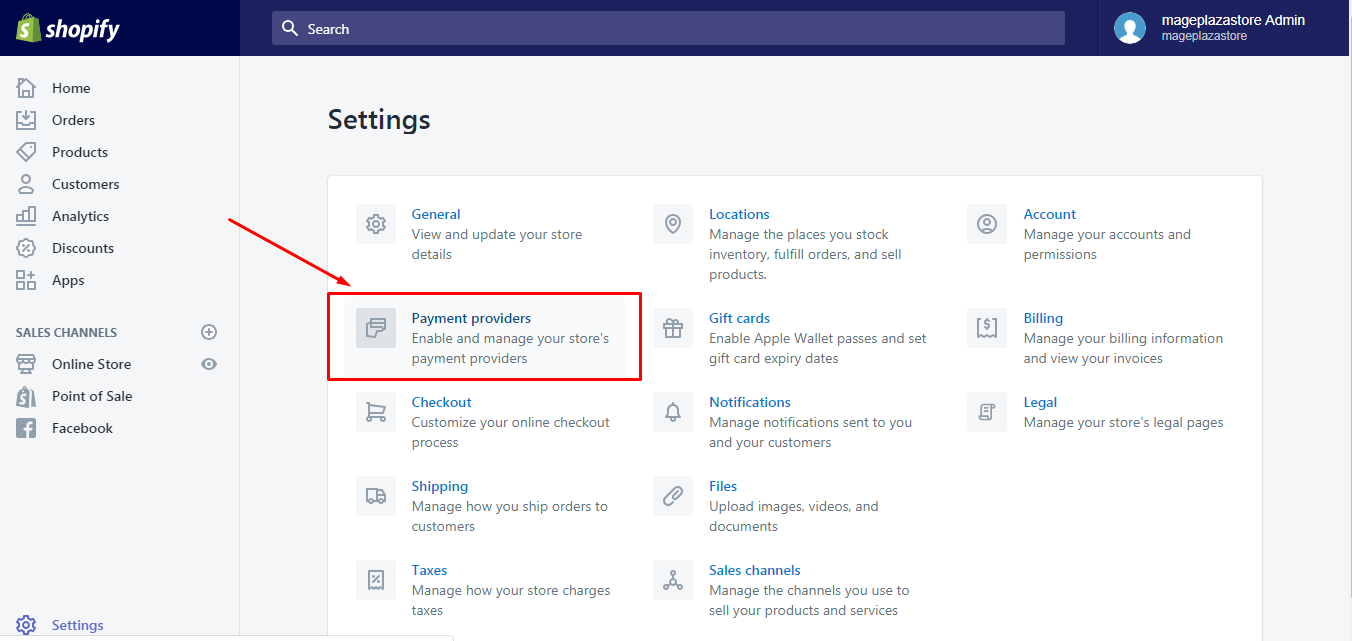
Step 1: Select Payment providers
Get access to the Shopify website and sign-in. After that, press on Settings and Payment providers respectively.
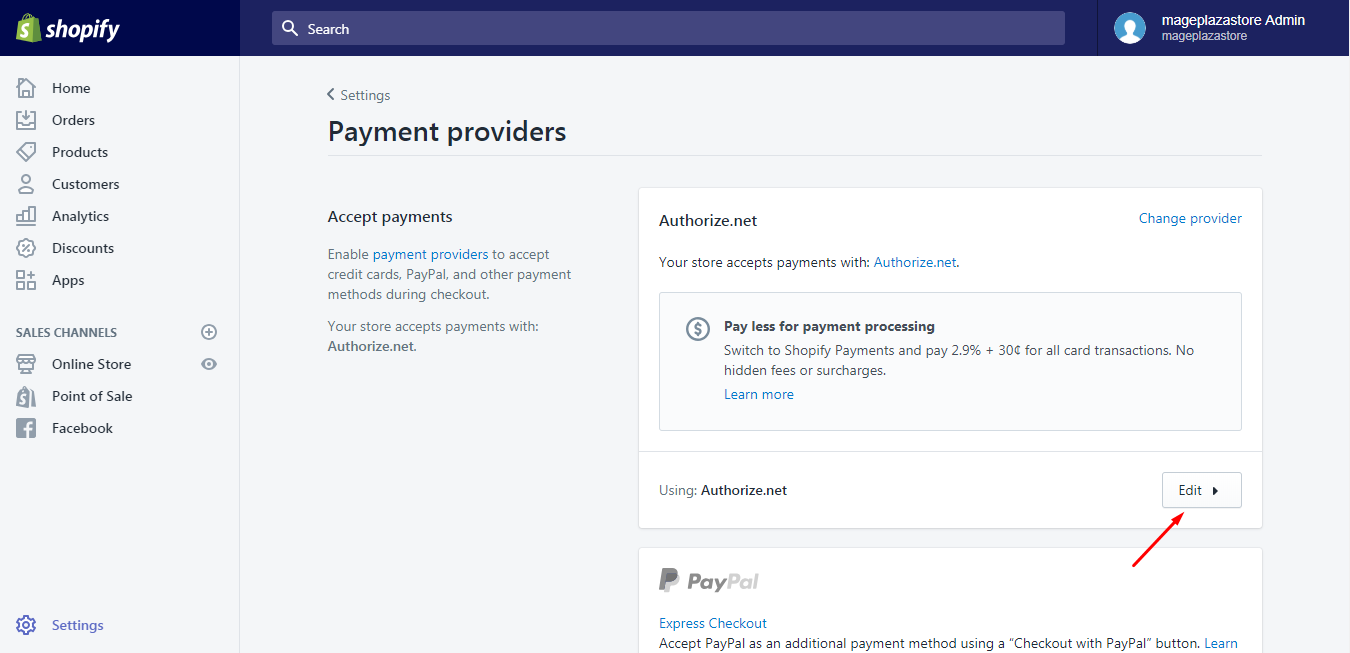
Step 2: Click Edit
There are two sections in the Payment providers including Accept payments and Payment authorization. Find Authorize.net setting part in the Accept payments then go to Edit.
Step 3: Use Authorize.net test mode
Tick on the Use test mode option to activate it. A box will appear that you have to fill in your sandbox account information.
Step 4: Press Save
If you see this step, there is only one thing left to do. It is recording all the changes you have made by choosing Save.
To use Authorize.net in test mode on iPhone (Click here)
-
Step 1: Select Settings Open the app in your smartphone and go to
Store. Next, you will see a list of options, click onSettings. -
Step 2: Choose Payments Another settings list will appear on your screen display that looks for
Paymentsunder theStore settingssection. -
Step 3: Tap Edit Scroll down until you see the
Authorize.netpart and press on theEditbutton. -
Step 4: Activate test mode Check on the box beside
Use test modeto allow its use. After that, add the credentials for your sandbox account. -
Step 5: Saving To end the process, tap on the
Savebutton and wait for the system to update changes.
To use Authorize.net in test mode on Android (Click here)
-
Step 1: Select Settings Log-in to your account on Shopify app. Click on
Storeat the right of the bottom bar and head toSettings.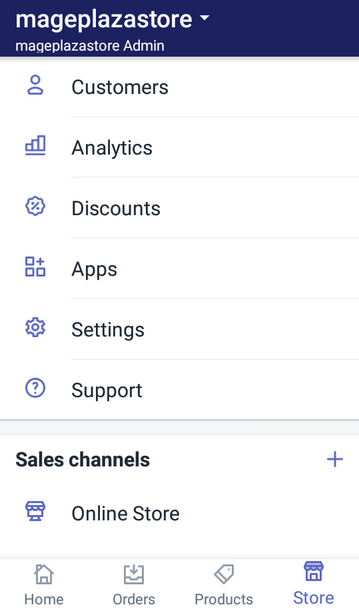
-
Step 2: Choose Payments To make it easier to use, Shopify divides it into smaller categories, which consists of
App settings,Store settingsandAbout. FindPaymentsin theStore settingssection.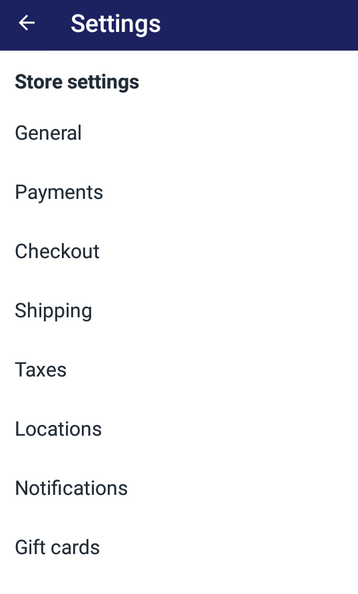
-
Step 3: Tap Edit You will see the
Edit ▶️button stays in the same line with theAuthorize.net. Hence, press on this button to continue.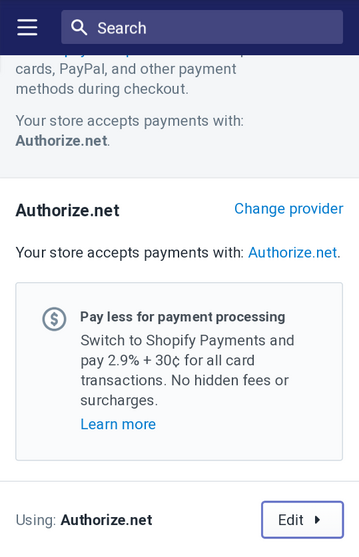
-
Step 4: Activate test mode In the newly appeared expanded settings of
Authorize.net, check on the box next toUse test modeto turn on this option. The system requires the sandbox credentials that you need to enter it into the provided space. -
Step 5: Saving After completing all the above steps, do not forget to click
Saveto help the system store your adjustment.
Conclusion
In short, this writing has shown you how to use Authorize.net in test mode on Shopify by providing you with the detailed explanation and image for each step. With such effort, hope that you can activate this setting and apply it efficiently for your store. If you want more instruction, check out our posts on payments on Shopify.
Related Posts:


