How to Translate Checkout Fields Individually on Shopify
Did you know that almost everything on your Shopify store could be customized to maximize your customers shopping experience? This includes things like adding logo to the checkout page or editing the small texts set as default that are displayed in textboxes on your checkout page to whatever content you want. This would help you personalize your customers’ experience when doing checkout with your brand. Wondering how to do that? Take a look at the few steps below on how to translate checkout fields individually on Shopify.
Step 1: Go to Settings
Log in your store with the store owner’s account, then go to the Settings field in the bottom right.
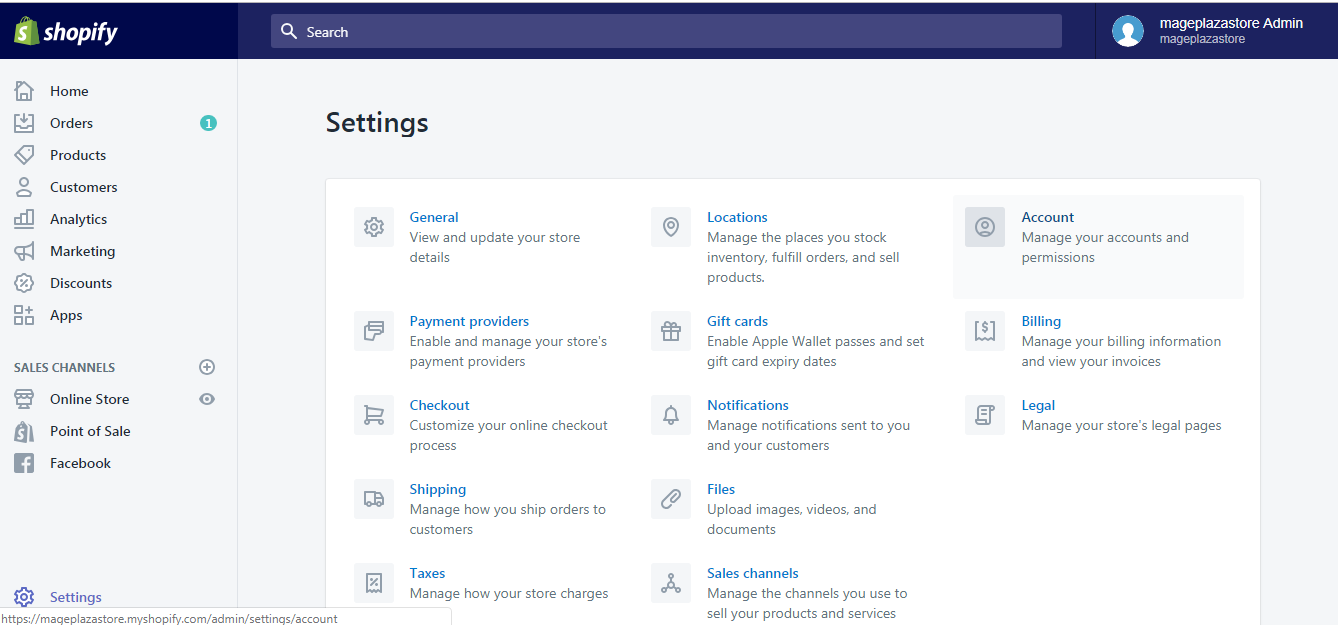
Step 2: Go to Checkout
From Settings, go to Checkout.
Step 3: Click Manage checkout language
Scroll down to the bottom and click the Manage checkout language button in Checkout language.
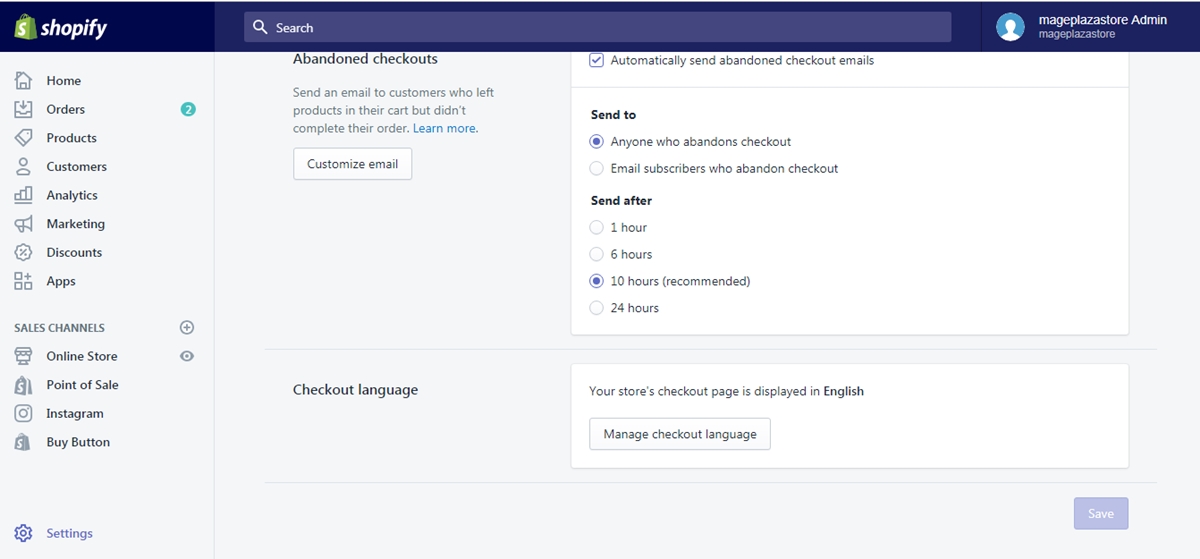
Step 4: Translate checkout fields individually
Customize your checkout fields to fit your brand.
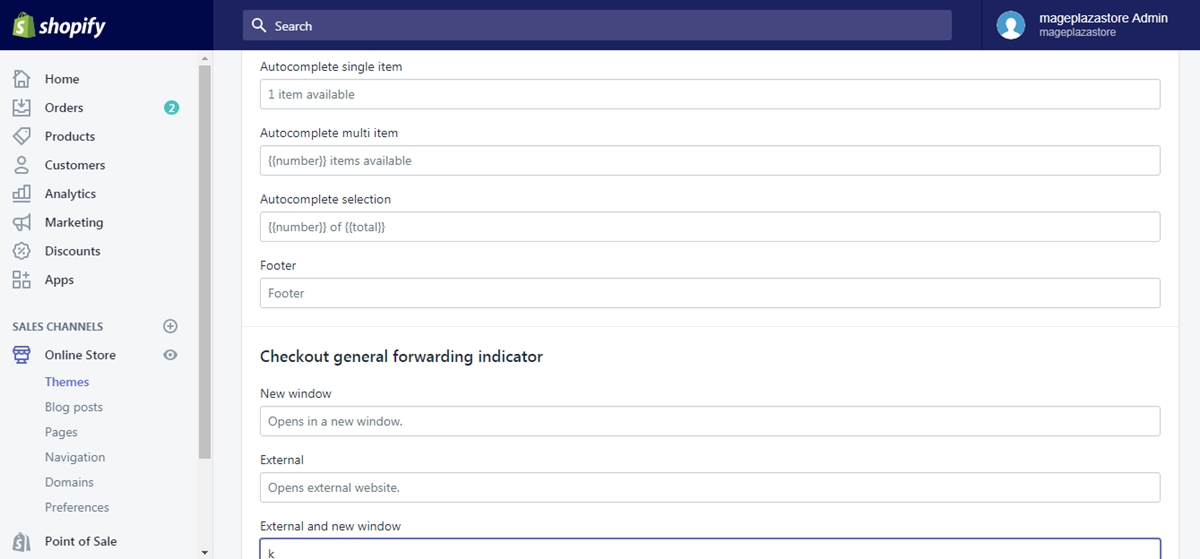
Step 5: Click Save
When you are done, click Save.
To translate checkout fields individually on iPhone (Click here)
- Step 1: Go to Settings
Log in your store with the store owner’s account, then go to the Settings field.
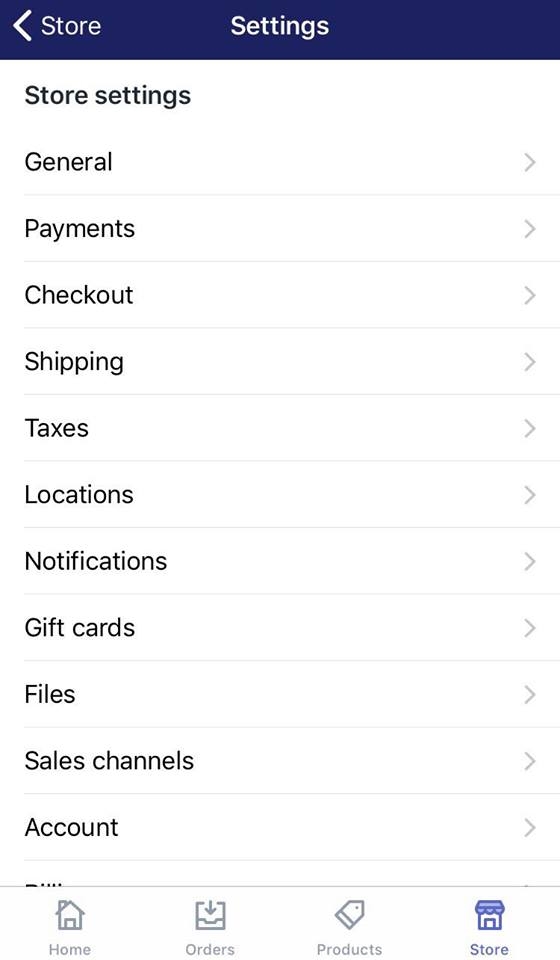
- Step 2: Go to Checkout
From Store Settings, go to the Checkout section.
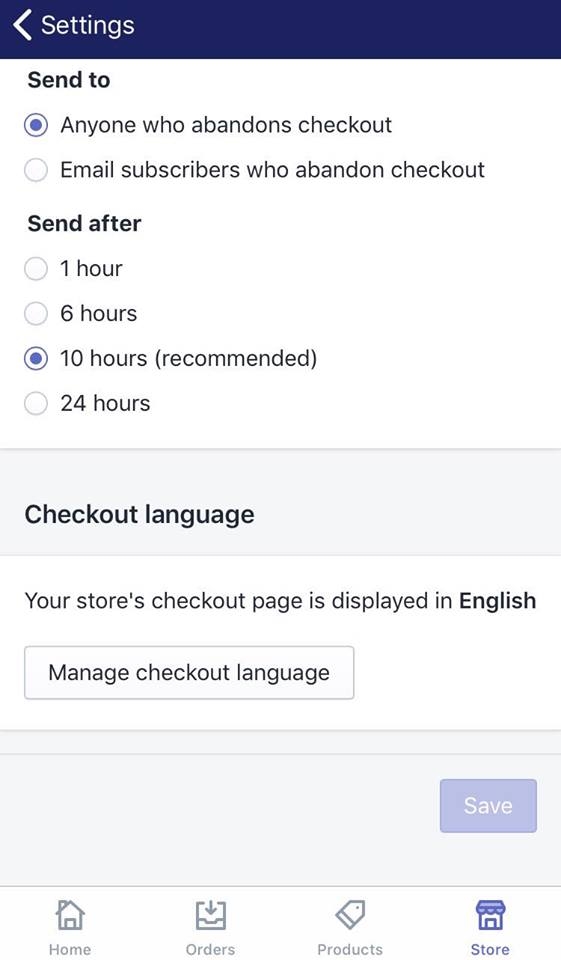
- Step 3: Tap Manage checkout language
Swipe down to the bottom and tap the Manage checkout language button in Checkout language.
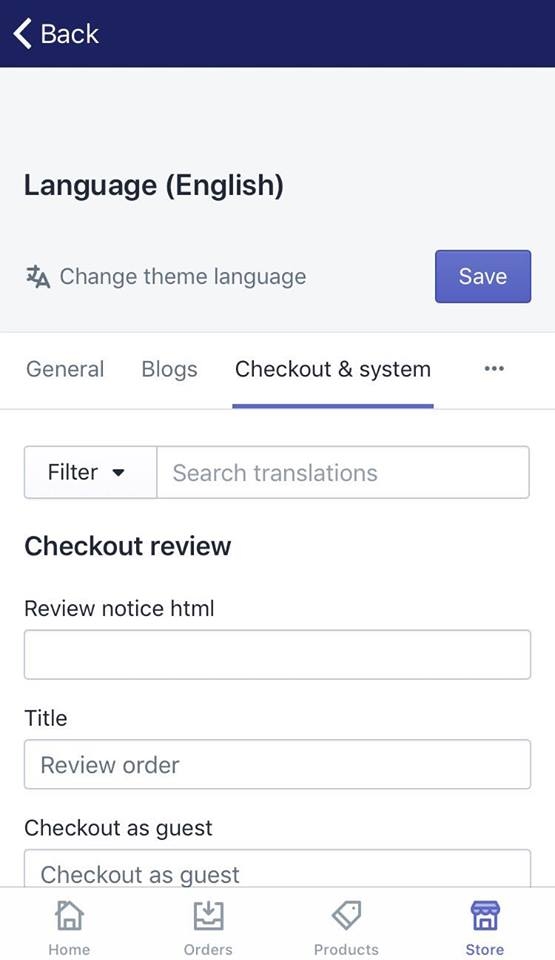
- Step 4: Make the changes of your need
Customize your checkout fields to fit your brand.
- Step 5: Tap Save
When you are done, tap Save.
To translate checkout fields individually on Android (Click here)
- Step 1: Go to Settings
Log in your store with the store owner’s account, then go to the Settings field.
- Step 2: Go to Checkout
From Store Settings, go to the Checkout section.
- Step 3: Tap Manage checkout language
Swipe down to the bottom and tap the Manage checkout language button in Checkout language.
- Step 4: Make the changes of your need
Customize your checkout fields to fit your brand.
- Step 5: Tap Save
When you are done, tap Save.
Conclusions
Above are the simple steps that guide you through How to translate checkout fields individually. You might also want to take a look at articles of the same category like How to select the new checkout language
To make the most out of the resource offered to you, visit our Help Center for hundreds of handy tips and instructions.


