How to modify the shipping calculator CSS in Shopify
If you are selling products and your orders are beyond of free-shipping zone, customer’s bill has to include shipping fee. Therefore, you want to install the shipping calculator. This tutorial will focus on modifying the shipping calculator CSS.
Table of content
Attention when applying these steps for CSS
You should clarify with which theme you are using, whether it is sectioned theme or non-sectioned theme. If there are files in the Sections directory, then your theme belongs to a sectioned theme while a non-sectioned theme does not have files in Sections directory.
Sectioned theme is a new theme allowing you to create and arrange the layout of your e-store’s websites while non-sectioned theme is an older one published before October 2016 without Section directory.
How to modify the shipping calculator CSS
Step 1:
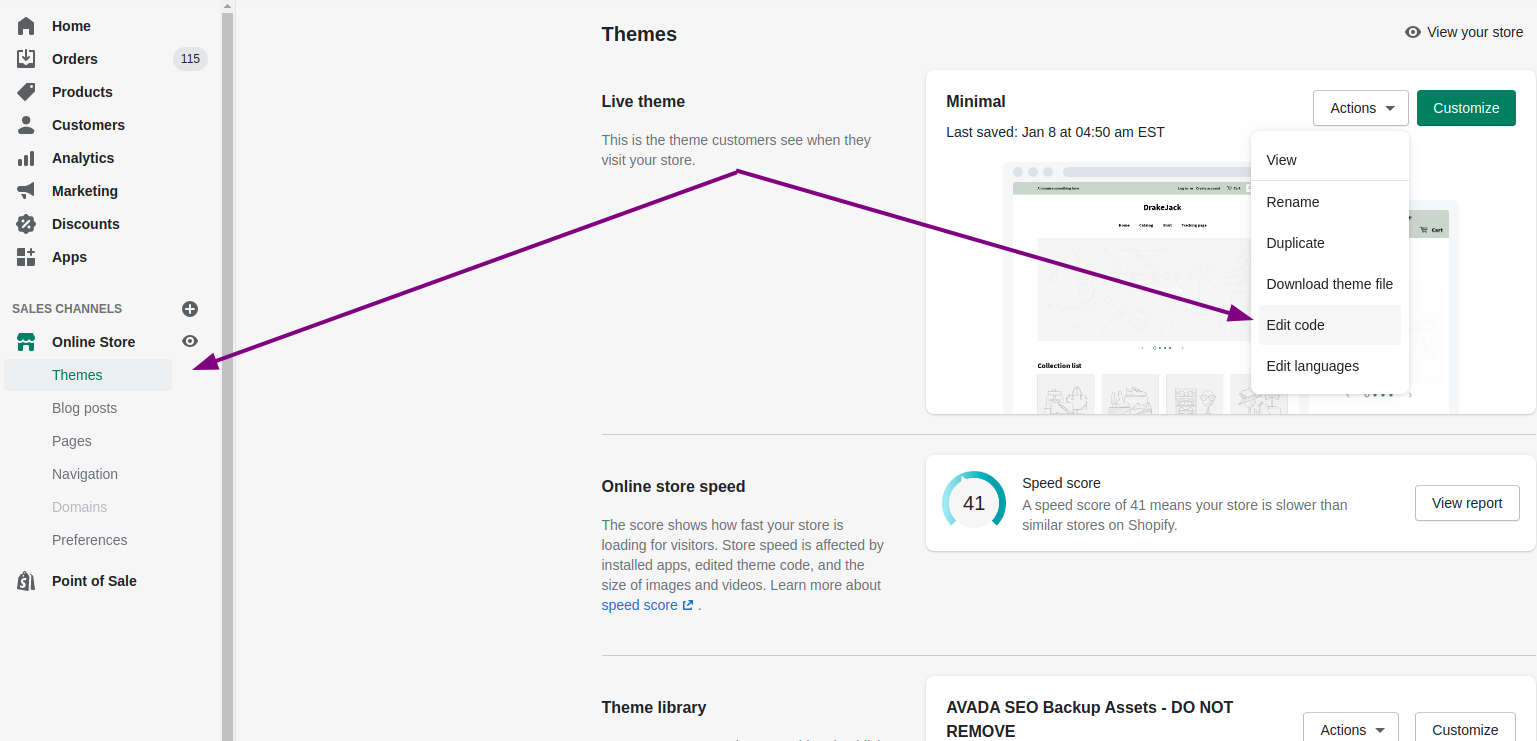
Open Online Store > Themes in Shopify Admins
Step 2:
Look for the theme that you want then tab Actions > Edit Codes
 ###Step 3:
Click
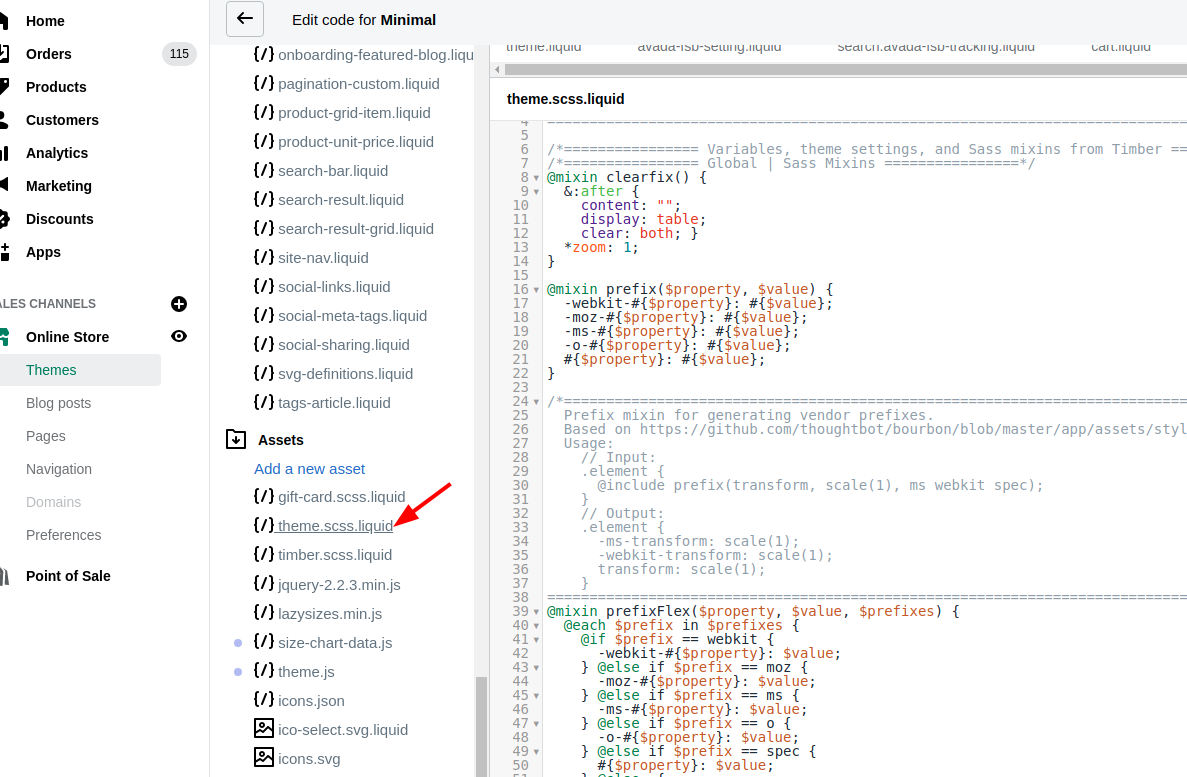
 theme.scss.liquid in the Assets directory
Step 4:
Add either the content of this CSS file or your own custom CSS code.
 ###Step 5: Save
Conclusion
In a nutshell, we hope that this tutorial is helpful for you and for your improvement of customer engagement. Your website would become more friendly with customers when they order items are beyond your free-shipping zones you have any questions, you can comment below the article and we will address this. Hope that you will find a better solution when following this method for shipping calculator on CSS.


