
How to generate a size chart snippet in Shopify
Drive 20-40% of your revenue with Avada
The online merchants who are selling on Shopify especially selling clothes and fashionable items are essential to display their products on the best images. This means that they should their store’s images with the most suitable targets and size. Especially, the customizable images which is one of the most important roles in how to make their products outstanding. Moreover, the better choice of how large the images are will improve the customer’s shopping experiences. For example, the products which are not legit will make the visitors misunderstand about the proportion of the items.
Related posts:
- How to generate a size chart page in Shopify
- How to insert the size chart to your theme in Shopify
- How to use a different language or change the Size chart text in Shopify
There are different choices to create the size chart in the Shopify app. The store owners can choose purchased Shopify apps to customize them easily. Those apps are available in many forums and Shopify apps markets. However, there is a free method that the Shopify store owners can display the standard size charts is changing the code setting. The product’s photos can be easily updated with the code snippet. With a particular product, online sellers can select the most suitable dimension for it.
By changing the code, the Shopify store owners would show their products in unlimited sizes. In particular, the images will be added automatically after the online merchants set the code for the collection of products. Therefore, it will save a lot of time when including the size chart on the product page.
This following article How to generate a size chart snippet in Shopify with the easy steps will provide the readers the procedure to differentiate their images and sizes by changing in theme.liquid and theme.scss.liquid.
How to generate a size chart snippet in Shopify
- Step 1: Choose the
Add page - Step 2: Enter
Size chart - Step 3: Customize the table
- Step 4: Set
Visible - Step 5: Click
Save
Step 1: Choose the Add page
After accessing the Shopify app and the admin dashboard, the Shopify store owners click to Online Store and then Pages.
To continue, the users choose Add page.

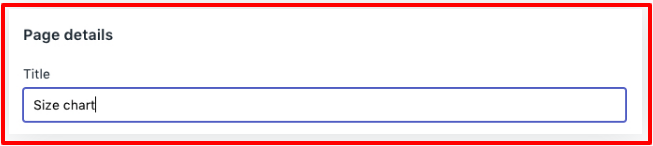
Step 2: Enter Size chart
On the page title, the Shopify merchants should enter Size chart like that:
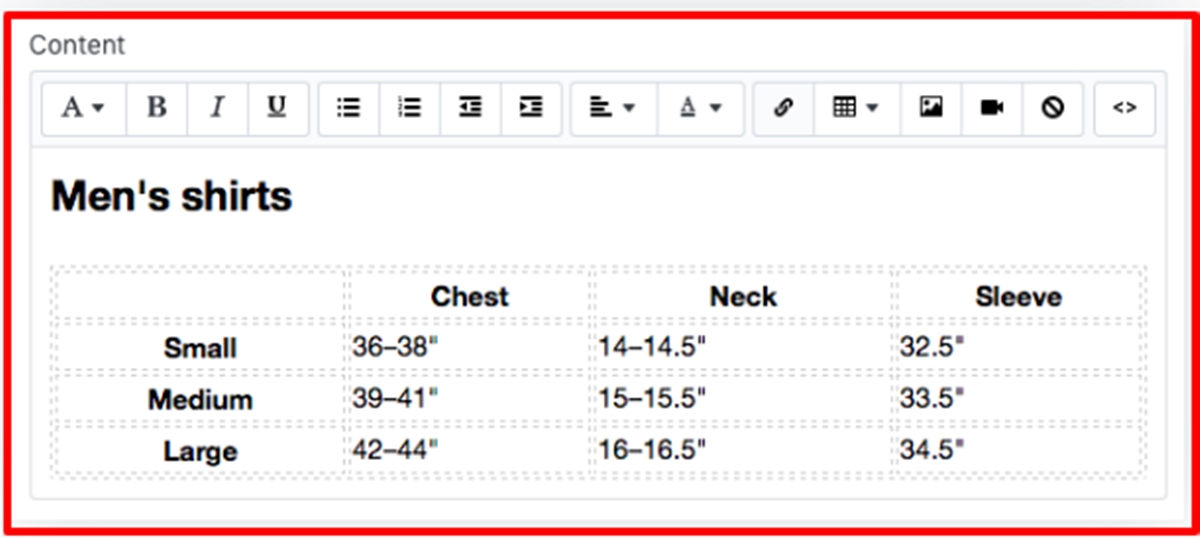
Step 3: Customize the table
For size chart information, the online sellers put those numbers in Content box to create a table. Moreover, it is necessary for them to customize this table:
Step 4: Set Visible
From the Visibility section, admins should check whether their page is in Visible fuctionality.
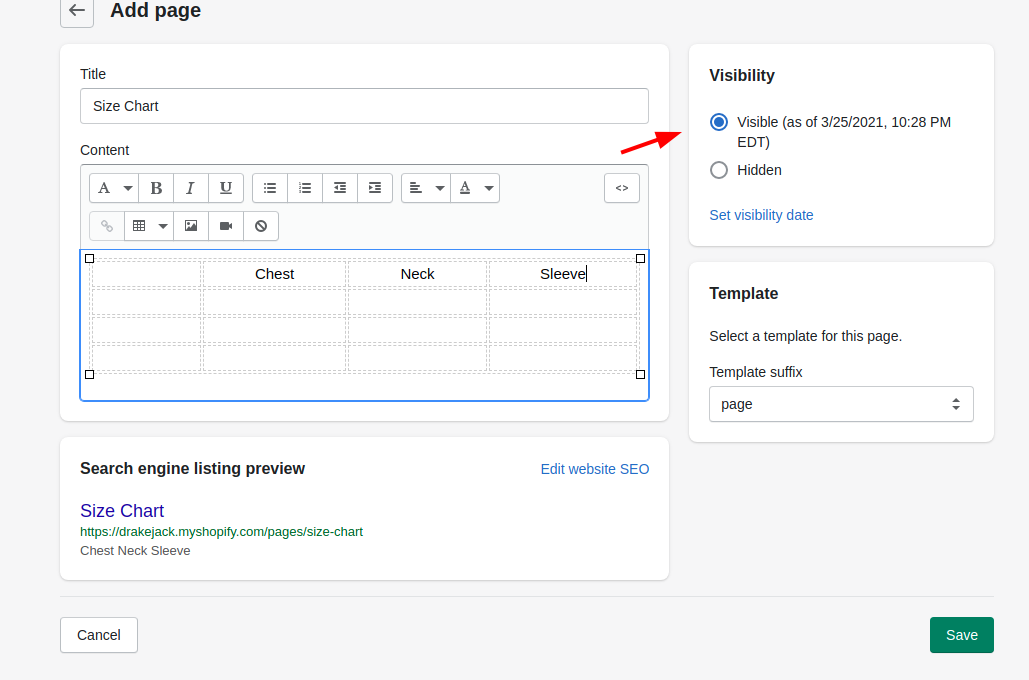
Step 5: Click Save
Click Save to finish and save the changes.
Conclusion
The more attractively the products are displayed, the more customers want to make a purchase. That is the reason why the Shopify store owners should customize their product image’s size. This article How to generate a size chart snippet in Shopify provides the Shopify users the simple process to set the dimension of their items displaying by editing the theme setting. Besides, the online merchants can read more about product pages topics such as How to use a different language or change the Size chart text, or the topic about online stores such as How to update the product form to support dynamic checkout buttons, and How to modify footer.liquid.


