How to Add or Edit A Customer’s Address on Shopify
When a customer set up an account in your store, you need to manage his or her information in order to manage your customer list properly. That includes small things like edit customer’s name or email, edit the customer note, edit the profile tags, etc. They are small things, indeed, but by no means trivial. In this post, we are going to show you to do one of those things: how to add or edit a customer’s address.
How to add or edit a customer’s address
Step 1: Choose Customers.
Choose Customers after you log in your Shopify admin successfully.

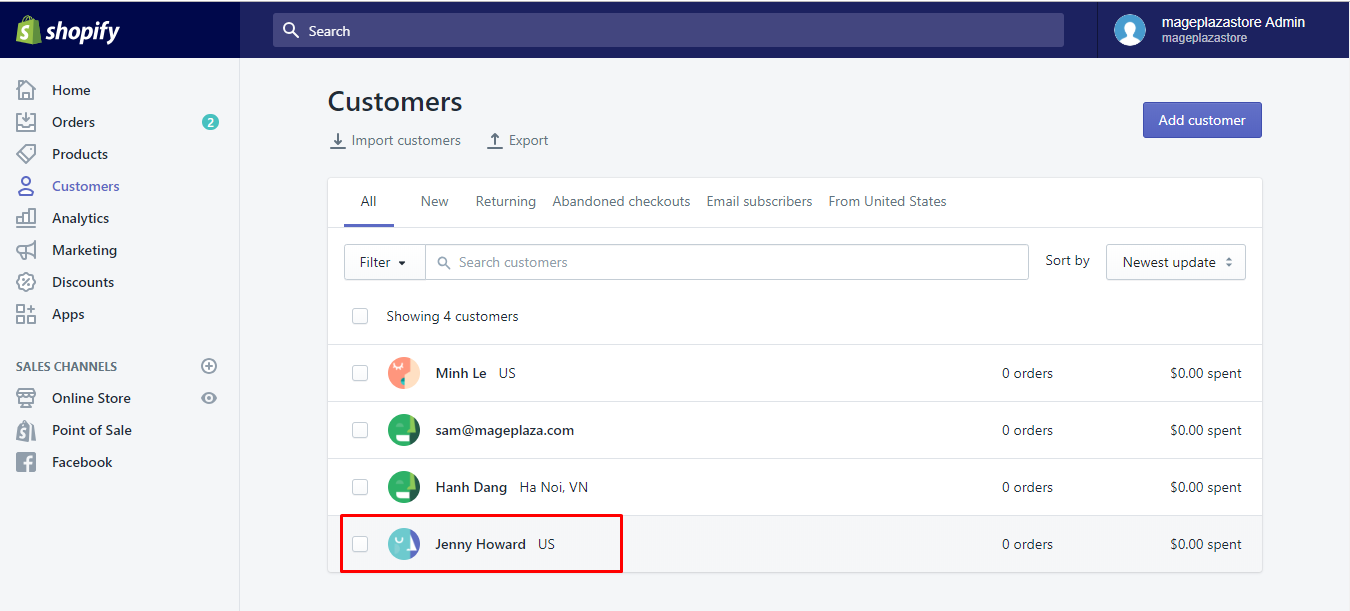
Step 2: Go to the customer profile you want to update.
Next, you can select the customer profile that you want to get it updated.
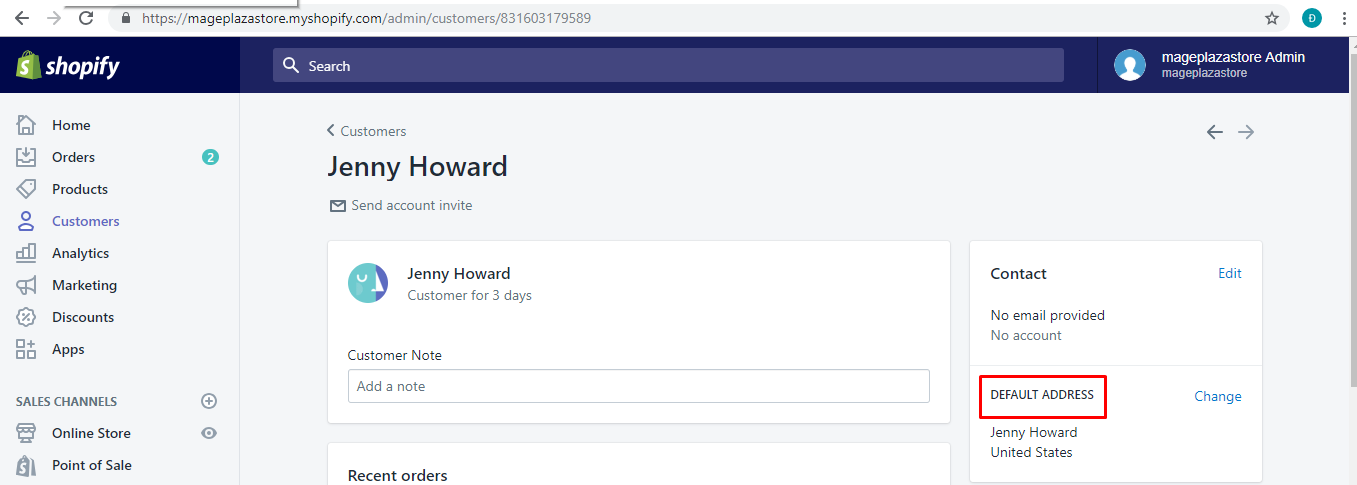
Step 3: Choose Change from the Default address section.
You can click Change in the Default address section.
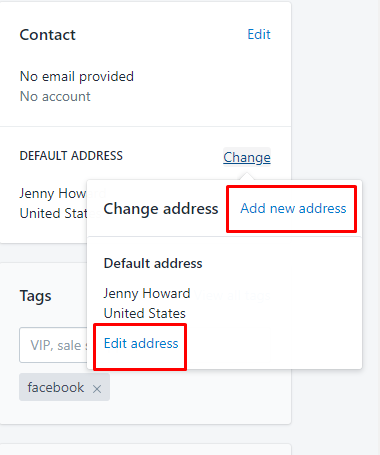
Step 4: Opt for Add new address or Edit address.
To continue, you can opt for Add new address or Edit address from the Change address dialog.
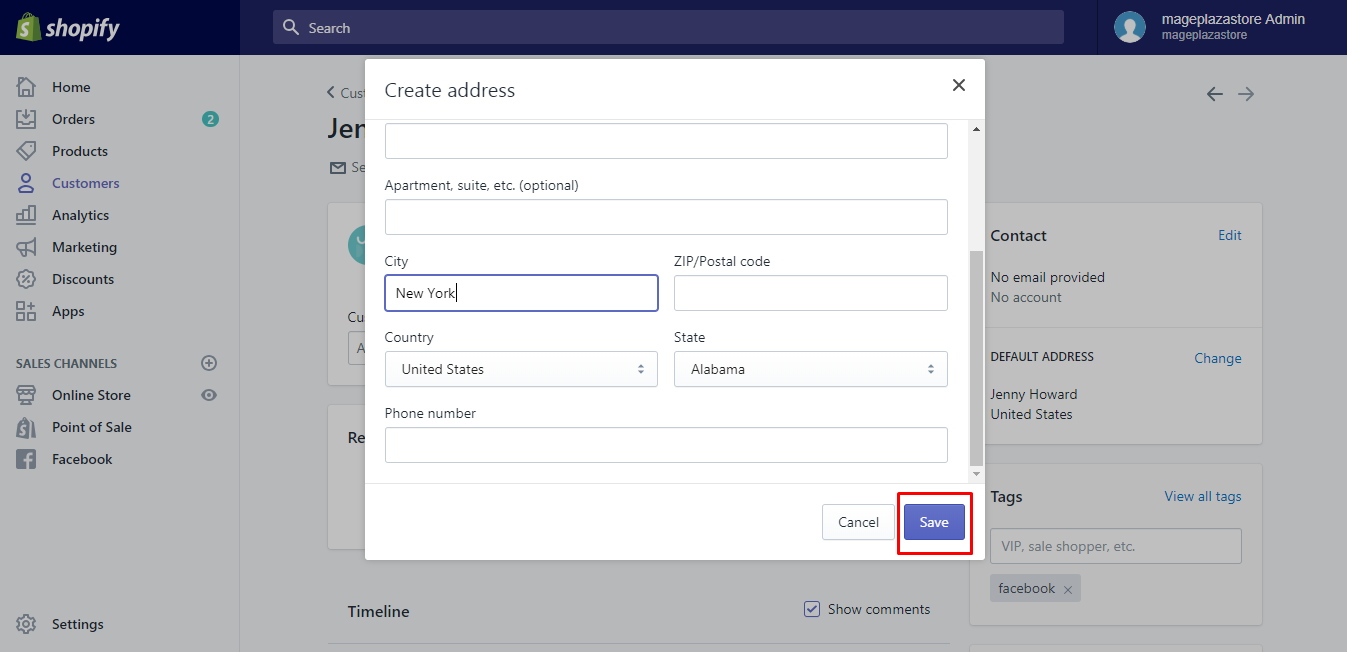
Step 5: Create a new customer address or change his current address.
You can create a new address or change the current address of the customer.
Step 6: Choose Save.
Finally, you can choose Save to confirm again your changes.
To add or edit a customer’s address on iPhone (Click here)
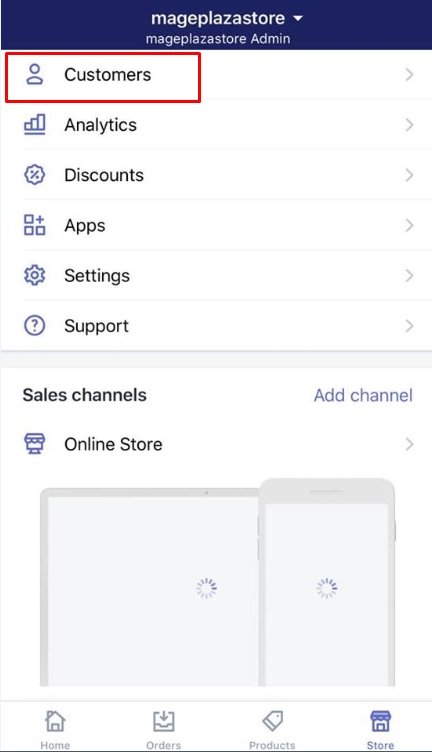
- Step 1: Tap Store and Customers.
After logging in, you can tapStoreand thenCustomers.
-
Step 2: Choose the customer profile you want to update.
Then, you can select the customer profile you want to update. -
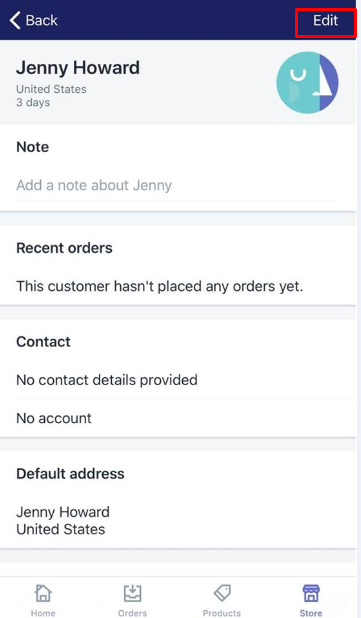
Step 3: Tap Edit.
TapEditon the top of the page.
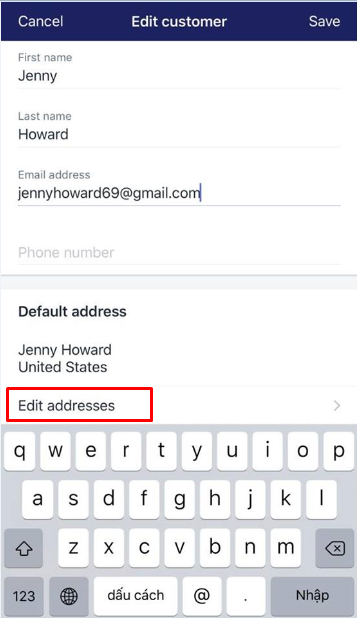
- Step 4: Tap Edit addresses.
TapEdit addressesto keep going.
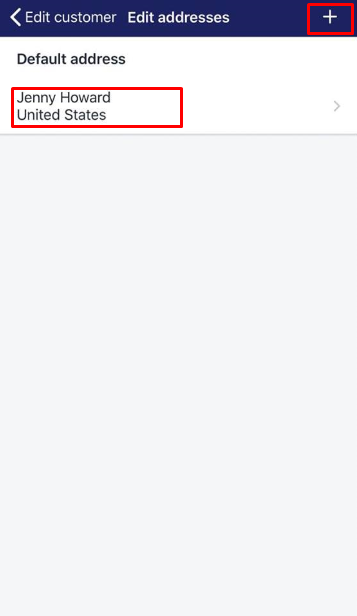
- Step 5: Opt for adding a new address or editing the existing one.
From theEdit addressesscreen, you can opt for adding a new address or editing the existing one. - When you want to create a new address, tap
+button. - When you want to edit the existing address, tap it.
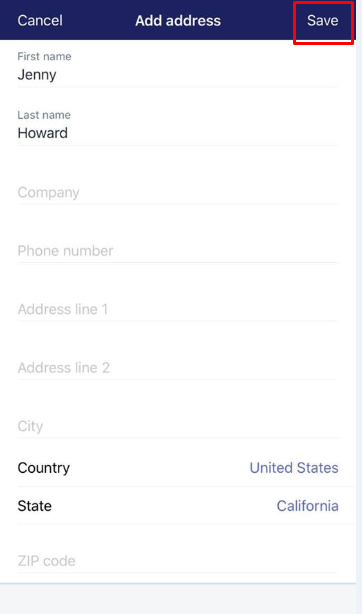
- Step 6: tap
Save.
After adding a new address or change the existing address, don’t forget to tapSave. In case you would like to set that address as the default address, you can tapMake default addressright under it.
To add or edit a customer’s address on Android (Click here)
-
Step 1: Touch Customers from your Shopify app.
To start, you need to touchCustomersfrom your Shopify app after logging in. -
Step 2: Touch the customer profile you want to have it updated.
-
Step 3: Choose the pencil icon.
To continue editing, you can choose the pencil icon. -
Step 4: Touch CHANGE DEFAULT ADDRESS.
-
Step 5: Opt for adding a new address or editing the existing one.
In this step, you can create a new address or just edit the existing one. -
In case you like to create a new address, tap
+button. -
In case you like to edit the current address, touch the pencil icon next to it.
-
Step 6: Type the customer’s new address.
-
Step 7: Touch Save.
Remember to touchSaveto save your current changes. -
Step 8: Touch MAKE DEFAULT ADDRESS.
You can touchMAKE DEFAULT ADDRESSif you want the address is set as the default address.
Conclusion
You just learned how to add or edit a customer’s address on Shopify. It’s not hard to do and I think anyone can do it after reading this guide. For more guides like this one, check out our Shopify tutorials.
Related Posts:


