6 Easy Steps to Set Up Email Money Transfers on Shopify
If your store is based in Canada, you can allow the customers to pay the orders using email money transfer instead of a credit card. You have to provide the customers with your email address and a secret Q&A that they will use as the password for the money transfer. The customers will go to the bank to send the money to your email address then you will receive an email guiding you how to transfer money to your bank account. When you get the payment, you can mark it as paid on Shopify later. Hence, if you have an online shop in Canada, you can follow this writing to know how to set up email money transfers on Shopify.
Related Posts:
- How to Edit Customer Billing Statement on Shopify (on Desktop and Mobile)
- How to Verify your Identity on Shopify in 5 Simple Steps
- 4 Steps to Deactivate a Manual Payment Method on Shopify
- How to Set Up Shopify Payments in 4 Easy Steps
How to set up email money transfers
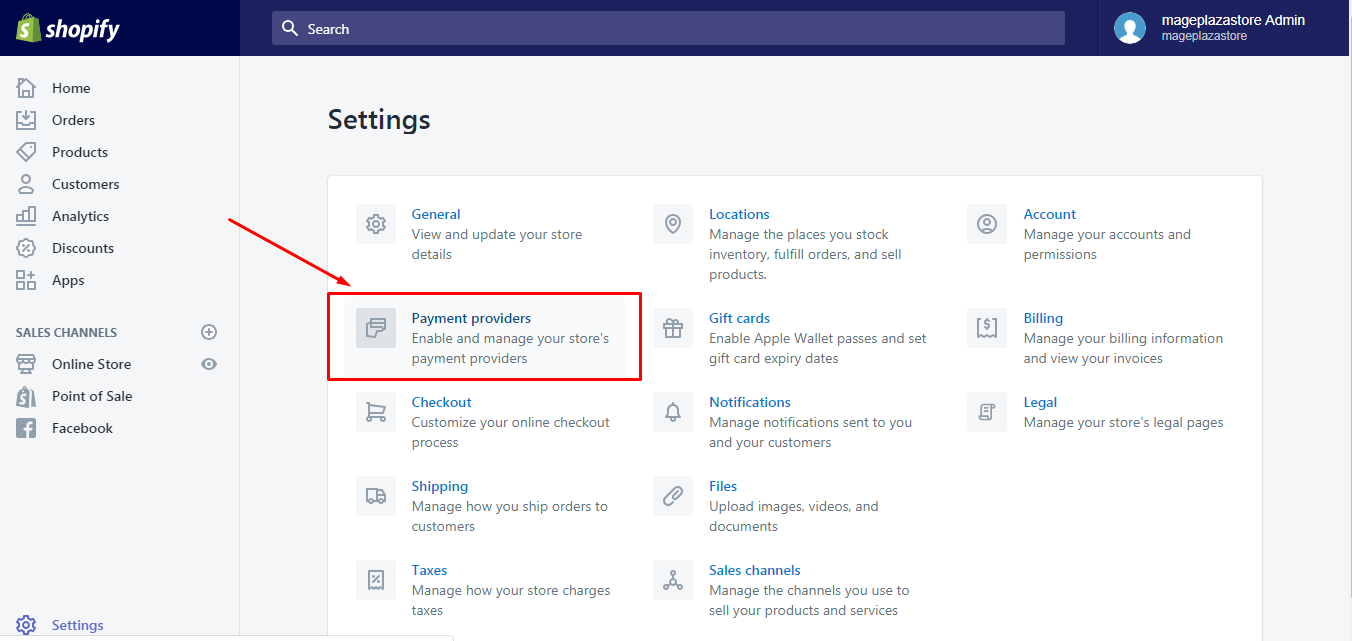
Step 1: Head to Payment providers
Open the Shopify admin page and click on the Settings at the left end of the screen. Next, select Payment providers in the first column of the settings list.
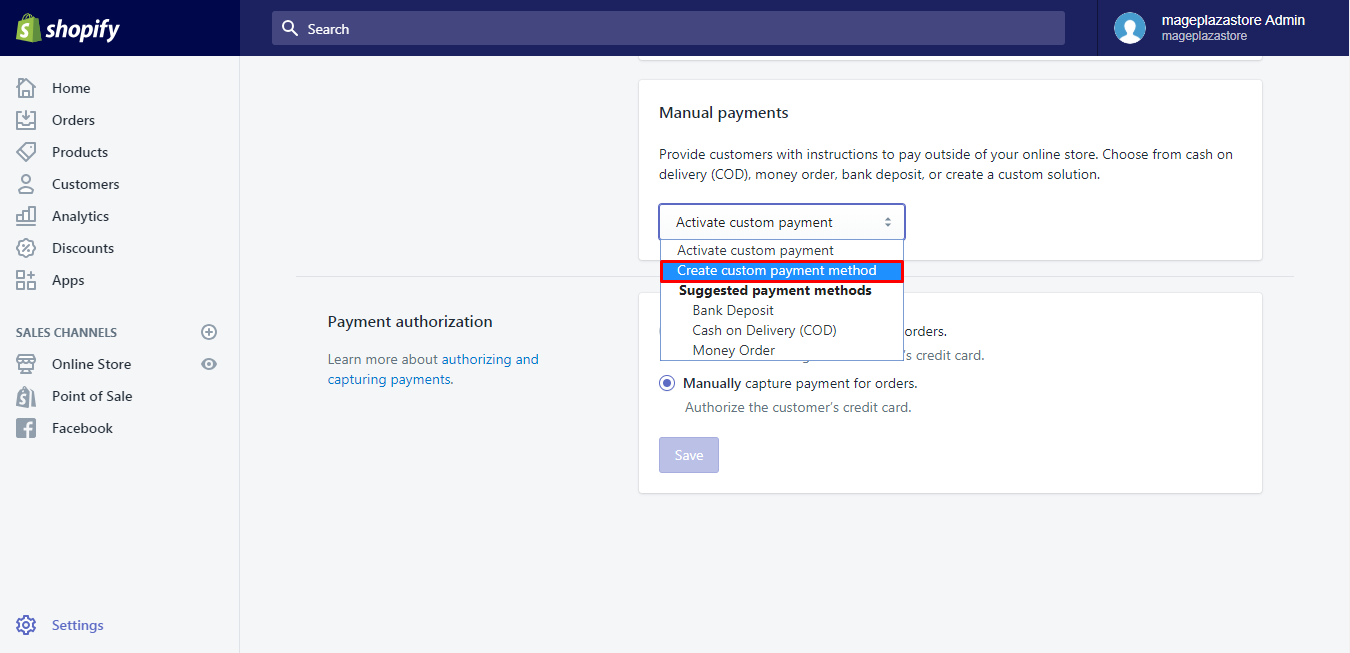
Step 2: Choose Create custom payment method
Scroll down until you see the Manual payments section. Find the drop-down menu below the description and press on the Create custom payment method.
Step 3: Add the name
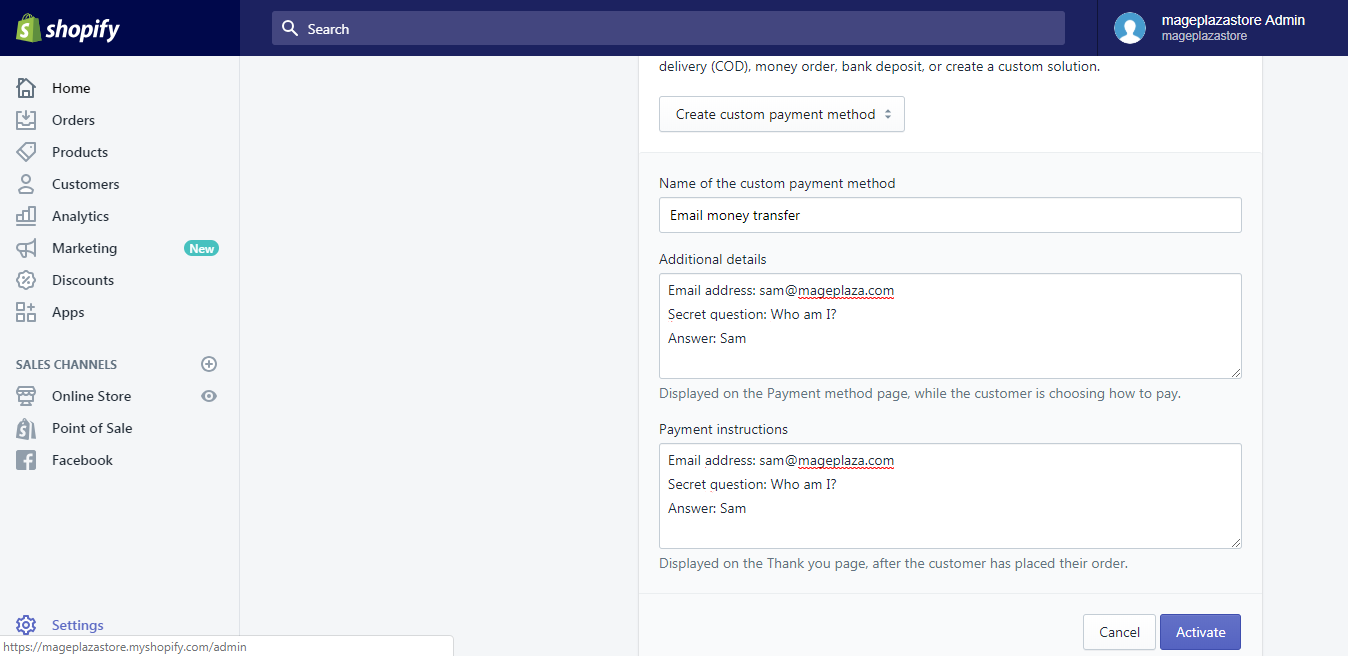
There is a blank space for you to fill in the name for the payment method. You can call it as Email money transfer for example.
Step 4: Enter the email address, secret question and answer
Because you will receive payment through email, you need to enter your email address. Moreover, when your customers use email money transfer to make payment, they will need to input the secret question and answer. Therefore, you have to provide it when you accept the payment.
Step 5: Fill in the instruction
What you enter in the Additional details is also the instruction that you just need to copy the text from this section and paste in the Payment instructions box.
Step 6: Activate email money transfers
If you’re done, choose Activate to end the process.
To set up email money transfers on iPhone (Click here)
-
Step 1: Select Settings Sign in your account on the Shopify app then go to
Store. After that, tapSettings. -
Step 2: Choose Payments A list of settings will appear on your screen that you have to find the
Paymentsunder theStore settingssection. -
Step 3: Tap Create custom payment method In the
Accept payments, look for theManual paymentspart and choose theCreate custom payment methodin theActivate custom paymentlist. -
Step 4: Enter the name Like I mentioned in the writing about creating a custom manual payment, you have to name the method payment that you are going to design.
-
Step 5: Add the email address, secret question and answer After entering the name, fill in the email address that the customers will send the money to. Besides it, you also need to add a secret question and its answer in the
Additional details. -
Step 6: Put in the instruction The instructions are quite similar to the information that you put in the
Additional detailsthen you can copy and paste it in the space for the guideline. -
Step 7: Press Activate After completing all the needed information, you can press on the
Activatebutton at the end to finish.
To set up email money transfers on Android (Click here)
-
Step 1: Select Settings Get access to your Shopify app, head to
StoreandSettingsrespectively.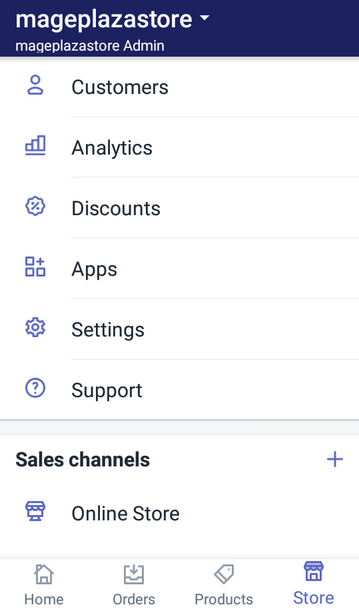
-
Step 2: Choose Payments In the list of settings, there are three smaller categories,
App settings,Store settingsandAbout. Click on thePaymentsunder theStore settingspart.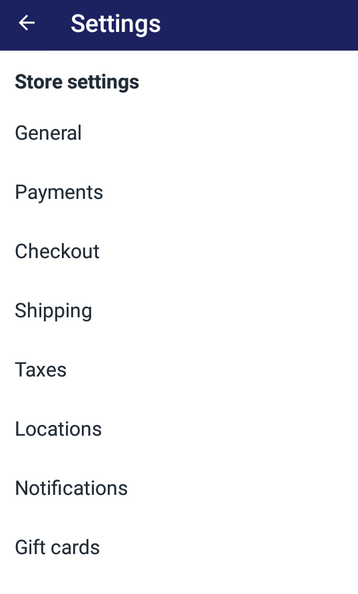
-
Step 3: Tap Create custom payment method At the end of the
Accept payments, you will find theManual paymentssection with the short description and a drop-down menu. Select theCreate custom payment methodin that menu.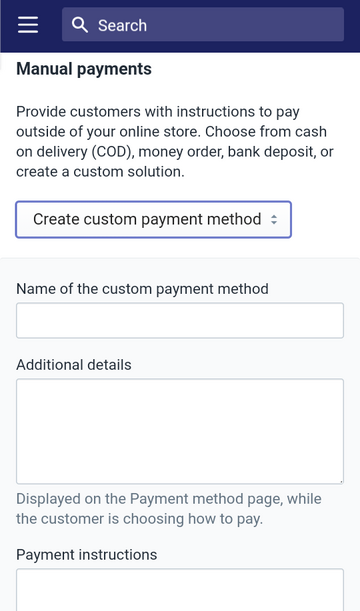
-
Step 4: Enter the name As the introduction has given, this is the email money transfer method then you can use it as the name of the payment.
-
Step 5: Add the email address, secret question and answer The money will be sent through email that enter your email address into the box. When the customers use this method, you need to provide them the secret question and the answer then add it in the
Additional detailsbox as well. -
Step 6: Put in the instruction Copy the text from the
Additional detailsand paste in the instructions box. -
Step 7: Press Activate This is the final step of the process that you just need to tap on the
Activatebutton to enable the payment method.
Conclusion
To conclude, this article talks about the steps to set up email money transfers on Shopify, both for the laptop using and smartphone using. Hope that it can support your store management and you enjoy this topic. If you want more information, check out our posts on Shopify payment.


