How to Set a Staff Account Picture on Shopify
Instead of the default account picture, staff members can use their own picture as their account picture. The personal account picture makes it easier for the account owner and the staff members to recognize and work with each other. Staff members can even create a Gravatar account with their emails and make it their account picture if they want to.
The simple yet easy steps How to set a staff account picture on Desktop, iPhone, and Android are shown below.
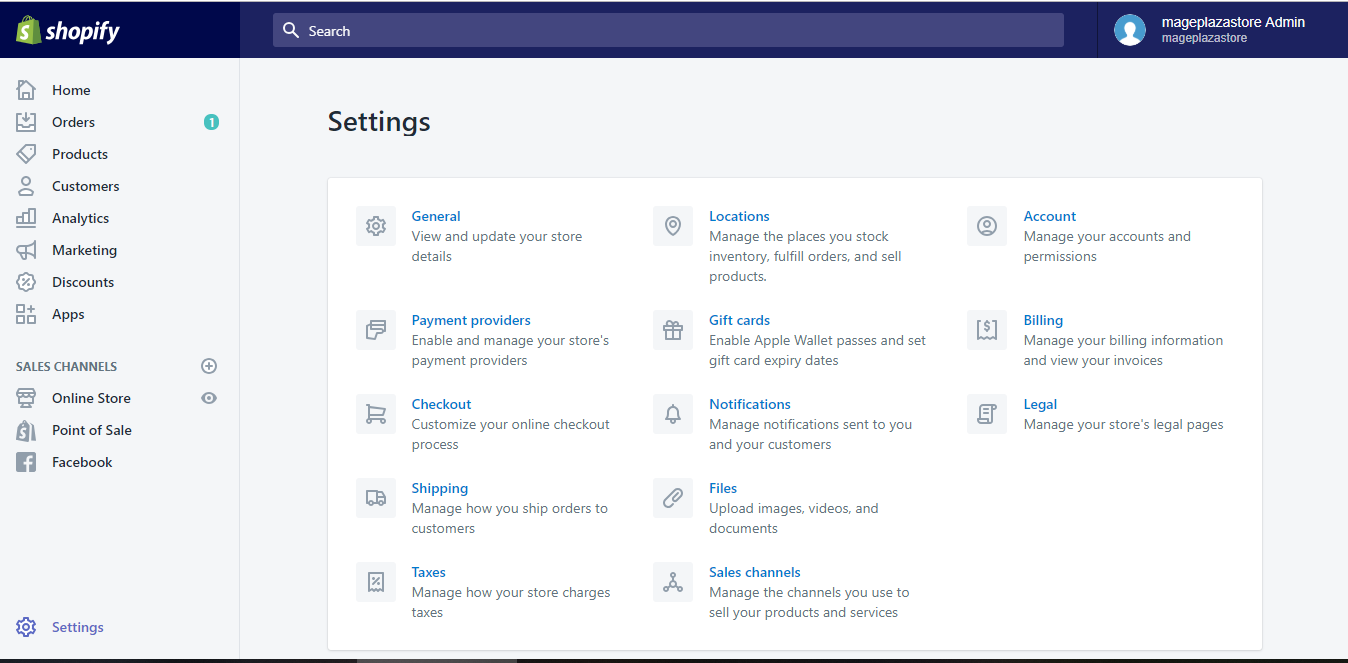
Step 1: Go to Settings
As the admin, go to Settings in the bottom left of your page and click Account for more of your account’s details.
Step 2: Set account picture
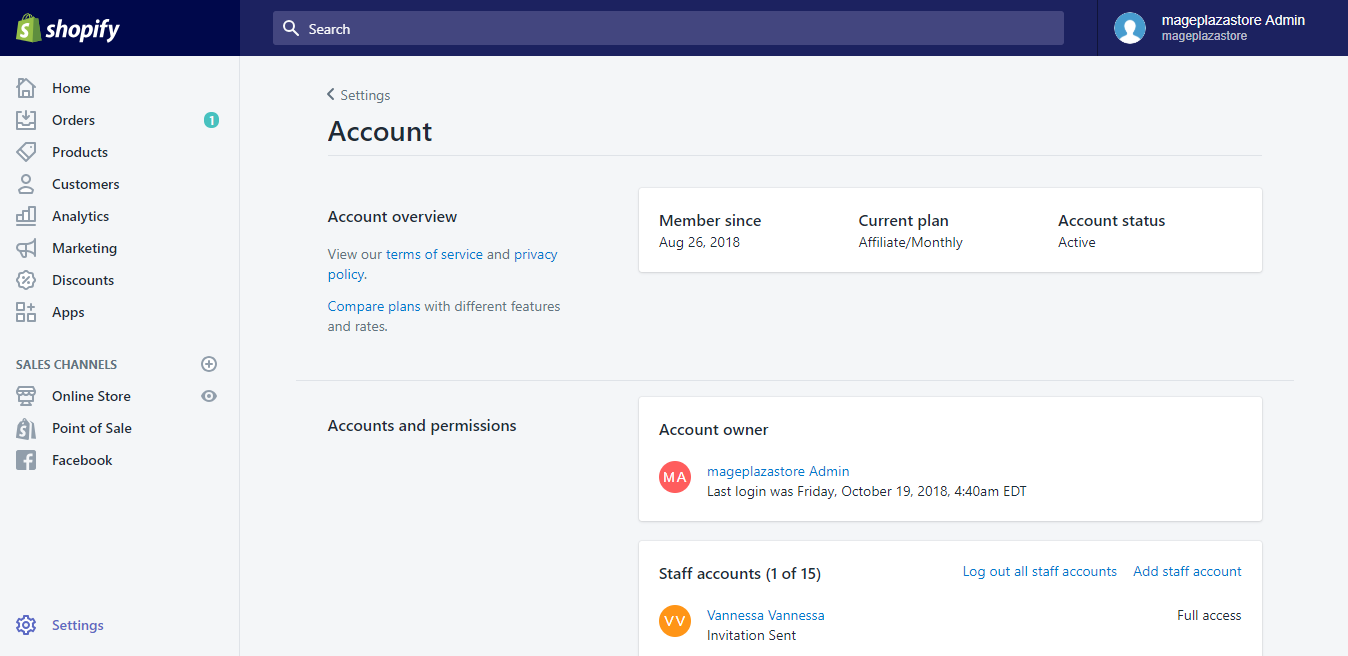
After entering the Account settings page, scroll down to find the Accounts and permissions section. By clicking on the name of the user that you want to edit their details under that section, Shopify will show you the account’s full details.
Step 3: Upload Photo
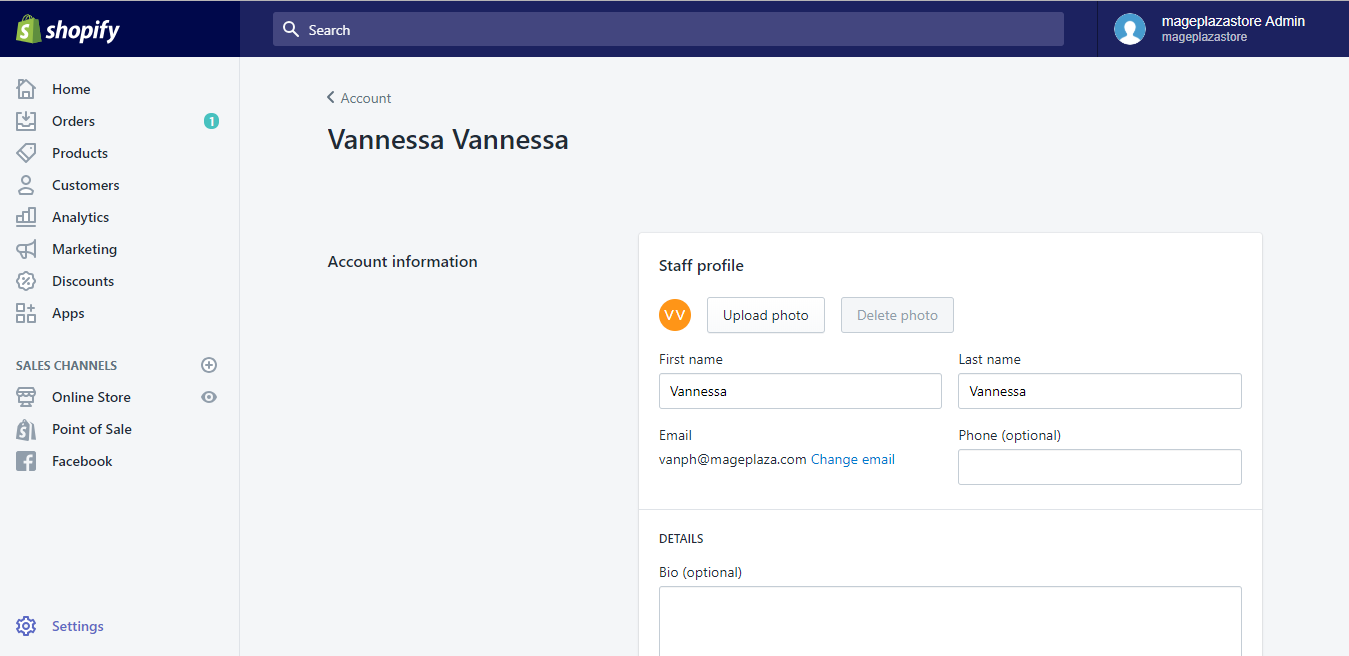
When name clicked, Shopify will lead you to the account details page. In the very first section named Account information, you will see an Upload photo button under the Staff profile line. Click on it to upload the account picture for the account.
Step 4: Confirmation
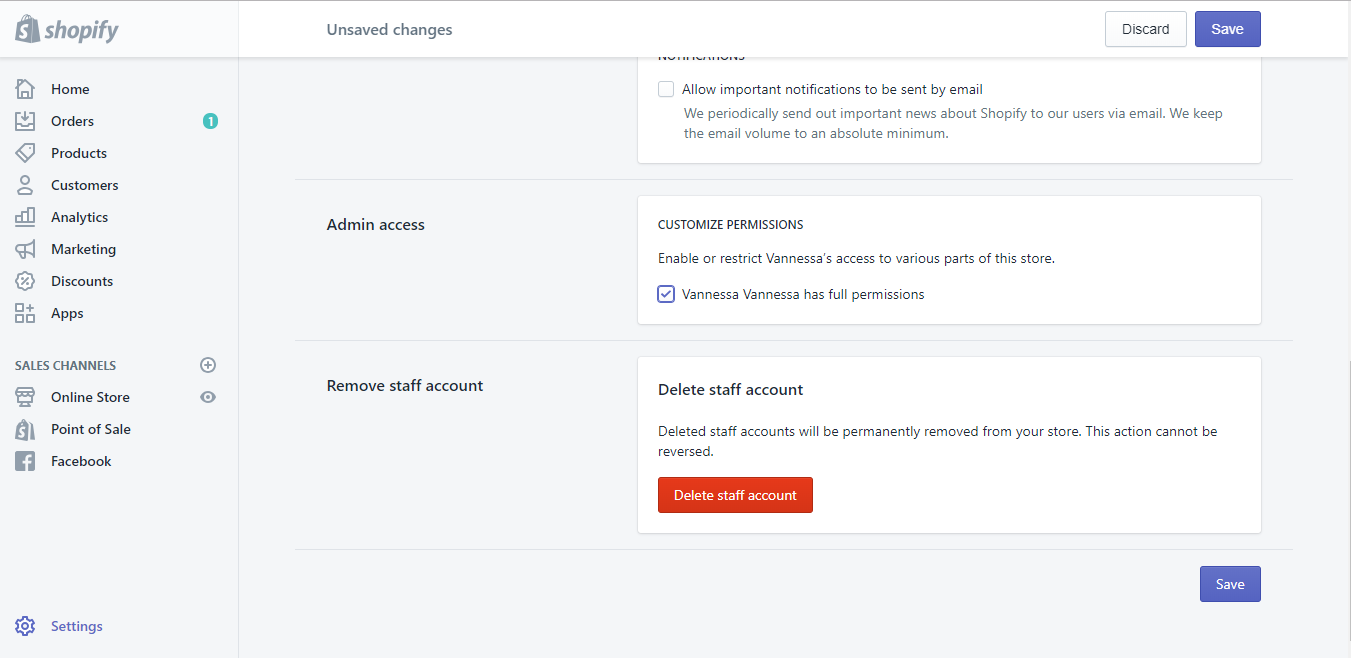
After successfully upload the account picture, choose Save to confirm the changes you made. The button lies both in the bottom right or in the top right of your screen.
To set a staff account picture on iPhone (Click here)
- Step 1: Go to Settings
Go into your Shopify app and choose to enter Store. After going to Store, for more account management, tap on Settings.
- Step 2: Tap Account
After tapping Settings, you will be led into Store settings. Tap Account in the page to move into the account management page.
- Step 3: Choose User
In the Account page, find the Accounts and permissions section in which displays the accounts list. Tap the name of the member you want to update their account picture.
- Step 4: Upload Photo
When tapping the name of the staff member, you will be directed to their account details page. Find the Account information section and tap Upload photo right under that section to choose new account picture for the staff member.
- Step 5: Save Changes
Tap Save when image successfully updated to confirm the change.
To set a staff account picture on Android (Click here)
- Step 1: Go to Settings
After going to your Shopify app, find and tap on the Store button on the bottom right of your page. Scroll down until you see the Settings option pops up and tap on it.

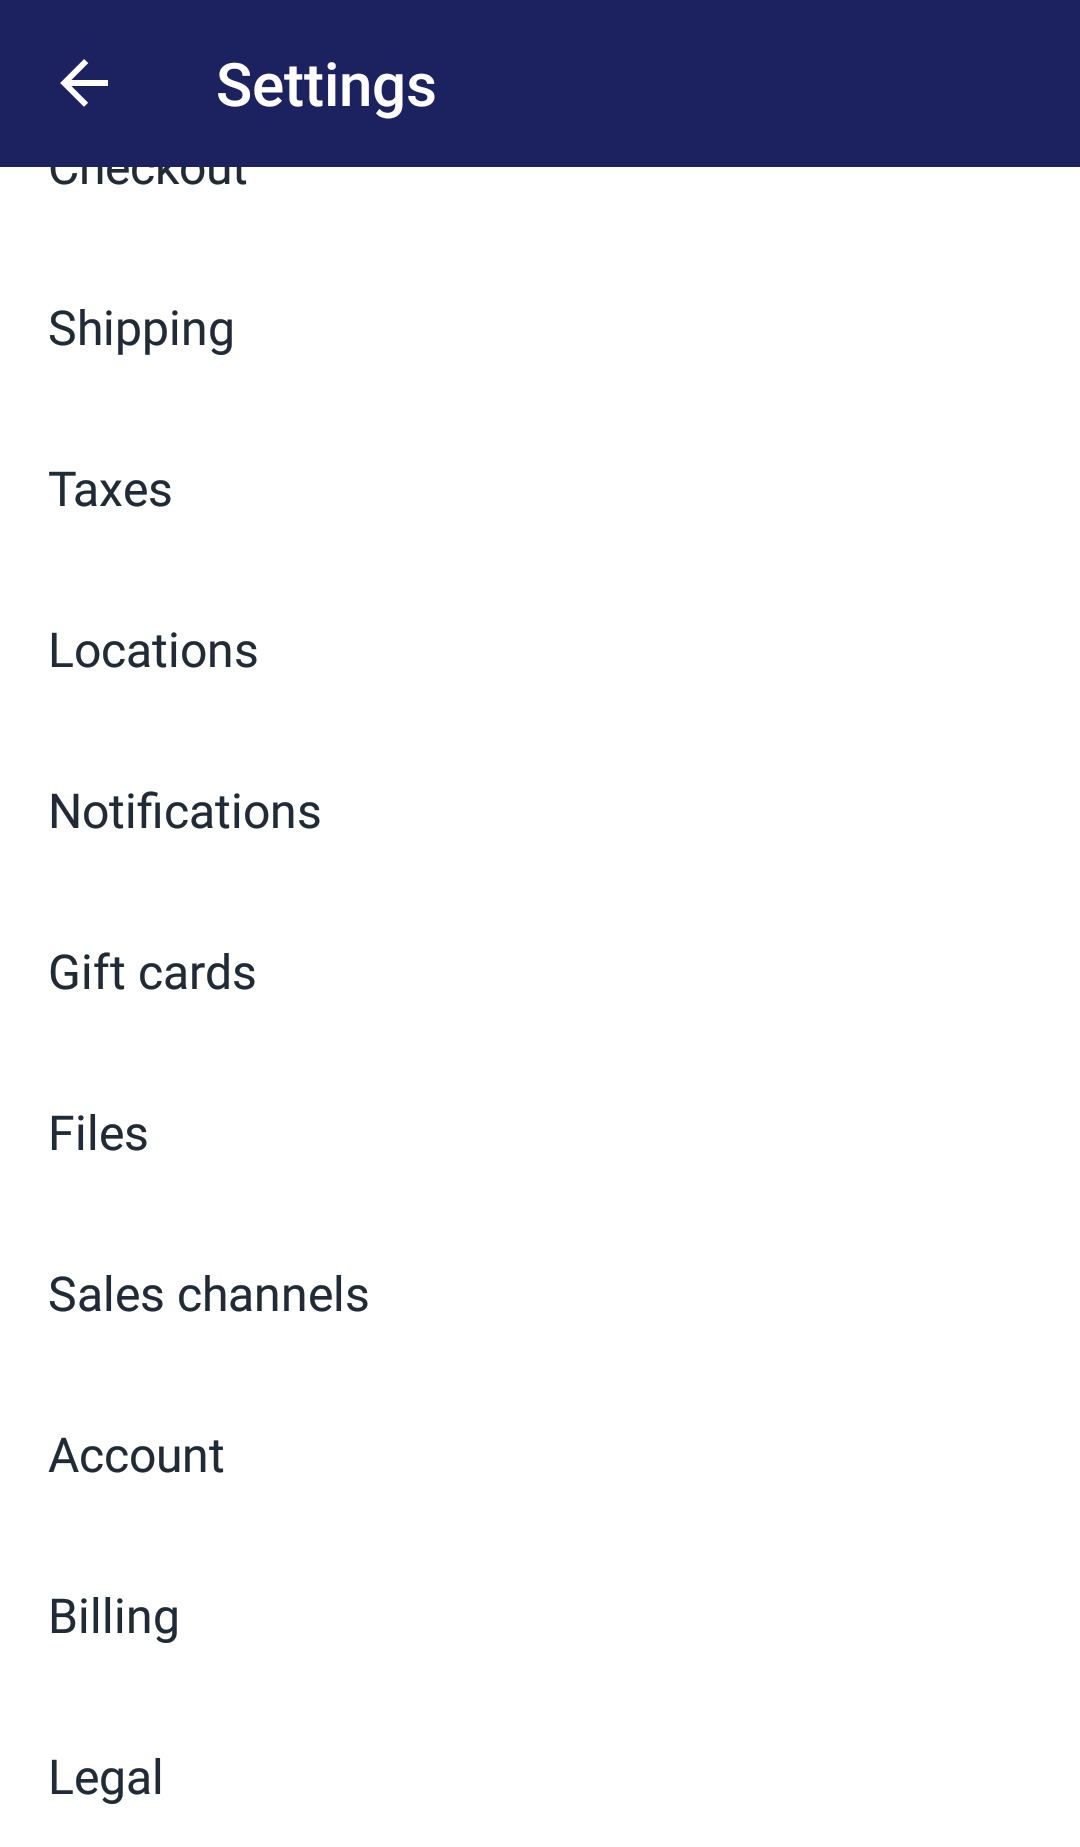
- Step 2: Tap Account
Tap Account under Store settings which will lead you into the account details and settings. It won’t be on the top of your page so you have to scroll down a bit until it shows up.
- Step 3: Choose User
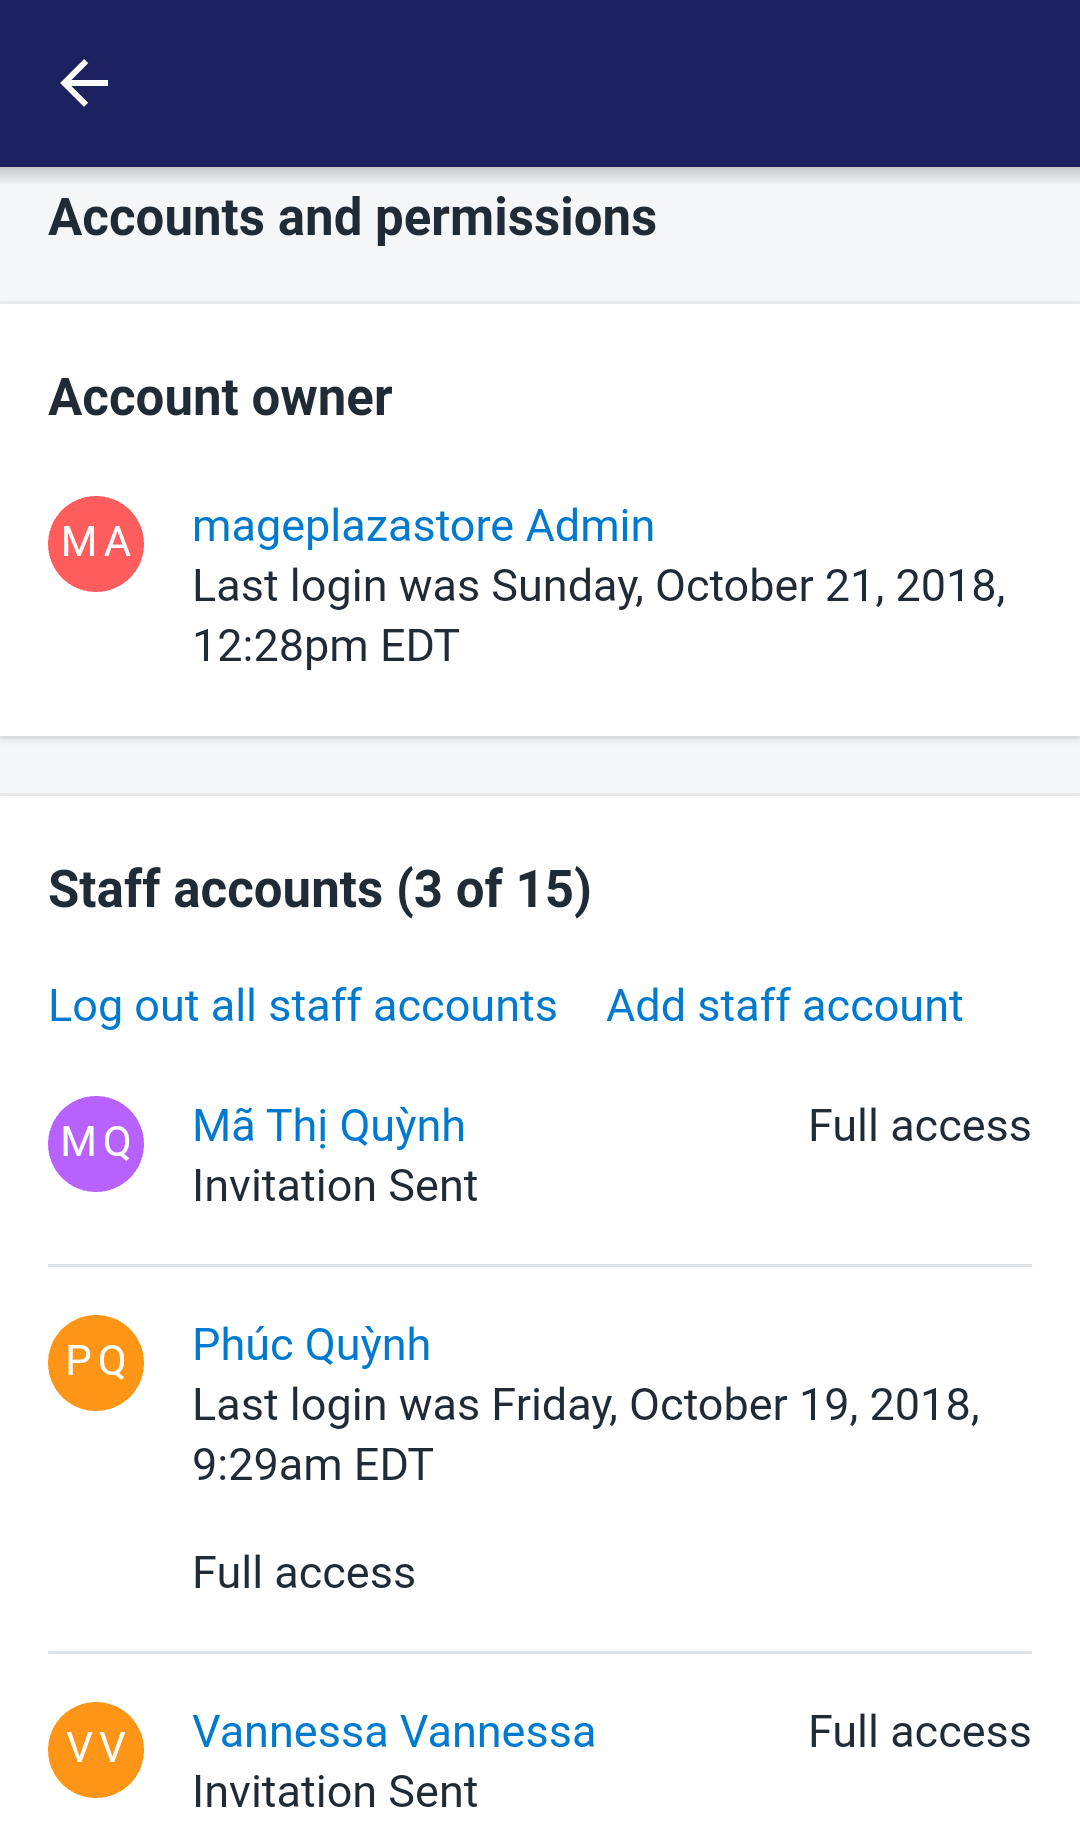
You will be led to Account settings after tapping Account. Find the Accounts and permissions in which the names of the members especially the member you want to update their account picture are displayed. Tap the name of the user you want to update their account picture.
- Step 4: Upload Photo
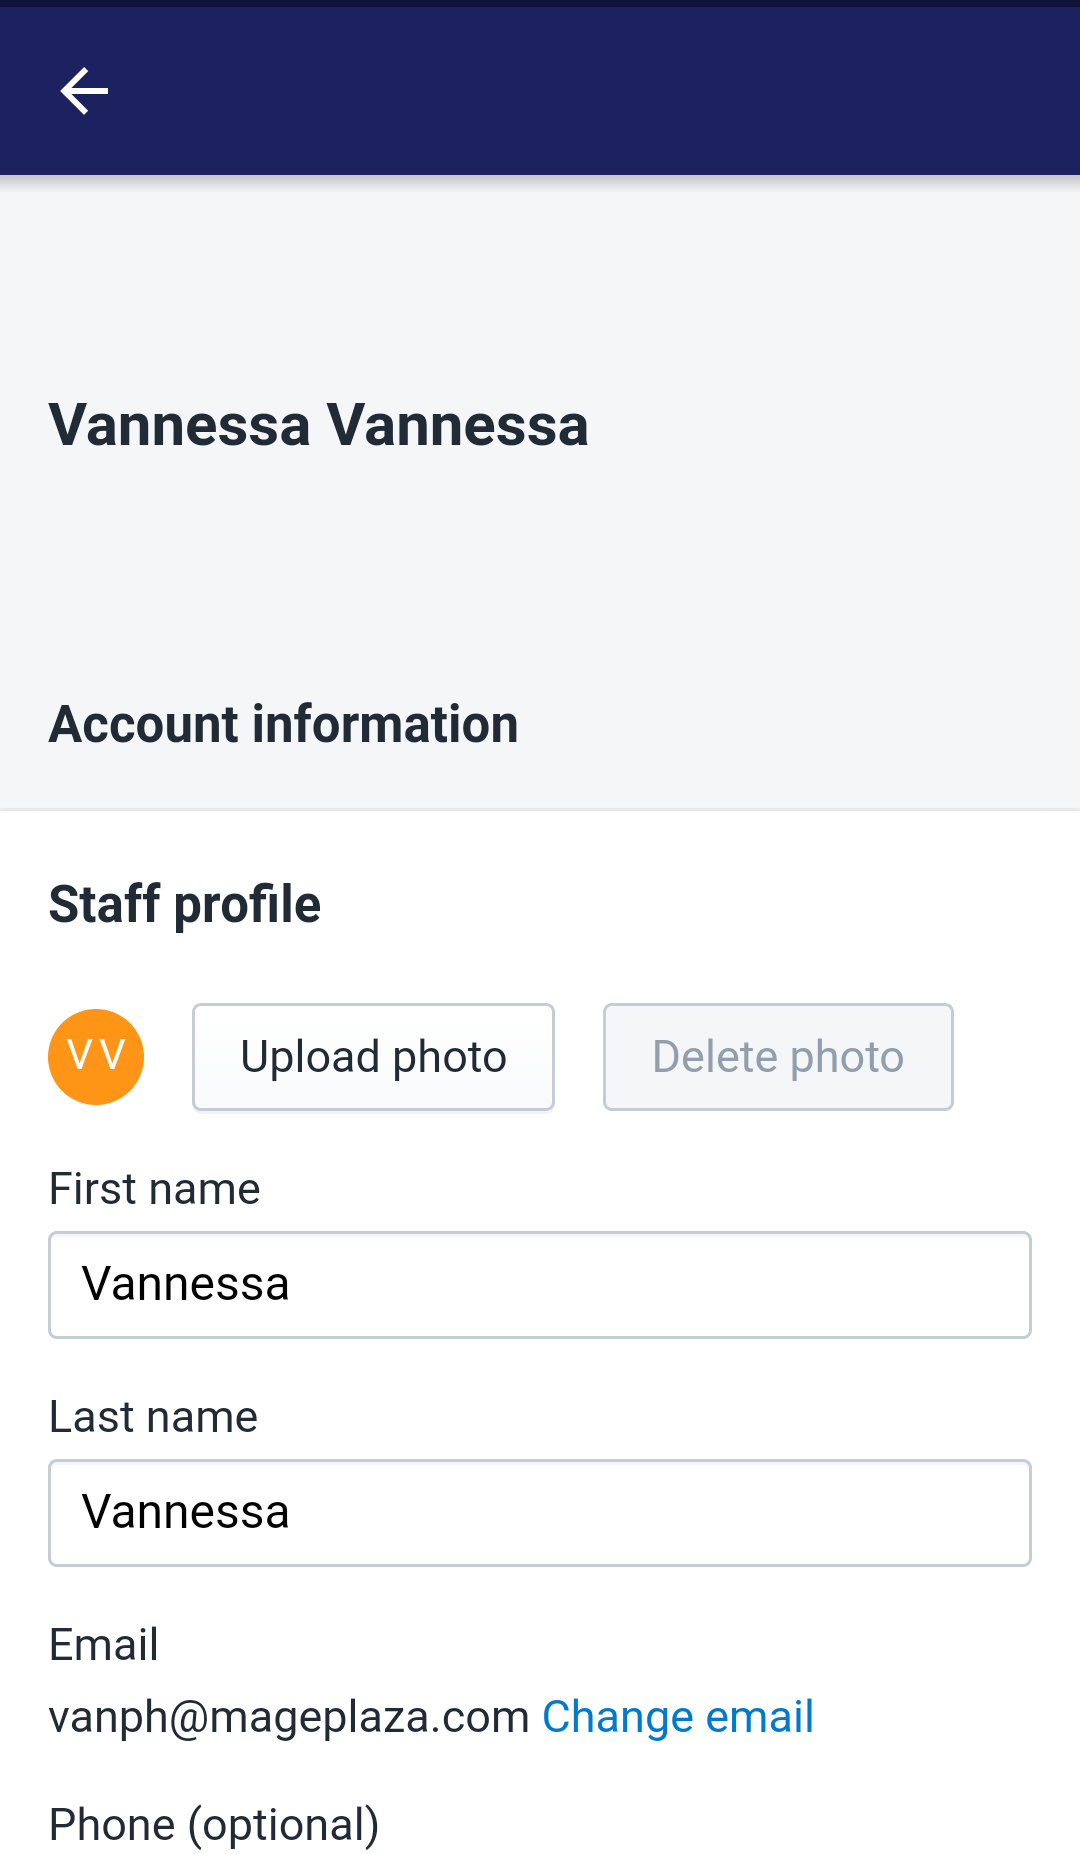
After tapping the user’s name, you will be directed to their account details displaying page. In the Account information section shows up right on top of your screen, tap the Upload photo button under the Staff profile line to upload their new account photo.
- Step 5: Save Changes
Tap Save when the picture is fully uploaded to confirm your changes. The change can be seen since then.

Conclusion
By these above steps, I have finished showing you How to set a staff account picture on Shopify. I hope that you can follow my tutorial easily and rearrange your account details effectively.
Related Posts:


