Set Your Products to be Fulfilled by Custom Service on Shopify
In the previous post I have shared with you about how to activate a custom fulfillment service. If you want to set your products to be fulfilled by your customer service on Shopify, read this post.
As you have already known, on Shopify, there are various services which you can use to fulfill your product such as:
- Shipwire: It connects your online store or marketplace with Shipwire fulfillment centers in the US, Canada, UK, Asia or Australia and will help you to grow and manage your business.
- Rakuten (formerly Webgistix): Rakuten Super Logistics will help you to delivery fastly and accurately. Besides, it will also help you to use the Internet technology effectively.
- Amazon Multi-Channel Fulfillment: This service enables you to fulfill all the orders of your Shopify shop by using your inventory which is stored at the Amazon fulfillment center.
Below are some steps that I have prepared for you on how to set your products to be fulfilled by your customer service on Shopify. With shop owners who use an iPhone or Android to manage their store they can also apply these steps when they set a custom service to fulfill a product.
Related Posts:
- How to Activate Shipwire on Shopify in 5 Simple Steps
- How to Configure New Products for Fulfillment by Shipwire on Shopify
- How to Configure Existing Products for Fulfillment by Shipwire on Shopify
- How to Activate Rakuten Super Logistics on Shopify (on Desktop and Mobile)
How to set your products to be fulfilled by your custom service
Below is the step-by-step guide to set your products to be fulfilled by customer service.
Step 1: Choose a product to be fulfilled by customer service
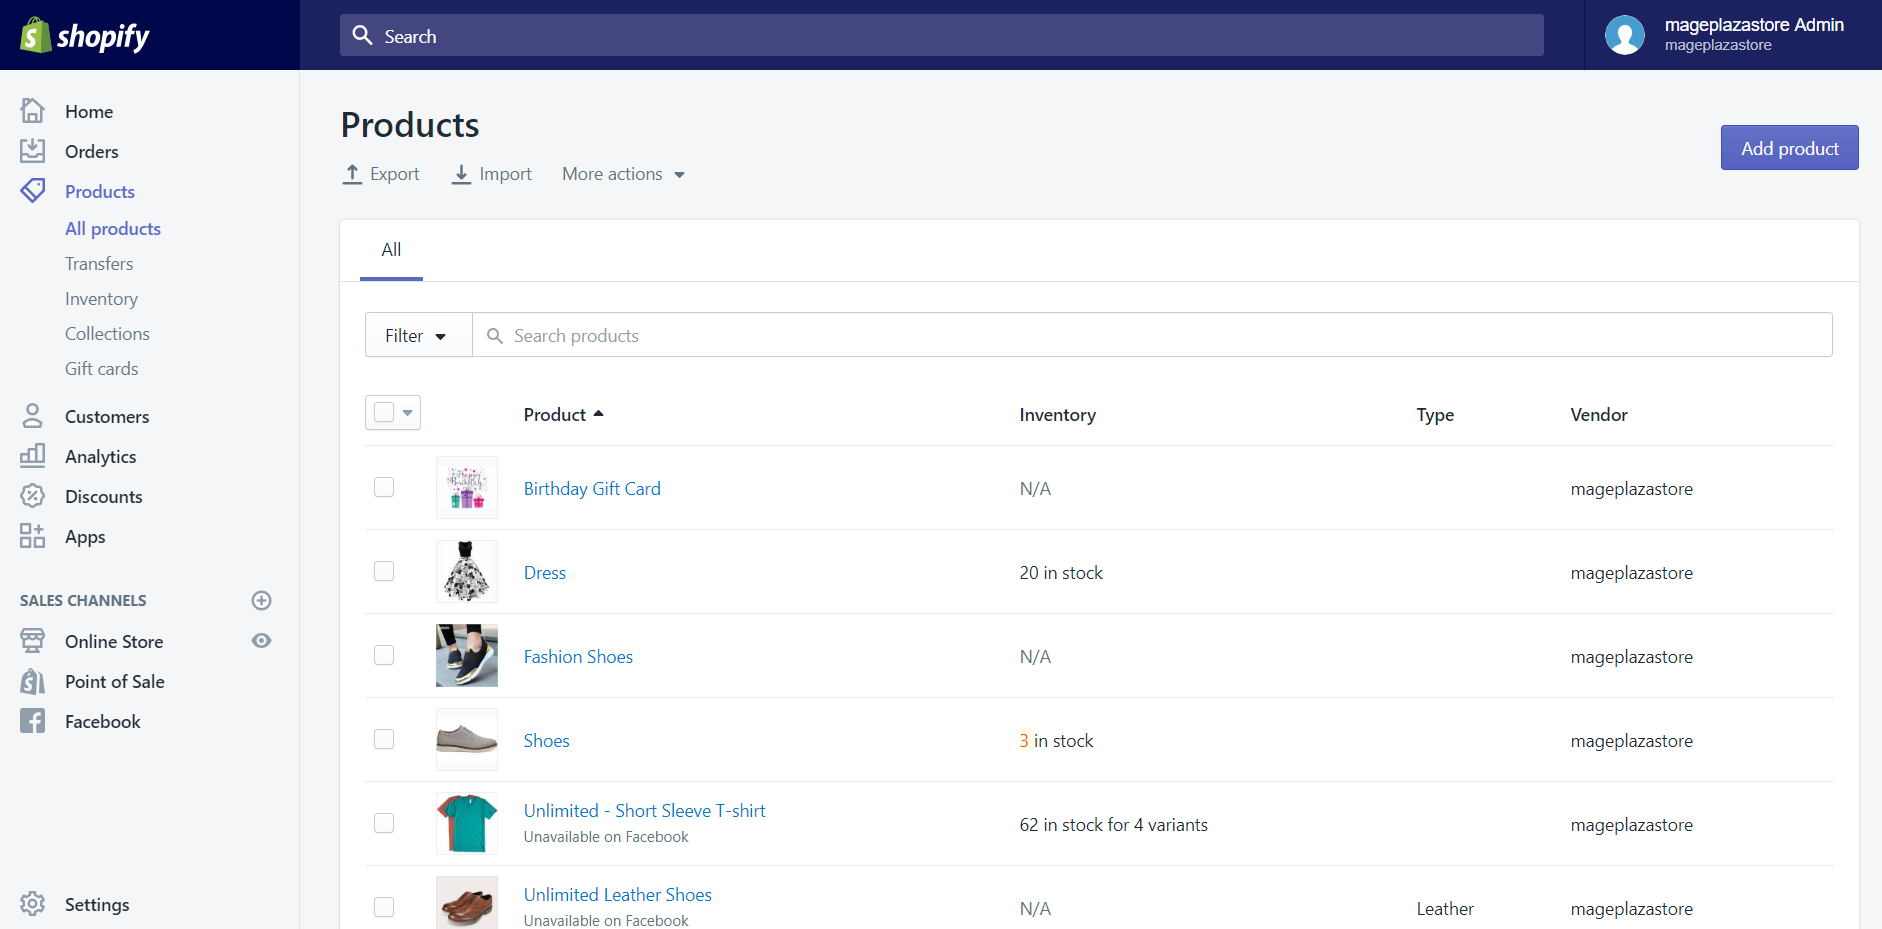
Firstly, you can go to this link and login to your Shopify account. After that, you click on the All products button which is in the Product section. In here, you can view all the products which you have added to the Shopify store. You can then choose a product that you want to use the customer service to fulfill by clicking on the name of that product.

Step 2: Choose a variant
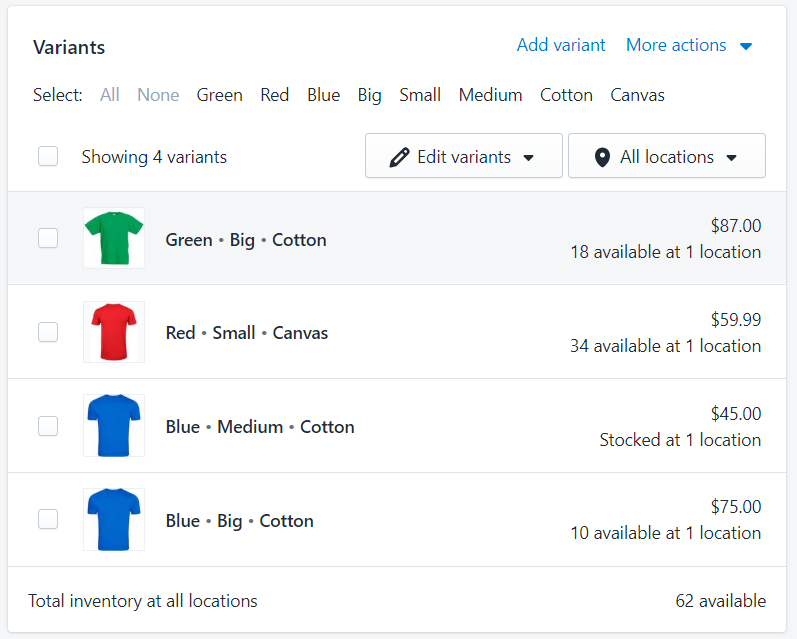
When it comes to a product which has variants, you can only fulfill one variant at a time. So after you have chosen a product, scroll down to the Variants section. Afterward, select the one that you want it to be fulfilled by clicking on the Edit button beside that variant or just clicking on the name of that variant.

Step 3: Select a fulfillment service
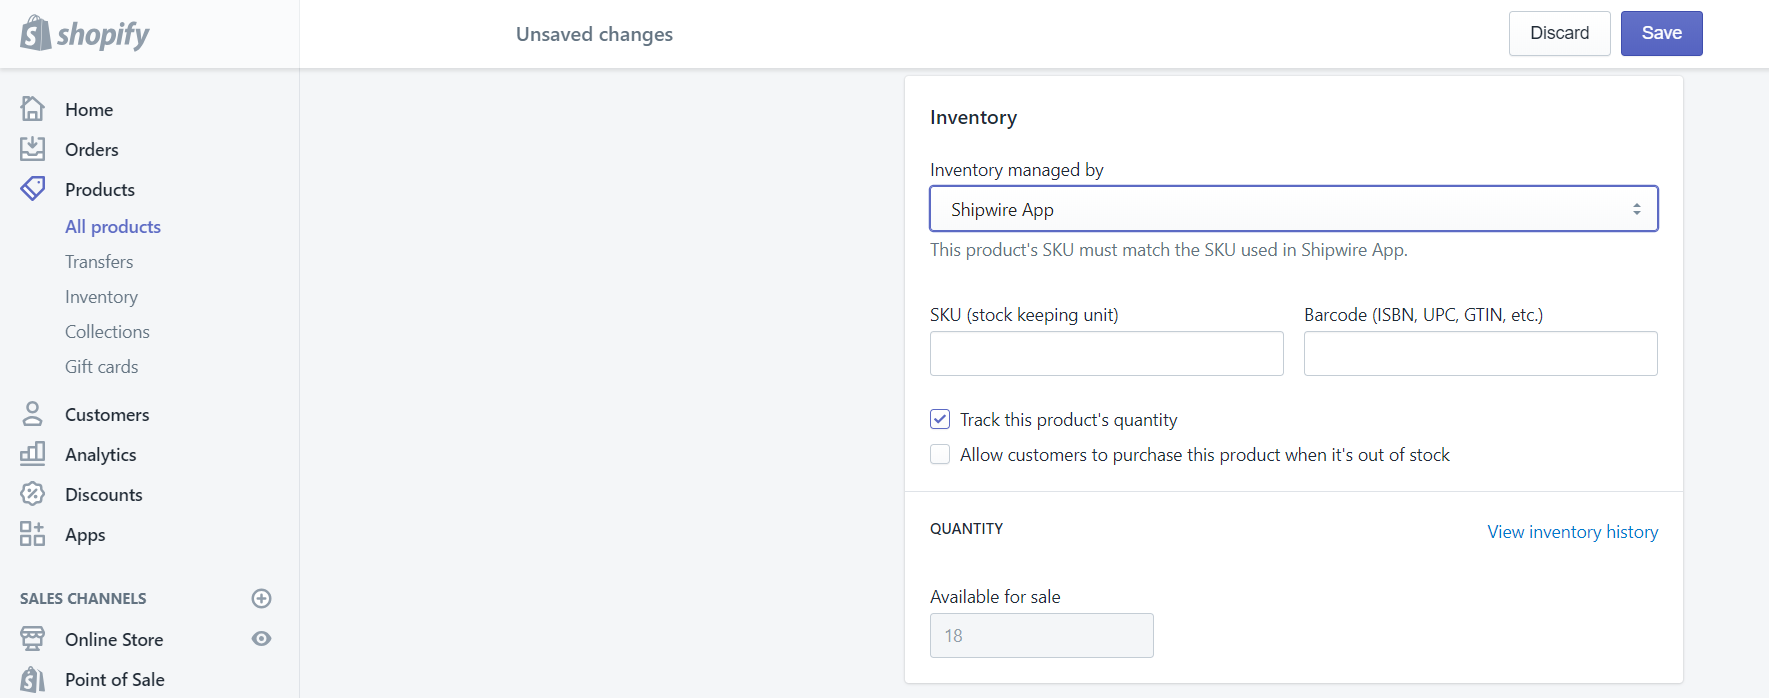
Once you have finished choosing a product or a variant. In the details screen, you can scroll down to Inventory section. In this section, you will see a drop-down list. Subsequently, you can select the fulfillment service that you want to use.

Step 4: Click Save to apply your changes
When you have chosen the service which you think is suitable when fulfilling the product or variant. You need to click on the Save button to apply all the changes you have made. If you forget to click on this button your process might be lost.

Conclusion
Above is the instruction on how to set your products to be fulfilled by your customs service on Shopify. I hope that this tutorial will support you and your crew when managing the Fulfillment and Dropshipping section. To read more posts about adding and managing domains, you can go to our website.


