How to Set Image Alt Text on Shopify
You may know that if your content and the page title is matching with each other, it will increase the rank of your store in the search engine results. But in the body of your page, it may also contain pictures which the search engine cannot read that it may lower your position. Hence, you can add the alternative (alt) text in your images to help the search tools recognize your content. This text can be supportive for someone who has visual impairments as well.
You can add the keywords from the page where the image is included in the alt text. Be noted that the words should be readable and is used to explain what the photo is but not what you expect people to think about it. Moreover, you can insert the alt text for a product image or the featured image of a collection or blog posts, however, there are some differences in the setting up process for a product image and the other two. If you are curious about these process, keep reading to discover how to set image alt text on Shopify.
Related Posts:
- How to Re-Enable Multiple Discounts on Shopify
- How to Set a Compare at Price on a Variant on Shopify
- How to Create a Buy X Get Y Discount on Shopify
- How to Add a Product Image on Shopify
Step 1: Head to Products
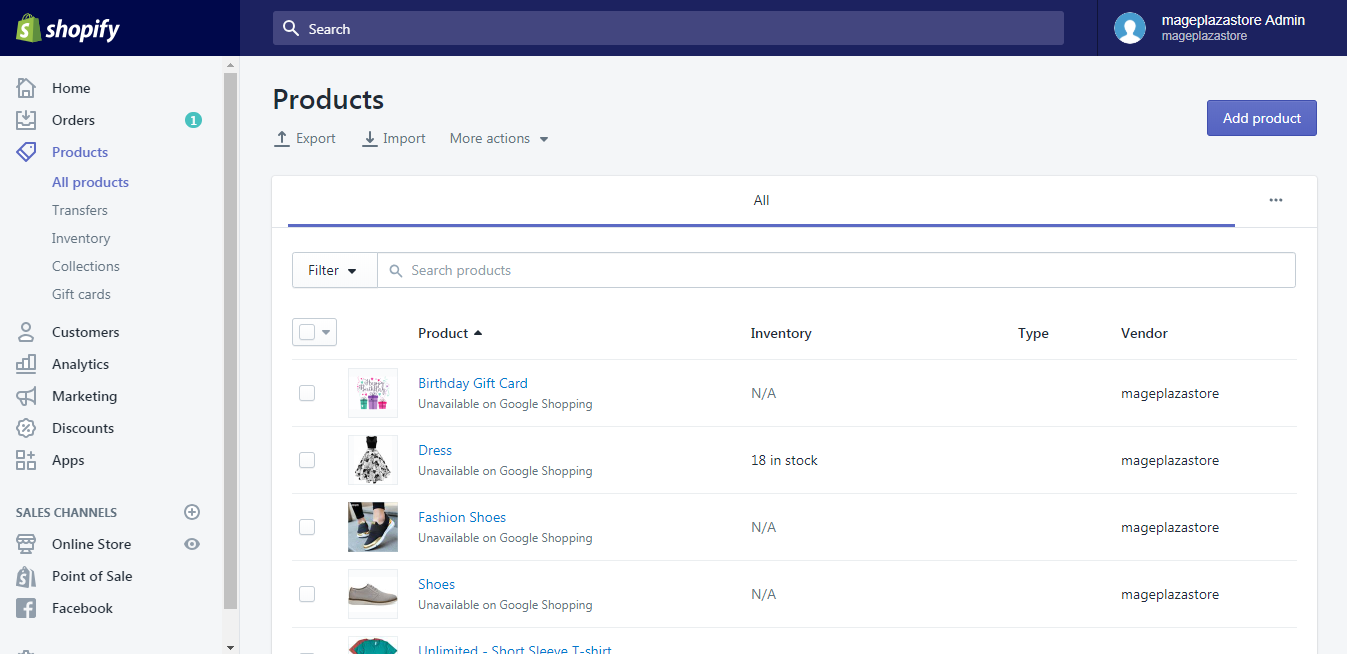
Sign in your account on Shopify then select Products which stays at the third place of the menu and right below the Orders.
Step 2: Pick a product
After clicking on Products, it will automatically direct to All products section that you can see the list of all products on your screen. Pick the one with the picture that you want to adjust.
Step 3: Press on Alt link
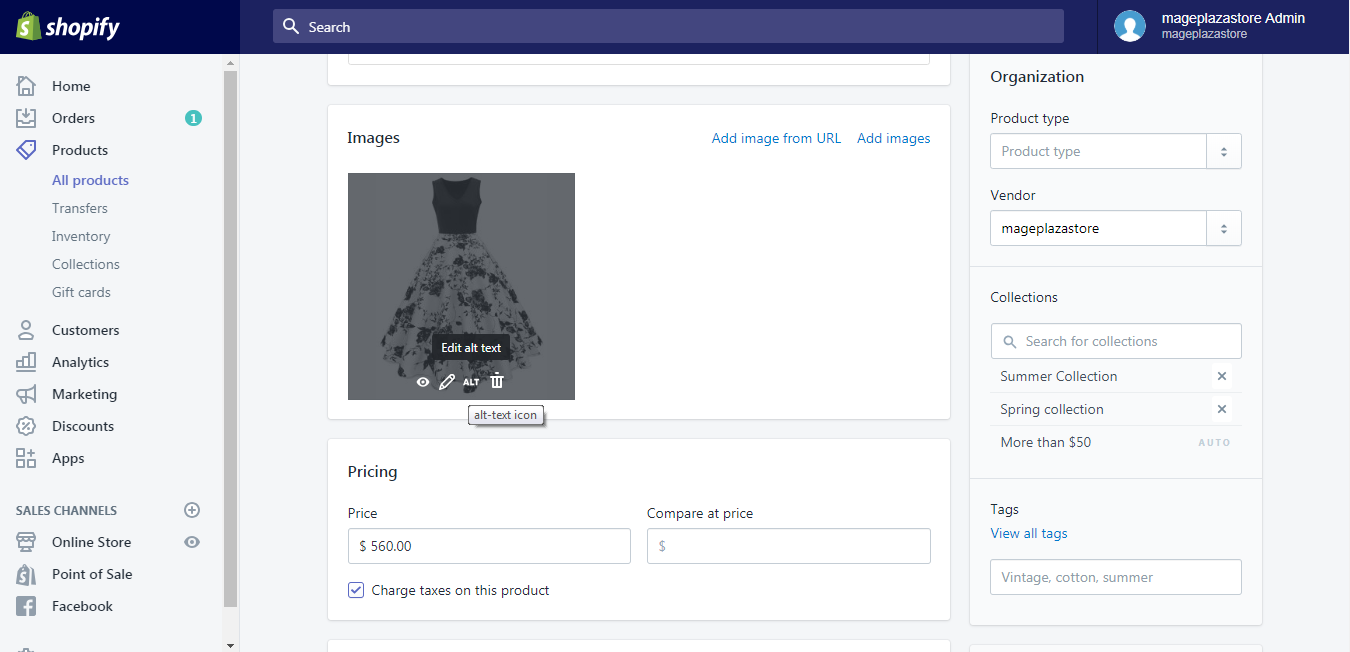
Move the pointer to the image of your product then you will see four icons symboling for Preview, Edit image, Edit alt text and Delete respectively. Click on the ALT which means Edit alt text.
Step 4: Enter the text
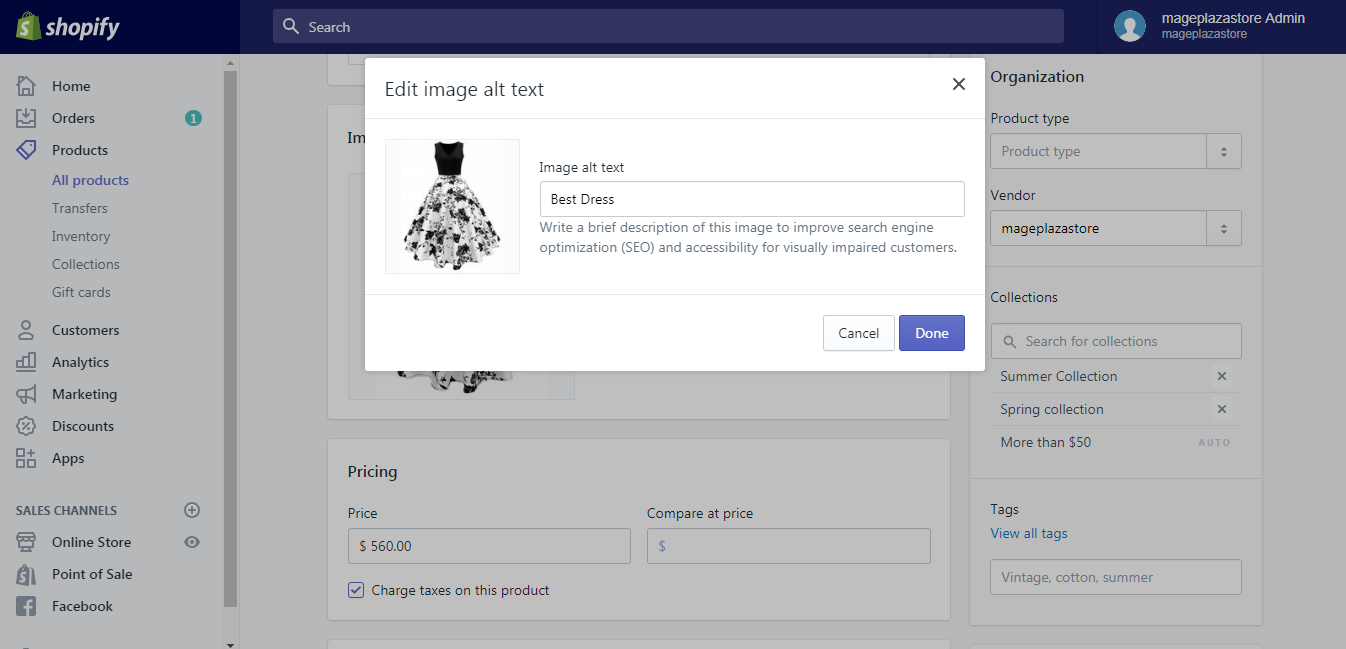
Another dialog box will appear which includes an Image alt text space. Fill the description in that blank. Below it, the system also gives you a short note of what the alt text is.
Step 5: Choose Done
If you are satisfied with your content, choose the Done button to end the process and save your changes.
How to set image alt text for a collection or blog post featured image
- Step 1: Select a collection or blog post
- Step 2: Click Edit image
- Step 3: Add the text
- Step 4: Press Save
Step 1: Select a collection or blog post
Open the collection or blog post that you want to change the image text.
Step 2: Click Edit image
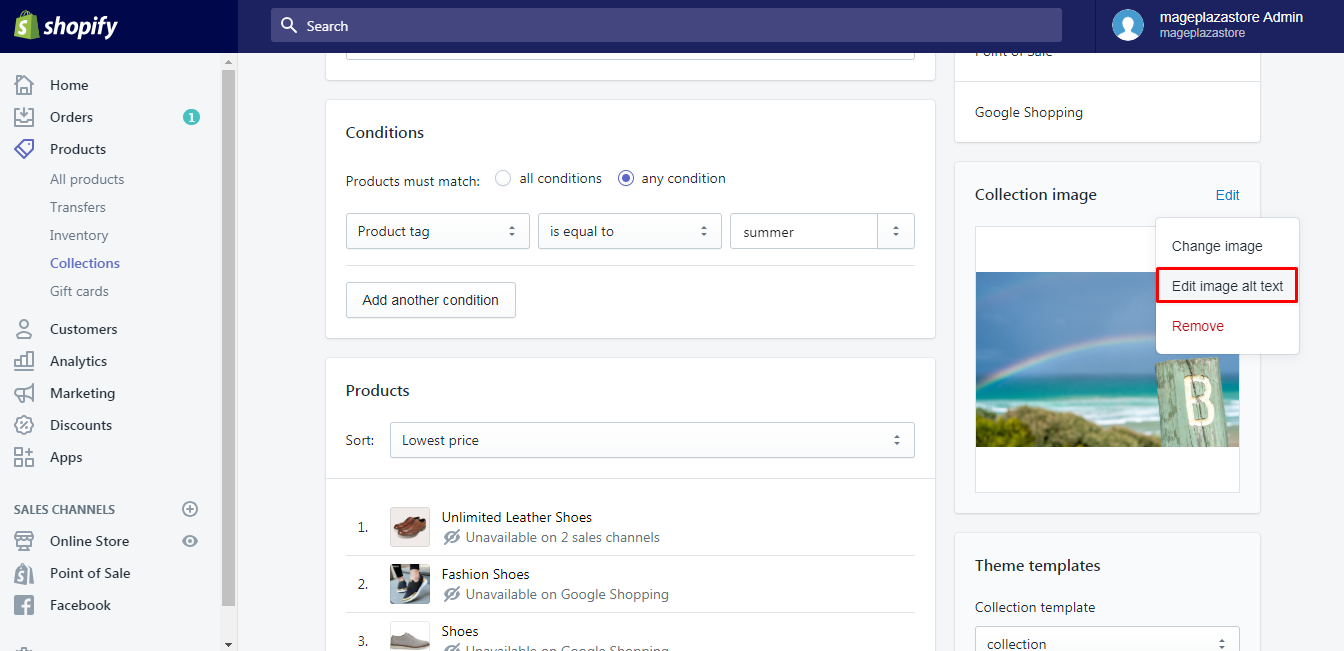
In the Collection image or Post image, select Edit then go to Edit image alt text. If you don’t want to press on too many things, you can also click directly on the featured image of the collection or blog post.
Step 3: Add the text
In the Edit image box, enter the content in the Image alt text.
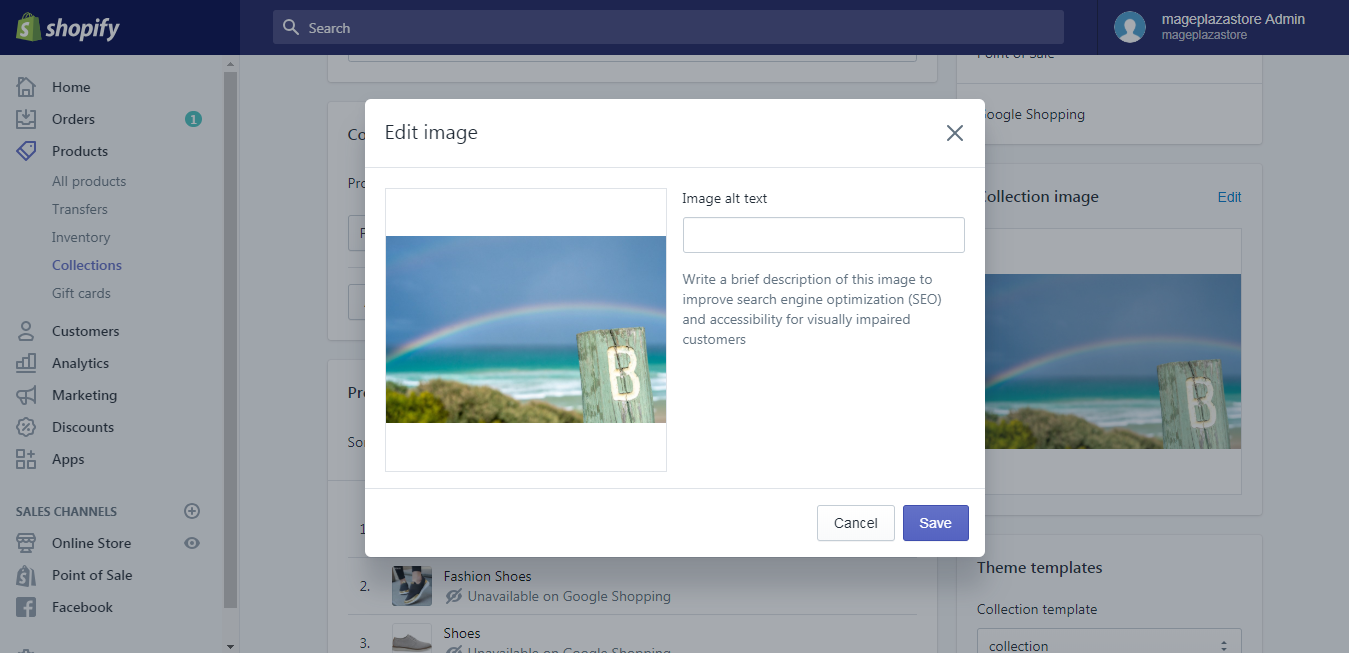
Step 4: Press Save
After completing the adjustment, remember to click on Save to help the system record all your changes.
Conclusion
Overall, the above steps are all about how to set image alt text on Shopify. The process is quite short and easy-to-practice that it will take about five minutes as much to complete. By following this writing, you can improve your page rank then it can increase your customers as well as your revenue that I hope you can take this advantage for your own benefits.


