4 Steps to Remove a Physical Presence on Shopify
After creating some physical presences, there may come a time you prefer to delete one. It is unnecessary in the current time so that removing it is the best decision to keep the physical presence list in neat. This writing provides you the easiest way to follow to remove a physical presence on Shopify. With the illustrated images, you won’t be confusing with plenty of words. Moreover, it would be convenient for you to do it not only on a desktop but also on smartphones.
Related Posts:
- How to Enable VAT Rates for Digital Goods on Shopify
- Set Tax Rate for New POS Location on Shopify - A How-to Guide
- How to Create Collection for Products that need Tax Override on Shopify
- 3 Steps to Set a Product to be Exempted from Sales Tax on Shopify
- How to Include Taxes in Product Prices on Shopify Here are the details.
Note: The specific state which your store based in needs at least one physical presence. Therefore, remember to keep one available in the list. Once you delete the last one, it will be added again by default.
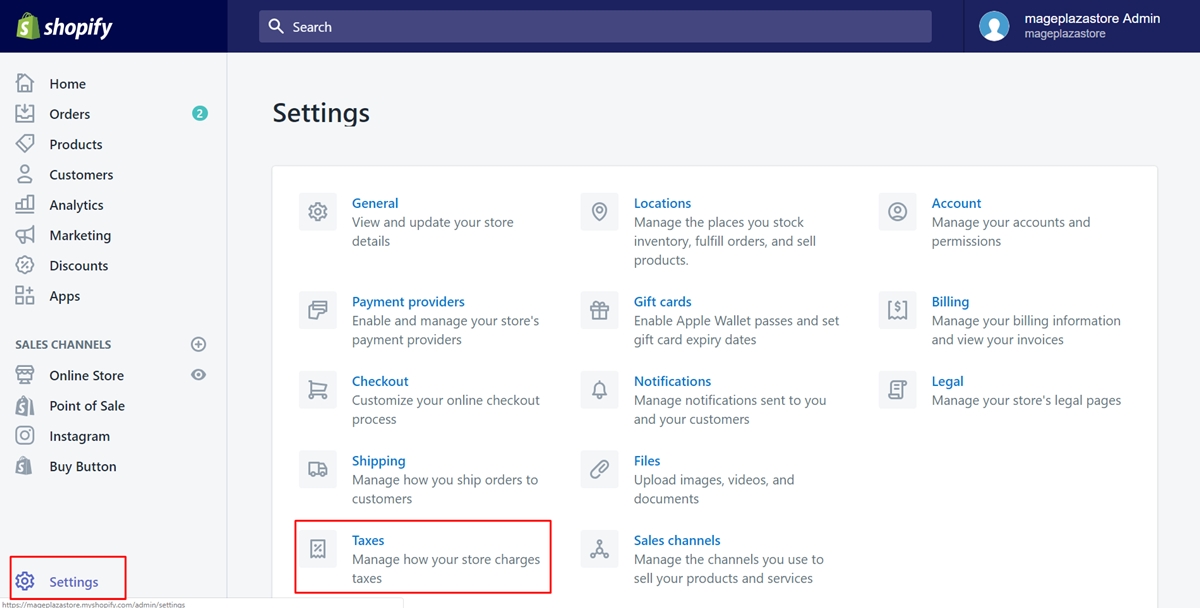
Step 1: Click Settings and Taxes
Sign in your account to access to the admin page. Then, look at the button list on the left and scroll down. Make sure to choose Settings. Go to Taxes.
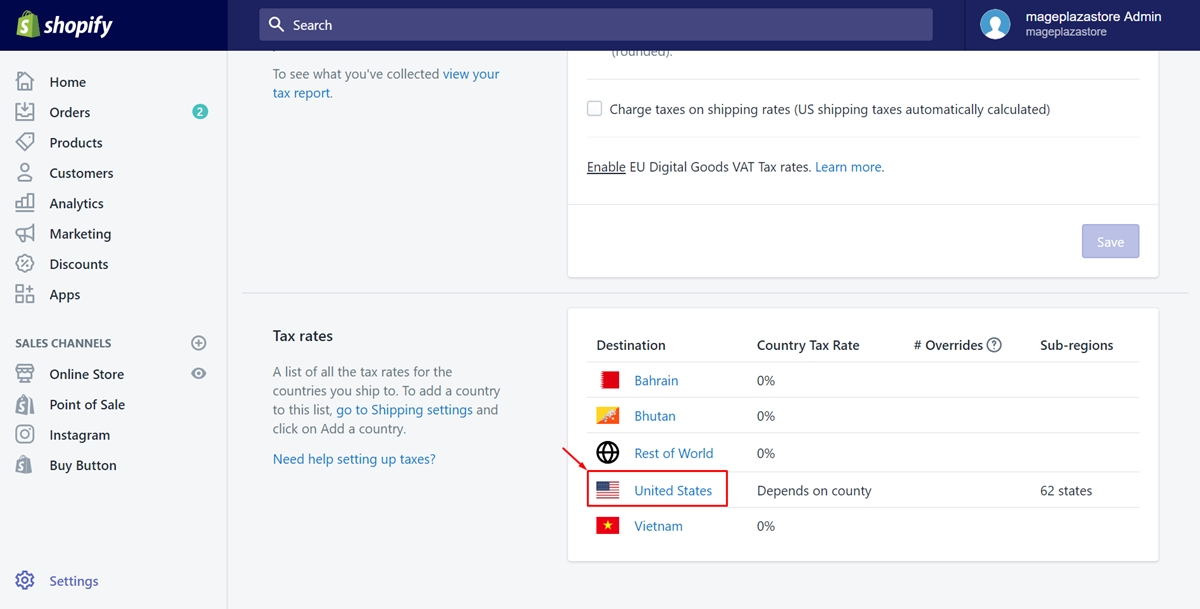
Step 2: Choose United States
You should scroll down to view the Tax rates field. Here come all the destinations. Choose the United States by clicking on its name to delete a physical presence there.
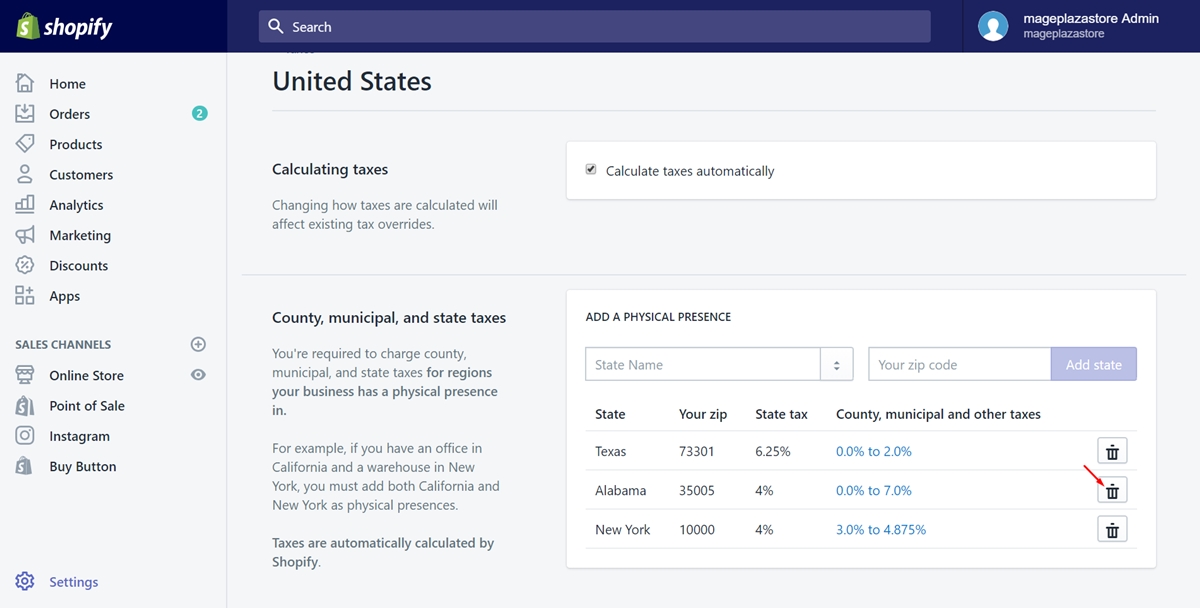
Step 3: Remove physical presence
As you can see, all the states you’ve created before will appear. There is a trash bin icon next to each state. To remove the physical presence you expected, just tap on the icon beside it. For example, I want to delete Alabama so that I select the button I’ve pointed in the following picture.
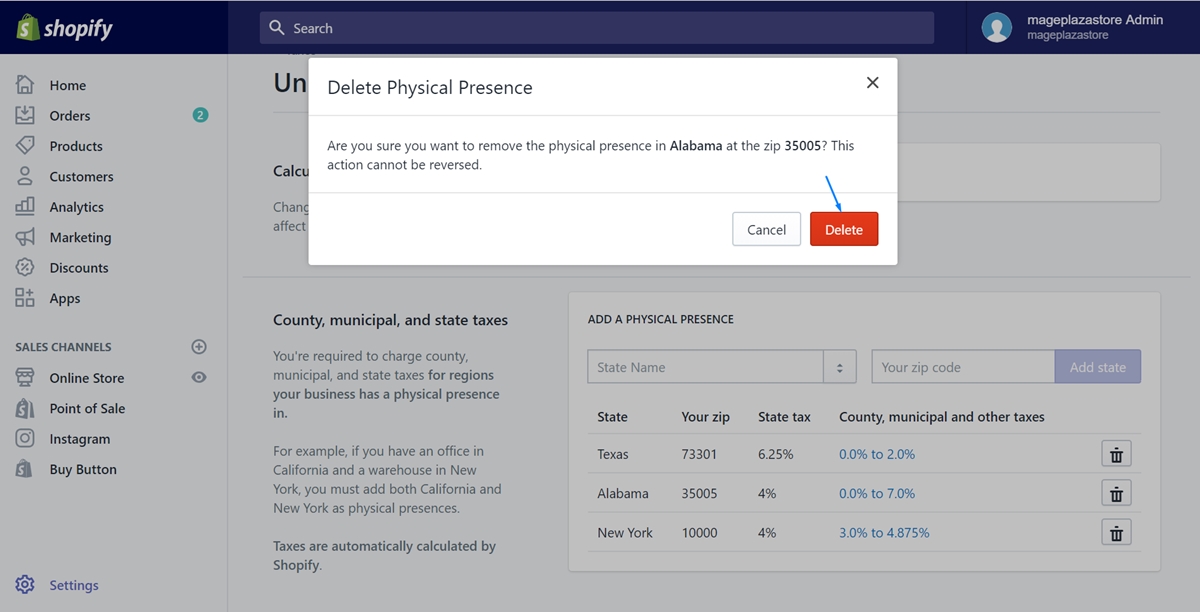
Step 4: Click Delete
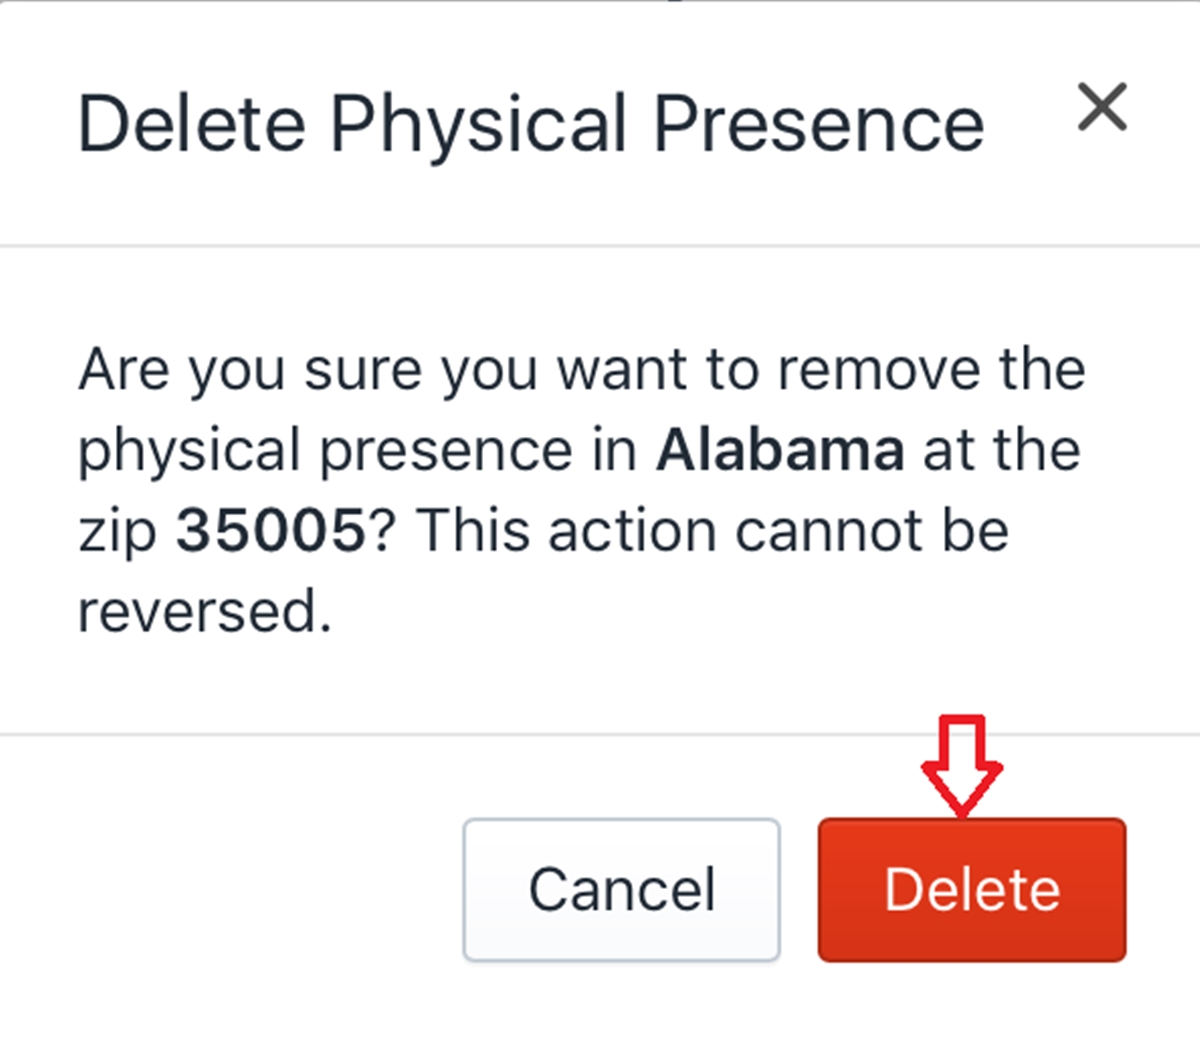
A small dialog will come out to get your confirmation about removing the physical presence. Click Delete to delete it permanently.
To remove a physical presence on iPhone (Click here)
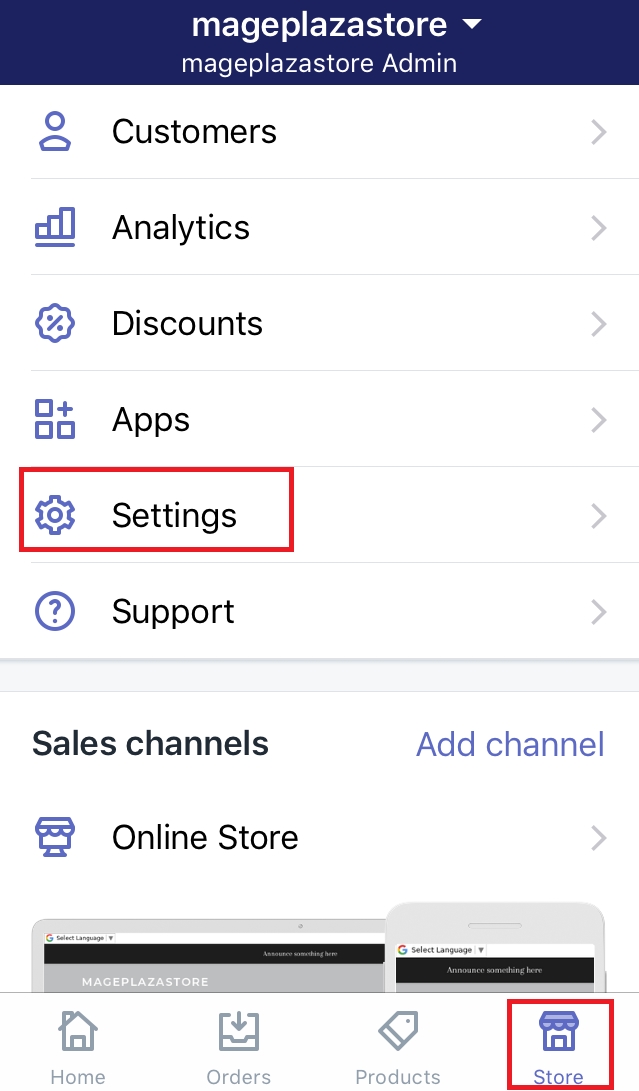
- Step 1: Click Store and Settings
To go to the admin page, you need to log in your Shopify account firstly. Click theStoresection at the bottom of the page. Then, go toSettings.
- Step 2: Choose Taxes
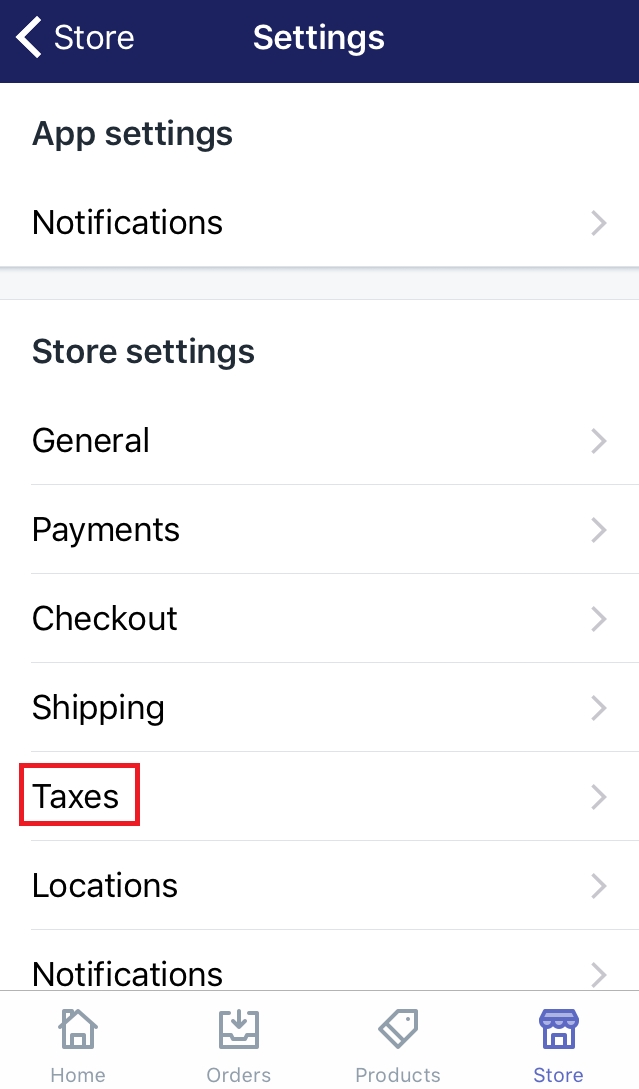
In this step, press on theTaxesbutton to continue.
- Step 3: Click United States
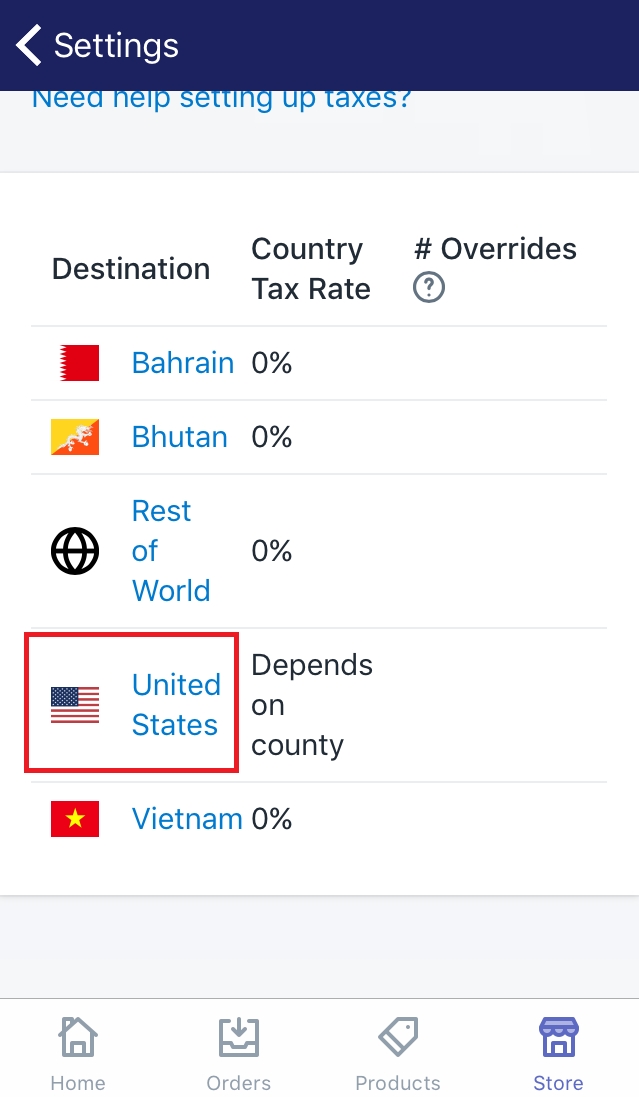
To delete the state in the United States, make sure to choose theUnited Statesby tapping on its name in the destination list.
- Step 4: Press on the Trash bin icon
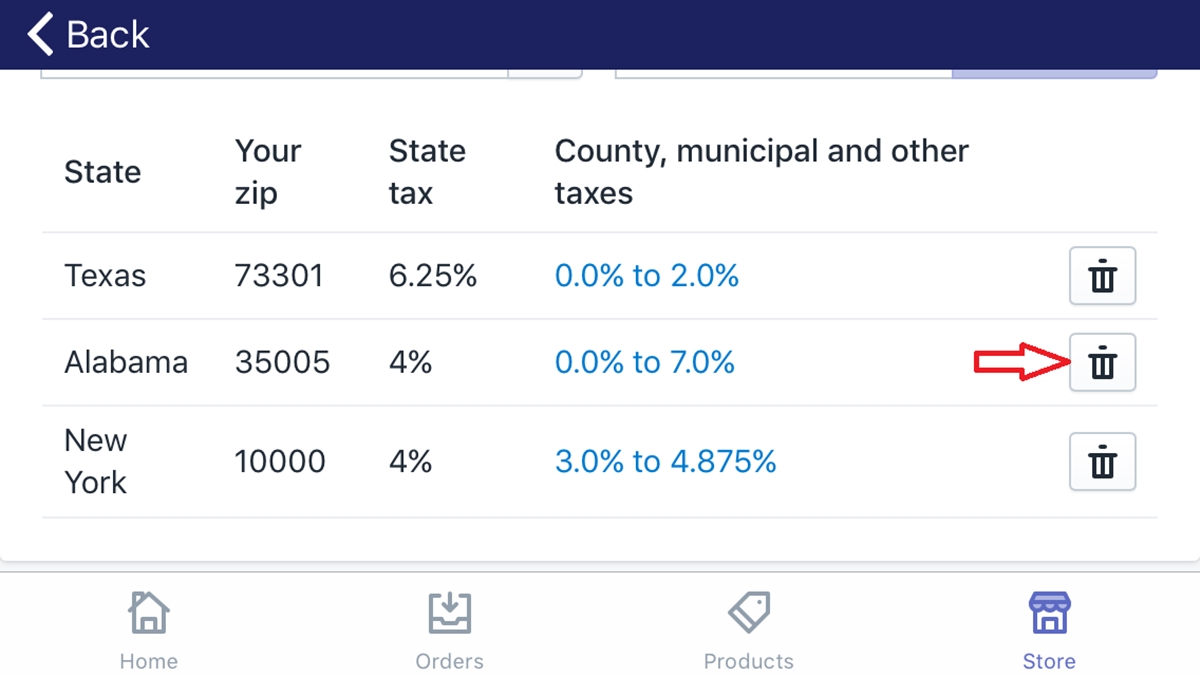
Afterward, you can see a trash can icon next to each state. To remove the state, what you need to do is just clicking on the trash bin icon beside it. For example, I want to delete Alabama so that I click on the button which I’ve pointed in the below picture.
- Step 5: Click Delete
You will be asked again to make sure to remove the physical presence. After considering carefully, tap on it to finish.
To remove a physical presence on Android (Click here)
-
Step 1: Click Store and Settings
To go to the admin page, you need to log in your Shopify account firstly. Click theStoresection at the bottom of the page. Then, go toSettings. -
Step 2: Choose Taxes
In this step, press on theTaxesbutton to continue. -
Step 3: Click United States
To delete the state in the United States, make sure to choose theUnited Statesby tapping on its name in the destination list. -
Step 4: Press on the Trash bin icon
Afterward, you can see a trash can icon next to each state. To remove the state, what you need to do is just clicking on the trash bin icon beside it. -
Step 5: Click Delete
You will be asked again to make sure to remove the physical presence. After considering carefully, tap on it to finish.
Conclusion
The above guide is about how to remove a physical presence. Hope you find some benefits from this to delete one and generate Shopify more effectively. For more information, you can check out our posts on tax.


