How to Publish Web Pages in Bulk
As an ideal e-commerce platform, Shopify gives you a helpful feature to customize the publish many web pages in bulk at once. Moreover, just by taking some simple steps in about five minutes, you’ve done with this. Thanks to this, you can save lots of time, especially when you move from another website to Shopify.
Below is a step-by-step instruction for you on how to publish web pages in bulk on Shopify.
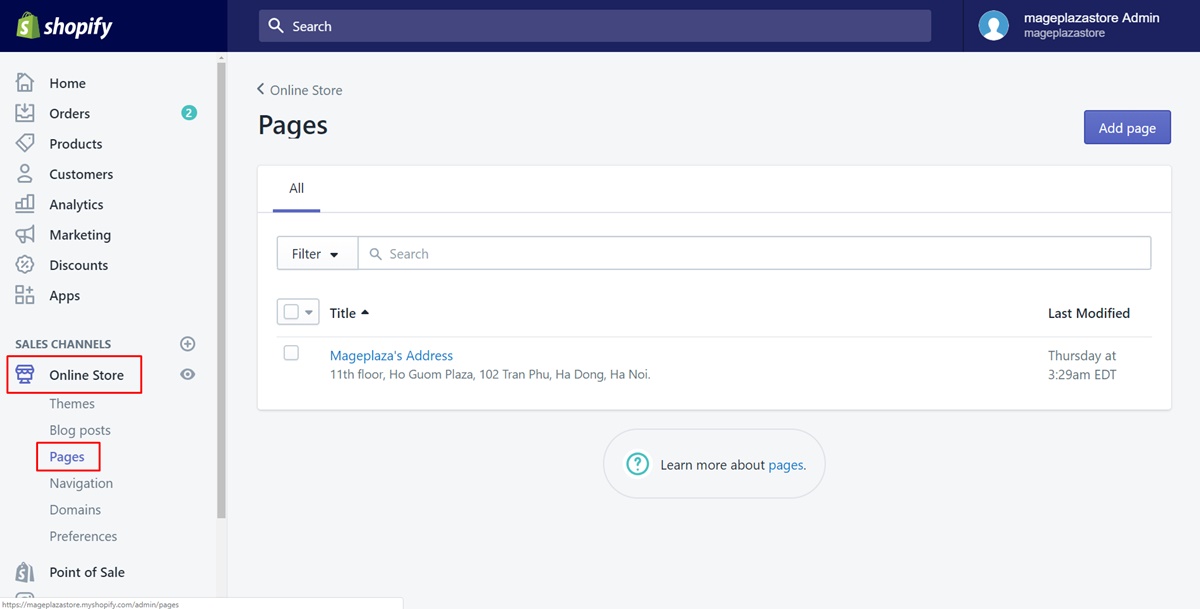
Step 1: Choose Online Store and Pages
In order to access the admin page, you have to log in your account. Then, take a view of all the sections displayed on the left of the screen. Make sure to choose Online Store. Press on the button named Pages.
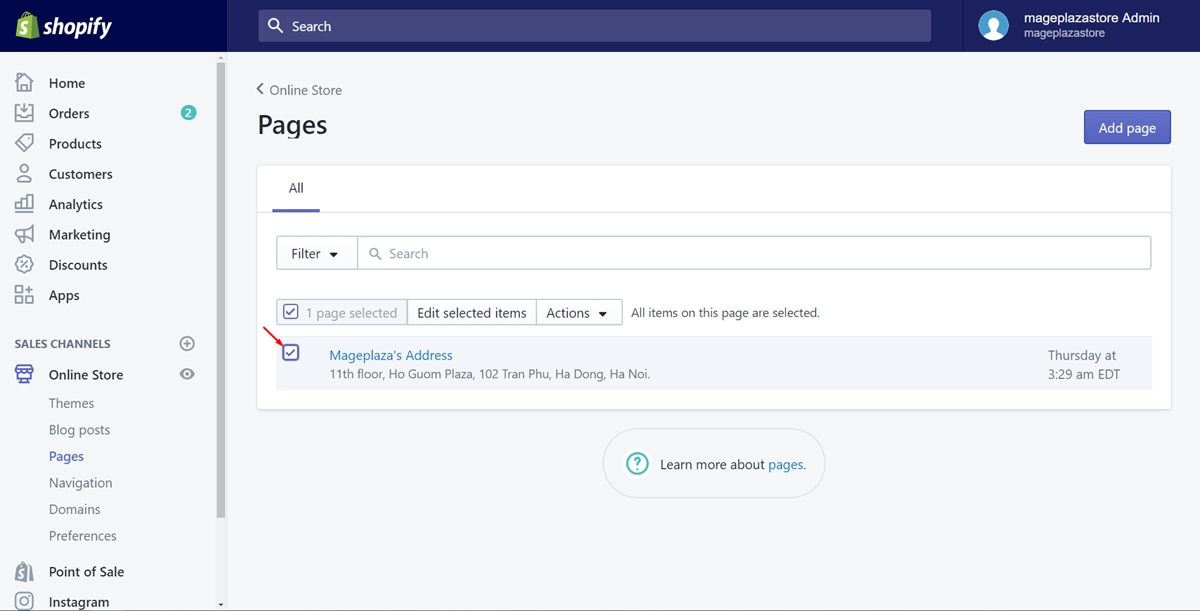
Step 2: Check the checkbox
In this step, you can choose how many web pages you prefer to publish. After you’ve decided, check the boxes beside the title of the web pages. You can check a box or more. It depends on your decision. The below image will help you to find the exact location of the box to check.
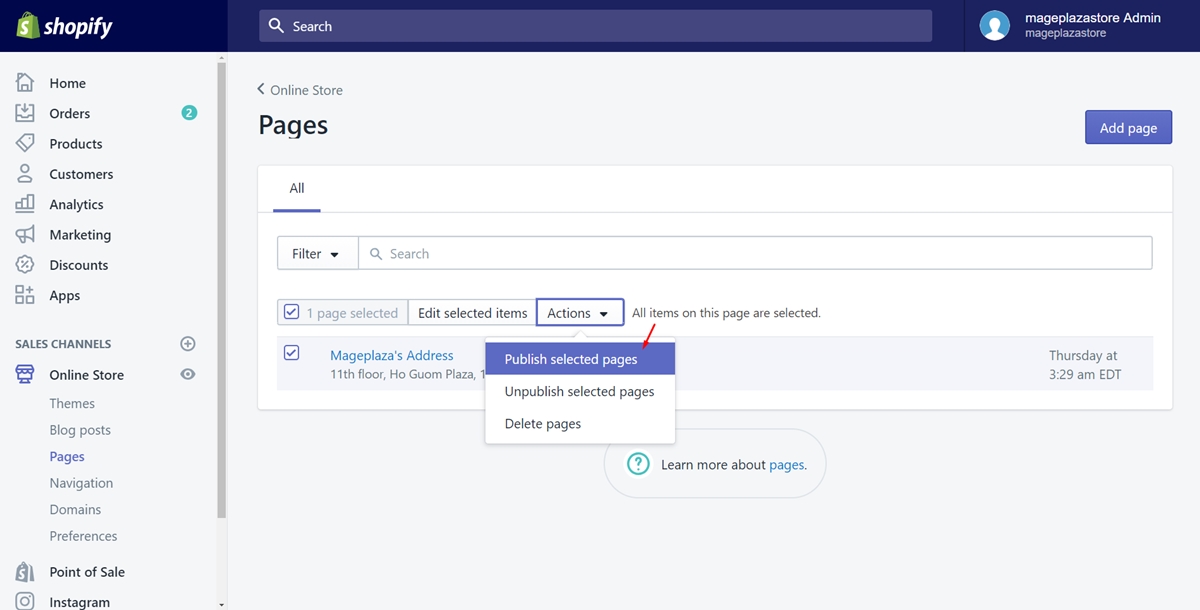
Step 3: Click Actions and choose Publish selected pages
Above all the titles, the Actions section is shown. Click on it to view a drop-down menu which allows you to make the selected pages published. To do this, tap on Publish selected pages.
Step 4: Add a link to your new web pages
After you’ve done all previous steps, make sure to display your web pages in a menu for the customers can easily look for them.
To publish web pages in bulk on iPhone (Click here)
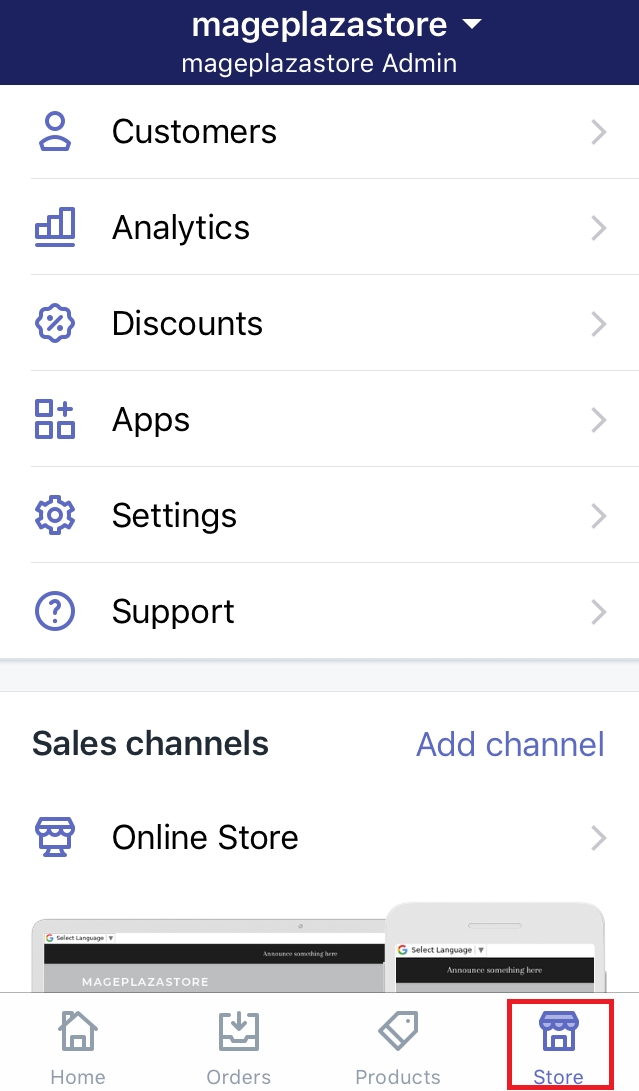
- Step 1: Go to Store
Make sure to sign in your Shopify account firstly. Go to theStoresection at the bottom of the admin page.
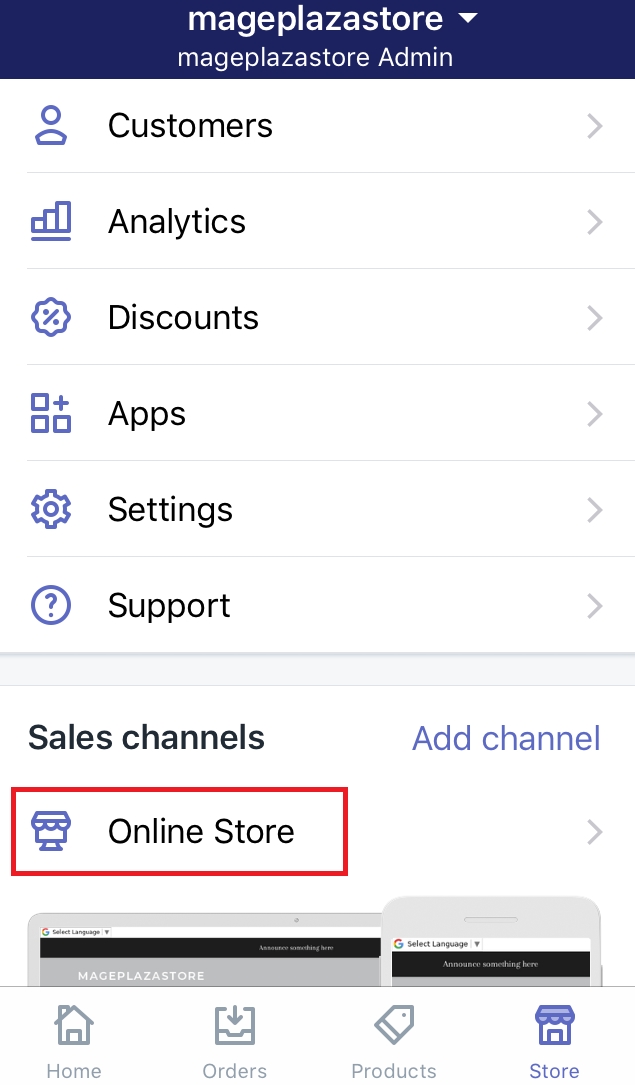
- Step 2: Choose Online Store
Under the Sale channels section, you will see a button calledOnline Store. Press on it to continue.
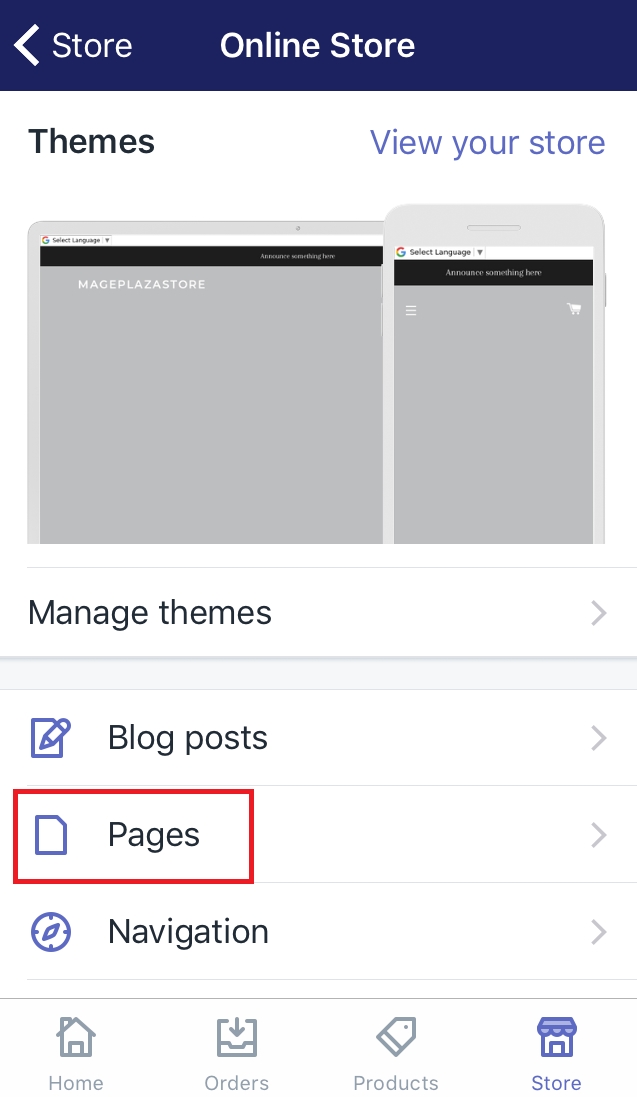
- Step 3: Click Pages
You will go to the Online Store page. From this, find out the second section which isPages. Afterward, press on it.
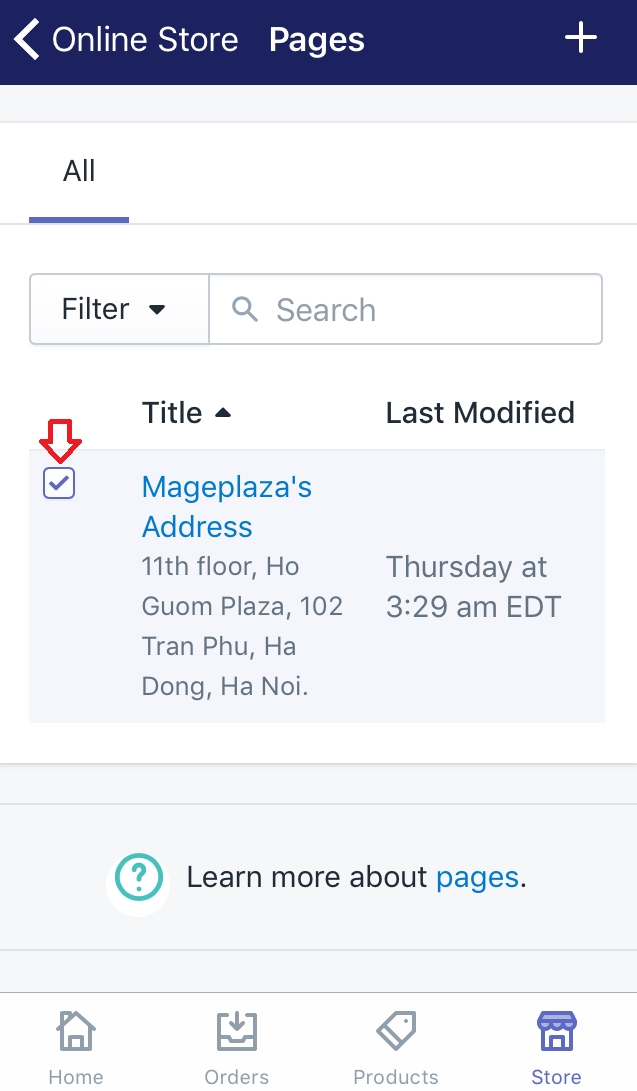
- Step 4: Check the checkbox
There is a list shown all the webpage you have. In this step, you can choose one or more to be published by checking the checkbox next to them.
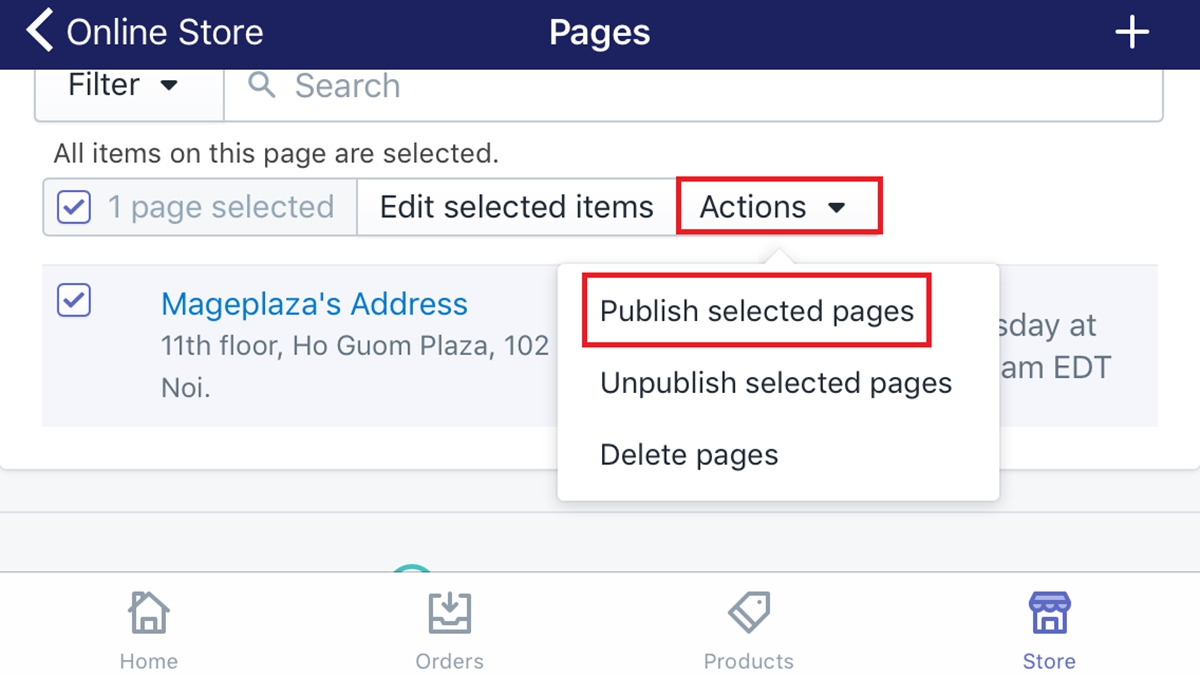
- Step 5: Choose Action and Publish selected pages
After all the web pages you expected are checked, press onActions. Then, choosePublish selected pagesin the drop-down menu. If you can’t see those button. It’s highly recommended that you should set the horizontal screen rotation.
- Step 6: Add a link to your new web pages
After you’ve done all previous steps, make sure to show your web pages in a menu for the customers can easily look for them.
To publish web pages in bulk on Android (Click here)
-
Step 1: Go to Store
Make sure to sign in your Shopify account firstly. Go to theStoresection from the admin page. -
Step 2: Choose Online Store
Under the Sale channels section, you will see a button calledOnline Store. Press on it to continue. -
Step 3: Click Pages
You will go to the Online Store page. From this, find out the second section which isPages. Afterward, tap on it. -
Step 4: Check the checkbox
There is a list shown all the webpage you have. In this step, you can choose one or more to be published by checking the checkbox next to them. -
Step 5: Choose Action and Publish selected pages
After all the web pages you expected are checked, press onActions. Then, choosePublish selected pagesin the drop-down menu. -
Step 6: Add a link to your new web pages
After you’ve done all previous steps, make sure to show your web pages in a menu for the customers can easily look for them.
Summary
Hope this post will bring you some benefit to publish web pages in bulk. You can follow to do this not only on a desktop but also on iPhone or Android. We also have a post on how to unpublish web pages in bulk, be sure to give it a read whenever you need.
Related Posts:


