How to Insert Audio Files With the Rich Text Editor on Shopify
With Shopify, you can also insert audio files with the rich text editor in your content. It depends on the type of the content you may have, but by doing so, you also increase another channel to interact with your customers when they search your posts.
Related Posts:
- How to insert videos with the rich text editor on Shopify
- How to move and resize an image in the rich text editor on Shopify
- How to upload images with the rich text editor on Shopify
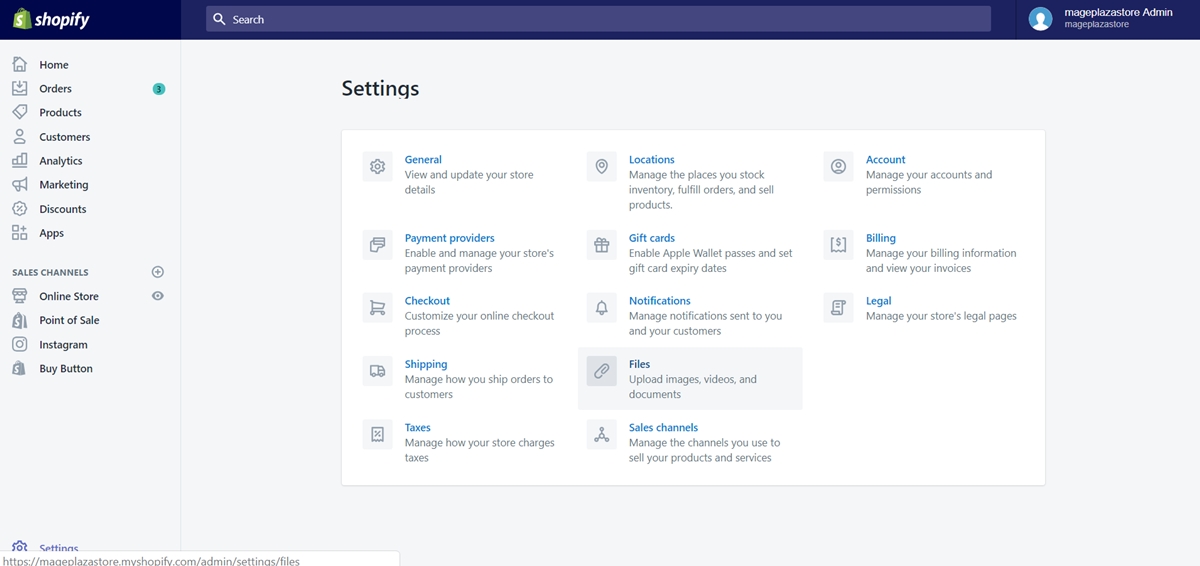
Step 1: Go to Settings, select Audio Files
After access to the Shopify admin interface, click Settings at the bottom left corner of the screen.
Then, select Files.

Step 2: Click Upload Audio files
Take a look at the top right corner, click Upload files to upload the audio file you want to add.
After uploading the audio file successfully, you have to copy its URL to use later.
Step 3: Go to the text you want to insert the audio files
Go back to the text you’re editing.
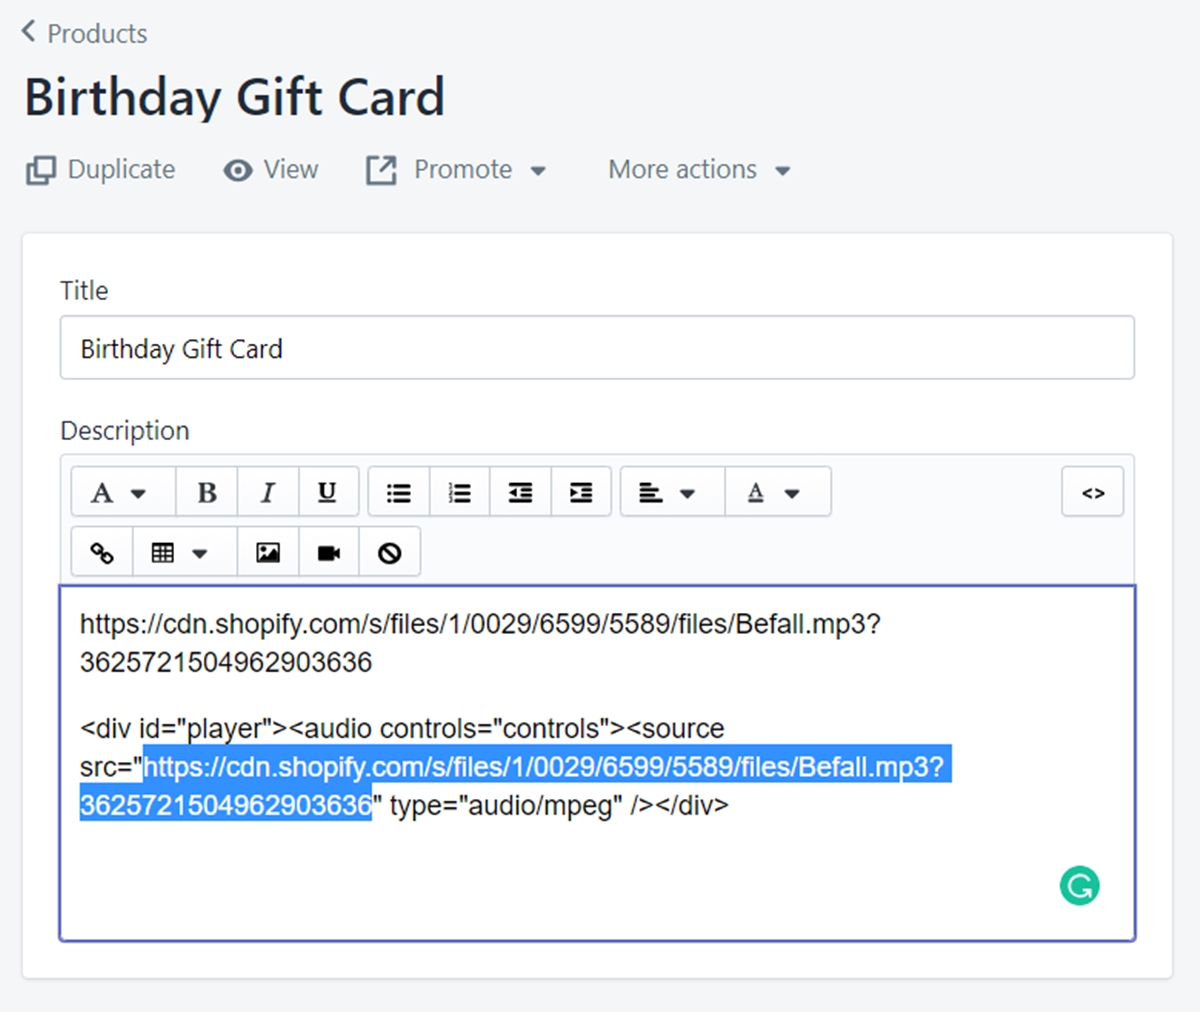
Step 4: Add the following codes to the text
Add this code <div id="player"><audio controls="controls"> in the text editor to embed an audio player in your content.
Add this code <source src="xxxx" type="audio/mpeg" /></div> right after the audio player code and replace the xxxx part with the URL of the audio file you copied before.
Remember the URL of the audio file after being uploaded has to begin with cdn.shopify.com.

Step 5: Save your edit
Click Save to confirm your edit.
Once you save all changes, you can click View (with an eye icon) to see your updated content on your online store.
Summary
As you can see, inserting audio files with the rich text editor is quite easy to perform. The audio files using for this purpose can be a song, a review, a soundtrack or anything you believe it will make your posts more attractive.


