How to Hide Out-of-Stock Products in Default Catalog Collection on Shopify
Each store in Shopify has a catalog page at a URL link your-store.com/collections/all, like mageplaza.com/collections/all for example, which lists all the goods in your store. Your products will be arranged in the alphabetic order by default, however, you can change its order to reach your satisfaction. You can also adjust the catalog not to show the items which are out of stock automatically. If you are curious about this process, follow this writing to know how to hide out-of-stock products in your default Catalog collection on Shopify.
Step 1: Select Collection
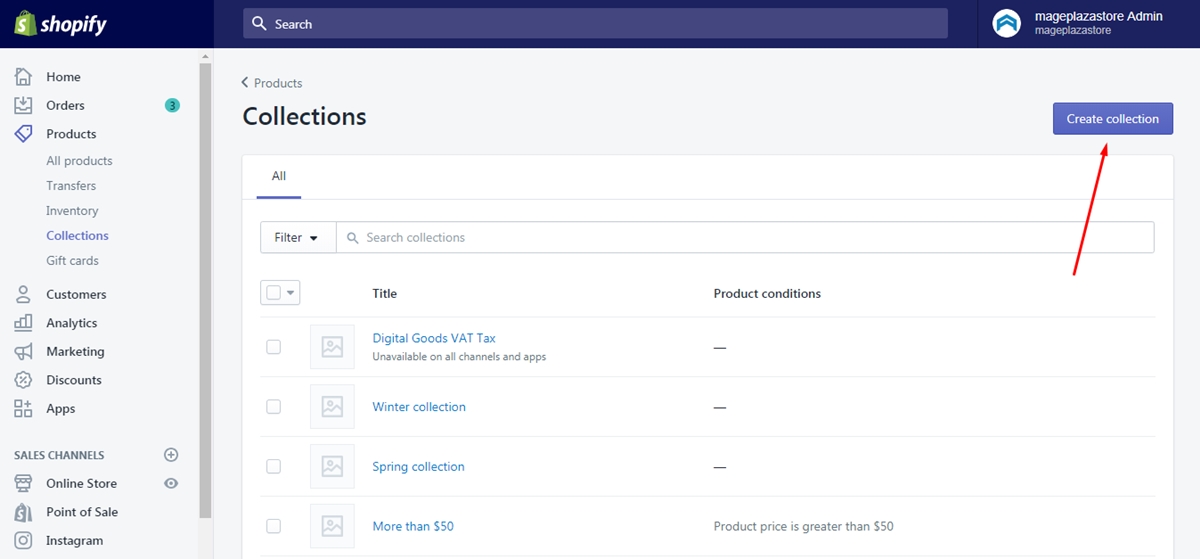
Log-in to your account on Shopify first and head to the Products from the admin page. After that, click on the Collections which stays above the Gift cards in the list.
Step 2: Choose Create collection
The Collections page will appear with a list of all the collections you created. However, you need to add a new one as your Catalog collection, hence, select the Create collection on the right side of the screen display to move on to the next step.

Step 3: Set up the collection
The settings page for collection will appear that you have to enter the following information to create the Catalog:
- The first thing you see is
Title, you have to set it asall. If you don’t want to use this name, you can change to another one later. However, be noted that if you use other headers notallfor the collection, you need to adjust theURL and handleas well. - In the
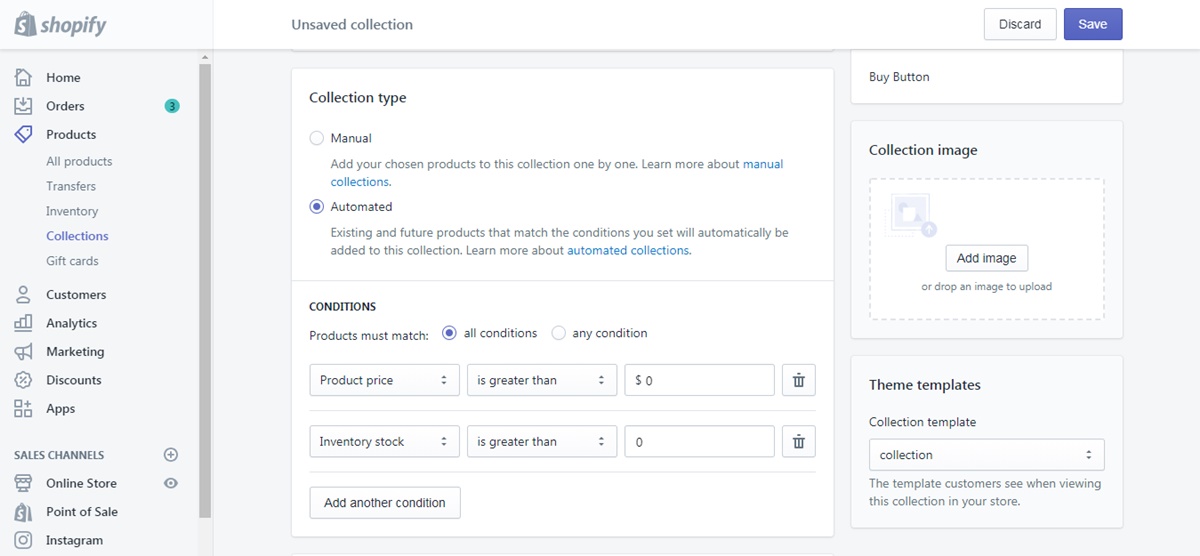
Collection typesection, remember to selectAutomated. This option will enable the collection to be automatically updated and add new products which match the conditions of the collection. - Move on to the
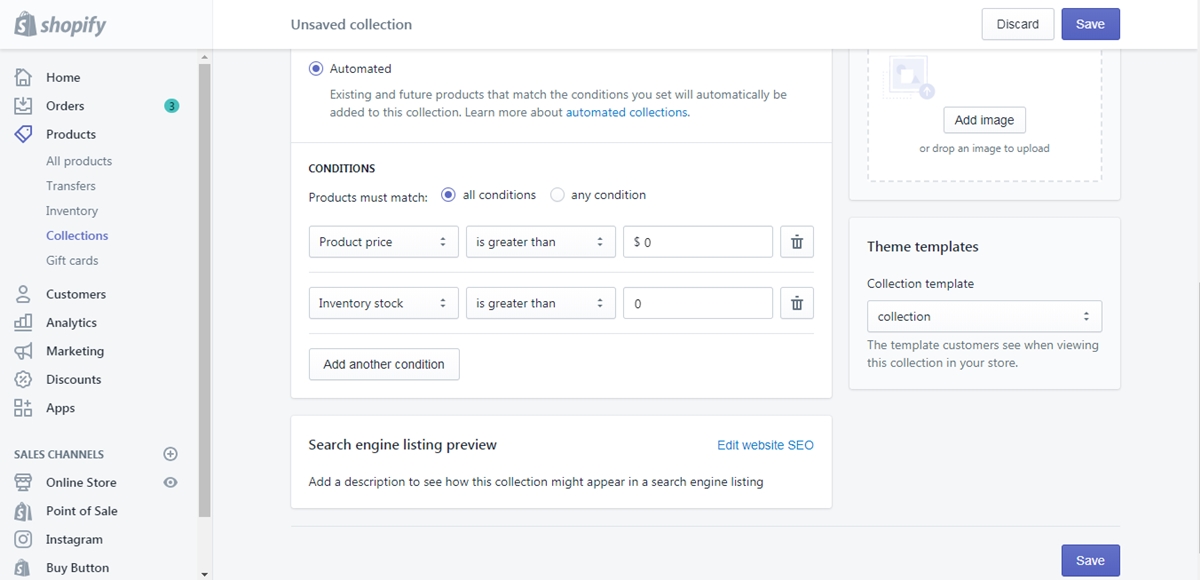
Conditionspart, you will see theProducts must matchzone and two options next to it, which areall conditionsandany conditionsthen choose the former one. Next, set the condition asProduct price is greater than $0to include all your items in the collection. Because you want to hide out-of-stock products, you have to add another condition which isInventory stock is greater than 0.

Step 4: Press on Save
After you are completed all the above steps, select Save to store it and end the action. Be noted that there are two buttons which are available. One is on the top while the other stays at the end of the page then you can pick one out of two to press on.

Conclusion
In brief, this writing has shown you the process of Hide out-of-stock products in your default Catalog collection on Shopify. There are just four steps in total that it will not take much of your time to complete it. Moreover, this is a useful technique that I hope you enjoy the reading time and find this topic helpful. Read more Shopify tutorials.
Related Posts:


