How to Enable Shopify Payments Test Mode
Payment is an important process that you need to pay attention to receive money from your customers. There are numbers of payment methods that you can use for your shop and Shopify payments is one of them. If you apply it to your store, you can check for its setup and configuration, and simulate the successful as well as failed transactions also. To know how to enable test mode on Shopify, do not skip any part of the following post.
Before we start, I want to remind you that Shopify Payments is currently limited to stores in certain countries. Therefore, make sure that your store can use this method of payment.
How to Enable Test Mode for Shopify Payments
Step 1: Select Payment providers
Log-in to your Shopify account, head to Settings and Payment providers respectively.

Step 2: Click on Edit
There are two smaller categories in the Payment providers section, which are Accept payments and Payment authorization. Under Accept payment, choose Edit below the Shopify payments.
Step 3: Enable test mode
Options for adjusting will appear on your screen, tick on the box next to Use test mode.

Step 4: Choose Save
After allowing the use of test mode, do not forget to record it by pressing Save
If you do it properly and you see a black and yellow striped band appearing on your screen like the picture below, it means you are successful activating test mode.

To enable test mode on iPhone (Click here)
-
Step 1: Tap on Settings Get access to your Shopify app, tap
Storethen go toSettings -
Step 2: Go to Payments
Settingsis divided into three main parts, includingApp settings,Store settingsandAbout. FindPaymentswhich stays in the second place of theStore settingslist -
Step 3: Press Edit Select
EditunderShopify paymentsto continue -
Step 4: Tick Use test mode Check on the option
Use test mode -
Step 5: Click Save Tap
Saveto finish. If you forget, all of the above steps will be meaningless and nothing will be stored.
To enable test mode on Android (Click here)
-
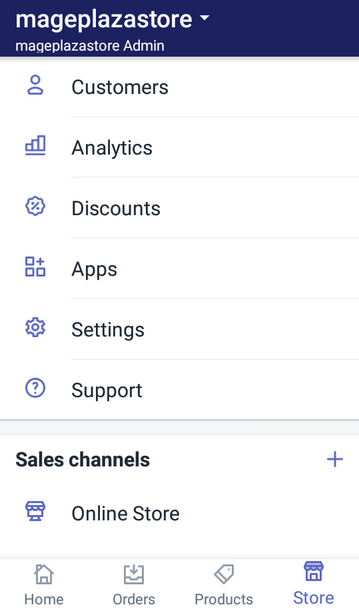
Step 1: Tap on Settings After opening your app, at the bottom bar of the display, choose
Storewhich has the house icon above it. Next, selectSettings.
-
Step 2: Go to Payments In the
Store settings, click on the second option which isPayments
-
Step 3: Press Edit Find
Shopify paymentsin theAccept payments. After that, press on theEditin this section -
Step 4: Tick Use test mode Tick on the option which has a flag symbol
Use test mode.
-
Step 5: Click Save If you are coming to this step, there is just one thing left to do, that is saving all your adjustment by tapping
Save.
Conclusion
In conclusion, I have introduced to you the process to enable test mode for your online store. There are three approaches discussed in this articles, which are by using a laptop, using an iOS phone and using an Android device. I also attach images for some of the steps to help you have a clearer vision for what you have to do. There is a note that if your customers want to pay orders by using credit cards, you have to deactivate the use of test mode. Moreover, do not fulfill any test orders because you have to pay for the shipping labels which you purchase. This is the end of this topic, I hope that you find it informative and helpful.
Related Posts:


