How to Edit your Password Page Settings on Shopify
You need to know how to edit your password page if you’re a Shopify store owner. A password page is set up to help reduce the number of people who are daily accessing your online store on Shopify. Enabling a password page is one of the best ways to restrict the flow of customers visiting your online shop. You can even create a new password and then give it to the specific number of customers whom you want them to be capable of visiting your own store. If you already know the way to add password protection to or to remove it from your online store, then it is time to show you how to edit your password page setting on Shopify on Desktop, iPhone, and Android. In this part, your content which is shown on the password page, including colors, text, and typography can be successfully updated and edited.
Related Posts:
- How to hide the footer on your password page on Shopify
- How to hide your store name on your password page on Shopify
- How to edit the code templates for your password page on Shopify
- How to reset your customer passwords on Shopify
- How to reset your password on Shopify
How to edit your password page settings
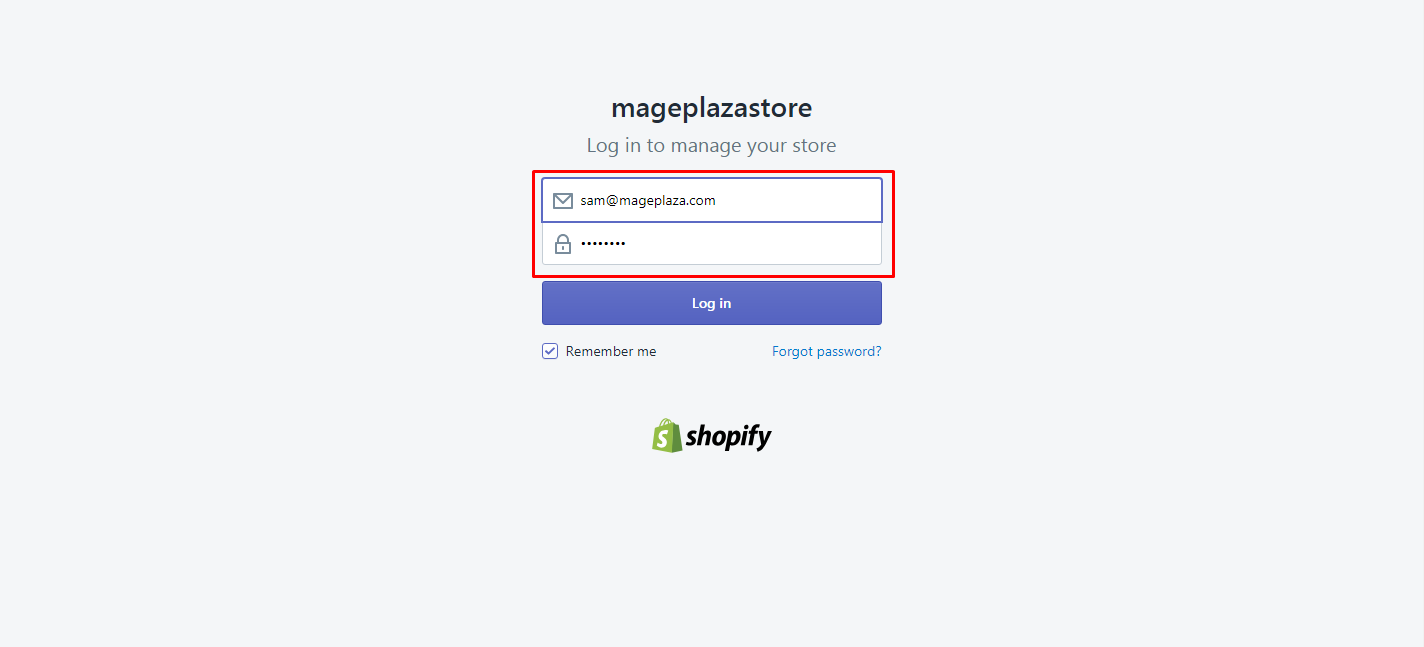
Step 1: Login your account.
Using your own email and password to log in your Shopify admin.
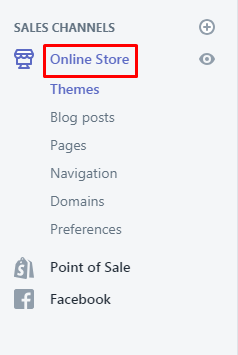
Step 2: Open Themes section.
In the Sales Channels area, you can opt for Online Store > Themes.
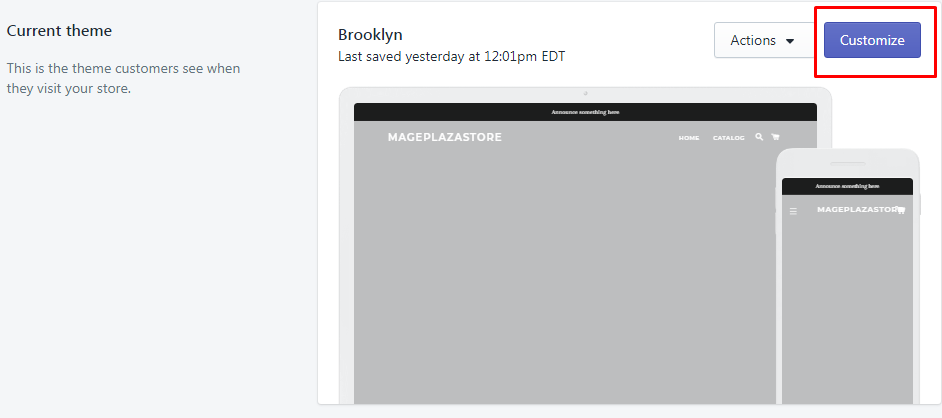
Step 3: Go to Customize.
Click the theme you want to get it edited before selecting Customize next to Action.
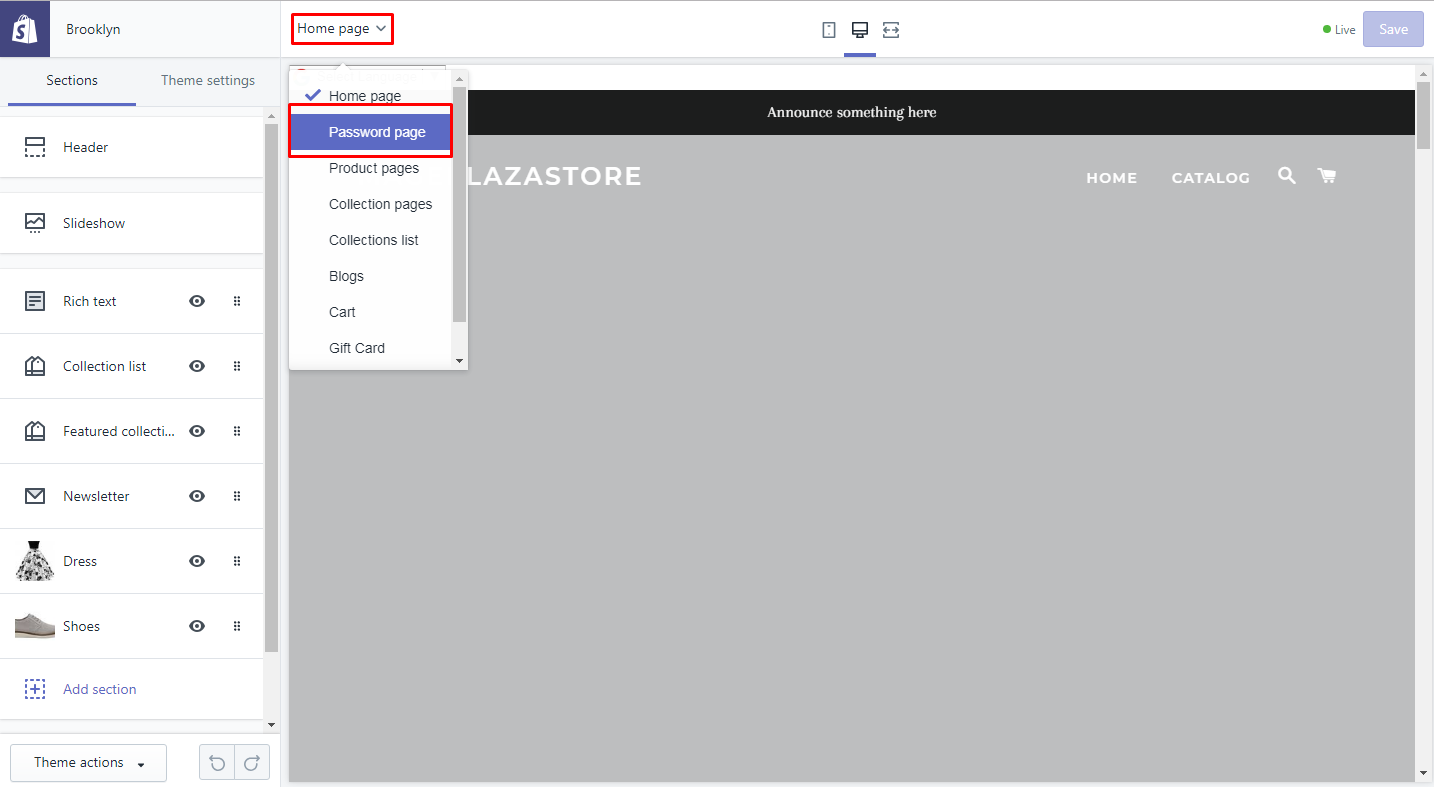
Step 4: Choose Password page.
From the top bar drop-down list, you can choose Password page to continue. If you cannot see the Password page in the list, you must create password protection for your online shop.
Step 5: Edit password page’s functions.
Follow the instruction below to edit functions of your password page:
-
Opt for Sections.
-
Choose the section you like to edit. Themes on Shopify mostly contains content, header, and footer section.
-
Make things change from section settings and before leaving, don’t forget to choose Save to save your current work.
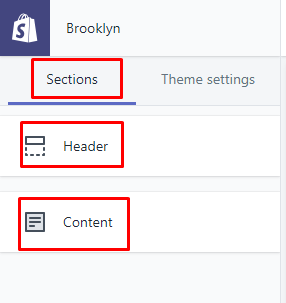
Step 6: Edit password page’s theme settings.
Follow the instruction below to edit theme settings for your password page:
-
Located next to Sections, Theme settings are available.
-
Select Theme settings to change the settings you want to update. Every theme consists of color, social, favicon or typography setting.
-
Remember to select Save to complete your task.
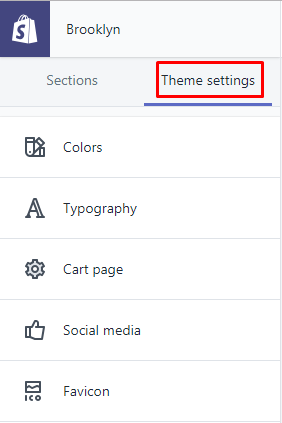
Step 7: Change theme style (optional).
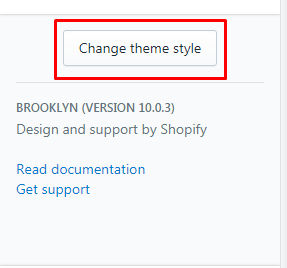
You can even change the theme style by going to Change theme style at the bottom. Your theme style is either classic or playful. When you are done with your option, click Change style to save.
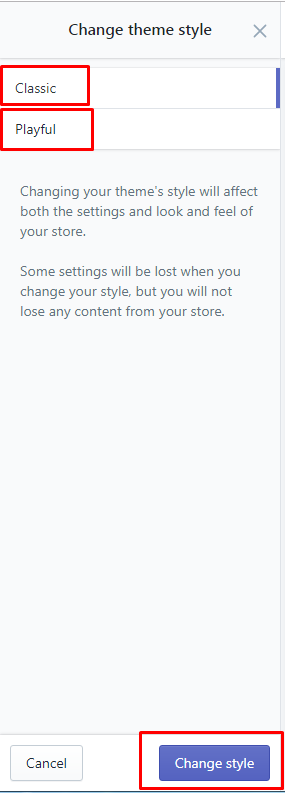
To edit your password page settings on Shopify on iPhone (Click here)
-
Step 1: Log in your Shopify admin with your own email and password.
-
Step 2: Tap
Storesection at the bottom of the page to continue. -
Step 3: From the
Sales channelssection, touchOnline Store.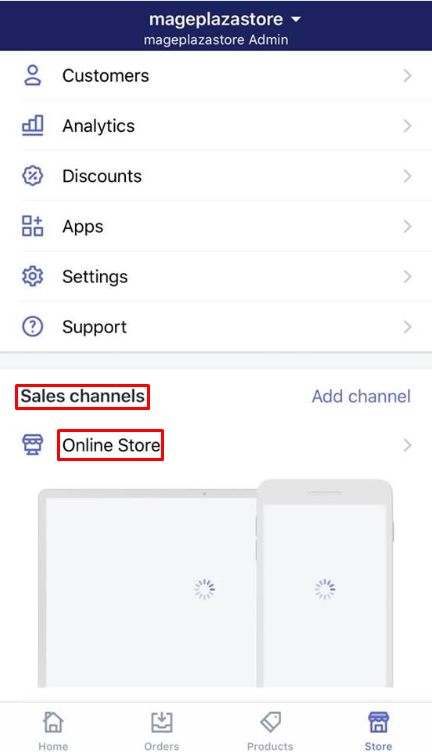
-
Step 4: After that, move to
Manage Themes.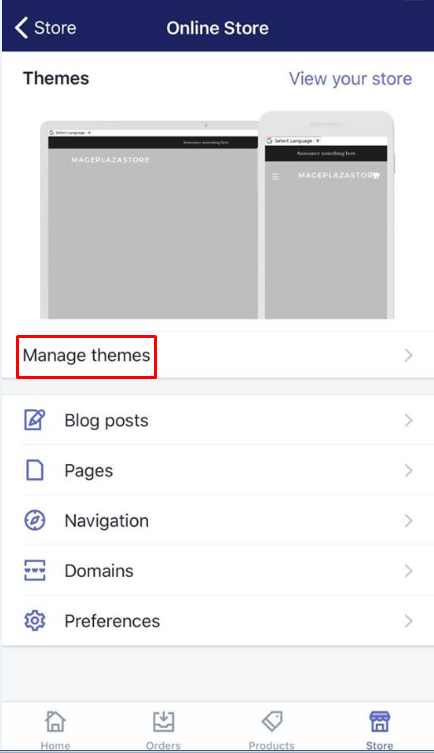
-
Step 5: Look for the theme you want it to be edited and then tap
Customize.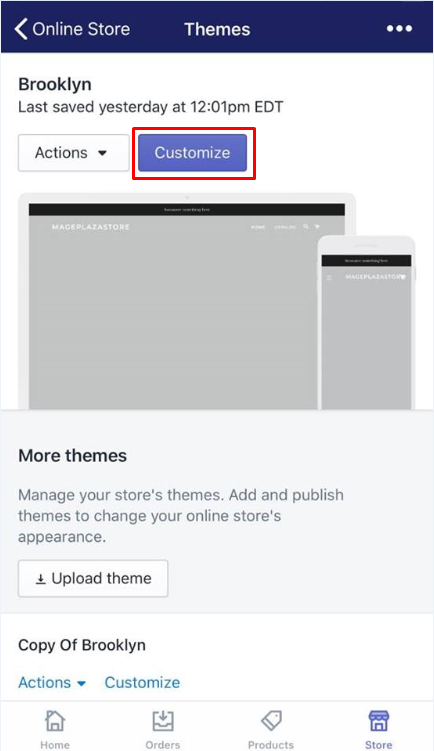
-
Step 6: Touch
Password page. Tap Password page from the drop-down menu at the top bar. In case you do not see the Password page in the list, you had better create a new password for your store. -
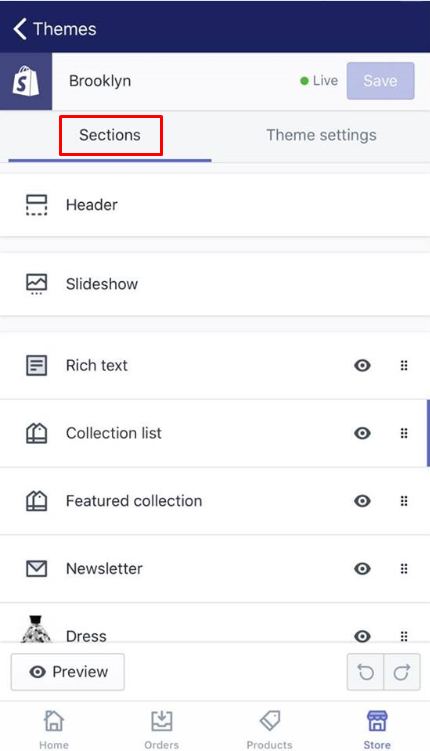
Step 7: Regarding editing sections on your password page You can tap Sections and start changing each option. Most themes also contain a header, footer and content section. Don’t forget to tap Save at the end.
-
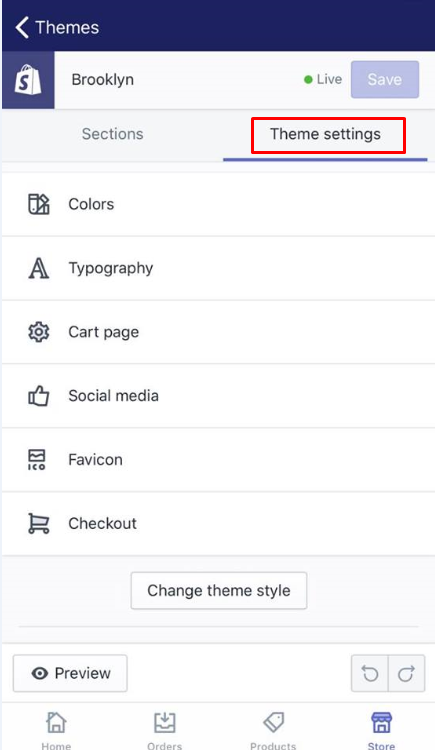
Step 8: Regarding editing themes settings for your password page Tapping Theme settings is a must. Then, choose the settings you want to update, including favicon, social, color and typography settings. After changing everything, touch Save to finish all.
-
Step 9: Change theme style if you want. You can even change your theme style from classic to playful format. Tap Change style before leaving the page.
To edit your password page settings on Shopify on Android (Click here)
-
Step 1: As usuall, log in your Shopify app.
-
Step 2: Tap
Store. At the bottom of the page, chooseStore. -
Step 3: Touch
Online store. From the Sales channels section, you can opt for Online Store. -
Step 4: Go to
Manage Theme. -
Step 5: Tap
Customize. Select the theme you think it needs editing, then touch Customize. -
Step 6: Tap
Password page. You can see Password page section at the drop-down menu. A new passowrd for your page needs to be created if you cannot see the Password page section. -
Step 7: To update editing sections on your password page Go to Sections and change each header, footer or content section. Tap Save to finalize your work.
-
Step 8: To update themes settings for your password page Go to Themes settings and opt for sections you want to change such as social, color, favicon or typography settings. Touch Save to complete your current work.
-
Step 9: You can Chane theme style from classic to plaful platform (optional).
Conclusion
As you can see, the above-mentioned steps on how to edit your password page settings on Shopify are easy to remember and follow. We hope this article can, once again, provide both store owners and their customers with good experiences when selling and purchasing products on Shopify.


