How to Edit a Webpage on Shopify
Each webpage plays an important role in your online shop. It makes your website become more complete and more professional. In order that it always maintains that indispensable function, you need to ensure it shows the customers accurate information and attractive content. Hence, you’d better know about how to edit a webpage in case your webpage should be changed.
Related Posts:
- How to add a webpage with your store policies on Shopify
- How to add a link to a webpage on Shopify
- How to edit the search engine listing for a webpage on Shopify
- How to publish web pages in bulk on Shopify
- How to unpublish web pages in bulk on Shopify
Here is the step-by-step guide for you to follow.
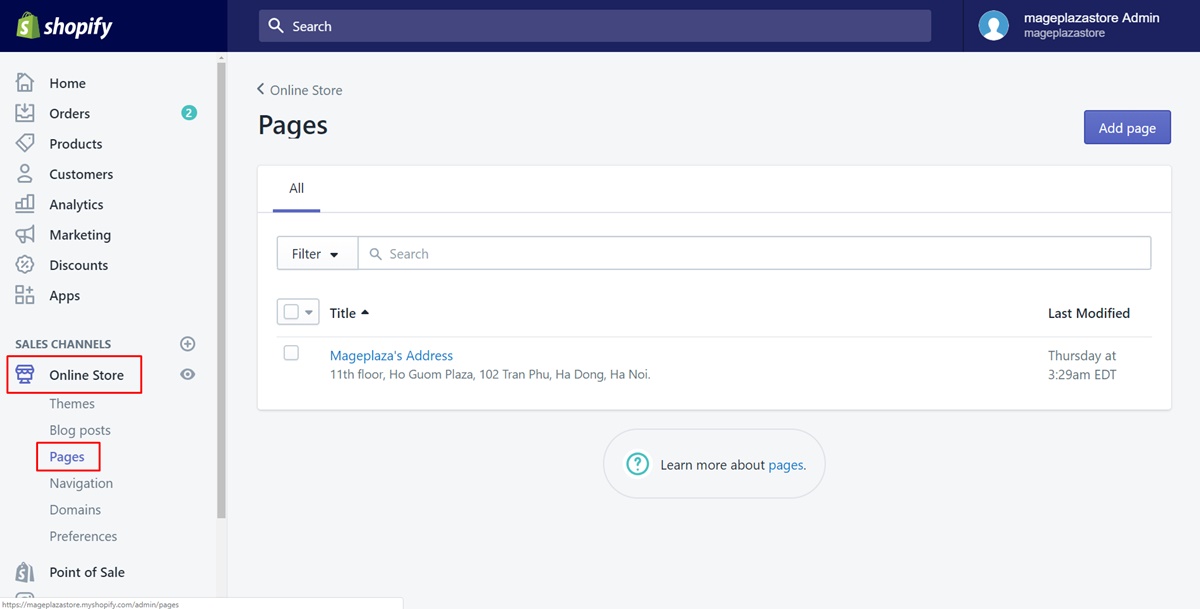
Step 1: Go to Online Store and Pages
In your admin page, take a view of all the sections in the left-hand side of the screen. You will see a button named Online Store. Tap on it. Then, go to the third section Pages.
Step 2: Choose the webpage
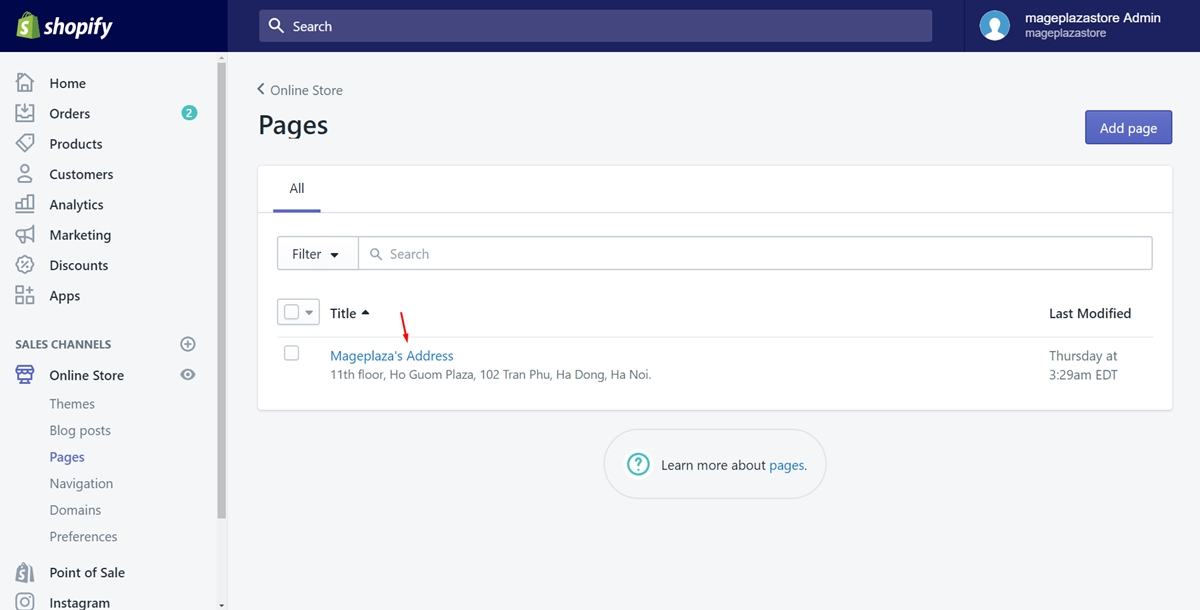
You will be able to see a list of all the title of the web pages you’ve created. You must be thought of the webpage you want to make changes in advance. Hence, choose the webpage you expected by pressing on its title.
Step 3: Edit the webpage
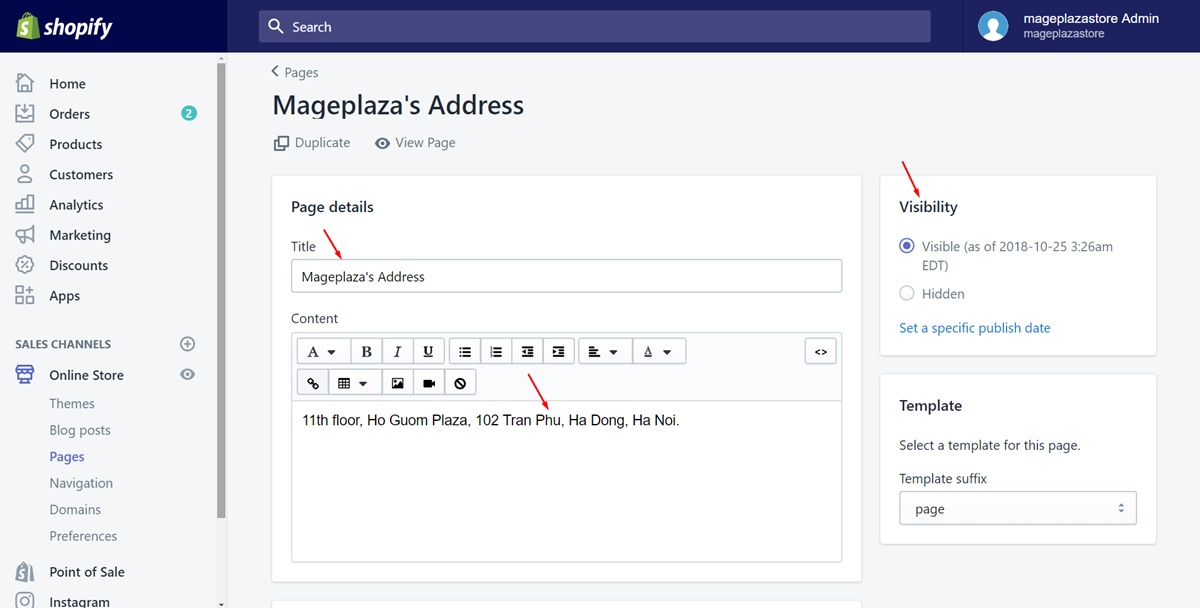
In this step, what you do is up to you. You can customize as you prefer. Here are the title, the content and the visibility also. Make changes to them as much as you want. They will be better after editing for sure.
Step 4: Save changes
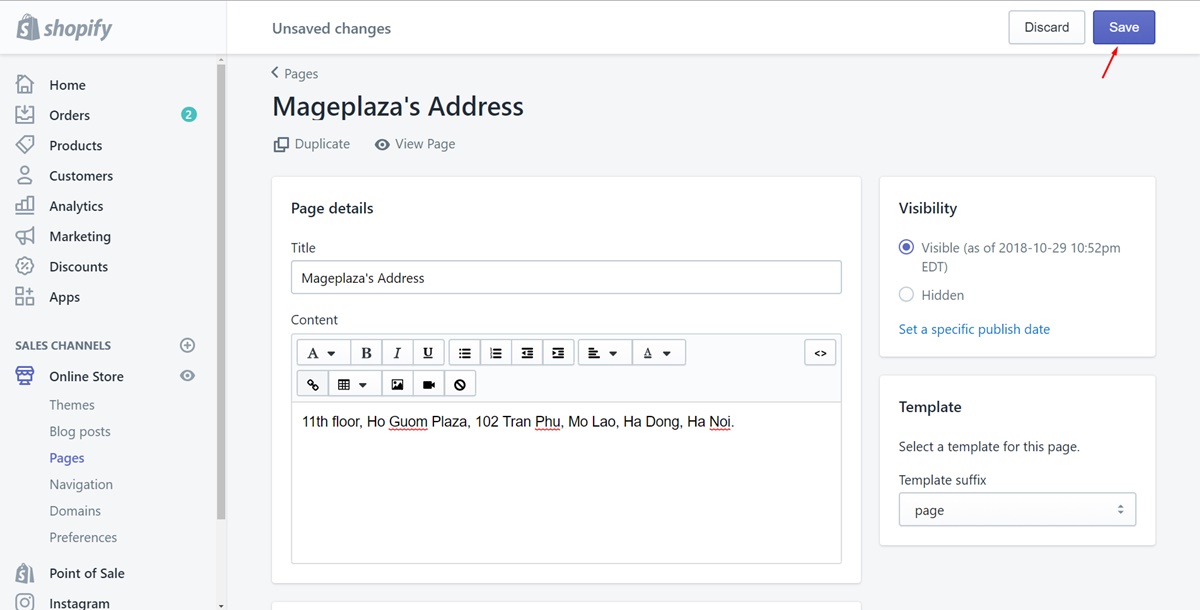
Make sure to select Save to finish. Afterward, you can go to the webpage to view the changes. If something is not satisfied, you can take these steps again to change.
To edit a webpage store on iPhone (Click here)
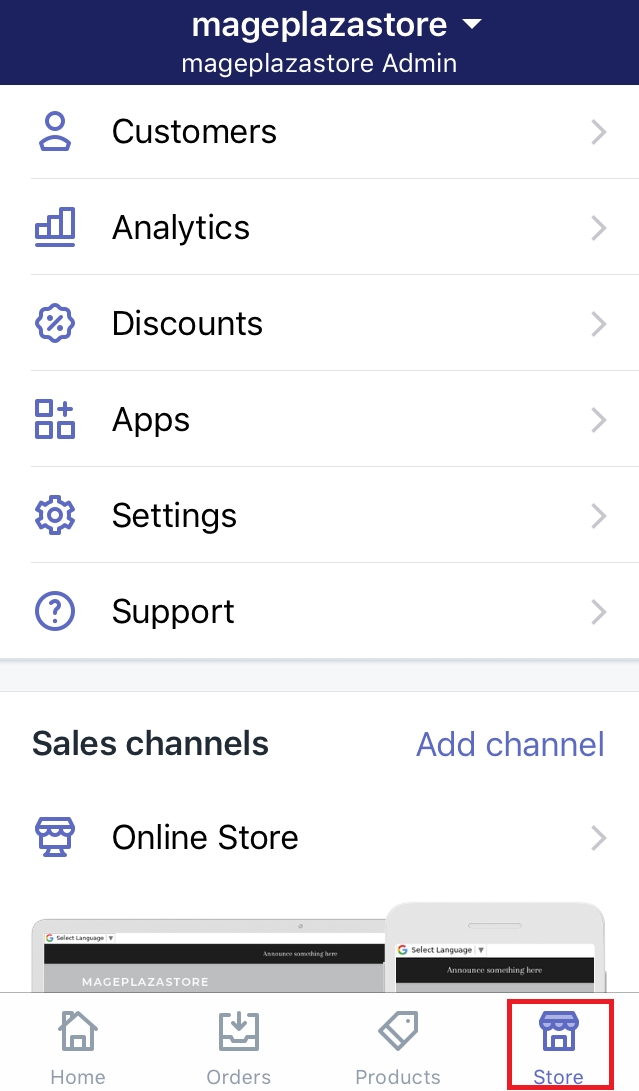
- Step 1: Go to Store
From the Shopify app, log in your account. Then, look at the bottom of the screen and chooseStore.
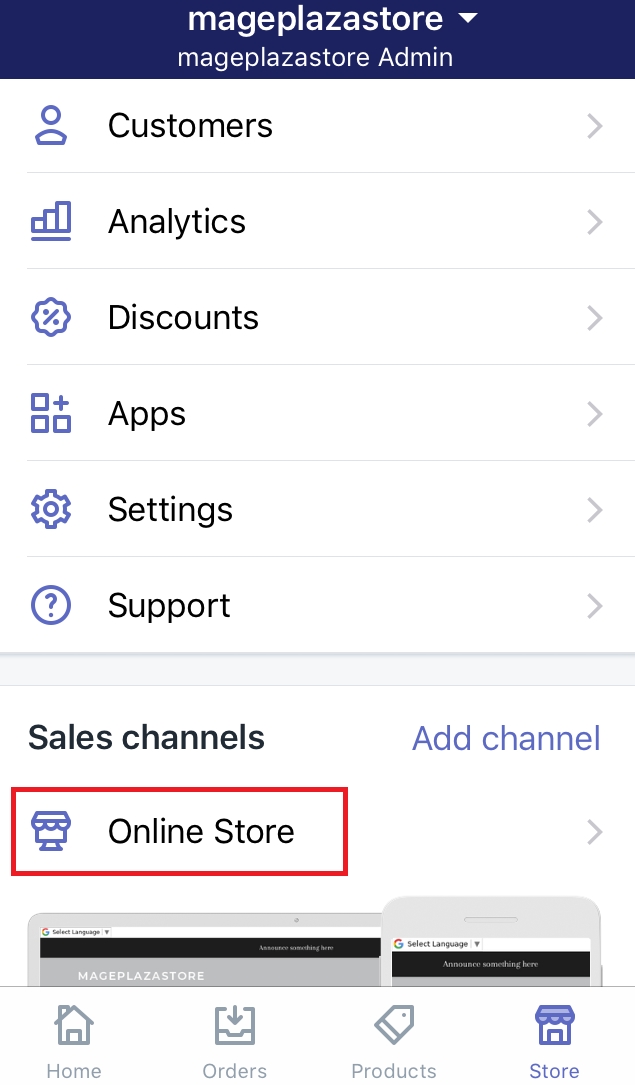
- Step 2: Click Online Store
Under the Sales channels section, there is a button calledOnline Store. Make sure to tap on it.
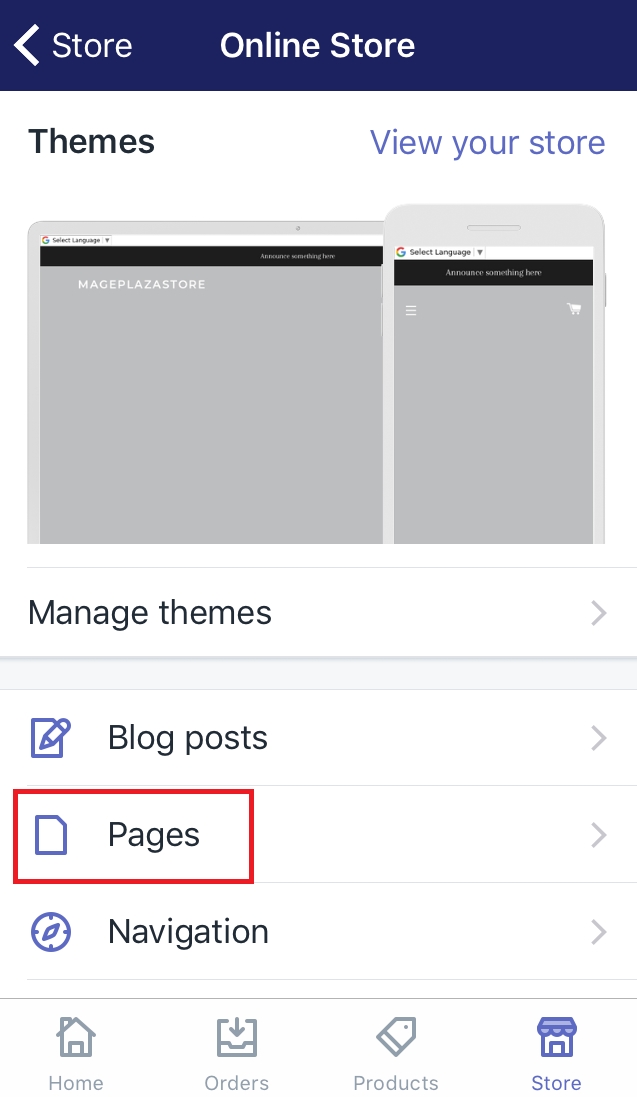
- Step 3: Choose Pages
Afterward, press onPageswhich I’ve marked in the following image.
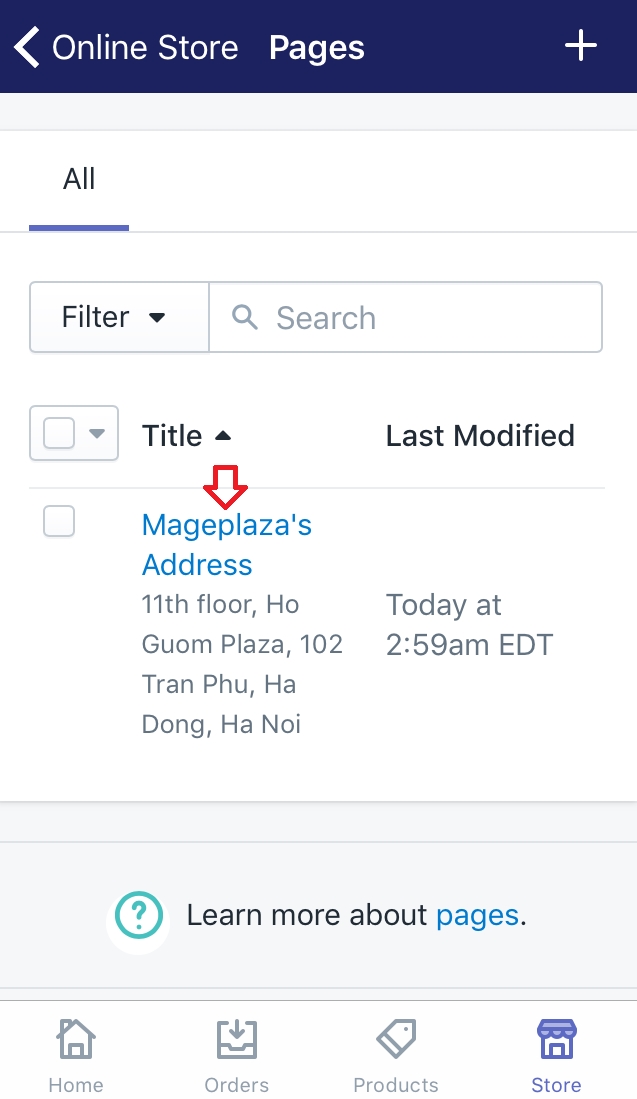
- Step 4: Choose the webpage
You will see a list of all the title of the web pages you’ve created. You must be thought of the webpage you want to make changes in advance. Hence, choose the webpage you expected by pressing on its title.
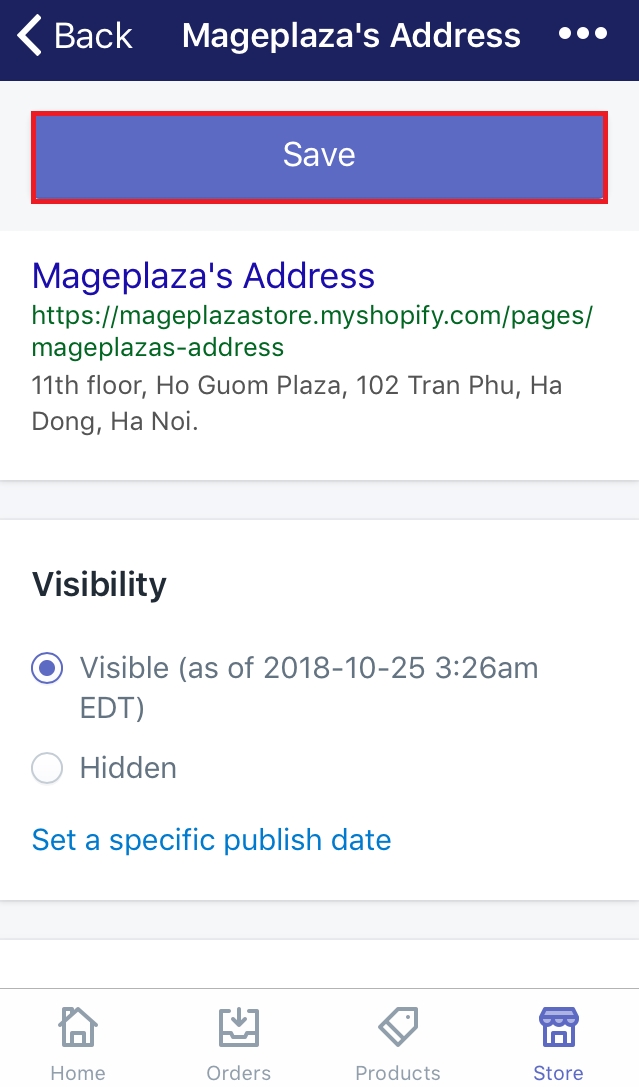
- Step 5: Edit the webpage
In this step, what you do is up to you. You can customize as you prefer. Here are the title, the content and the visibility also. Make changes to them as much as you want. They will be better after editing for sure.

- Step 6: Save
To complete, choose theSavebutton. You can go to the webpage to view the changes. If something is not satisfied, you can take these steps again to change.
To edit a webpage on Android (Click here)
-
Step 1: Go to Store
From the Shopify app, log in your account. Then, chooseStore. -
Step 2: Click Online Store
Under the Sales channels section, there is a button calledOnline Store. Make sure to tap on it. -
Step 3: Choose Pages
Afterward, press onPagesto continue. -
Step 4: Choose the webpage
You will see a list of all the title of the web pages you’ve created. You must be thought of the webpage you want to make changes in advance. Hence, choose the webpage you expected by pressing on its title. -
Step 5: Edit the webpage
In this step, what you do is up to you. You can customize as you prefer. Here are the title, the content and the visibility also. Make changes to them as much as you want. They will be better after editing for sure. -
Step 6: Save
To complete, choose theSavebutton. You can go to the webpage to view the changes. If something is not satisfied, you can take these steps again to change.
Summary
Above are some simple steps to edit a webpage on Shopify. Thanks to this, the process of editing a webpage becomes easier. It also helps you save your time. Hope you will find some useful information from this post. If you want to edit HTML code on Shopify, read our post to learn how to do it. If you are concern about editing a webpage, you may want to visit the tutorial named How to edit the search engine listing for a webpage.


