How to Edit the Search Engine Listing for a Blog on Shopify
The text that can appear in the search engine results for your blog can be edited. You can use the descriptive title to help the visitors find the online store and persuade them to click on the link. In this article, you will be shown how to edit the search engine listing for a blog on Shopify on Desktop, iPhone, and Android.
Related Posts:
- How to search for a product on Shopify
- How to hide a page from search engines on Shopify
- How to edit the search engine listing for a blog on Shopify
- How to edit the search engine listing for a webpage on Shopify
- How to edit a search engine listing preview on Shopify
- How to search for a file on Shopify
- How to search by tag on Shopify
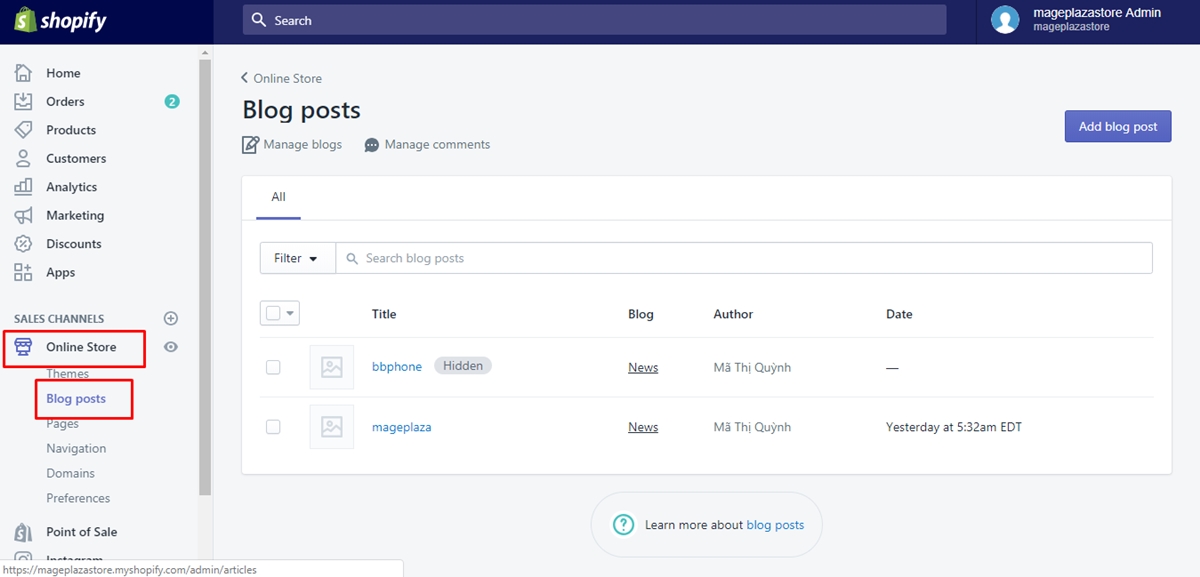
Step 1: Select Blog Posts.
After logging in your Shopify admin, you can select Online Store > Blog Posts from the Shopify admin.
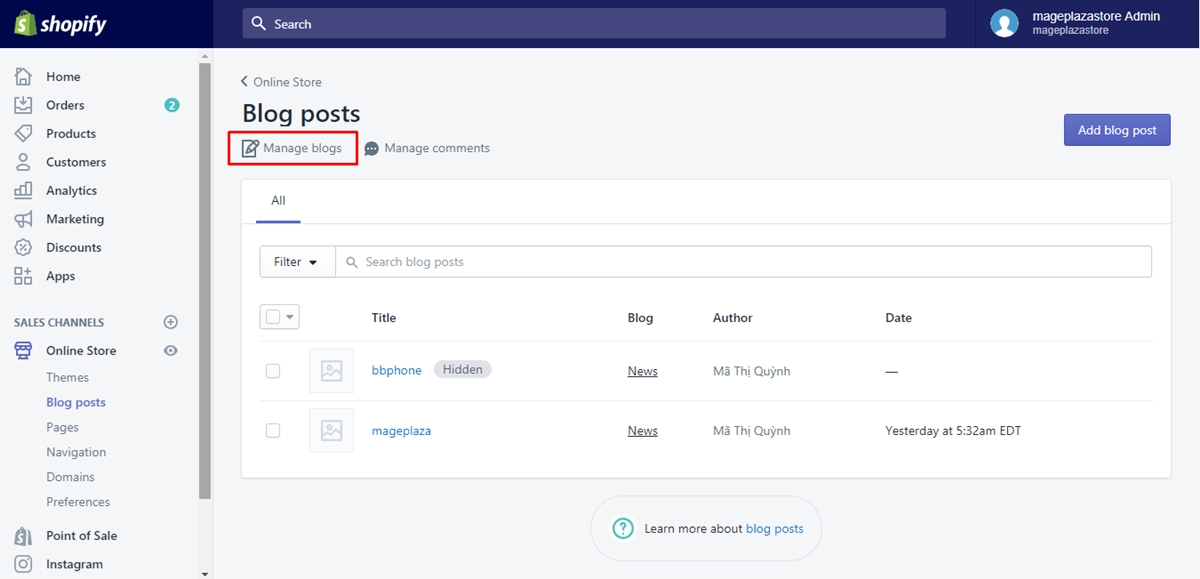
Step 2: Choose Manage blogs.
Next, you can choose Manage blogs.
Step 3: Click the blog name you want to edit.
In this step, you can click the blog name you want to edit.
Step 4: Opt for Edit website SEO
Then, from the Search engine listing preview, you can opt for Edit website SEO.

Step 5: Type the descriptive title.
Type the descriptive title from the Page title section. You can type up to 70 characters from the title. It can be displayed like a link in the search engine result.
Step 6: Type the description for search engine listing.
Type the description for search engine listing. You need to ensure that you add relevant keywords so that the new visitors and customers can easily find you and add your name of the business. You are allowed to type up to 320 characters into the description.
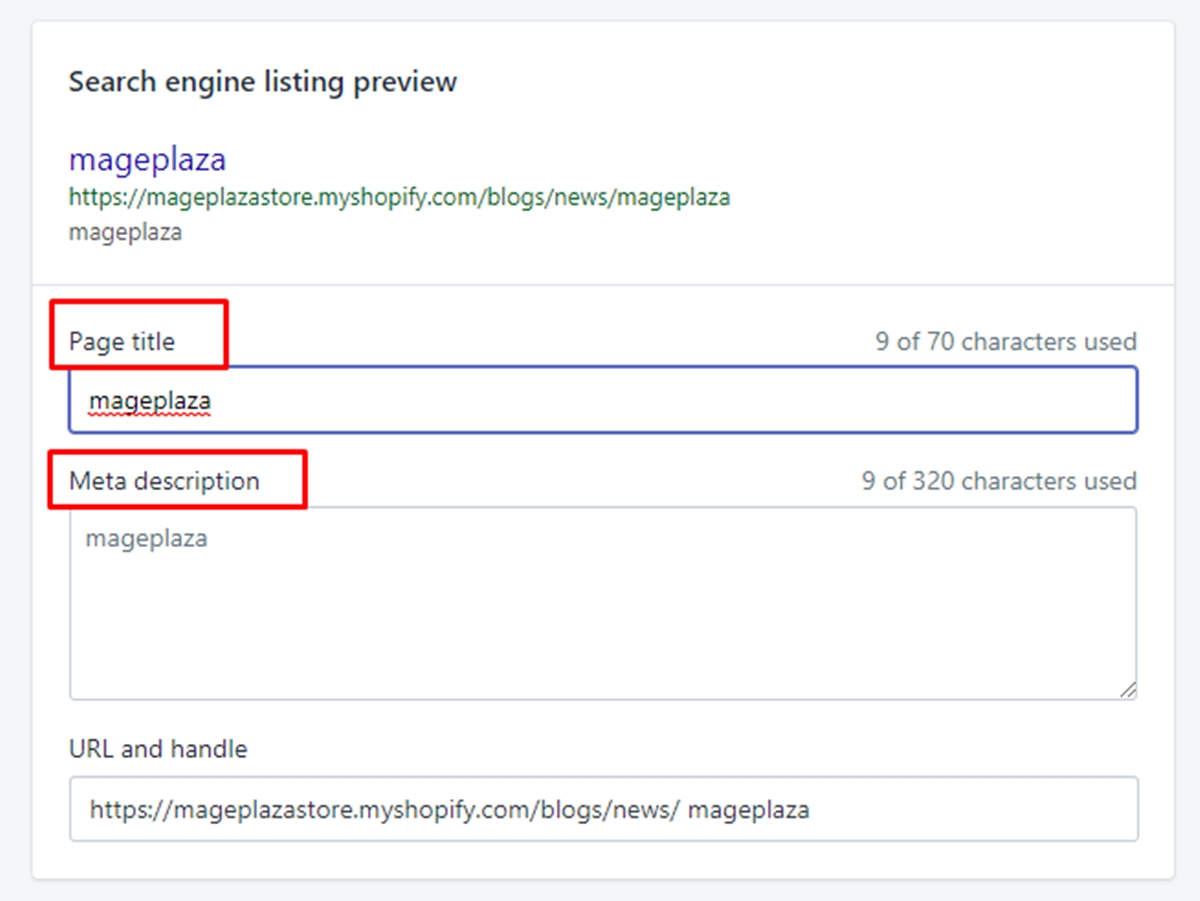
Step 7: Edit your web address.
You can edit the web address. In fact, you do not need to change the web address in most situations. If you want to change the web address, you need to make sure that the URL redirects from your previous web dress.
Step 8: Go to Save.
Go to Save to complete your work.
To edit the search engine listing for a blog on iPhone (Click here)
-
Step 1: Tap Store.
You can start your work by tappingStore. -
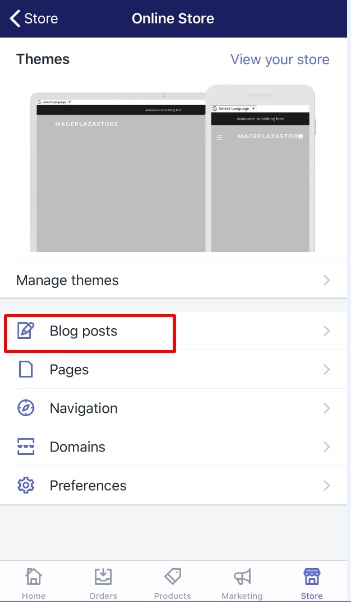
Step 2: Tap Online Store and then Blog posts.
Next, you can tapOnline Storefrom theSales channelsfield, and thenBlog posts.
- Step 3: Tap the button
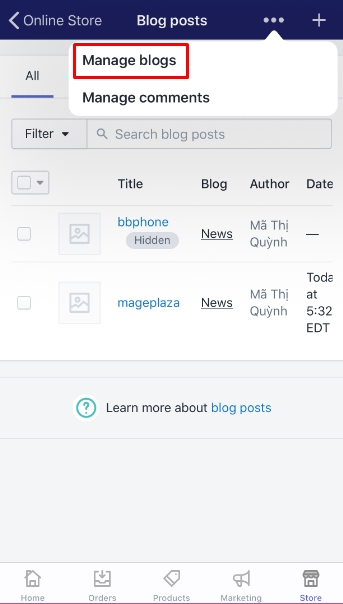
…, then choose Manage blogs.
Tap the button…, then chooseManage blogs.
-
Step 4: Select the blog name.
Then, select the blog name you want to edit. -
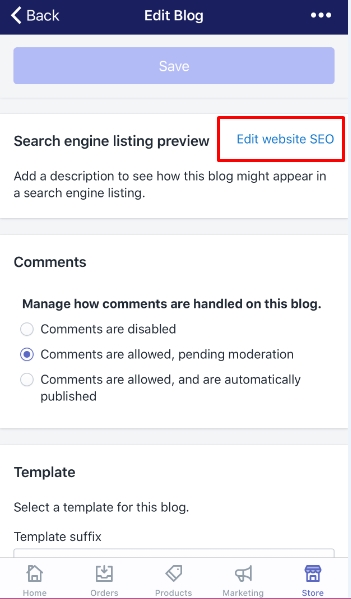
Step 5: Tap Edit website SEO.
In this step, you can tapEdit website SEO.
-
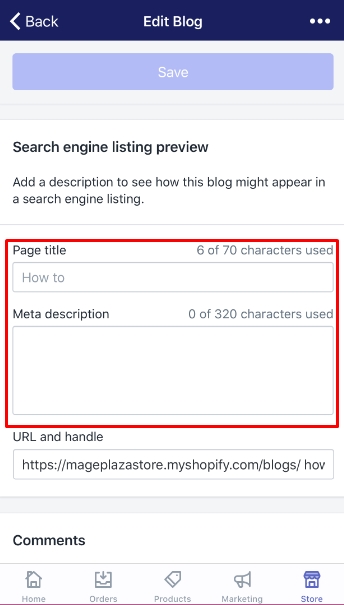
Step 6: Type a descriptive title.
Type your descriptive title. You can type up to 70 characters. -
Step 7: Enter the description for your search engine listing.
You can enter the description for your search engine listing. You need to make sure that you add relevant keywords.
-
Step 8: Change your website address.
Change your website address if necessary but the URL needs to redirect from your old web address. -
Step 9: Tap Save.
ChooseSaveto save your changes.
To edit the search engine listing for a blog on Android (Click here)
-
Step 1: Touch Store.
The first thing you need to do is to go toStore. -
Step 2: Touch Online Store and touch Blog posts.
In this step, to continue, touchOnline StoreandBlog posts. -
Step 3: Touch
⋮and Manage blogs.
To continue, touch⋮andManage blogs. -
Step 4: Choose the blog name.
-
Step 5: Tap Edit website SEO.
Next, you can tapEdit website SEOfrom theSearch engine listing previewfiled. -
Step 6: Enter your descriptive title.
Enter your descriptive title, which can be up to 55 characters. -
Step 7: Type your description for your search engine listing.
You can type your description for your search engine listing. Remember to include the relevant keywords so that the customers can find your link easily. -
Step 8: Edit your website address.
You can edit your website address if it is needed. However, you need to make sure that the URL can redirect from your old web address. -
Step 9: Touch Save.
Last but not least, touchSaveto complete your work.
Conclusion
As you can see, these steps on how to edit the search engine listing for a blog are not too complicated for you to perform. Don’t forget to spread this article out if you think it is helpful to read, and check out our Shopify tutorials if you want more helpful information.


