How to Edit the Code Templates for Password Page on Shopify
In this writing, you will be shown how to edit the code templates for your password page on Shopify on Desktop, iPhone, and Android. There are some situations that when you like to customize the functions which are not available in your theme settings, you can get the code of password page edited.
Related Posts:
- How to add password protection to your online store on Shopify
- How to reset your customer passwords on Shopify
- How to remove password protection from your online store on Shopify
- How to hide the footer on your password page on Shopify
- How to hide your store name on your password page on Shopify
- How to reset your password on Shopify
How to edit the code templates for your password page
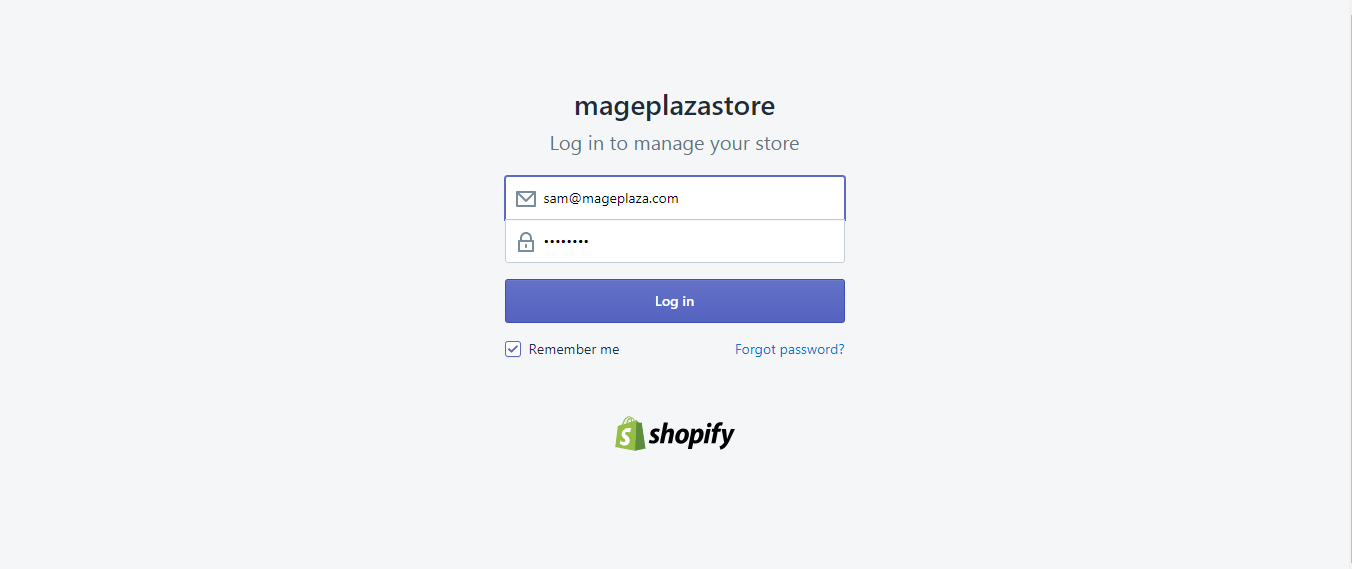
Step 1: Log in your Shopify admin.
Using your email and password to log in your Shopify admin.
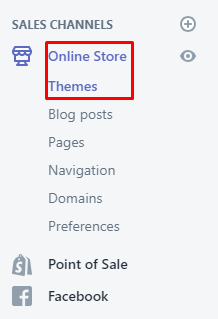
Step 2: Choose Online Store > Themes.
In the Sales channels section, choose Online Store > Themes.
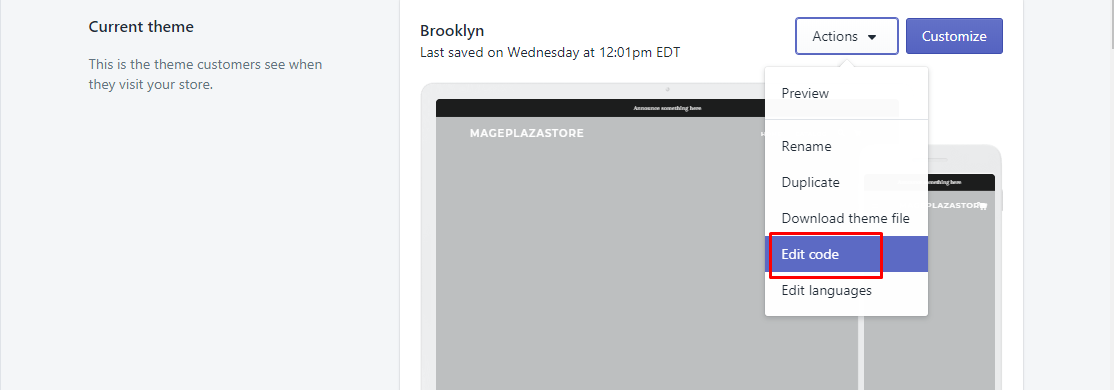
Step 3: Opt for Actions > Edit code.
Select the theme you want to get it updated. After that, click Actions > Edit code.
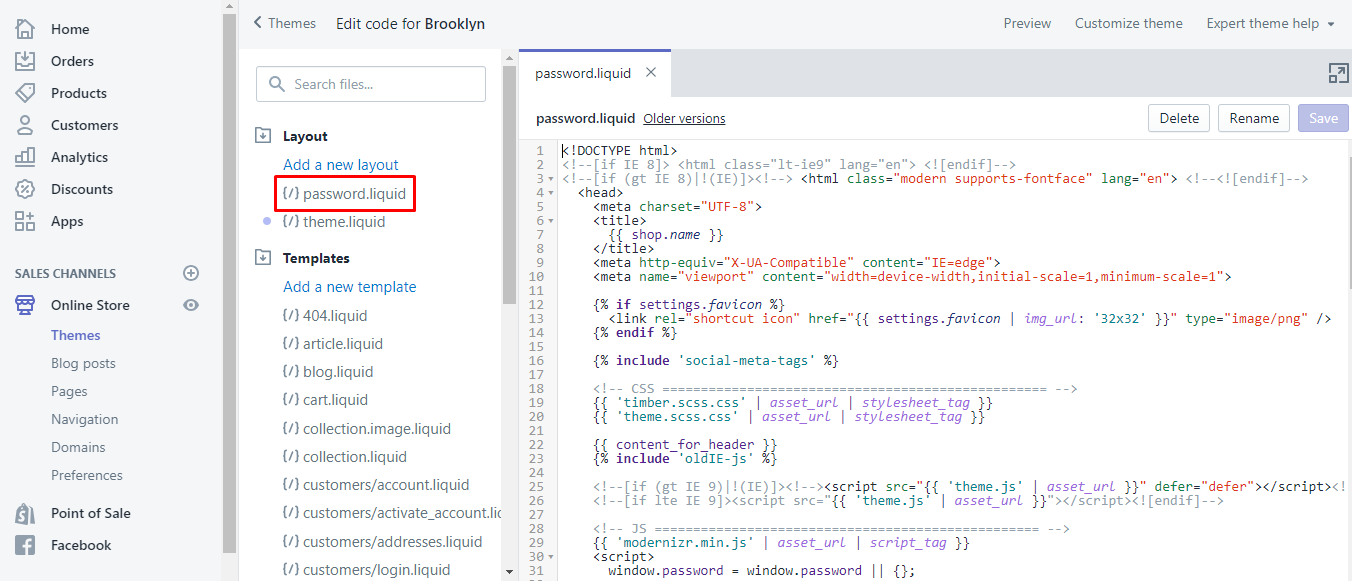
Step 4: Go to password.liquid.
In the Layout section, you can opt for password.liquid.
Step 5: Insert the Liquid tags.
As you can see from the password.liquid template, Liquid tags include these sections which can make up your password page. The theme may add the Liquid tags below:
{% section 'password-header' %}{% section 'password-content' %}{% section 'password-footer' %}
Step 6: Select files in Sections directory.
To change the content of these above-mentioned sections, you can go to one of the followings:
password-header.liquidpassword-content.liquidpassword-footer.liquid
Step 7: Edit code.
Edit the code under your requirement.
Step 8: Saving.
Don’t forget to click Save.

To edit the code templates for your password page on iPhone (Click here)
-
Step 1: Log in your Shopify admin with your email and password.
-
Step 2: Touch
Storeat the bottom of the page. -
Step 3: Touch
Online Store. From the Sales channels section, go to Online Store.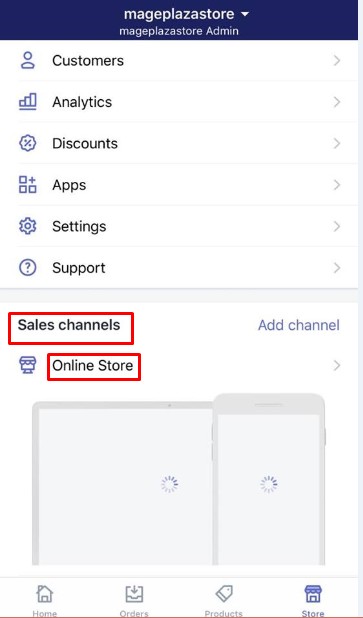
-
Step 4: Select
Manage themes.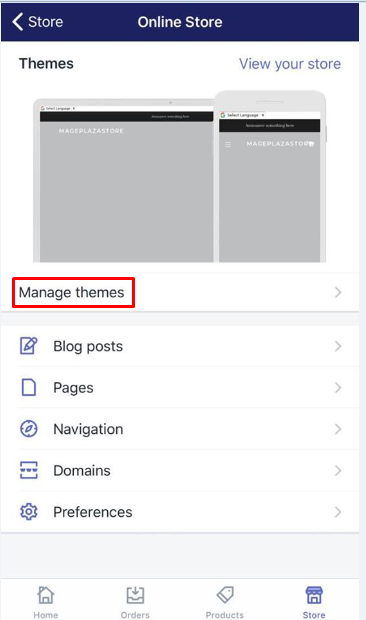
-
Step 5: Choose
Actions > Edit code. After finidng the themes you want to update, choose Actions > Edit code.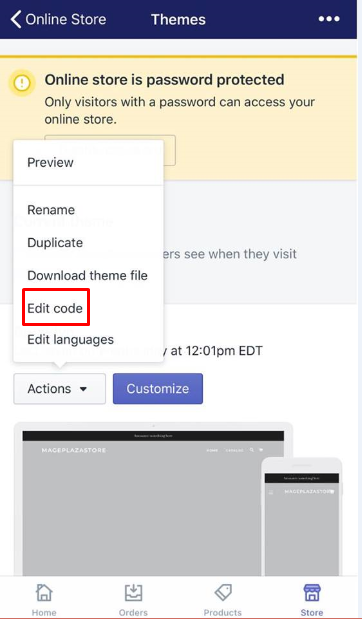
-
Step 6: Touch
password.liquidfrom theTemplatesdirectory.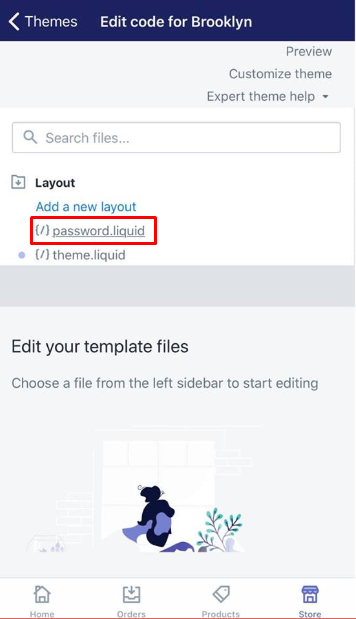
-
Step 7: Insert the Liquid tags. You can add the Liquid tags below to your theme:
- {% section 'password-header' %}
- {% section 'password-content' %}
- {% section 'password-footer' %}
-
Step 8: In order to change your content of these above sections, touch one of the files below
password-header.liquidpassword-content.liquidpassword-footer.liquid
-
Step 9: Get your code edited to meet your needs.
-
Step 10: Touch
Saveto finish.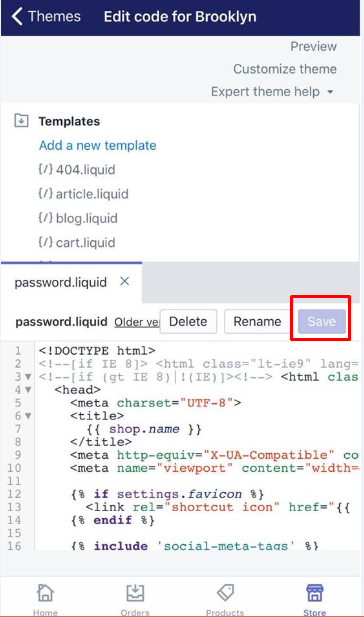
To edit the code templates for your password page on Android (Click here)
-
Step 1: Log in your Shopify admin.
-
Step 2: Tap
Storefrom your Shopify admin. -
Step 3: Tap
Online Storefrom theSales channelsarea. -
Step 4: After choosing
Manage themes, touchAction > Edit code. -
Step 5: Touch
password.liquid. -
Step 6: Insert the following Liquid tags into your theme
{% section 'password-header' %}{% section 'password-content' %}{% section 'password-footer' %}
-
Step 7: Touch one of the files below to help modify your content from these above sections
password-header.liquidpassword-content.liquidpassword-footer.liquid
-
Step 8: Choose the code that you want to edit under your demand.
-
Step 9: Touch
Saveto complete your work.
The file named password.liquid from the Templates section is contained in the theme by the {{content_for_layout}} Liquid tags that can be found in the layout file of your password page. If you want to modify your password page layout, you can select password.liquid at the Layout directory.
Conclusion
We hope that those above-mentioned step on how to edit the code templates for your password page on Shopify are not so complicated to you. Don’t forget to help us share this article if you find it useful.


