4 Steps to Delete a Shipping Zone From your Shipping List on Shopify
A shipping zone, simply speaking, is a group of freely customized countries or regions, often based on geographical locations, that share the same predefined shipping rates.
After creating a new shipping zone on Shopify, at some time you might want to add or remove a country or region from an existing shipping zone, or delete a shipping zone from your current shipping list. All of these could be done within a few steps in your Shopify Admin.
To make the process clear to you, this article would give you the answer to the question: How to delete a shipping zone from your shipping list on Shopify?
Related Posts:
- How to Add or Remove a Country or Region From an Existing Shipping Zone on Shopify
- How to Activate an On-Demand Delivery Service for a New Shipping Zone on Shopify
- How to Create a New Shipping Zone on Shopify - A Complete Guide
How to delete a shipping zone from your shipping list
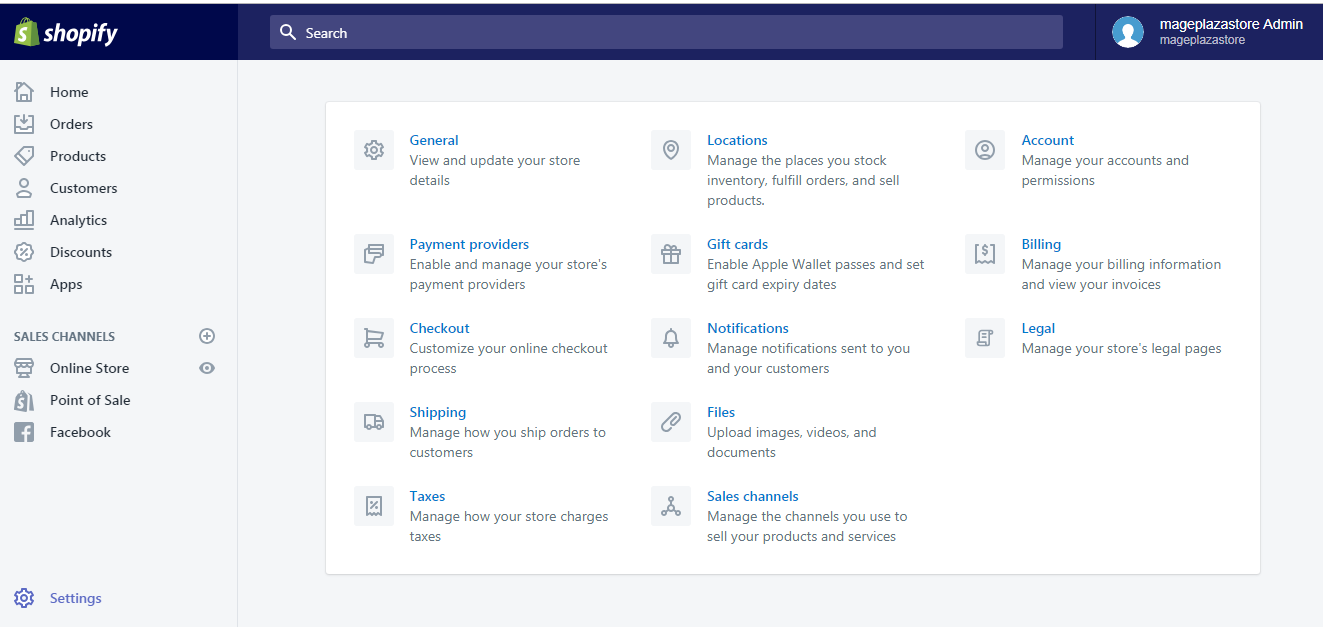
Step 1: Go to the Shipping section
First, log in your Shopify account, go to the Settings section in your bottom left corner and select Shipping.
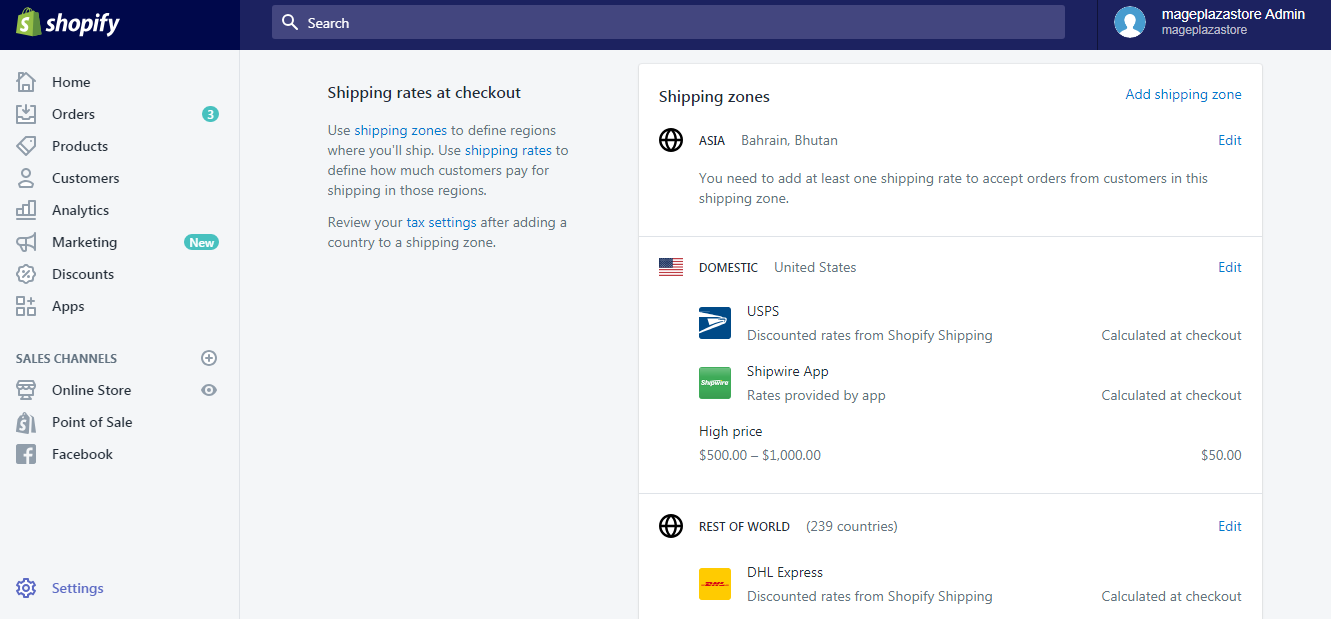
Step 2: Click Edit in Shipping Zones
Next, under the Shipping zones section, click the Edit button next to the shipping zone to be deleted.
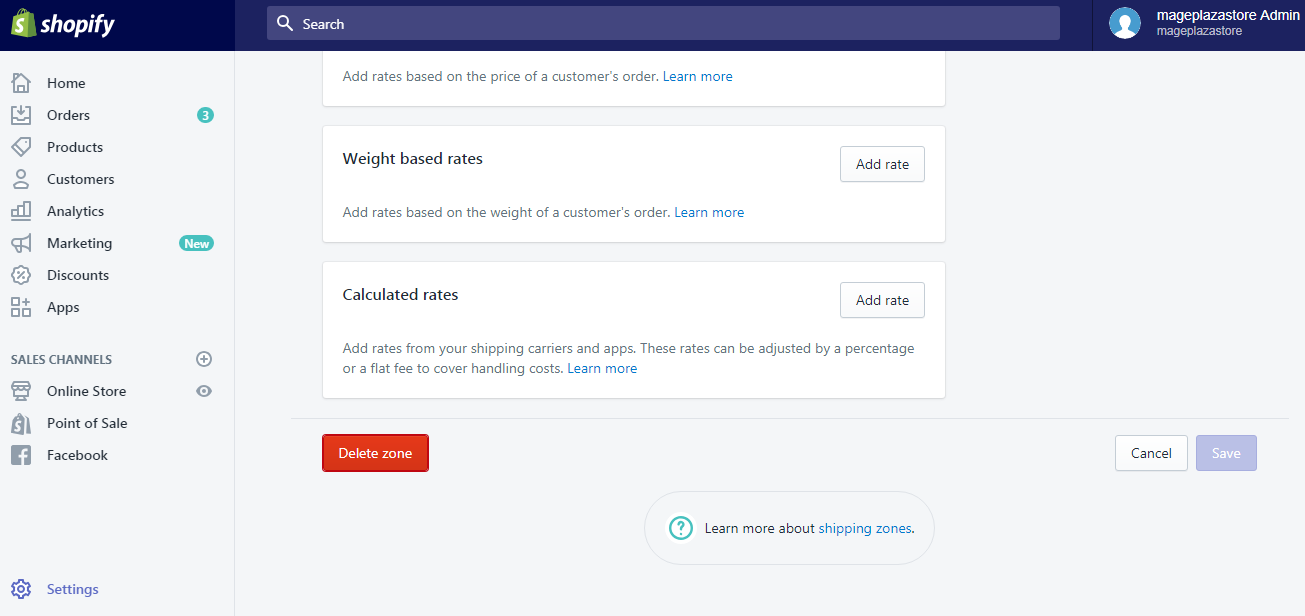
Step 3: Click Delete zone
In this shipping zone, scroll down to the bottom and click the red Delete zone button.
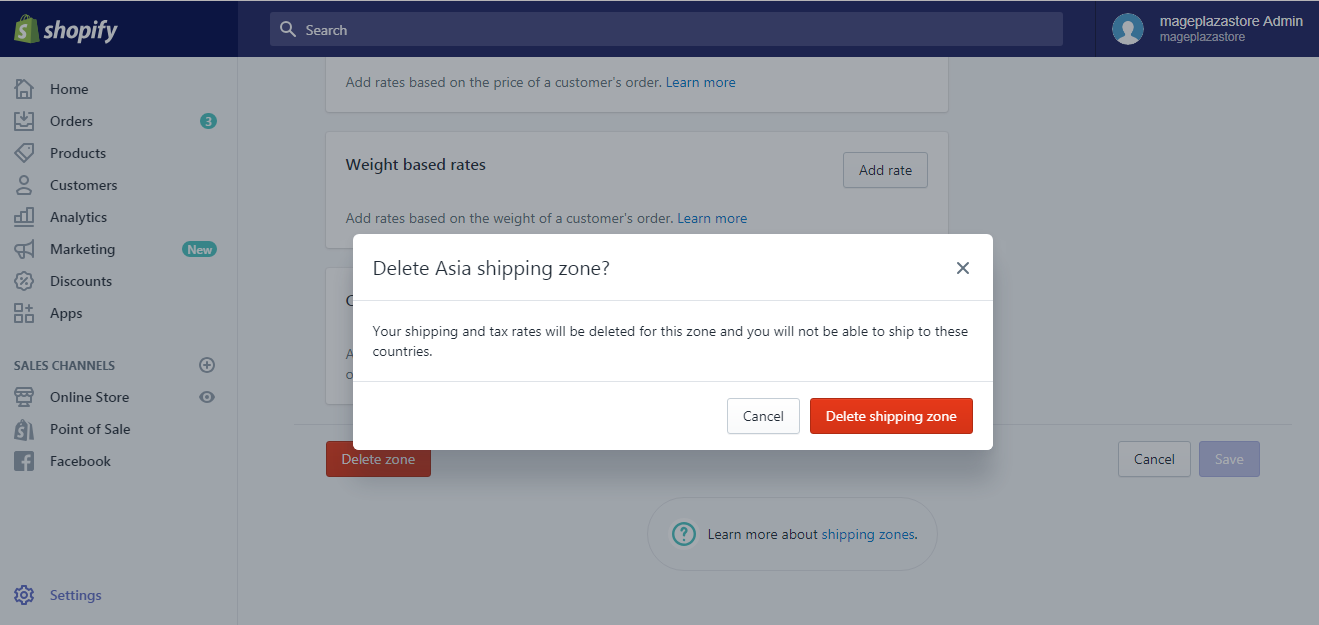
Step 4: Delete shipping zone permanently
A pop-up dialogue will appear to confirm your action. Click Delete shipping zone to delete it permanently.
To delete a shipping zone from your shipping list on iPhone (Click here)
-
Step 1: Go to Settings After logging into your Shopify account, go to the
Storesymbol in the bottom right corner and selectSettings.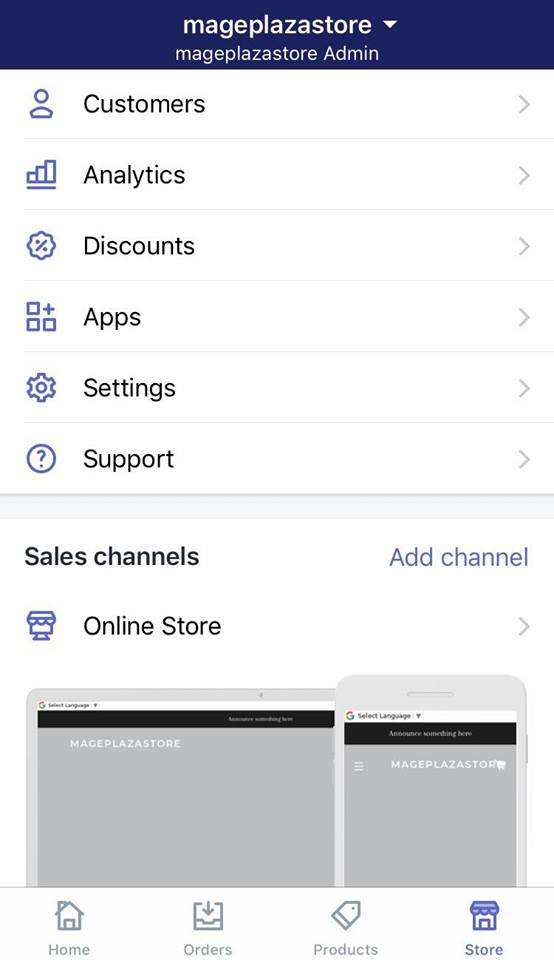
-
Step 2: Go to Shipping Next, in the Store settings section, a list of settings available to customize your store will be shown. Tap
Shipping.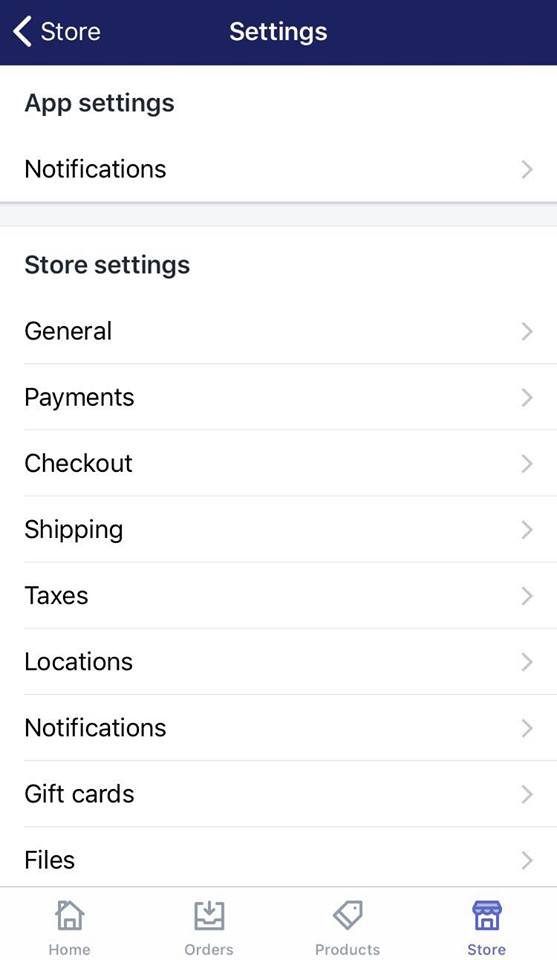
-
Step 3: Tap Edit in Shipping Zones Next, under the
Shipping zonessection, tap theEditbutton next to the shipping zone to be deleted.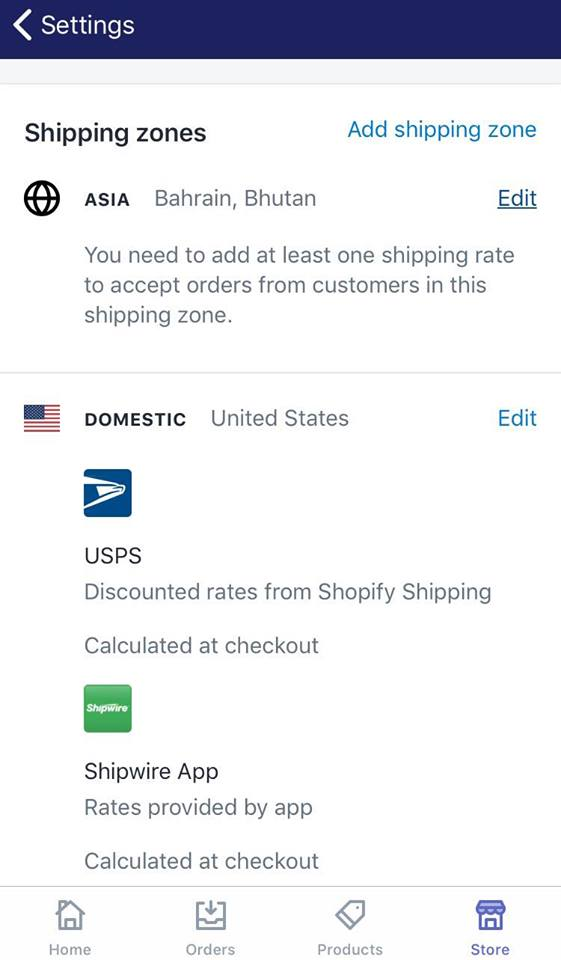
-
Step 4: Tap Delete zone In this shipping zone, swipe down to the bottom and tap the red
Delete zonebutton.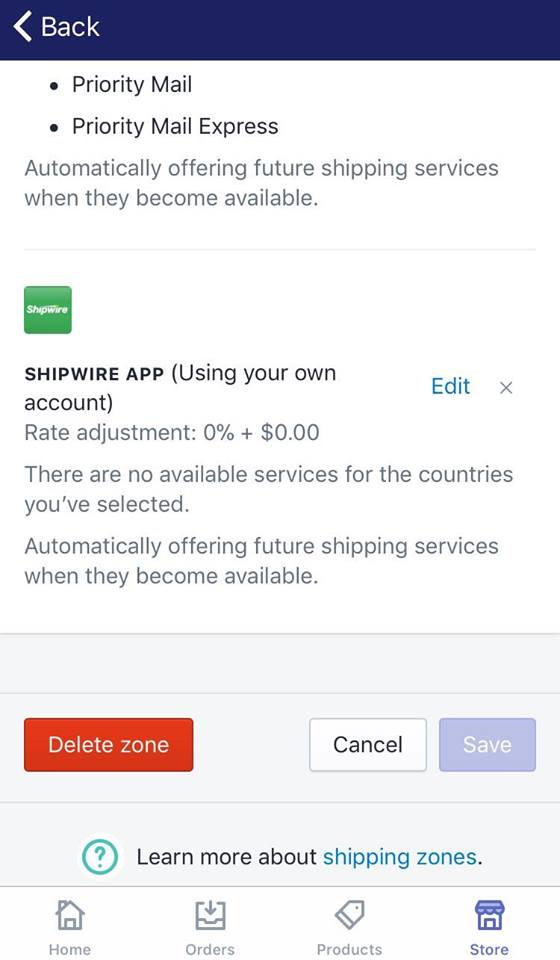
-
Step 5: Tap Delete shipping zone A pop-up dialogue will appear to confirm your action. Tap
Delete shipping zoneto delete it permanently.
To delete a shipping zone from your shipping list on Android (Click here)
-
Step 1: Go to Settings After logging into your Shopify account, go to the
Storesymbol in the bottom right corner and selectSettings.
-
Step 2: Go to Shipping Next, in the Store settings section, a list of settings available to customize your store will be shown. Tap
Shipping.
-
Step 3: Tap Edit in Shipping Zones Next, under the
Shipping zonessection, tap theEditbutton next to the shipping zone to be deleted.
-
Step 4: Tap Delete zone In this shipping zone, swipe down to the bottom and tap the red
Delete zonebutton.
-
Step 5: Tap Delete shipping zone A pop-up dialogue will appear to confirm your action. Tap
Delete shipping zoneto delete it permanently.
Conclusion
Above is a few easy steps to create a new shipping zone on Shopify on Desktop, iPhone and Android. I hope you find it helpful in managing your online business.
For similar guidelines, visit our Help Center.


