How to Deactivate and Reactivate Locations in 4 Easy Steps
After creating locations for your Shopify account, you can comfortably use the created locations for fulfulling orders from customers. But after a while, the locations can be no longer in need for a period of time, or furthermore, permanently. In that situation, you might want to deactive your owned locations permanently or just for a while, and then reactive it again. It seems to be a long and comlicated session, but with Shopify, we can help you to do that with just some simple steps.
To complete your wanted action, you just have to follow this tutorial of How to deactivate and reactivate locations on Desktop, iPhone, and Android.
Related Posts:
- How to Delete Locations on Shopify
- How to Create and Modify Locations on Shopify (on Desktop and Mobile)
- How to Fulfill Orders For Multiple Locations on Shopify in 6 Easy Steps
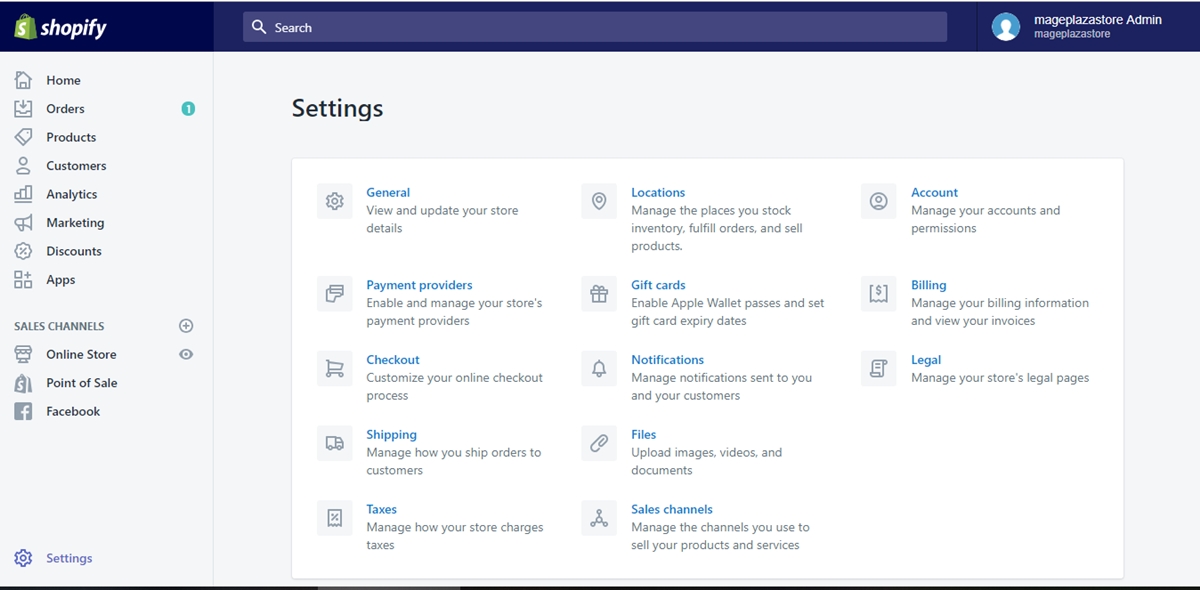
Step 1: Enter Locations
In the Shopify website from your desktop, click on Settings in your left-sided managing column and in the Settings page, find and click on Locations to enter the Locations page.
Step 2: Choose location
In the Locations page, right under the Locations section, you will find a list of locations that you created before. Click on the location to do some actions to that location.
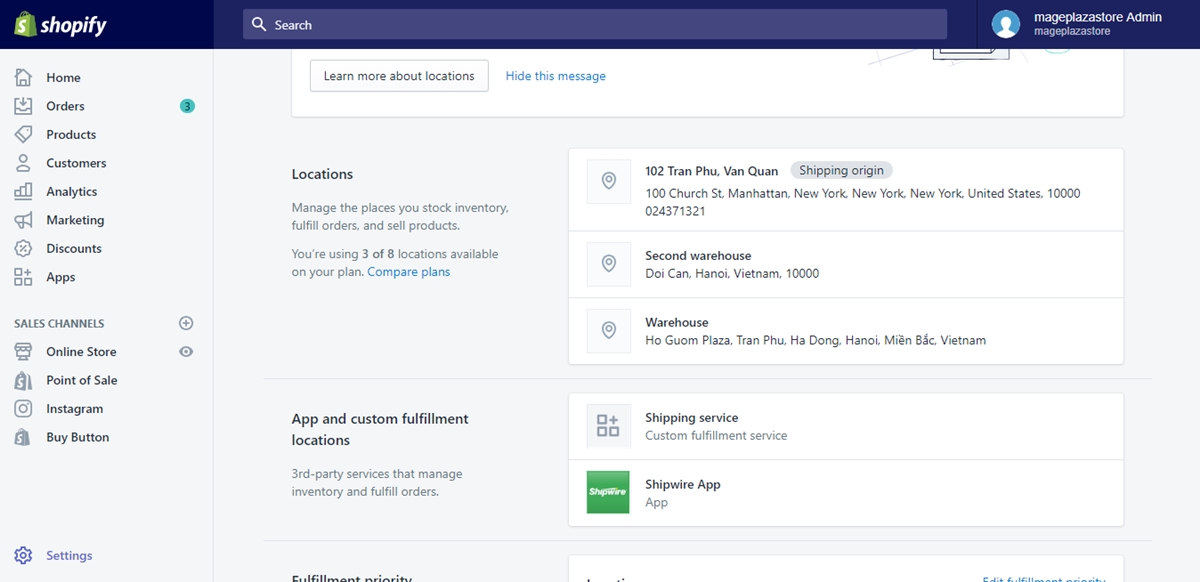
Step 3: Deactivate location
In the chosen location’s page, scroll down to the last part of your page or until you see the Deactivate location section. In that secion, click on the white button with the same name to enter further steps of your action. If the chosen location still has any processing orders, inventory, or transfers, you will have to move all those things to other locations.
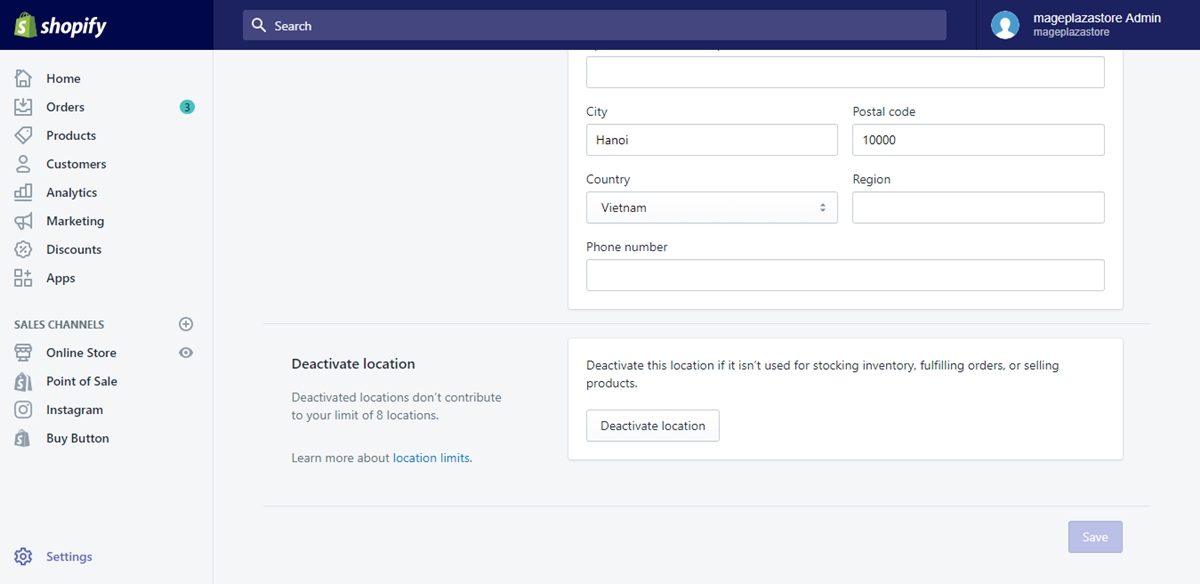
Step 4: Location deactivating
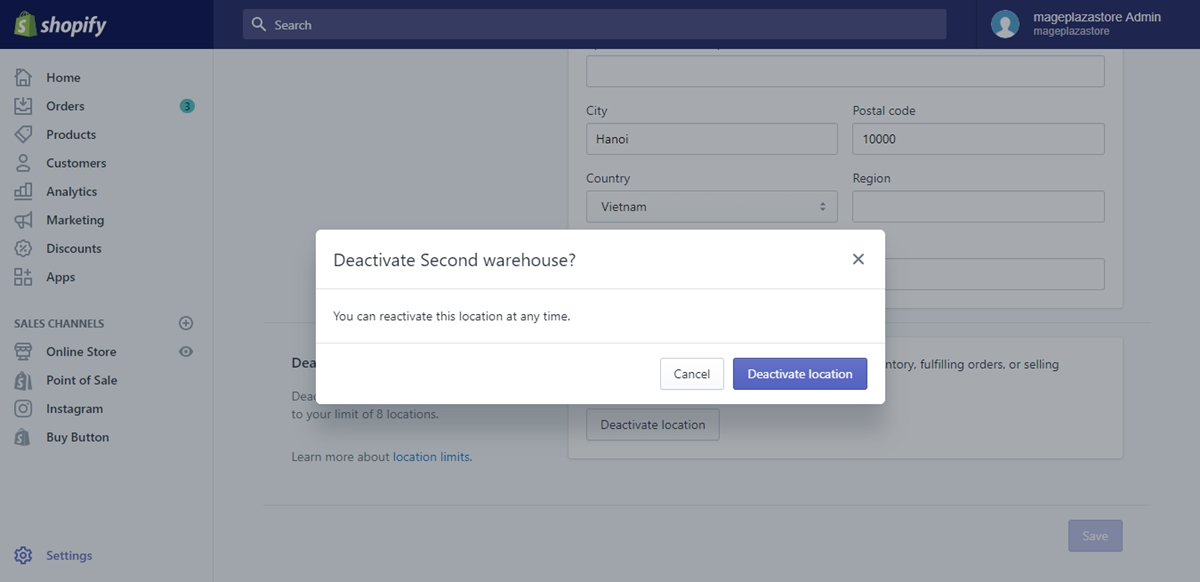
After clicking on the button, you will see a box named Deactivate Second warehouse? shows up. Click on the blue Deactivate location button to finish the session. If you want to reactivate that location, you just have to go to the same page and click on the Reactivate location button.
To deactivate and reactivate locations on iPhone (Click here)
- Step 1: Go to Locations
Upon logging into your store owner account from the Shopify app, you will have to go to the Store page if you want to start your action. Right after that, tap on the Settings button to find the Locations option in the Settings page. Tap Locations for more information.
- Step 2: Tap on location
The Locations page, like its name, will show you every of your owned locations. Tap on the location that you want to deactivate or reactivate from the list.
- Step 3: Finish
Tap Deactivate location to deactivate the chosen location. If you want to reactivate that location in any time, repeat the same steps but tap on the Reactivate location in the last step.
To deactivate and reactivate locations on Android (Click here)
- Step 1: Tap on Locations
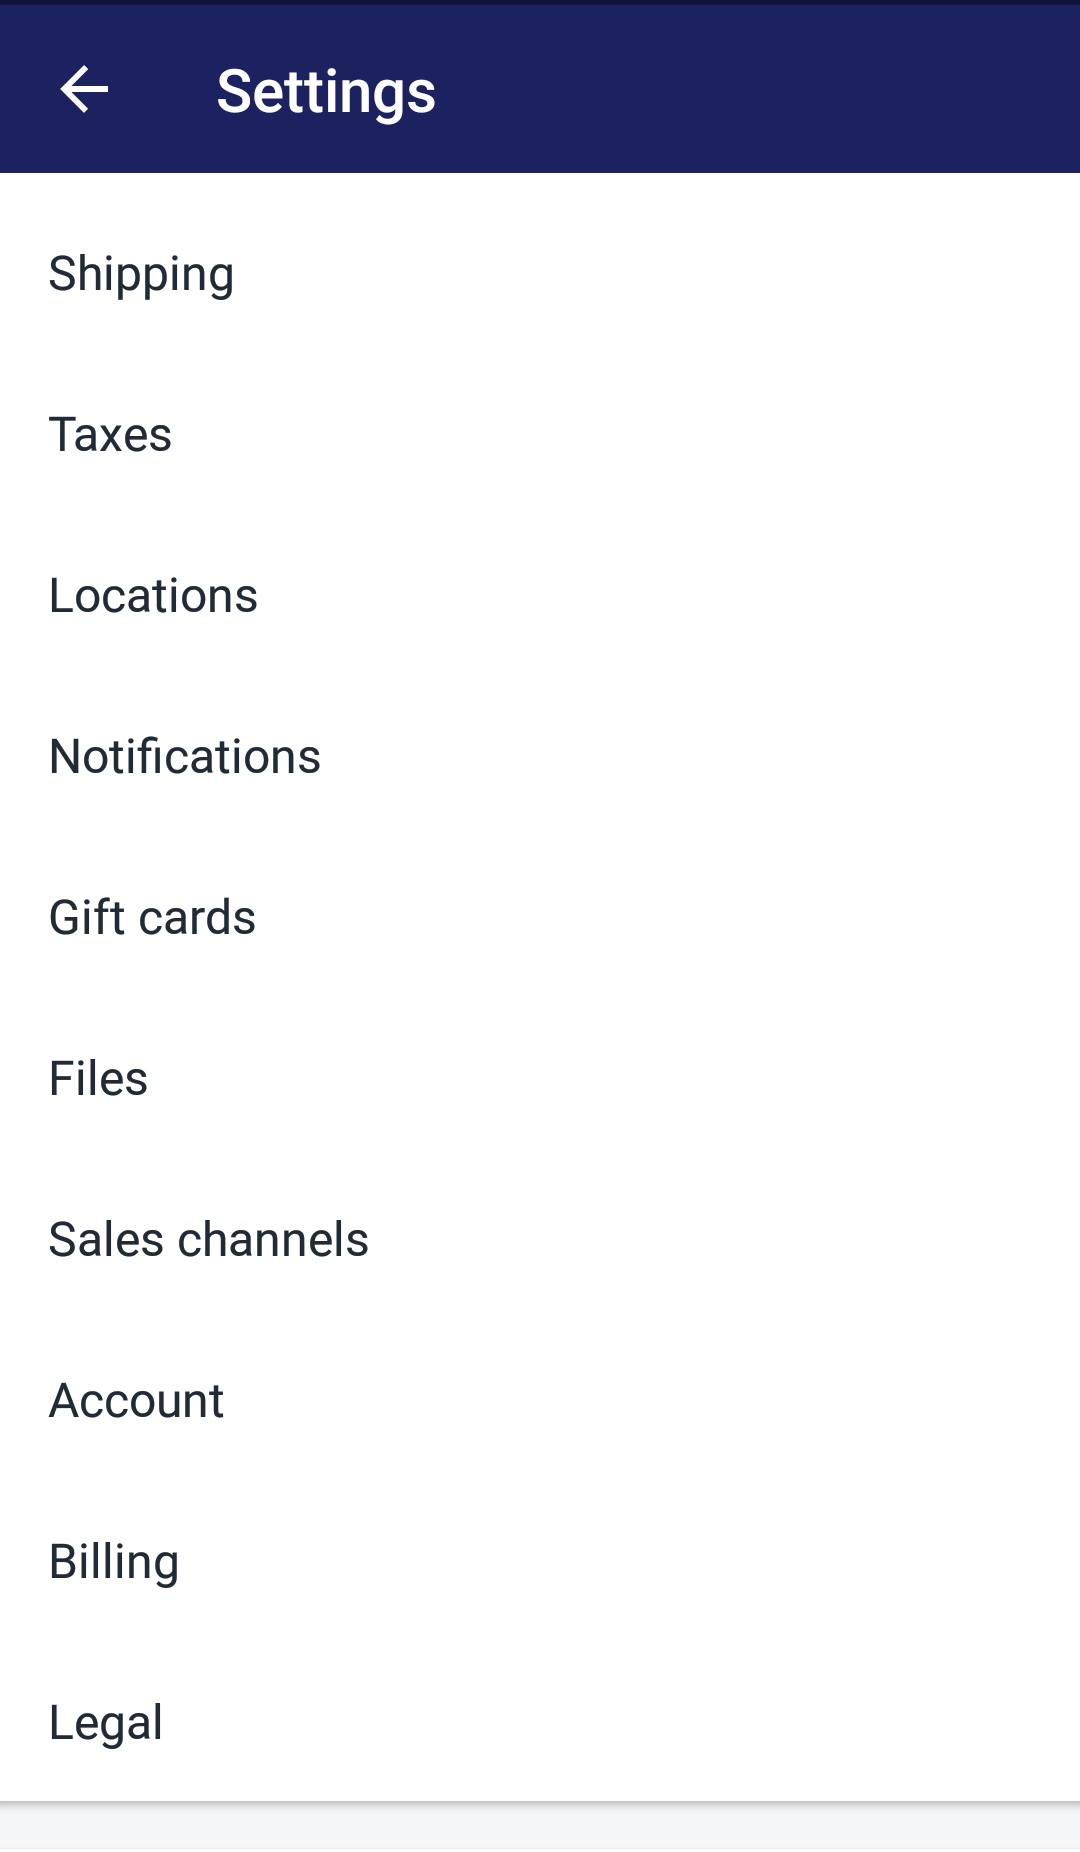
To deactivate or reactivate your locations on Android, you will have to log into your Shopify shop owner account from your Android device first. After logging in, find to tap the Store button from the bottom right of your screen to enter its page. In the Store page, tap Settings and scroll down to find the Locations choice in the Settings page.
- Step 2: Location chosing
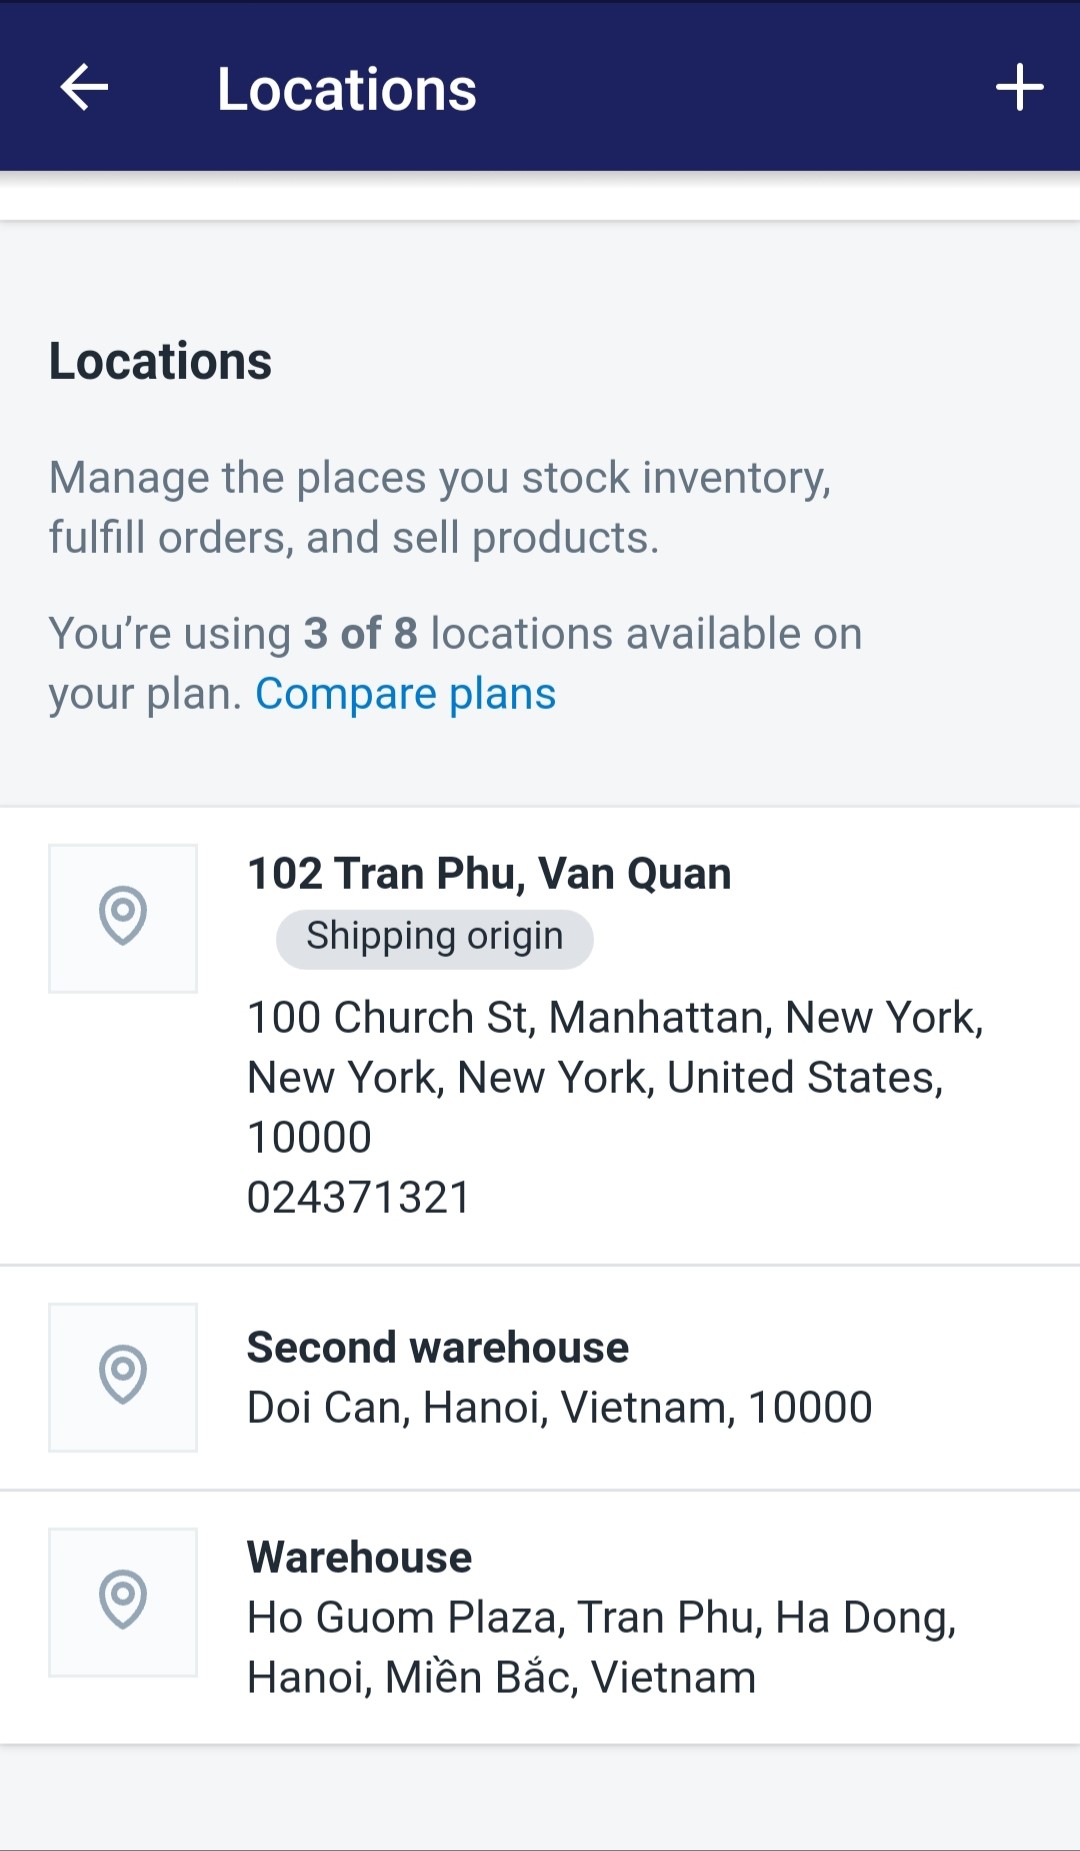
From the Locations page, you can easily find all the titles of the locations that you created before under the Locations section. To chose which location that you want to deactivate or reactivate, tap on its title.
- Step 3: Wrap up
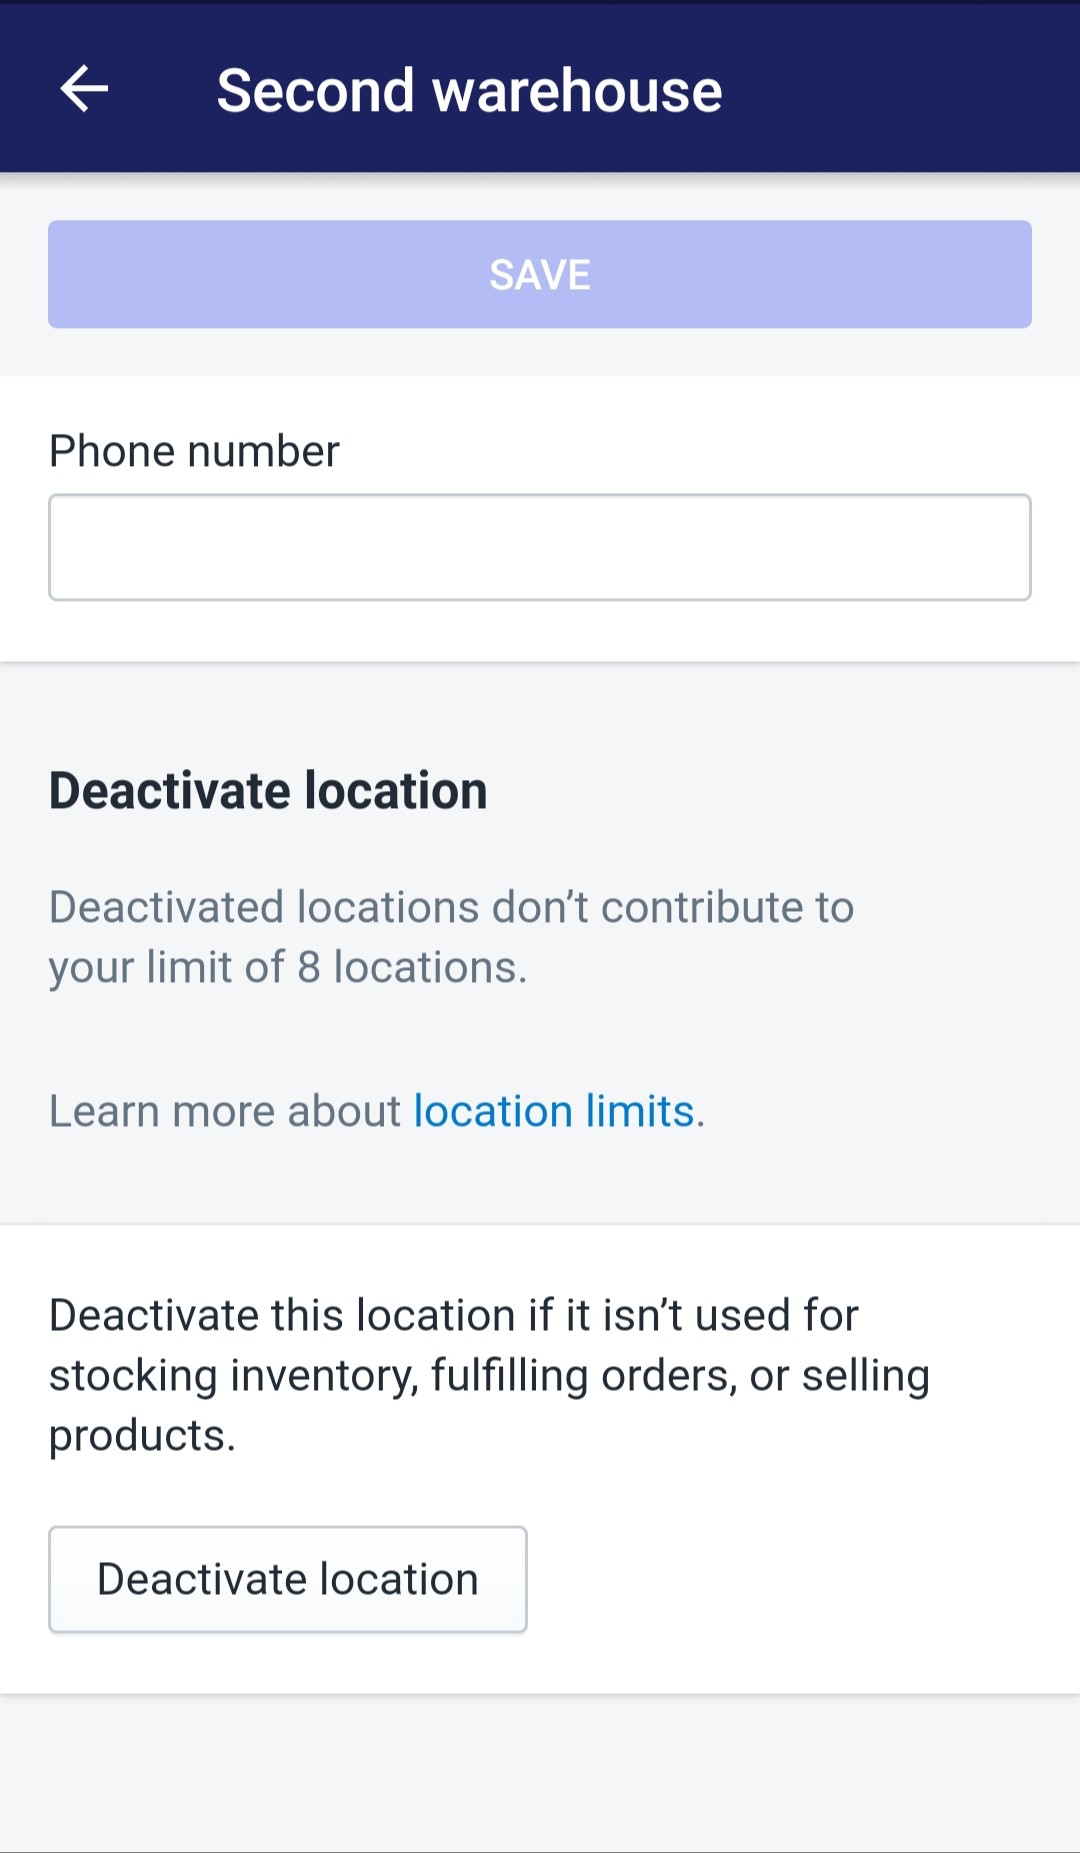
After tapping on the location’s title, you will be directed to its details page. In that page, scroll down till the Deactivate location section and tap on the white colored Deactivate location button under the section to confirm to deactivate the chosen location. When you want to reactivate the location, just simply follow the same steps again but tap on the Reactivate location in the end instead.
Conclusion
With some easy yet effective steps, after today’s tutorial, now you can master How to deactivate and reactivate locations on Shopify. Just with these steps, you can manage your online store’s locations anytime, everywhere, and easily.


