How to Customize Specific SMS Templates on Shopify
Alongside with email templates, there are also SMS templates. SMS notification is a quick-respond communication channel for some tasks that need an immediate announce to/reply from your customers. Not every template on Shopify has an SMS version. In this article, we will find out how to customize specific SMS templates.
Related Post: How to Edit the Templates for SMS Notifications on Shopify
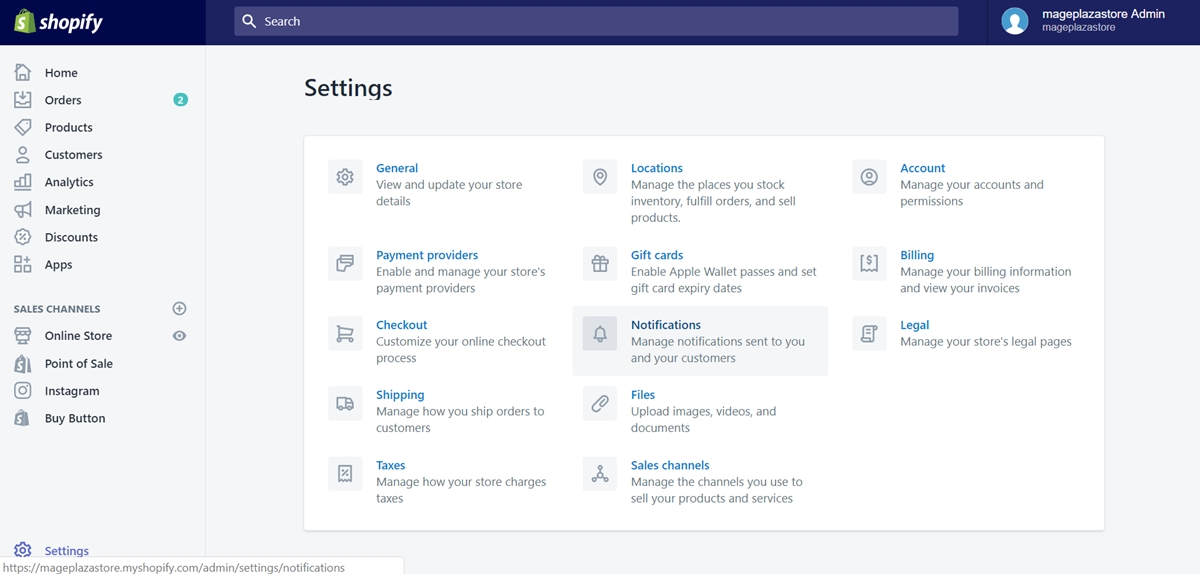
Step 1: Go to Settings, select Notifications
After access to the Shopify admin interface, click on Settings at the bottom left corner of the screen. You can easily recognize it with a gear icon. Then select Notifications.
Step 2: Select the specific template you want to edit
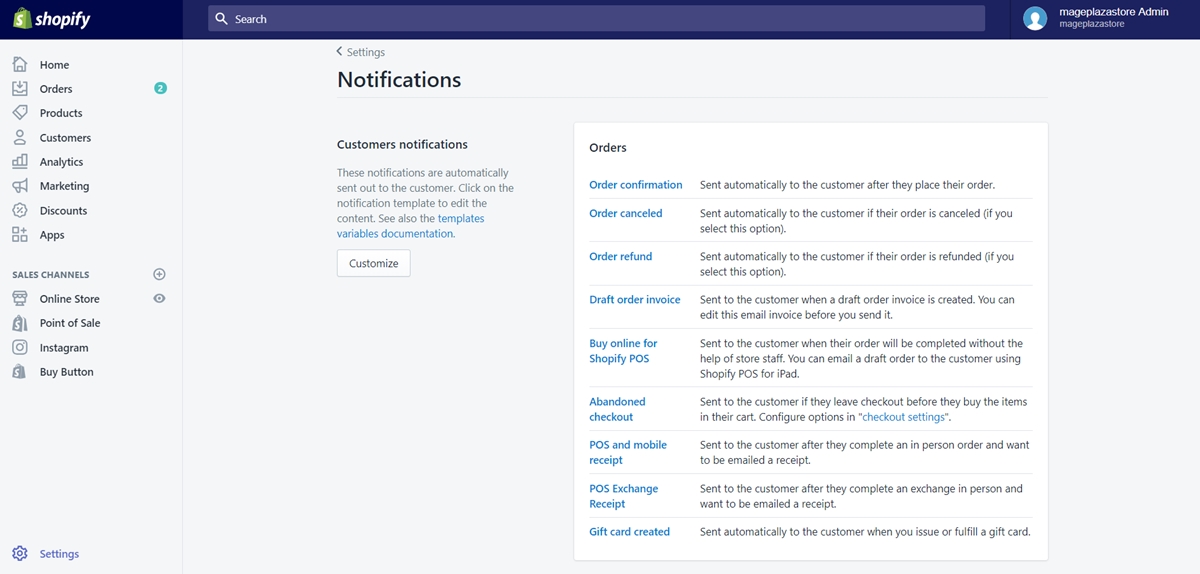
In the Customer notifications sector, you can see all notification templates on the right side of the interface. There are three types of templates on Shopify, Orders, Shipping and Customer. Click on the blue line of each template as you plan to edit.
Step 3: Switch to SMS tab and start customizing
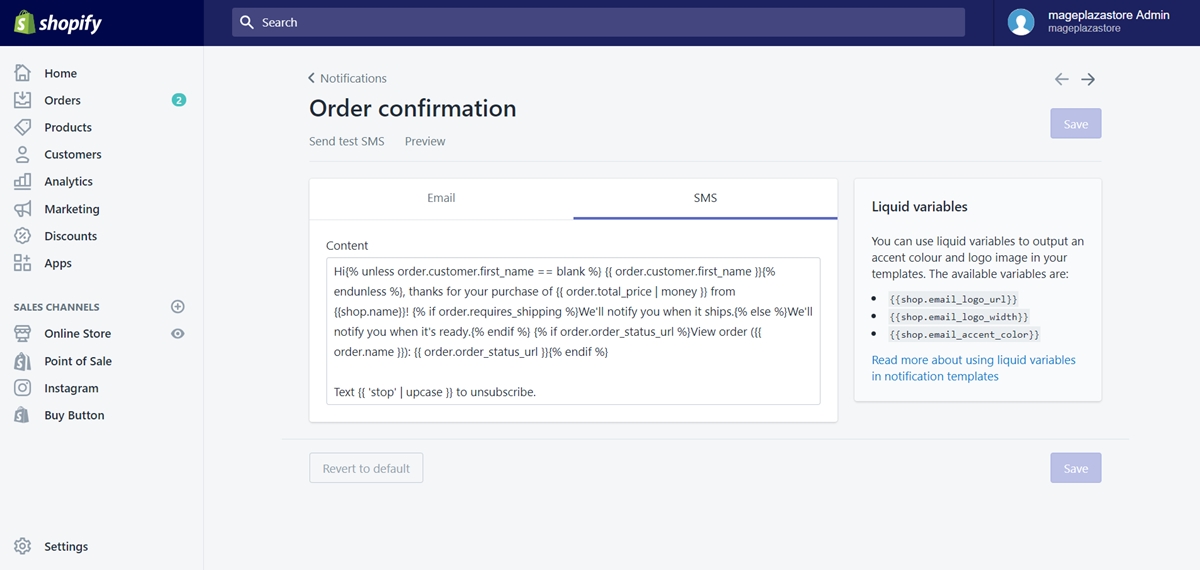
After your selection, you will be directed to a drafting sector. Click on the SMS tab to switch from email version to SMS version of the template. Then, you can start editing the content inside.
Step 4: Save your changes
When you finish editing, click Save to confirm your changes.
To customize specific SMS templates on iPhone (Click here)
- Step 1: Go to Store, select Settings
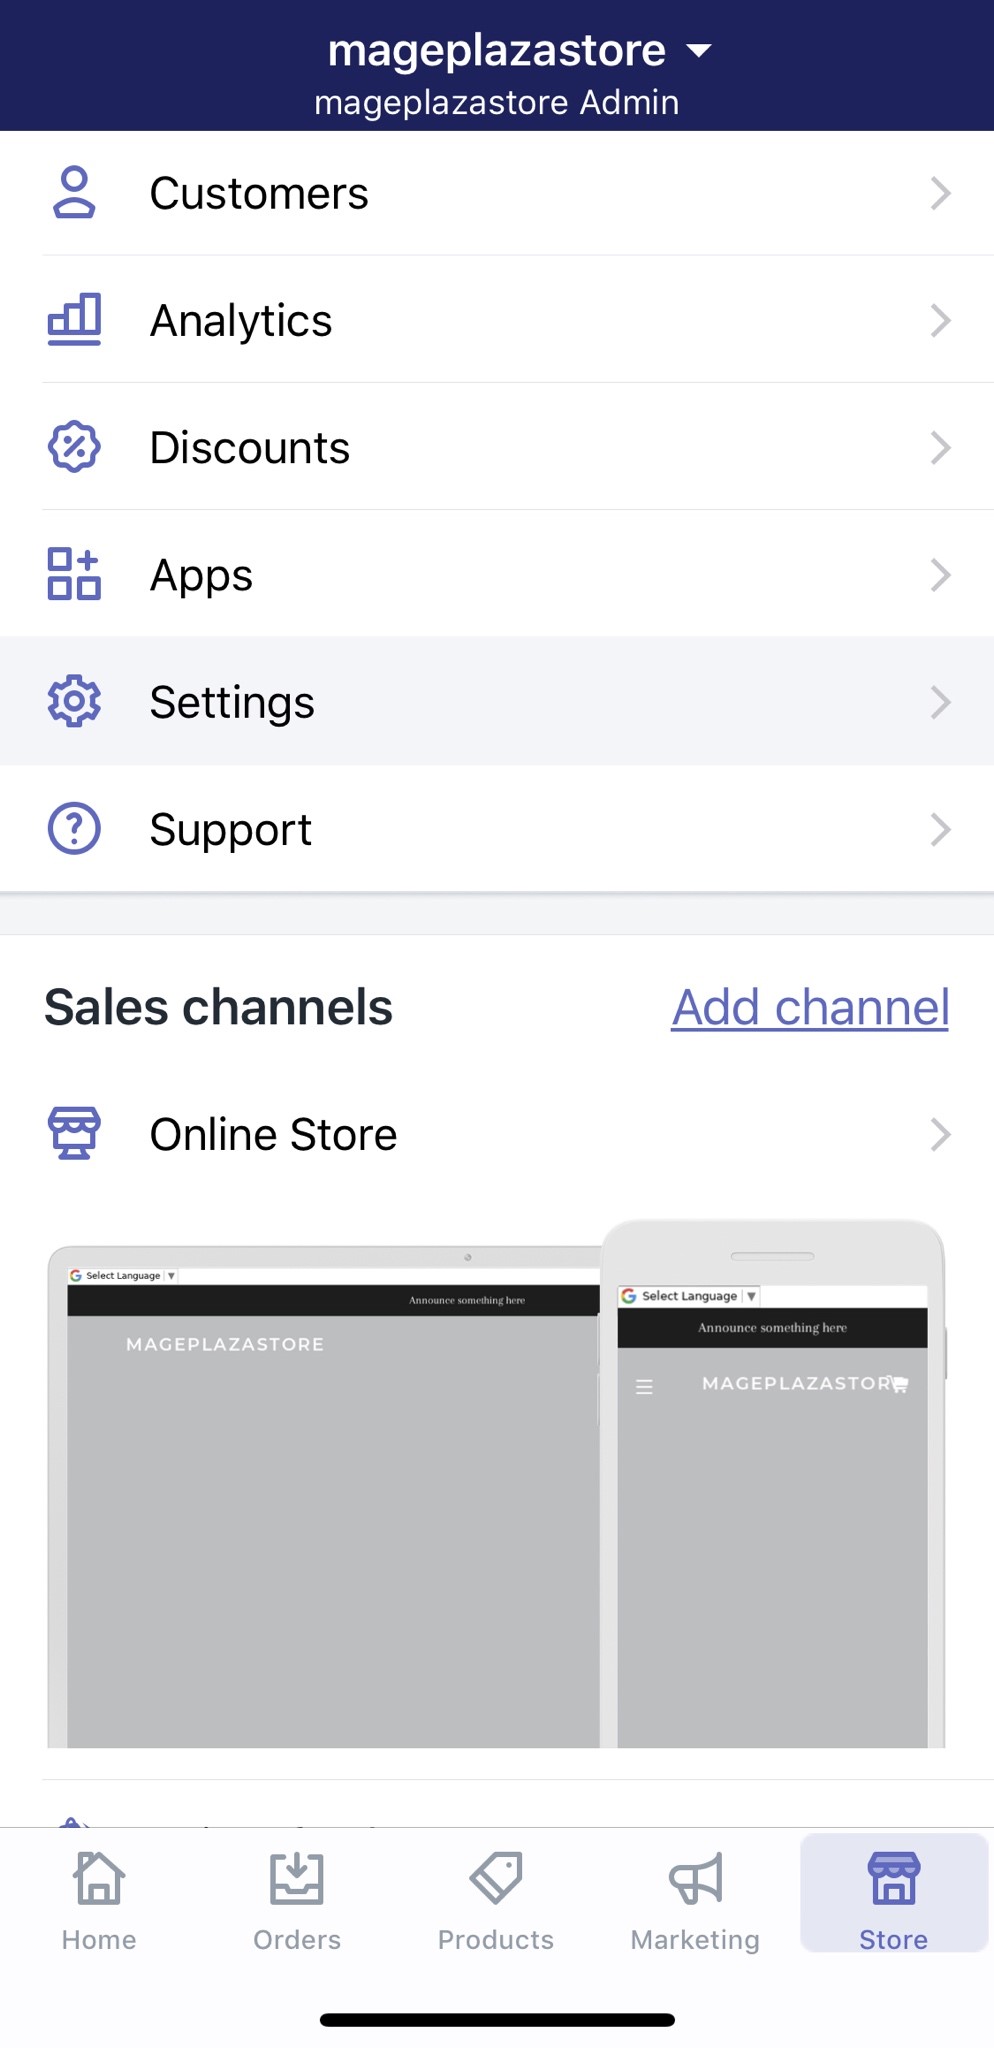
From the main screen of the Shopify app, tap on the Store tab at the bottom bar.
Then, select Settings.
- Step 2: Tap Notifications
Tap on Notifications among the Store settings.
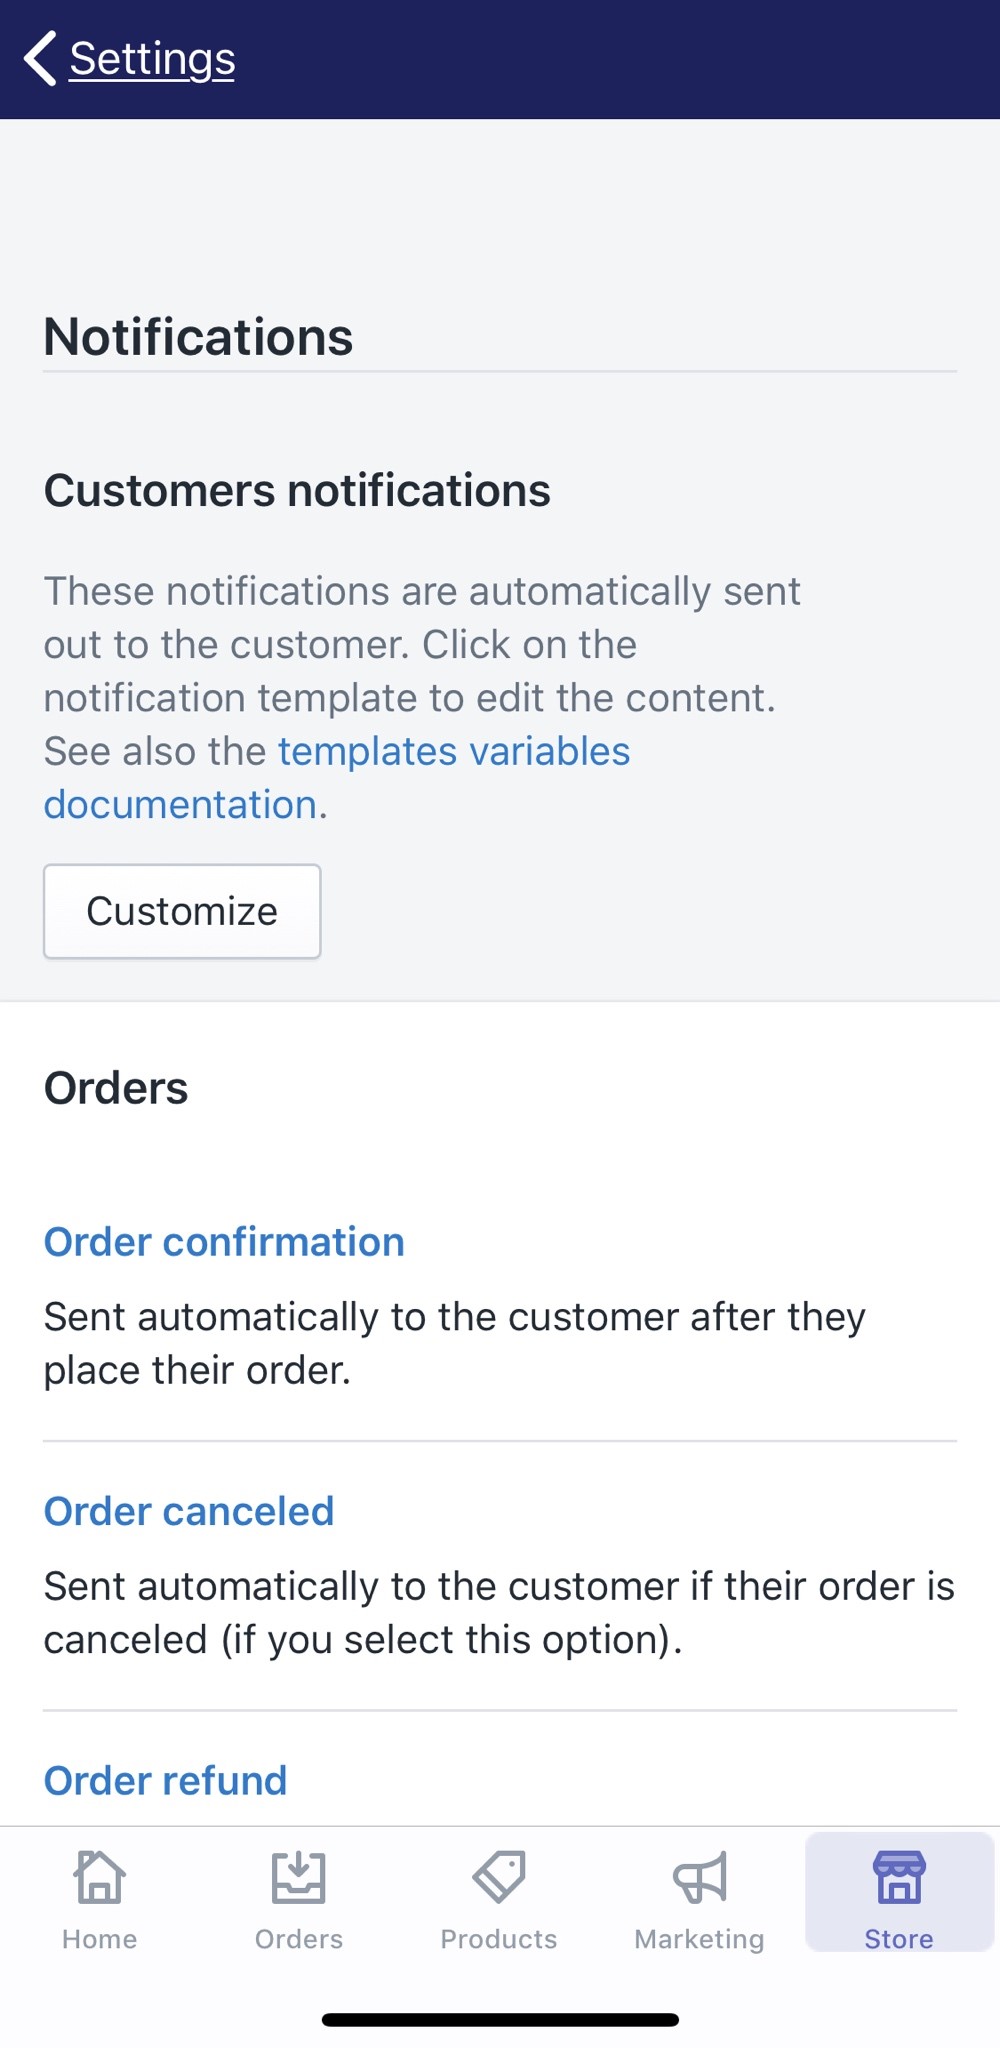
- Step 3: Tap on the specific template you want to edit
In the Customer notifications area, there are three types of notifications, Orders, Shipping, Customer. You can choose a specific template of each type to edit by tapping on each blue line.
- Step 4: Tap SMS and start editing
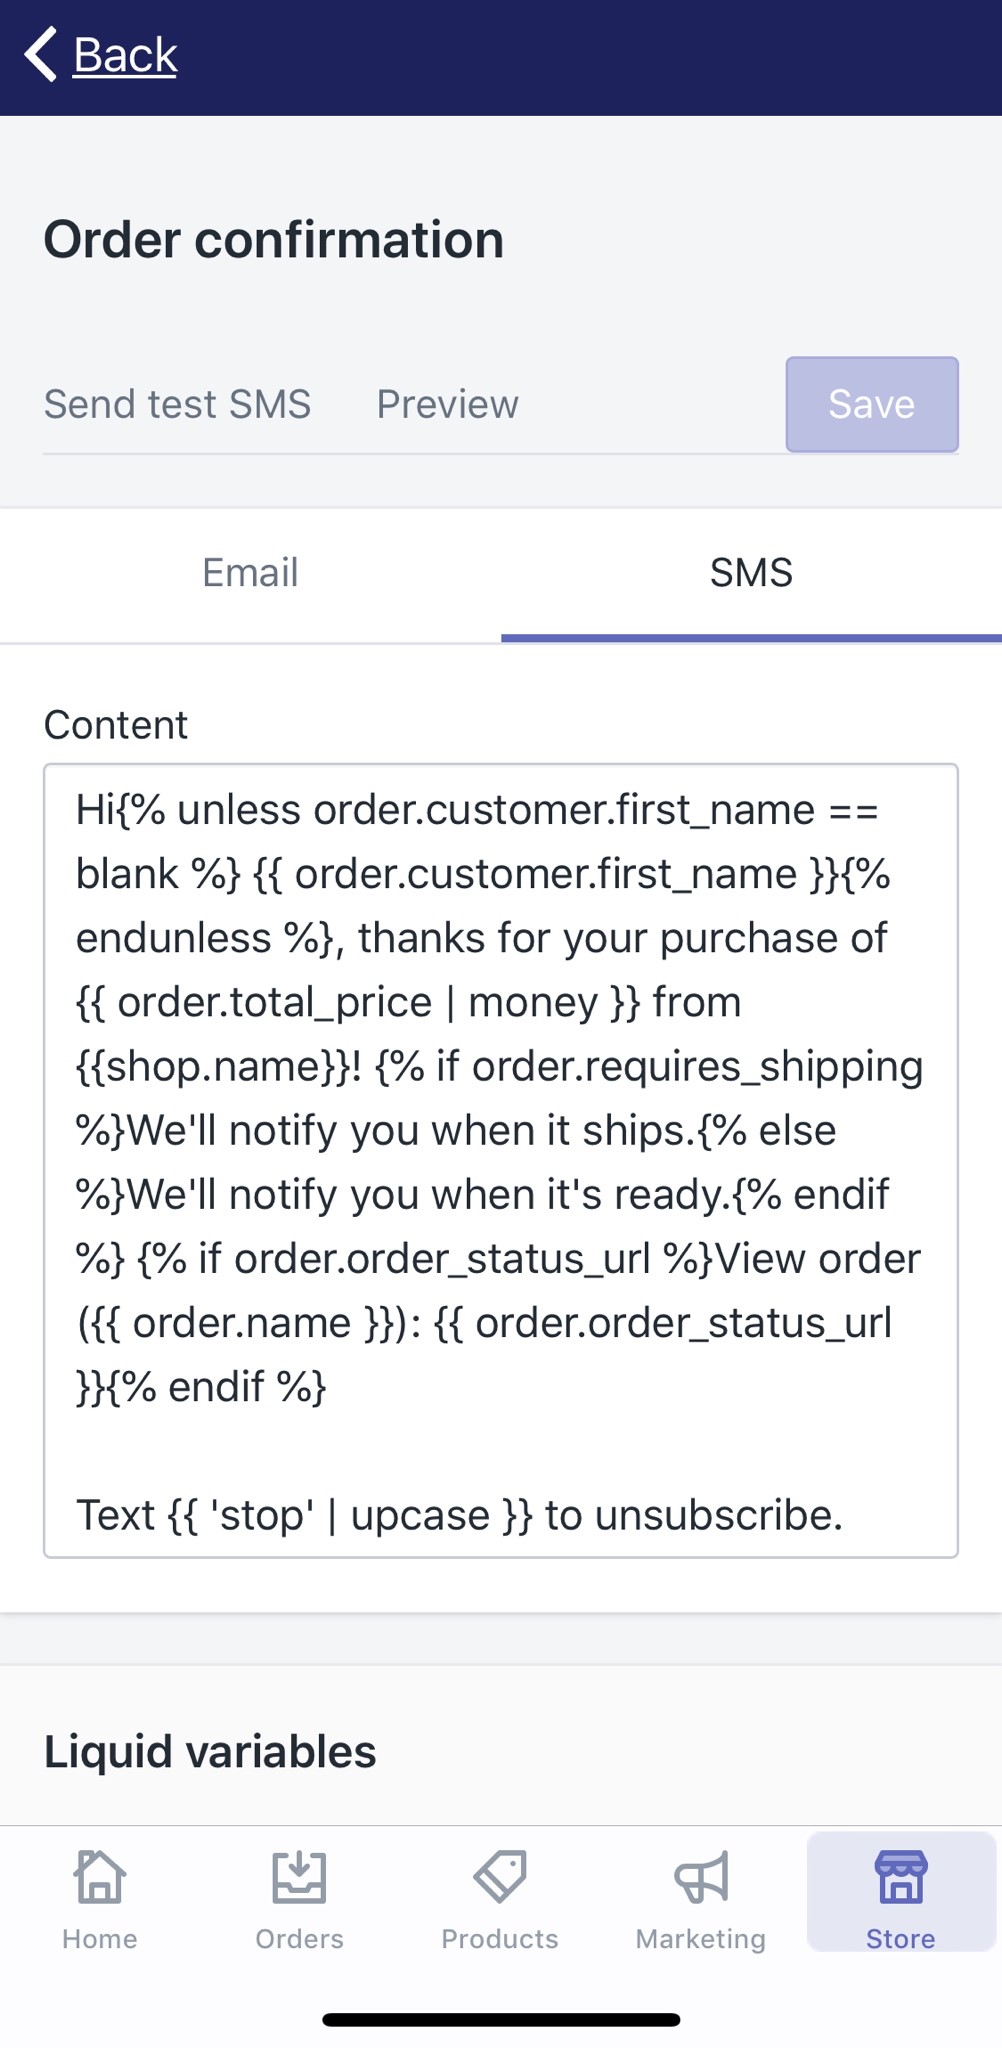
Before editing, you need to tap on SMS to switch from email version to SMS version of the template you selected.
You can check Preview to see the edited template and keep it on track, or tap Send test email to check your final template like a demo.
- Step 5: Save your changes
Tap Save to confirm your changes you have made. If you want to reverse the process, tap Revert to default.
To customize specific SMS templates on Android (Click here)
- Step 1: Go to Store, select Settings
From the main screen of the Shopify app, tap on the Store tab at the bottom bar.
Then, select Settings.
- Step 2: Tap Notifications
Tap on Notifications among the Store settings.
- Step 3: Tap on the specific template you want to edit
In the Customer notifications area, there are three types of notifications, Orders, Shipping, Customer. You can choose a specific template of each type to edit by tapping on each blue line.
- Step 4: Tap SMS and start editing
Before editing, you need to tap on SMS to switch from email version to SMS version of the template you selected.
You can check Preview to see the edited template and keep it on track, or tap Send test email to check your final template like a demo.
- Step 5: Save your changes
Tap Save to confirm your changes you have made. If you want to reverse the process, tap Revert to default.
Summary
I just show you how to customize specific SMS templates on Shopify. If you know how to customize email templates, then it would not be too hard to keep SMS templates on the right track. According to someone’s opinion, SMS is an obsolete channel for communication. But in fact, SMS notification is a trustworthy channel to confirm some information from customers. Therefore, make sure your SMS templates are drafted properly. If you enjoy this post, there’s a good chance you’ll also like other posts we wrote on selling online.


