How to Create a Buy X Get Y Discount on Shopify
Buy X Get Y discount is a traditional marketing strategy. By buying a certain number of products, customers will receive a set of other goods as special offers. Offering Buy X Get Y discounts will not only attract new customers, boost up your brand, but also help you to clear space in your store, increase sales and welcome a new collection of products.
Related Posts:
- How to Create a Fixed Value or Percentage Discount on Shopify
- How to View and Make Comments On A Discount’s Timeline on Shopify
- How to Promote Shopify Discount on Facebook
- How to Create Free Shipping Discount on Shopify
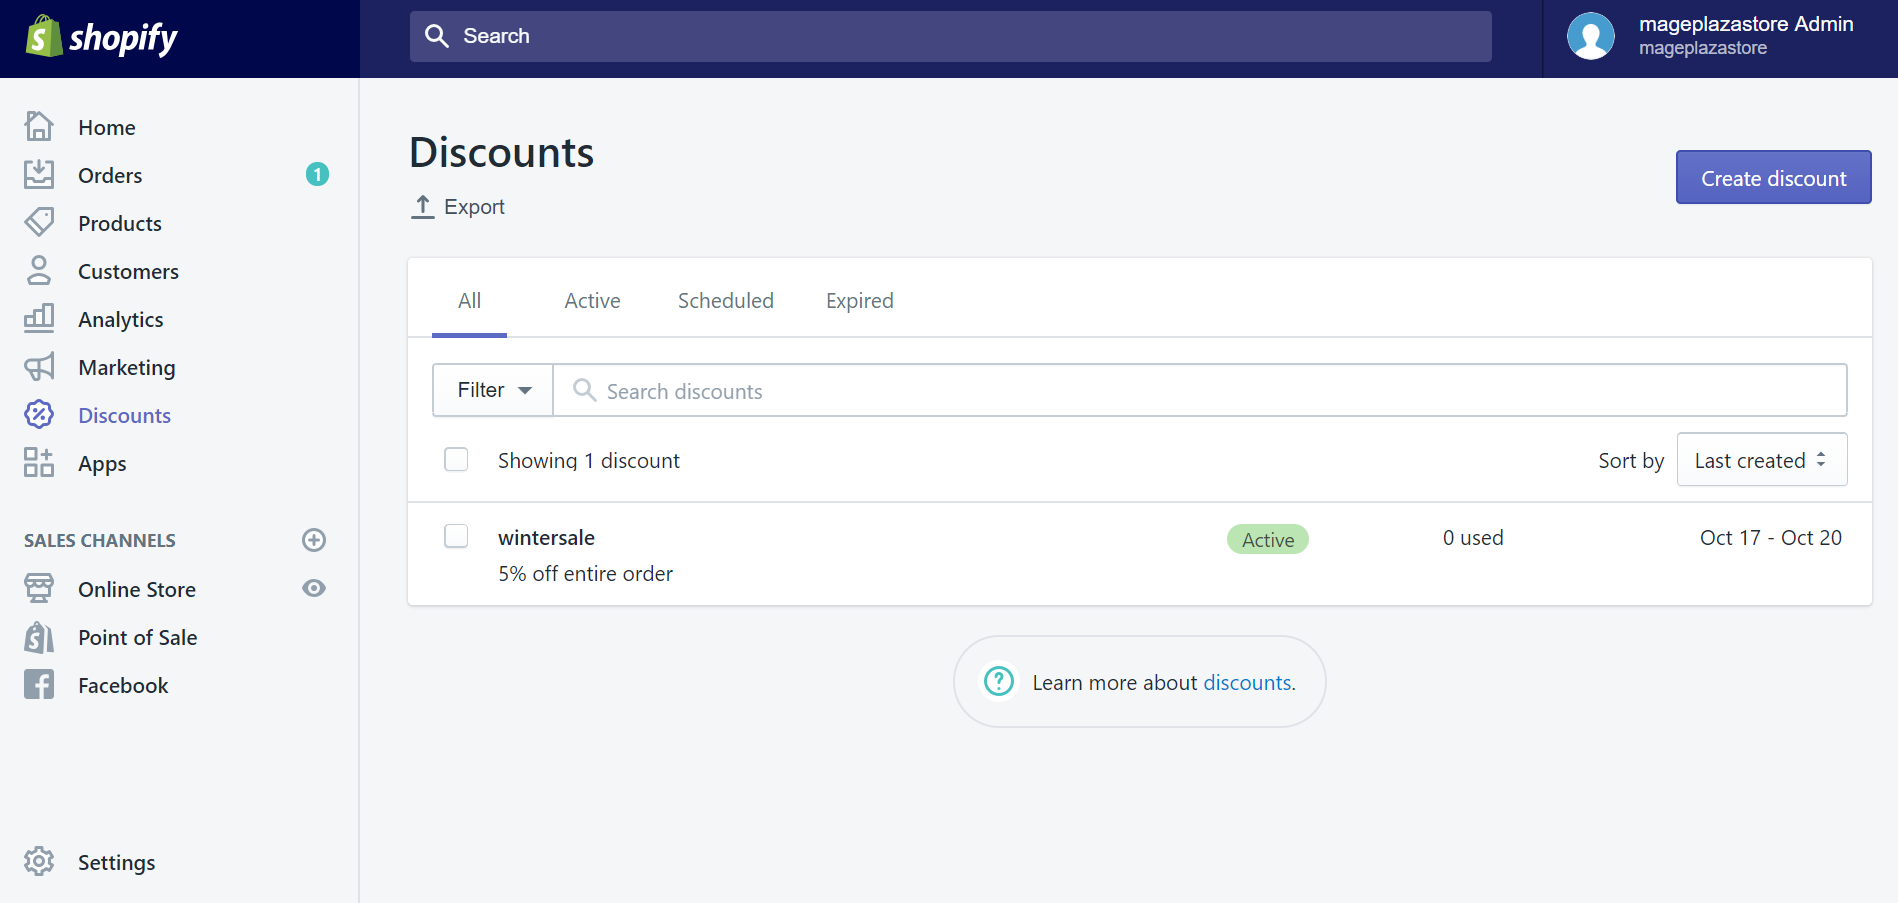
Step 1: Go to Discounts
After accessing the Shopify admin interface, take a look at the list on the left side of the screen. There, you can easily see Discounts option with a percentage-badge icon. Just click on it, and shall we continue.
Step 2: Click Create discount
After being directed to the Discount section, click on the button Create discount at the top right corner to start creating a new discount.
Step 3: Configure the new discount’s attributes
In the Create discount code section, you need to configure some details of your new discount before making it available for customers.
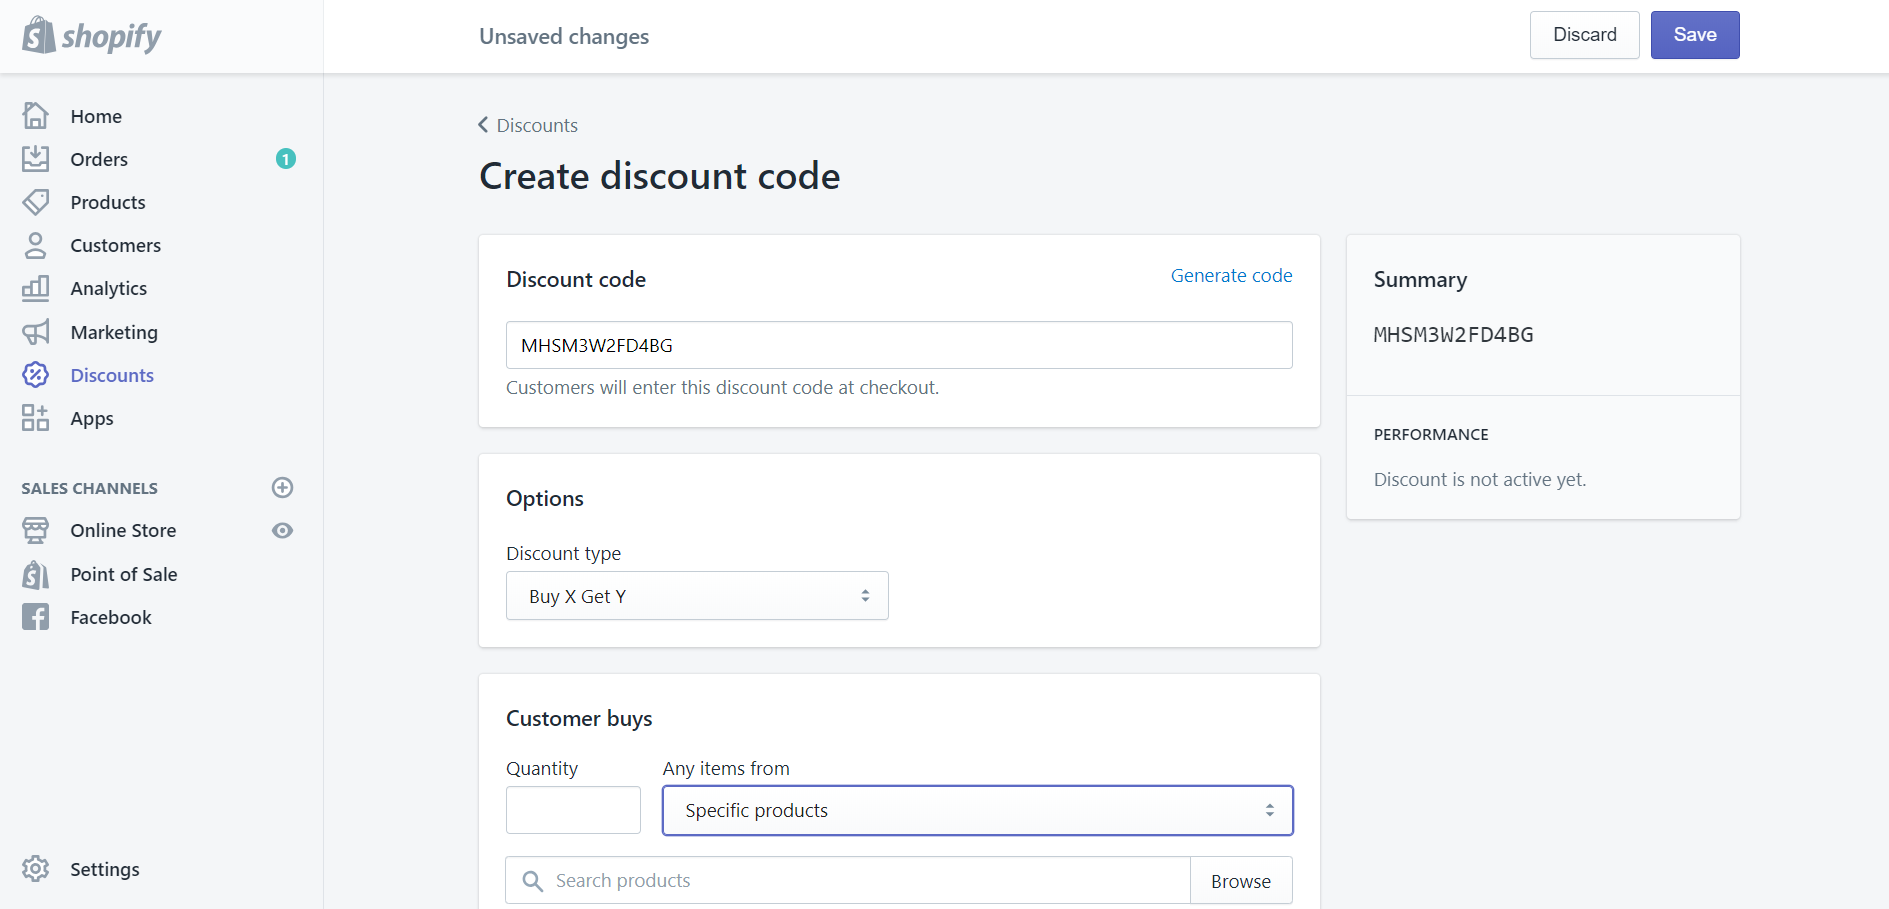
Discount code: This section allows you to create new codes using to enter the discount at Checkout. Shopify also provides an algorithm to generate new codes automatically, just click Generate code and it will do the rest.
Options: In Discount type, you can choose the type of discount. In this case, select Buy X Get Y.
Customer buys: This section requires you to select Specific products or Specific collections and set an amount of them by which your customers will be qualified after buying such amount to use the discount. By clicking Browse, a dropdown list will appear for you to select.
Customer gets: You will decide what Specific products or Specific collections your customers can get after being qualified in this section. By clicking Browse, a dropdown list will appear for you to select.
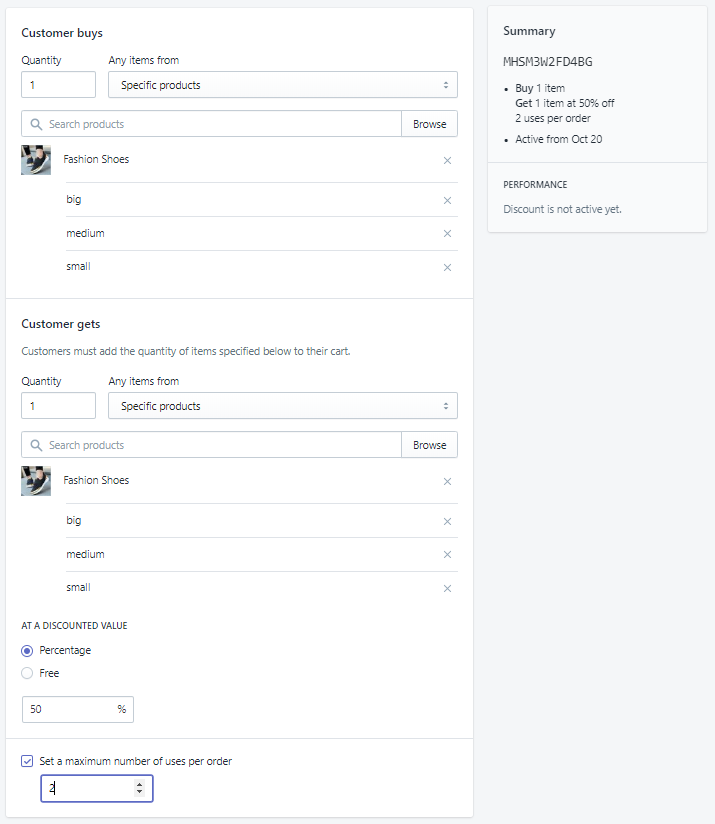
At a discounted value: In this section, you can choose a discounted value (applied for products in Customer gets) your customers will receive after buying a set amount of products in Customer buys. You can also select Free to offer for free.
Set a maximum number of uses per order: This section will limit the number of times this discount can be used in each order.
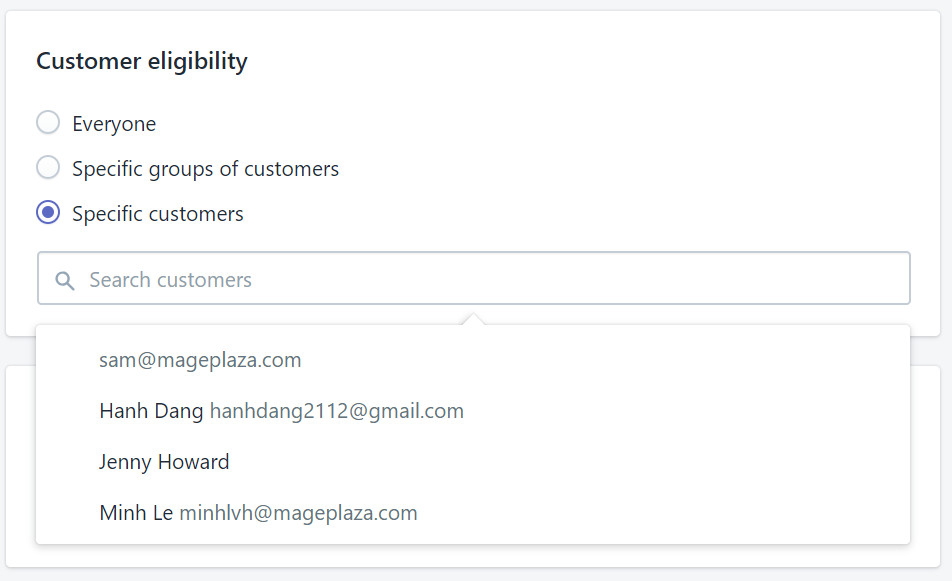
Customer eligibility: This field will help you in selecting particular individuals or groups of customers who are accessible to this offer. A dropdown list will show the list of them and their email addresses once you click on the blank field. In case some customers’ email addresses are not included in your data, other contact information will appear instead, such as phone numbers. If the group of customer is not there, you will need to create customer groups as your desired targets. If you select Specific customers, a dropdown list will show you all customers.
Usage limits: To restrain your customers from using the discount over a certain time of use, you need to put a tick in one or maybe both options in this section.
You can Limit number of times this discount can be used in total among all eligible customers, after putting the number of times in the blank. No matter how many customers use the discount, or how many times each eligible customer can use. You can also Limit to one use per customer.

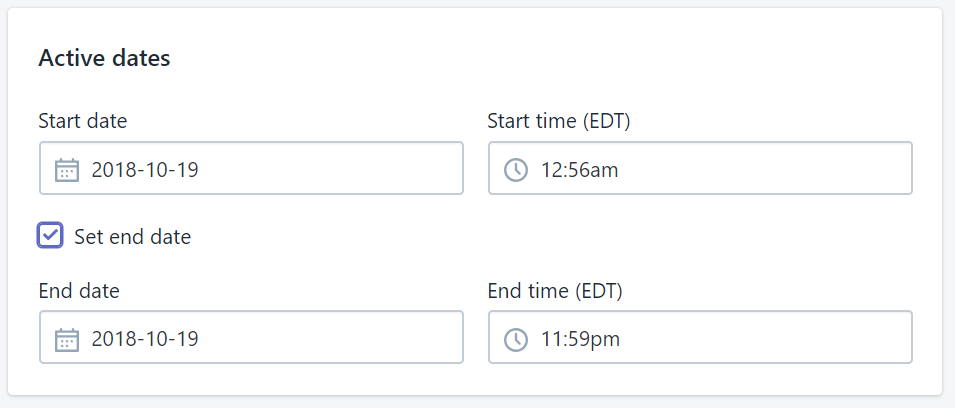
Active dates: This option helps you to decide whether you want to make your discount permanent or temporary. By setting an active date (and an end date if you want to), you will be able to control when your discount is available.
Step 4: Click Save discount
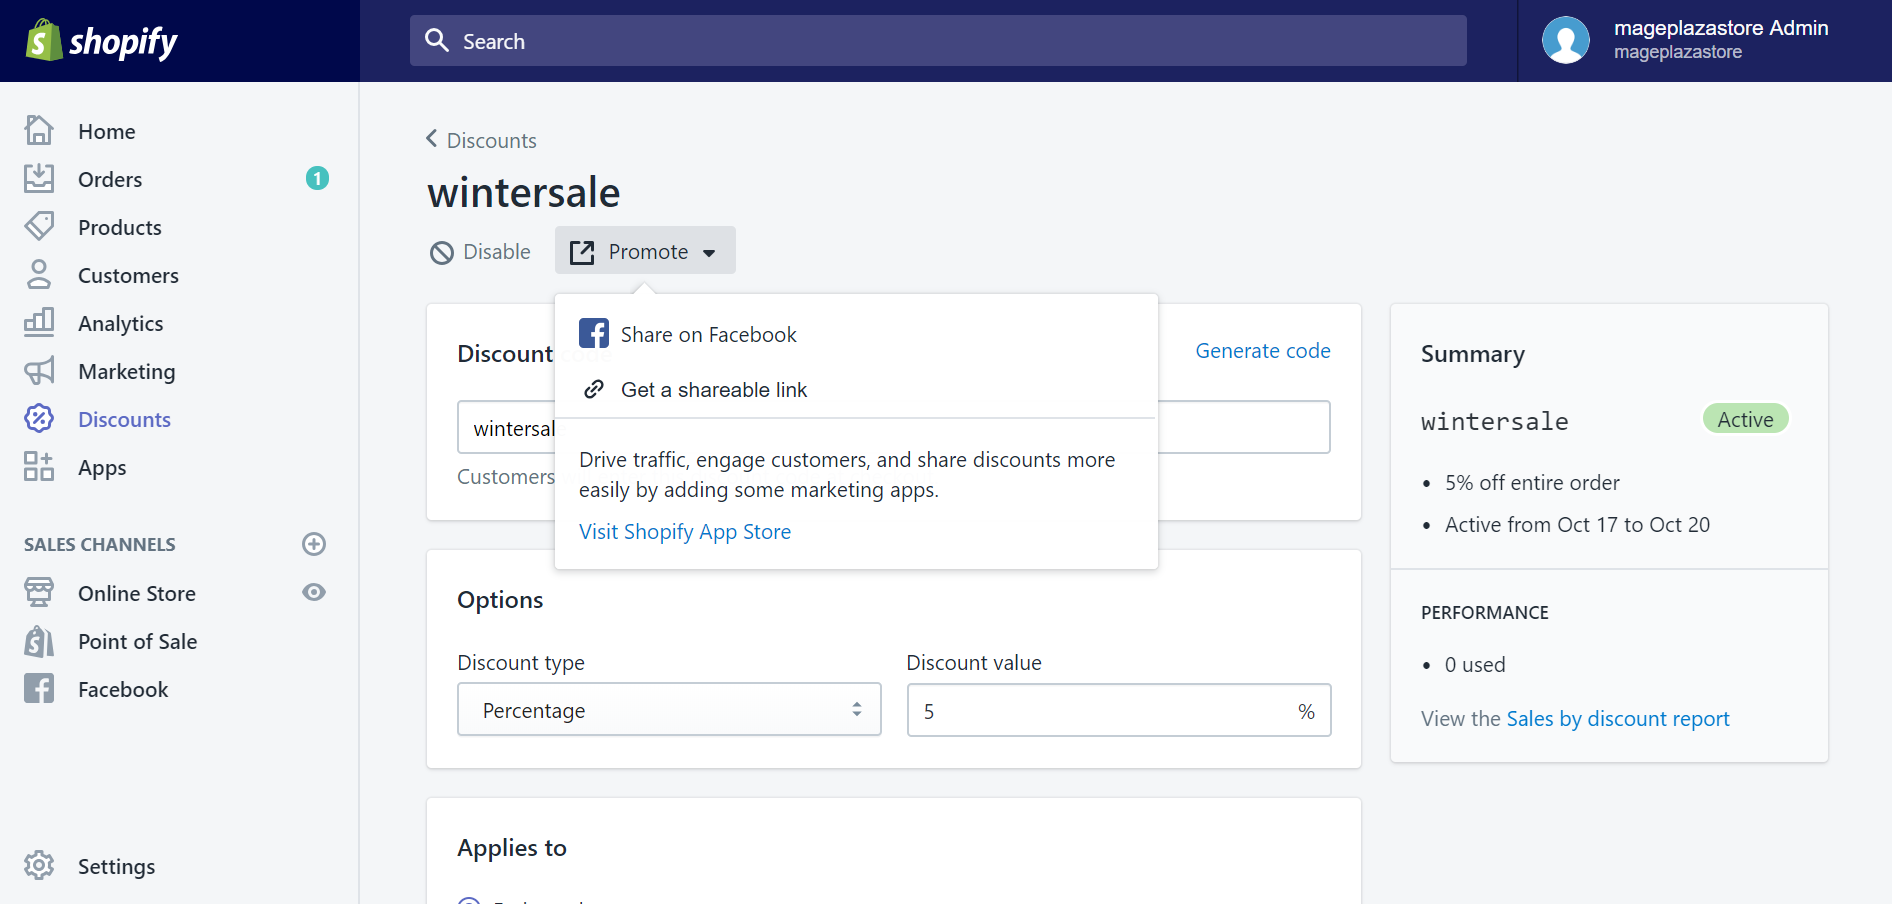
The discount will appear on the discount list right after you click Save and confirm your sequence. You can still check and configure some details of the discount by clicking on it. In here, by clicking on Promote. Shopify also gives you some options to share and advertise your new discount to customers by clicking on Promote.
To create a Buy X Get Y discount on iPhone (Click here)
- Step 1: Go to Discounts
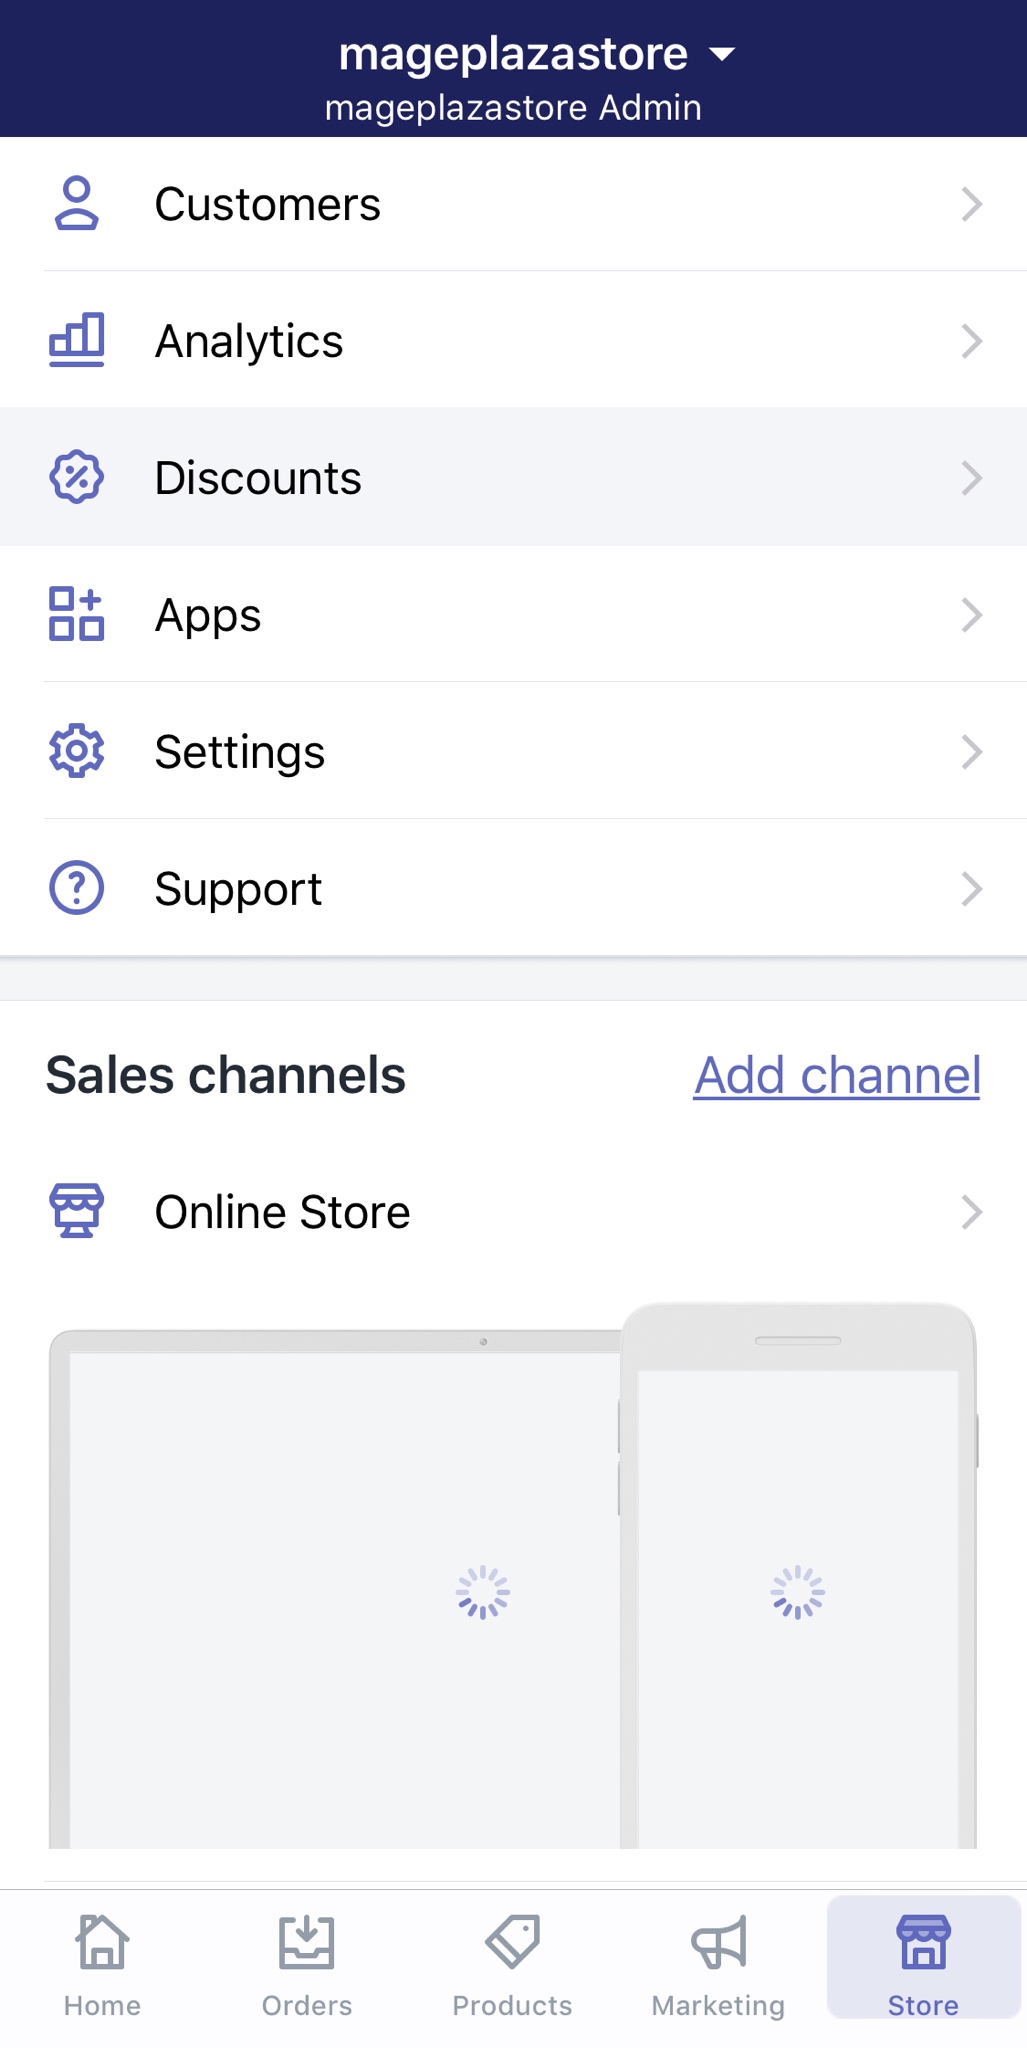
The very first step you need to do is opening the Shopify app. Once you complete that step, you can find the Store tab at the bottom right corner of your “iScreen” easily. Then, tap Discounts with a percentage-badge icon in the menu.
- Step 2: Tap “+” to create a new discount
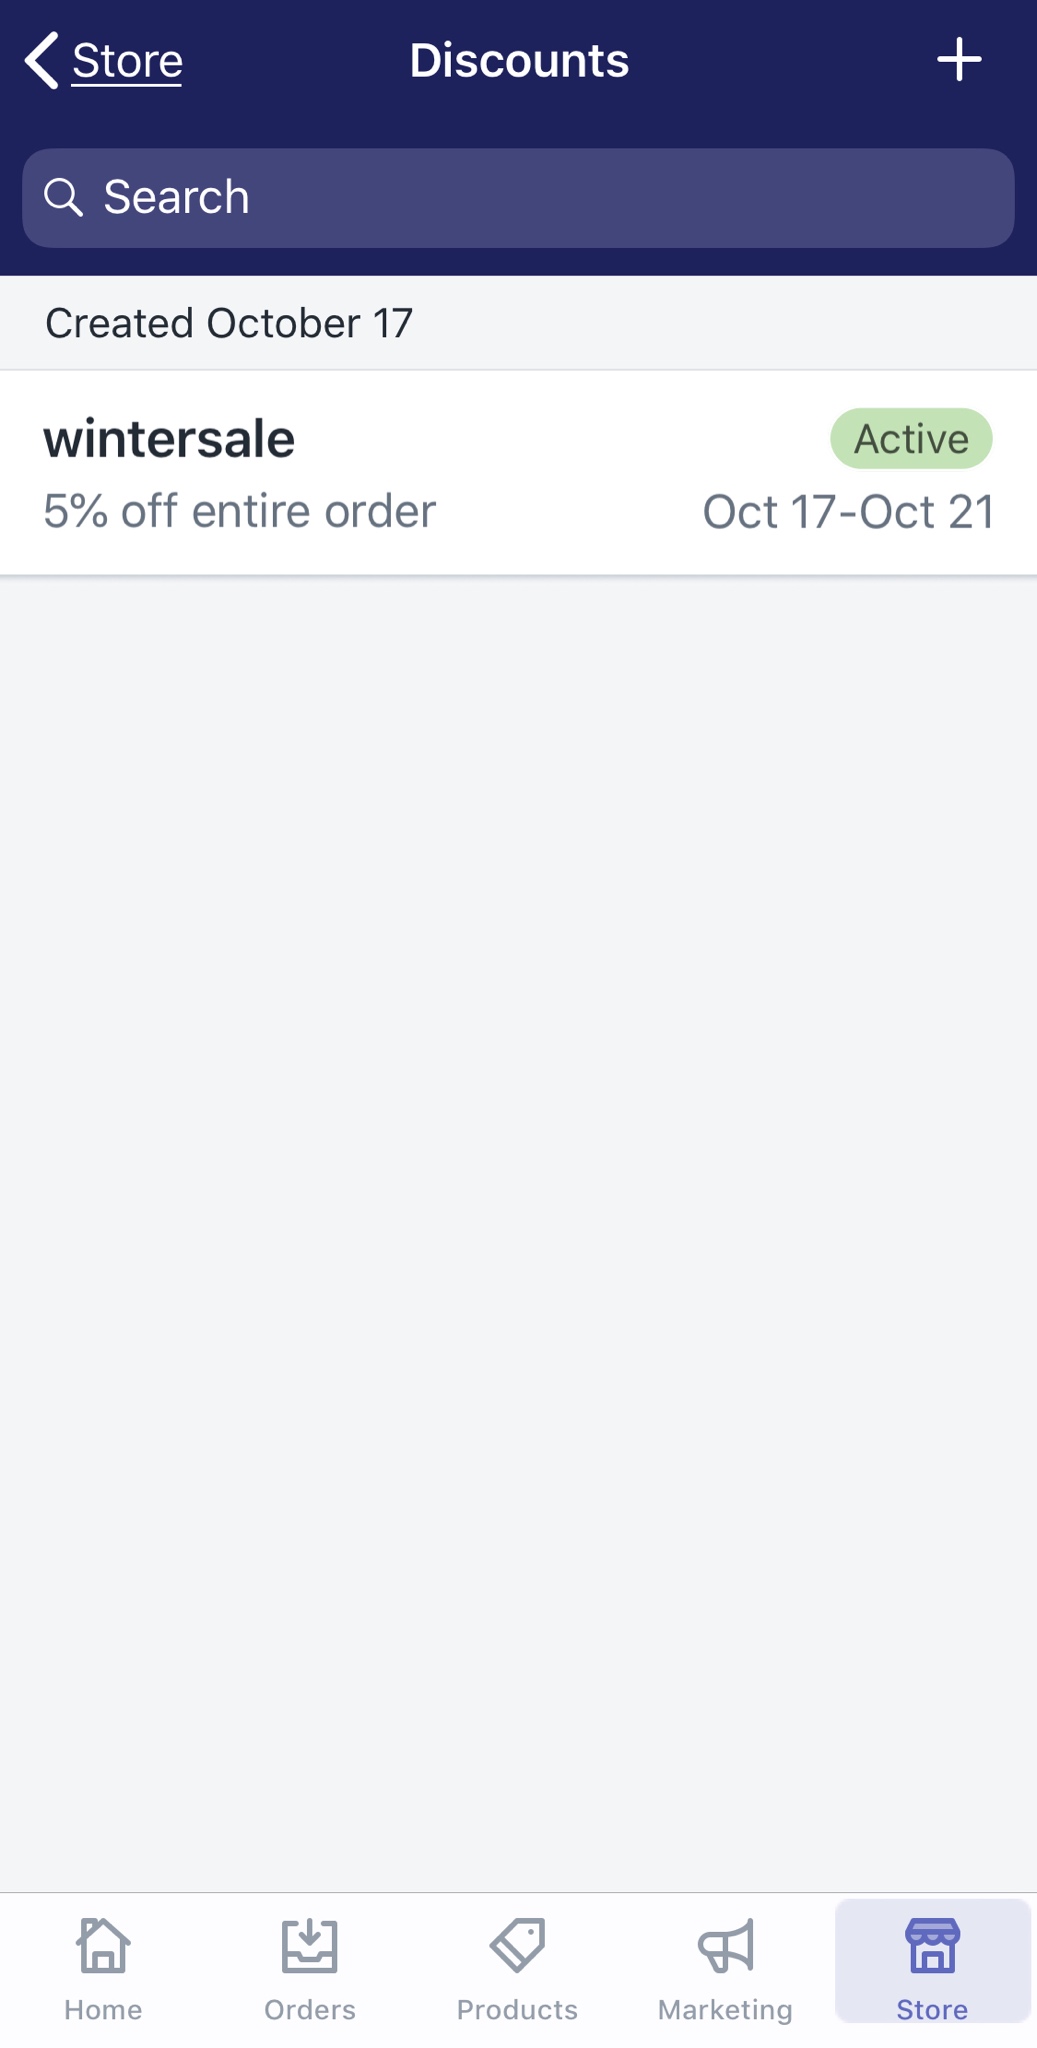
In the Discounts section, take a look at the top right corner of the screen, you will see a “+” icon. Tap on it and you will start creating a new discount.
- Step 3: Configure the new discount’s attributes
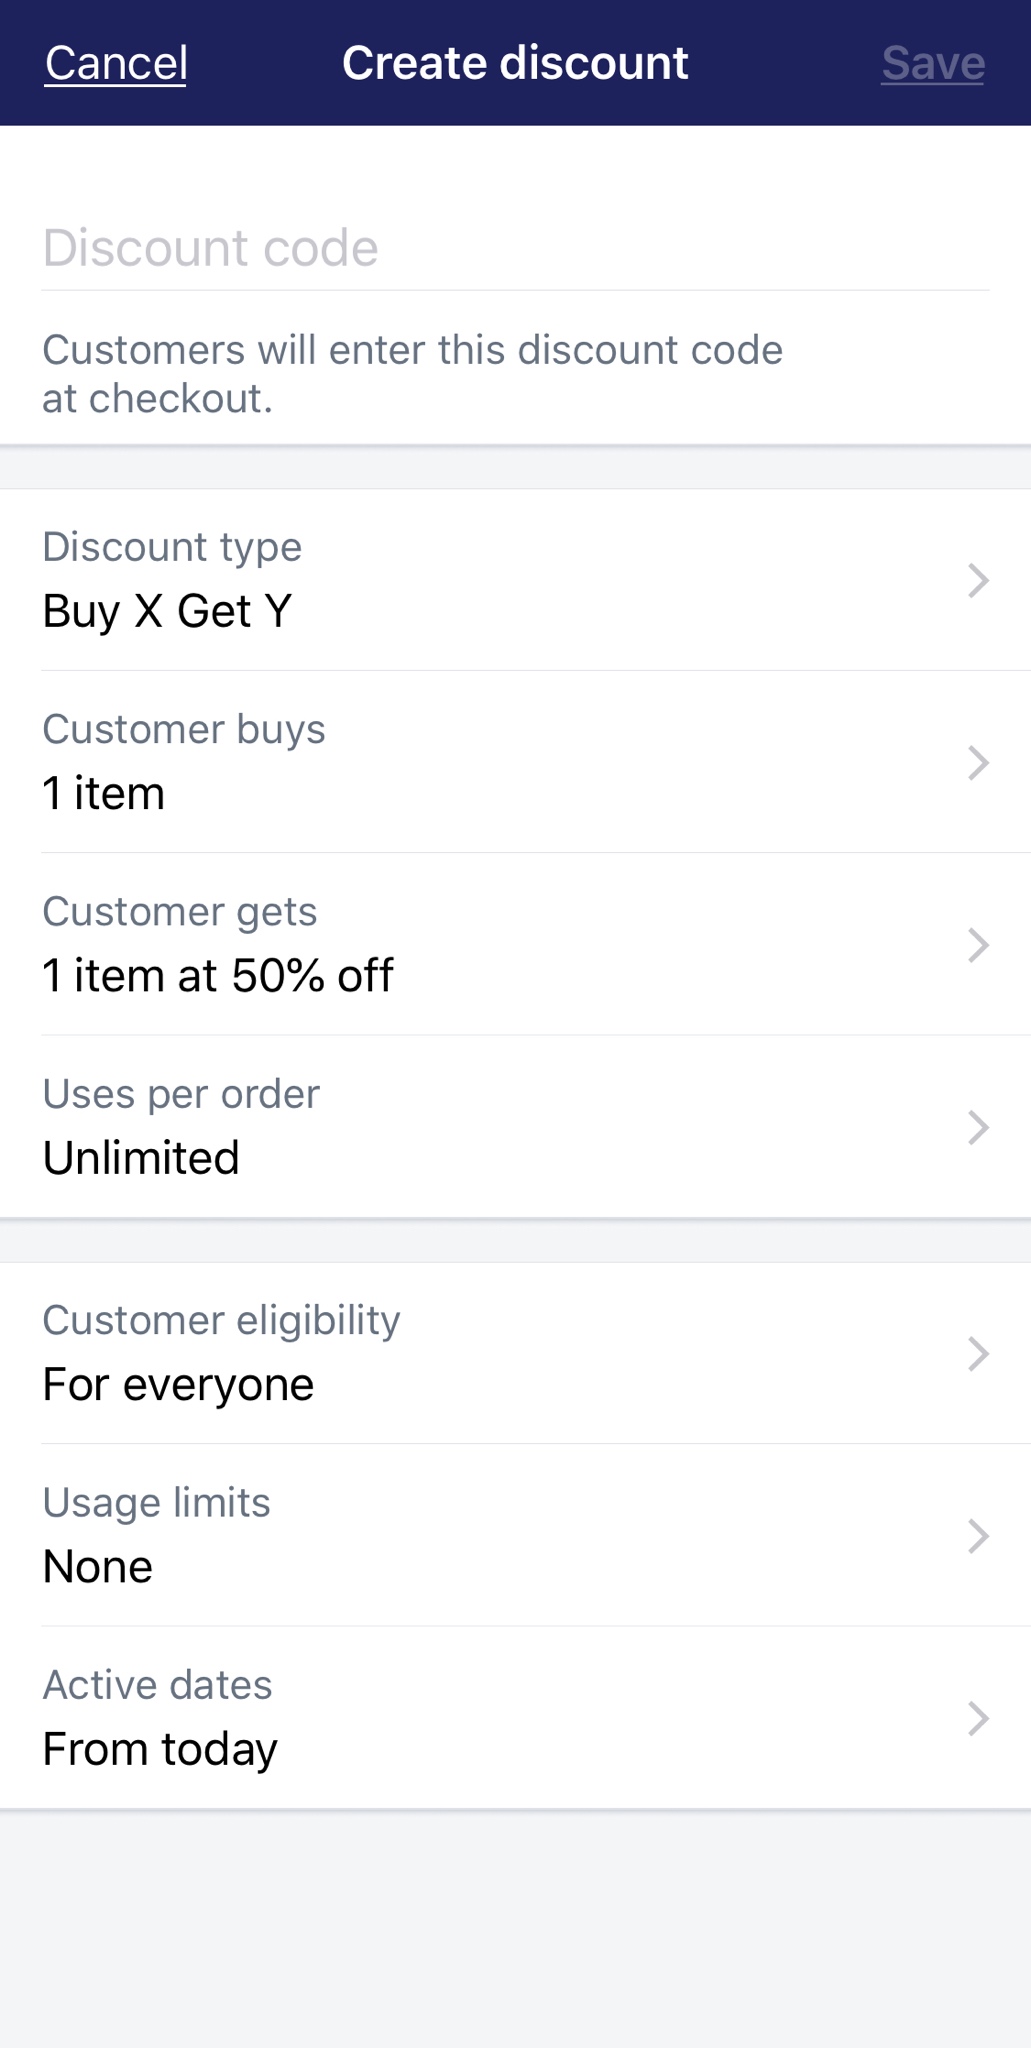
In the Create discount code section, you need to configure some details of your new discount before making it available for customers.
Discount code: This section allows you to create new codes using to enter the discount at Checkout. Shopify also provides an algorithm to generate new codes automatically, just click Generate code appearing on your virtual keyboard and it will do the rest.
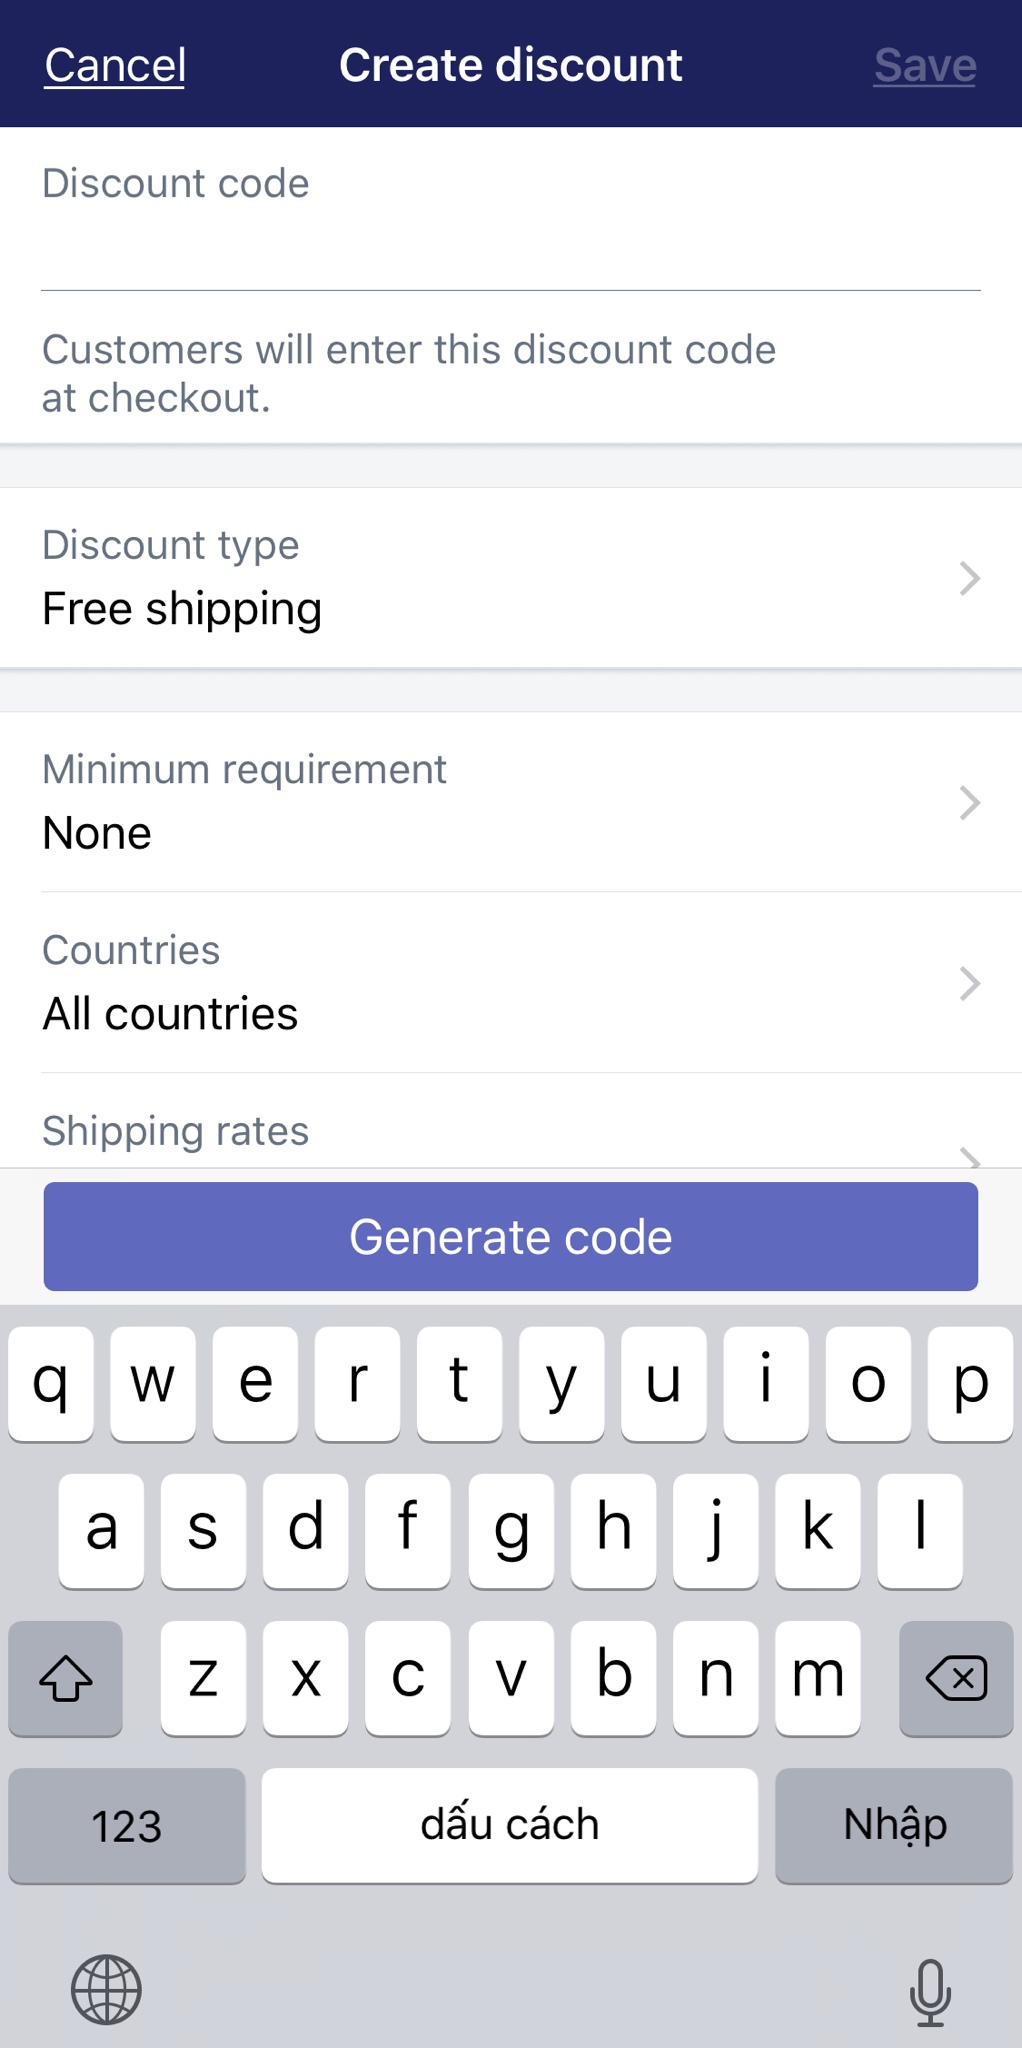
Options: In Discount type, you can choose the type of discount. In this case, select Buy X Get Y.
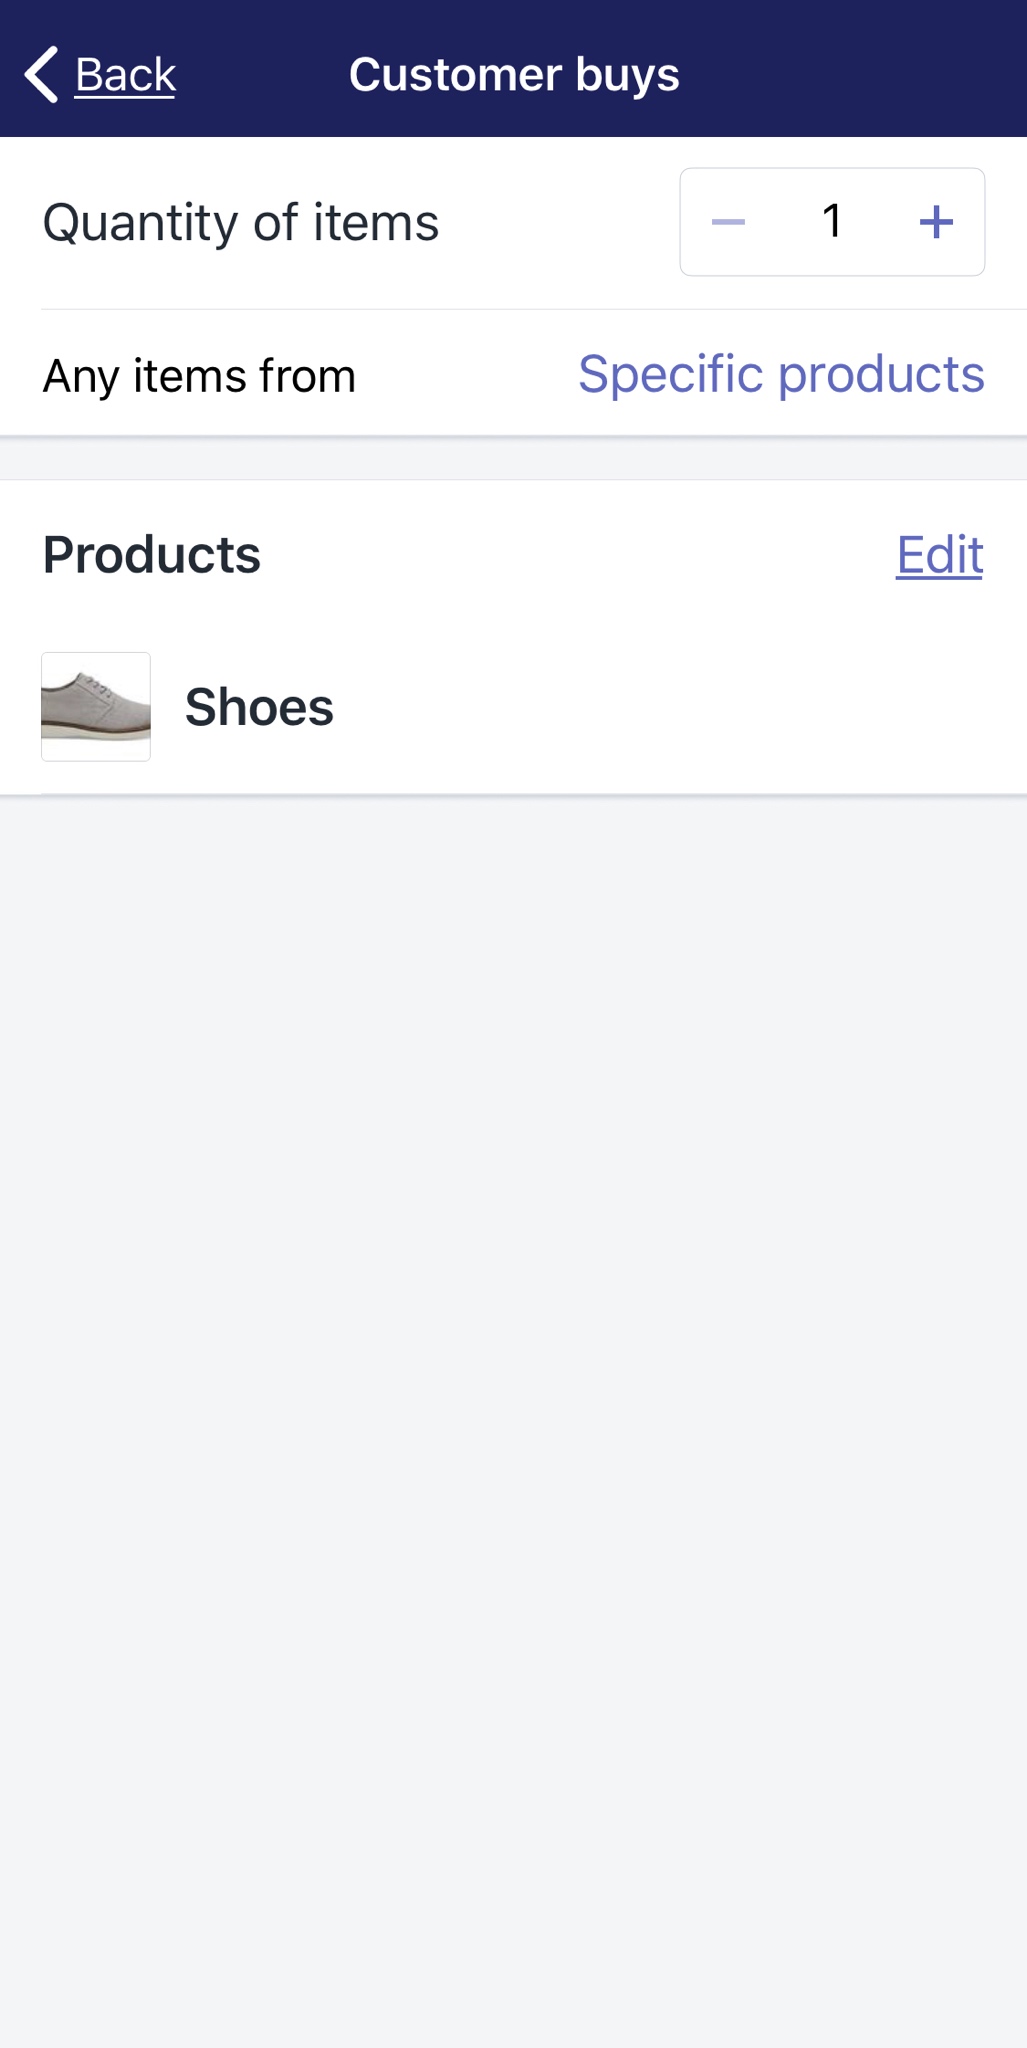
Customer buys: This section requires you to select Specific products or Specific collections and set an amount of them by which your customers will be qualified after buying such amount to use the discount. By clicking Browse, a dropdown list will appear for you to select.
Customer gets: You will decide what Specific products or Specific collections your customers can get after being qualified in this section. By clicking Browse, a dropdown list will appear for you to select.
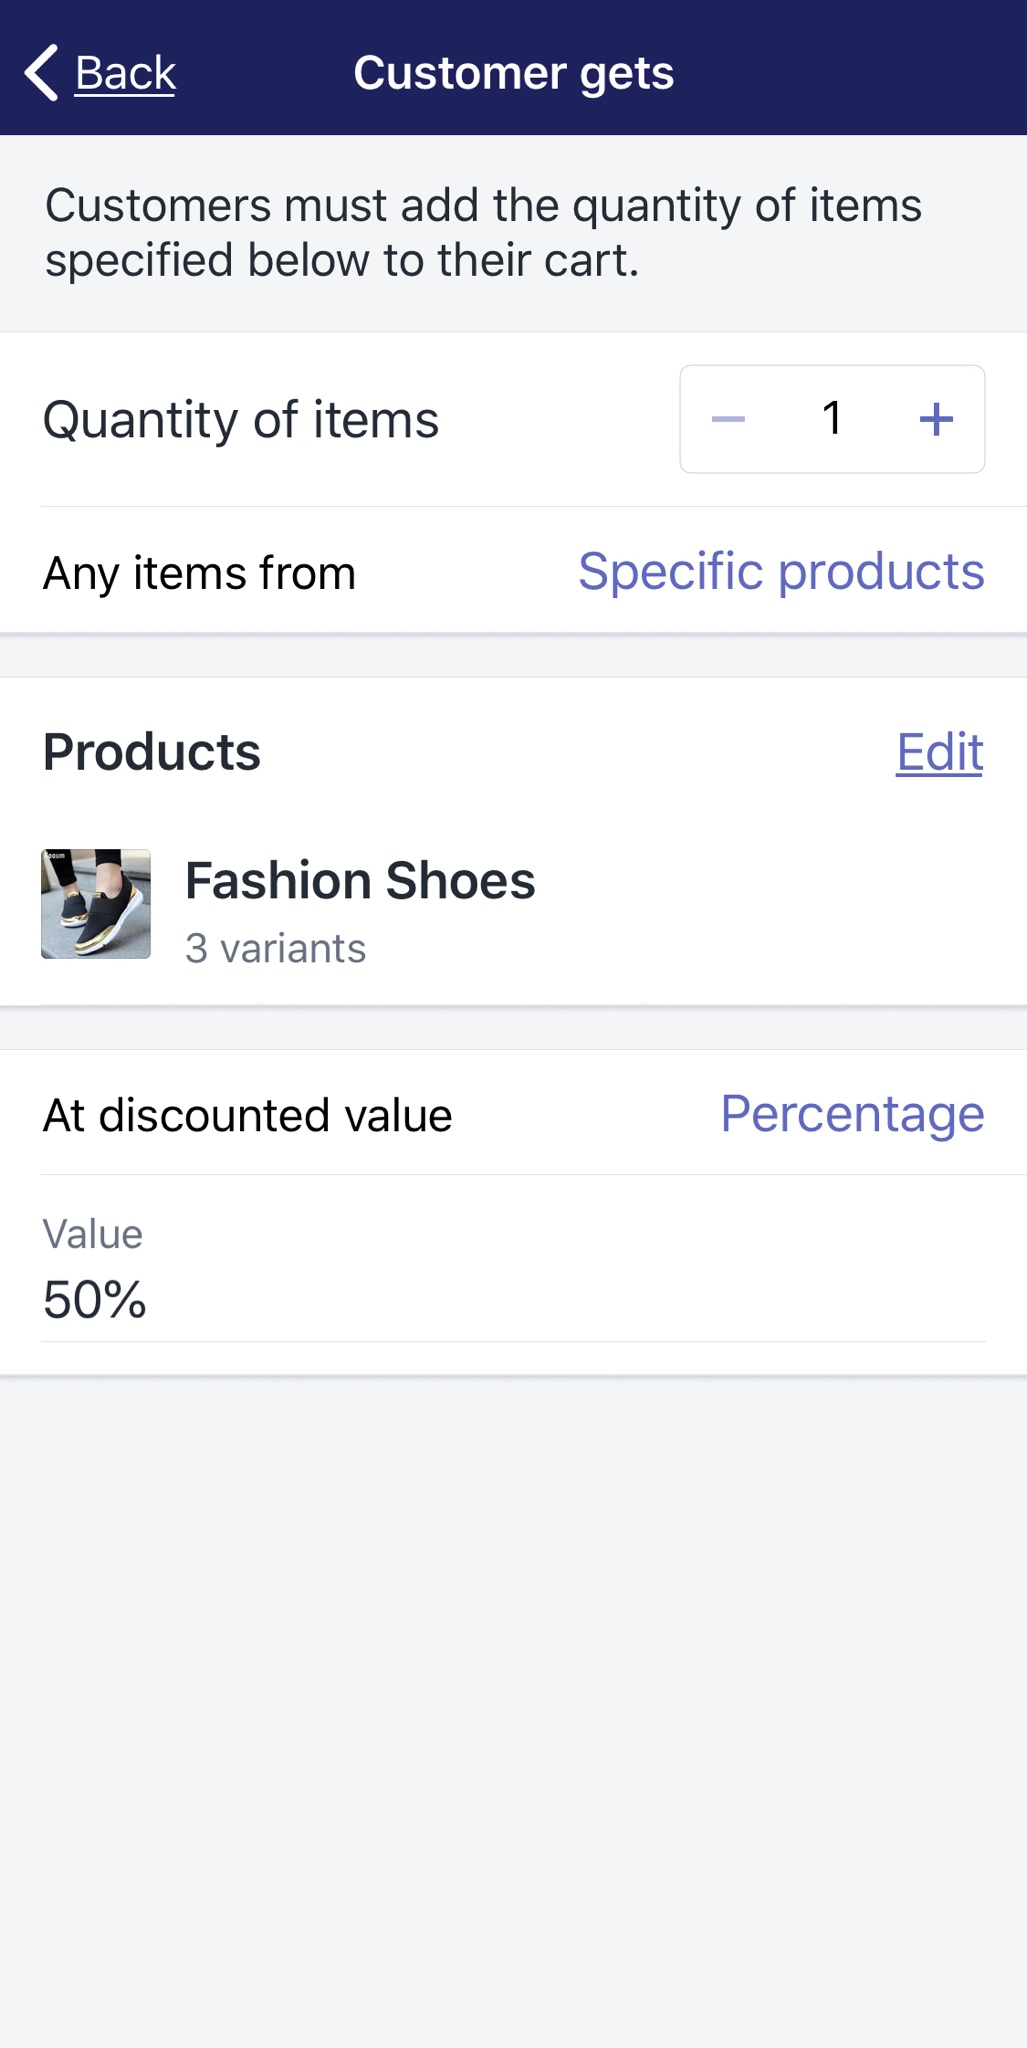
At discounted value: In this section, you can choose a discounted value (applied for products in Customer gets) your customers will receive after buying a set amount of products in Customer buys. You can also select Free to offer for free.
Uses per order: Tap on this section, you can turn on Set a maximum number of uses per order mode. It will limit the number of times this discount can be used in each order.
Customer eligibility: This field will help you in selecting particular individuals or groups of customers who are accessible to this offer. A dropdown list will show the list of them and their email addresses once you click on the blank field. In case some customers’ email addresses are not included in your data, other contact information will appear instead, such as phone numbers. If the group of customer is not there, you will need to create customer groups as your desired targets. If you select Specific customers, a dropdown list will show you all customers.
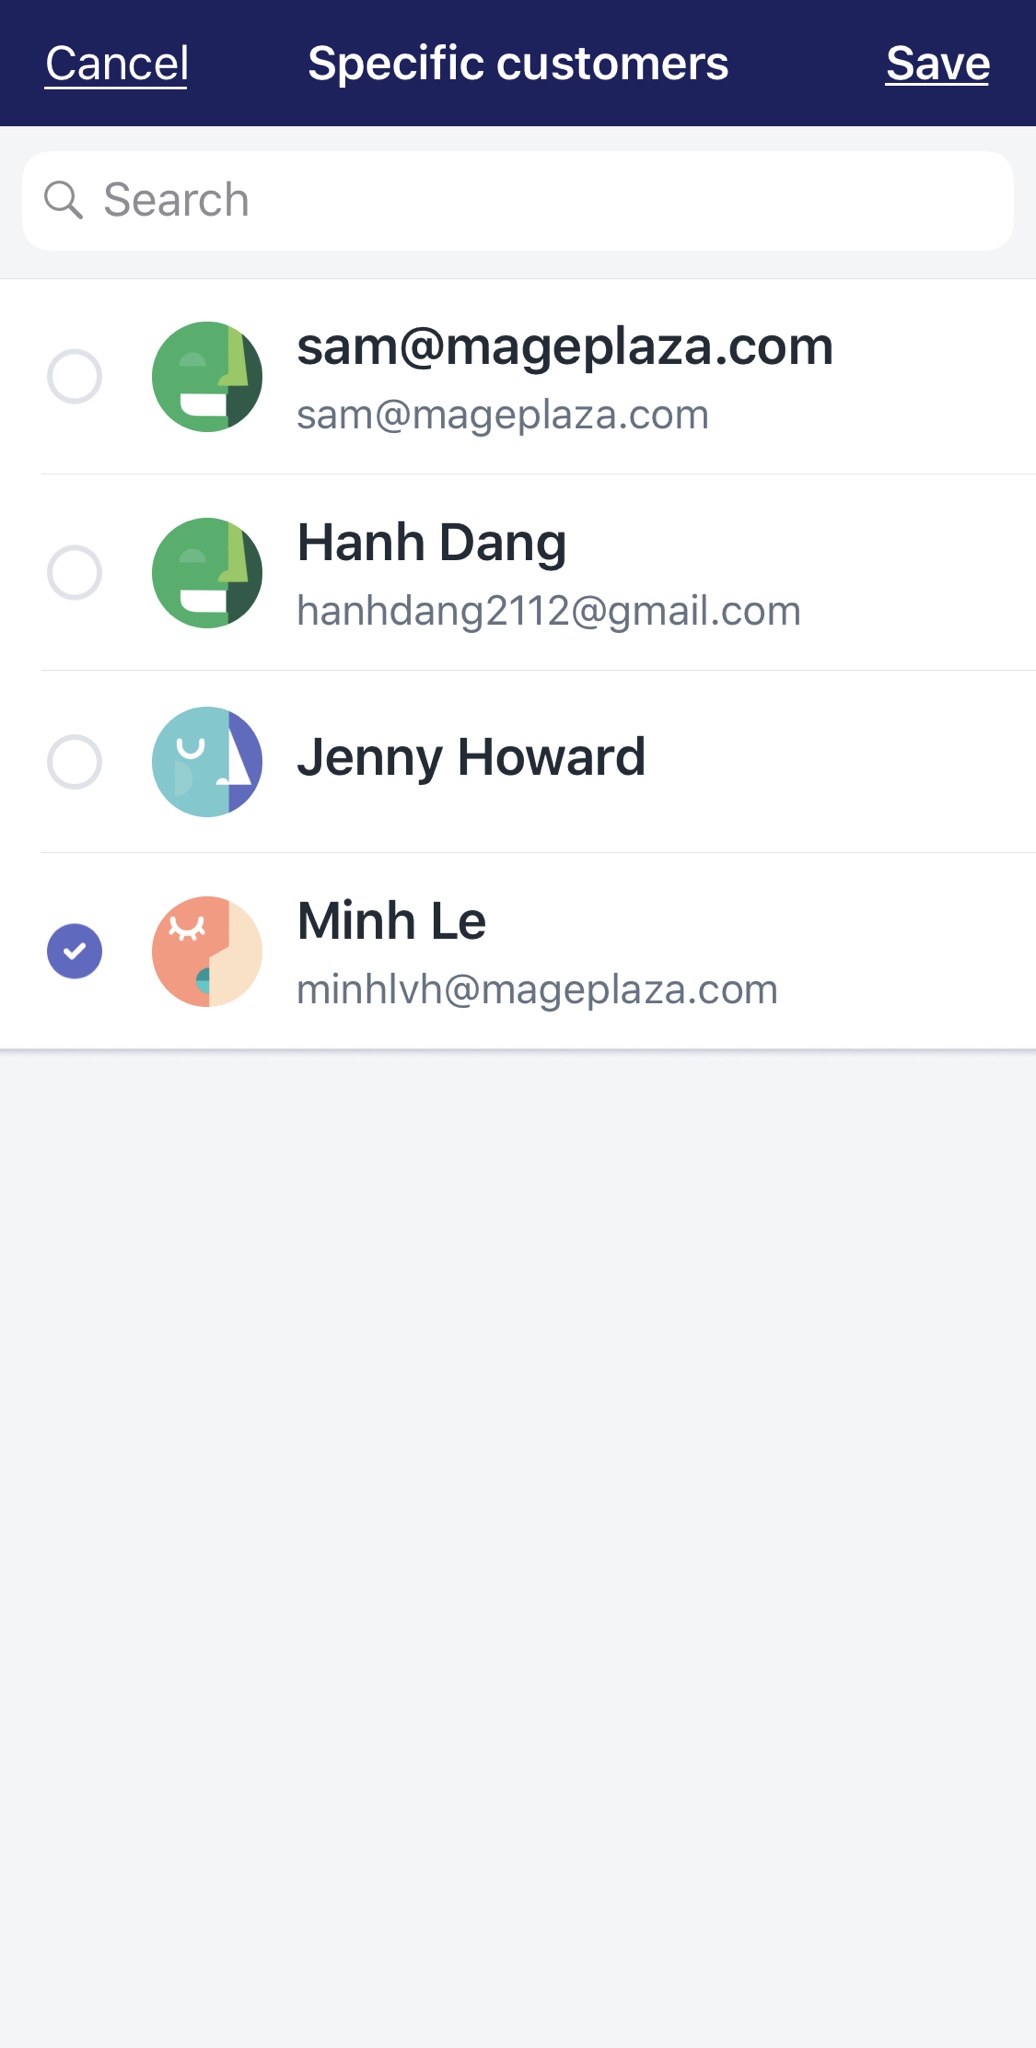
Usage limits: To restrain your customers from using the discount over a certain time of use, you need to put a tick in one or maybe both options in this section.
You can Limit number of times this discount can be used in total among all eligible customers, after putting the number of times in the blank. No matter how many customers use the discount, or how many times each eligible customer can use. You can also Limit to one use per customer.
Active dates: This option helps you to decide whether you want to make your discount permanent or temporary. By setting an active date (and an end date if you want to), you will be able to control when your discount is available.
- Step 4: Tap Save
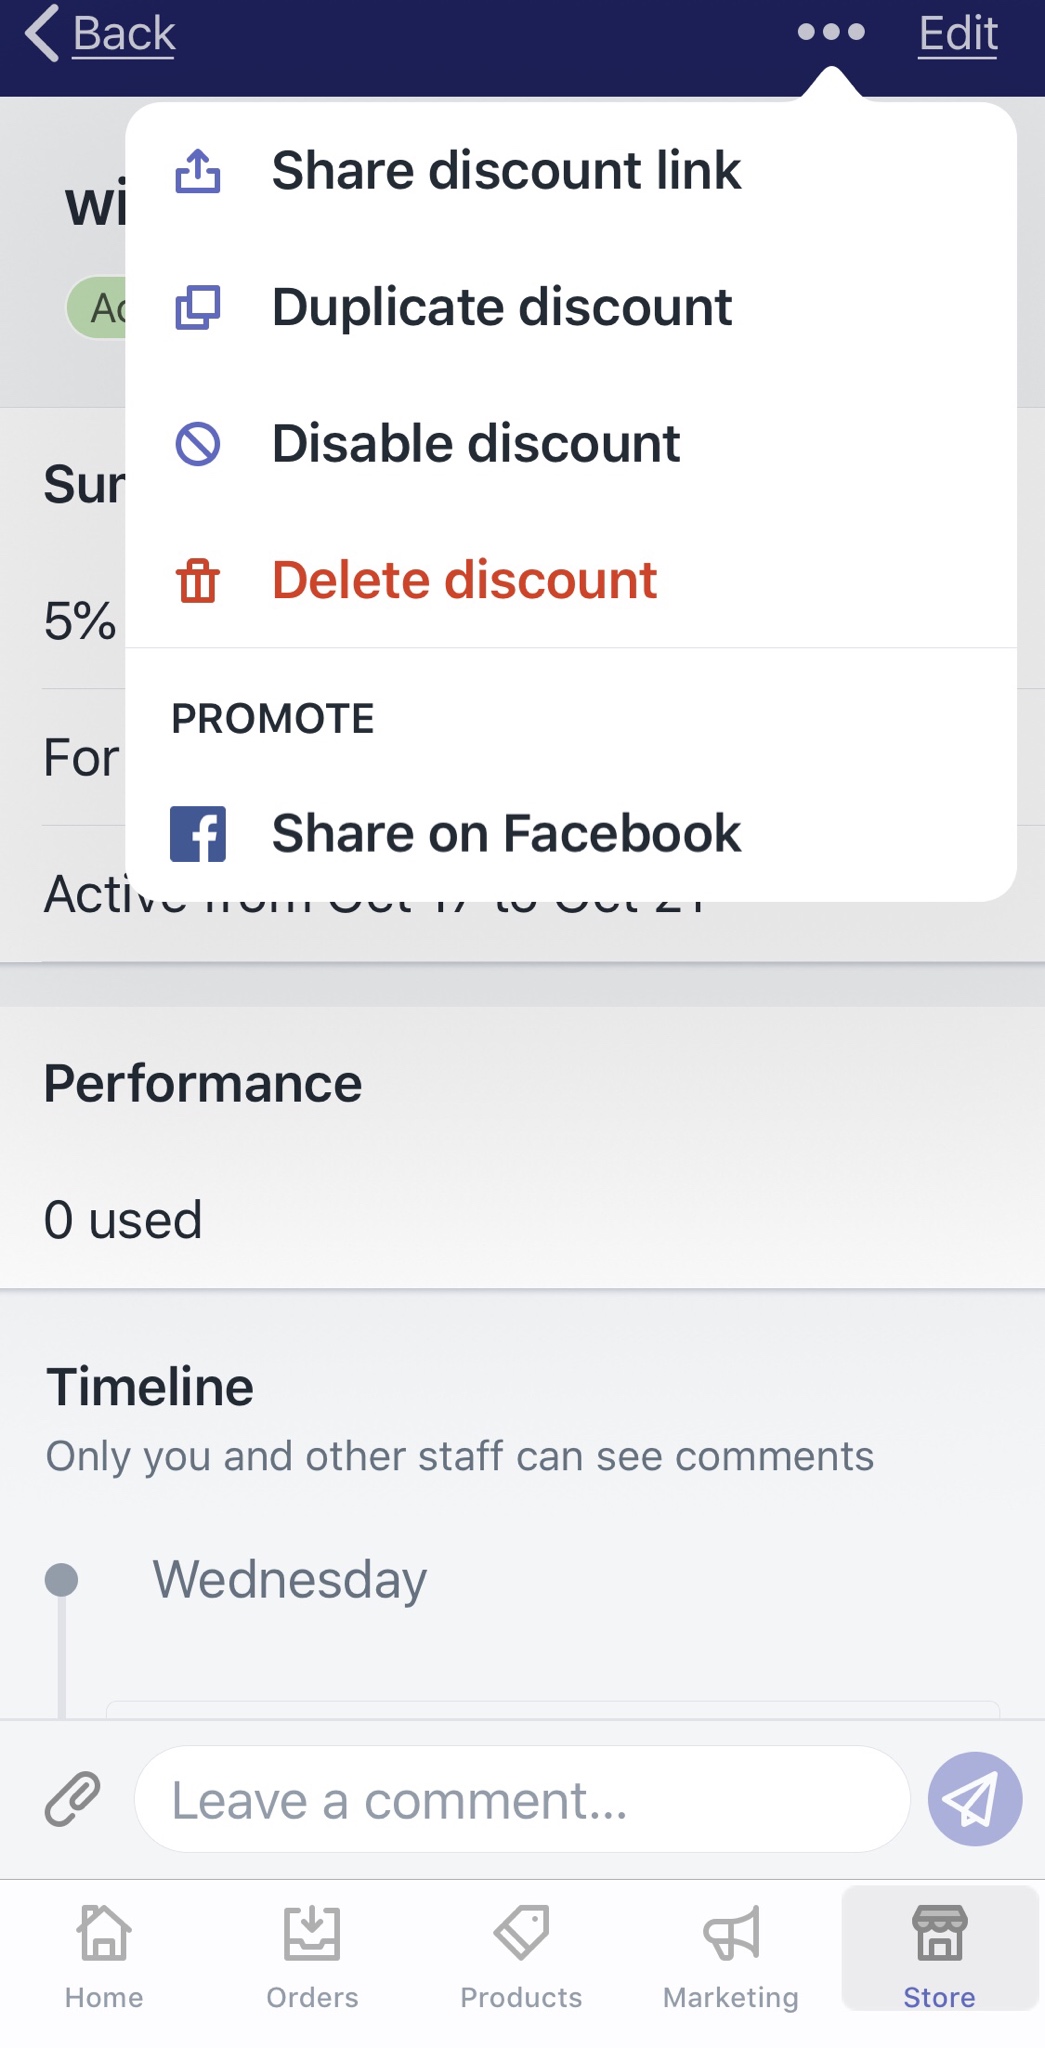
The discount will appear on the discount list right after you click Save and confirm your sequence. If you want to change some details, tap on the discount in the list, and then tap on Edit. One more handy stuff, right next to Edit, there is a “…” icon, tap on it, and Shopify will give you some options to share and advertise your new discount to customers.
To create a Buy X Get Y discount on Android (Click here)
- Step 1: Go to Discounts
The very first step you need to do is opening the Shopify app. Once you complete that step, you can find the Store tab at the bottom right corner of your “smartscreen” easily. Then, tap Discounts with a percentage-badge icon in the menu.
- Step 2: Tap “+” to create a new discount
In the Discounts section, take a look at the top right corner of the screen, you will see a “+” icon. Tap on it and you will start creating a new discount.
- Step 3: Configure the new discount’s attributes
In the Create discount code section, you need to configure some details of your new discount before making it available for customers.
Discount code: This section allows you to create new codes using to enter the discount at Checkout. Shopify also provides an algorithm to generate new codes automatically, just click Generate code appearing on your virtual keyboard and it will do the rest.
Options: In Discount type, you can choose the type of discount. In this case, select Buy X Get Y.
Customer buys: This section requires you to select Specific products or Specific collections and set an amount of them by which your customers will be qualified after buying such amount to use the discount. By clicking Browse, a dropdown list will appear for you to select.
Customer gets: You will decide what Specific products or Specific collections your customers can get after being qualified in this section. By clicking Browse, a dropdown list will appear for you to select.
At discounted value: In this section, you can choose a discounted value (applied for products in Customer gets) your customers will receive after buying a set amount of products in Customer buys. You can also select Free to offer for free.
Uses per order: Tap on this section, you can turn on Set a maximum number of uses per order mode. It will limit the number of times this discount can be used in each order.
Customer eligibility: This field will help you in selecting particular individuals or groups of customers who are accessible to this offer. A dropdown list will show the list of them and their email addresses once you click on the blank field. In case some customers’ email addresses are not included in your data, other contact information will appear instead, such as phone numbers. If the group of customer is not there, you will need to create customer groups as your desired targets. If you select Specific customers, a dropdown list will show you all customers.
Usage limits: To restrain your customers from using the discount over a certain time of use, you need to put a tick in one or maybe both options in this section.
You can Limit number of times this discount can be used in total among all eligible customers, after putting the number of times in the blank. No matter how many customers use the discount, or how many times each eligible customer can use. You can also Limit to one use per customer.
Active dates: This option helps you to decide whether you want to make your discount permanent or temporary. By setting an active date (and an end date if you want to), you will be able to control when your discount is available.
- Step 4: Tap Save
The discount will appear on the discount list right after you click Save and confirm your sequence. If you want to change some details, tap on the discount in the list, and then tap on Edit. One more handy stuff, right next to Edit, there is a “…” icon, tap on it, and Shopify will give you some options to share and advertise your new discount to customers.
Summary
If you are getting trouble with how to reach ideal sale targets, offering Buy X Get Y discount can be a method you need to consider. Not only that it can help you attract customers, but this can be a very useful measure using to create a seasonal marketing strategy.


