How to Choose a New Account Owner on Shopify
As the owner, you have the full permission to choose another staff to be the account owner of your Shopify store. When doing that, you have to be extremely careful because the account owner has the full permission to manage the account details and billing and can access every part of the Shopify admin. There can only be one owner at a time, so think twice before setting another staff as the owner as you will no longer to change the account owner and will lose your full access unless the current owner sets you up again.
The following steps show How to choose a new account owner on Desktop, iPhone, and Android.
Step 1: Log in
Log into your Shopify owner’s account.

Step 2: Go to Account Settings
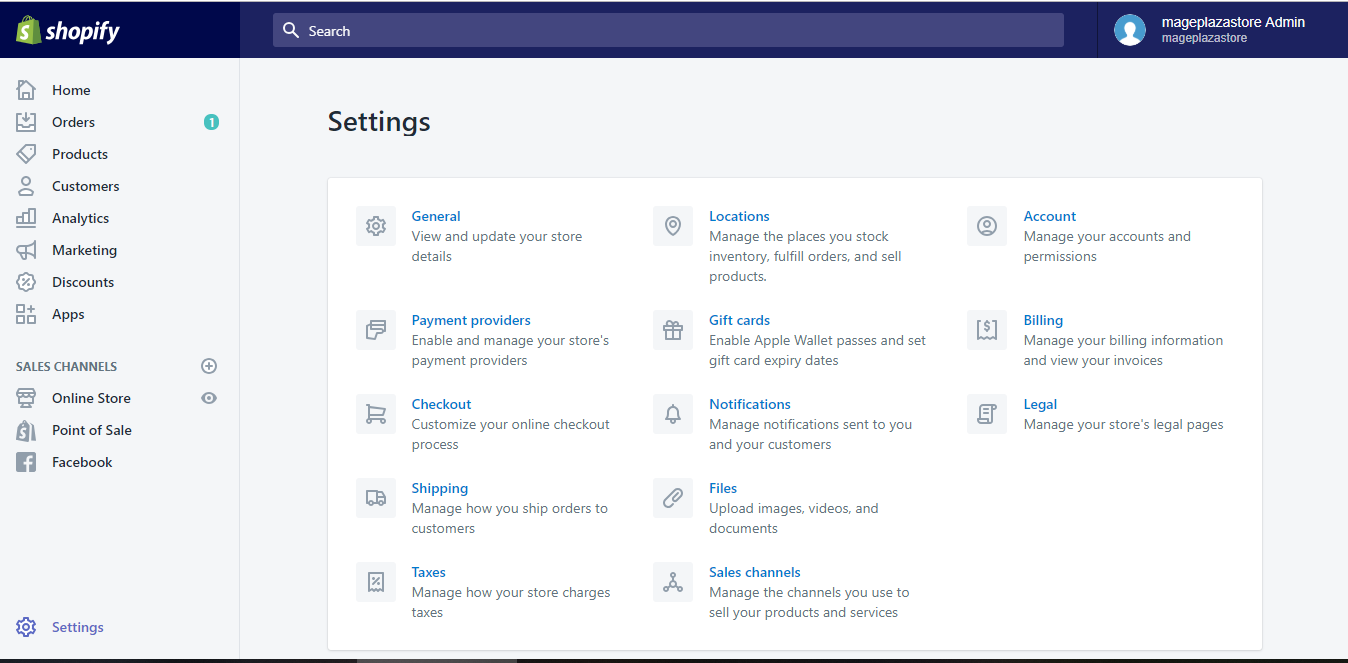
Now you are logged in the Admin page. Choose the Settings option in the lowest of your screen’s right-sided column. Click on Account in the first row to manage your accounts and permissions.

Step 3: Choose New Owner
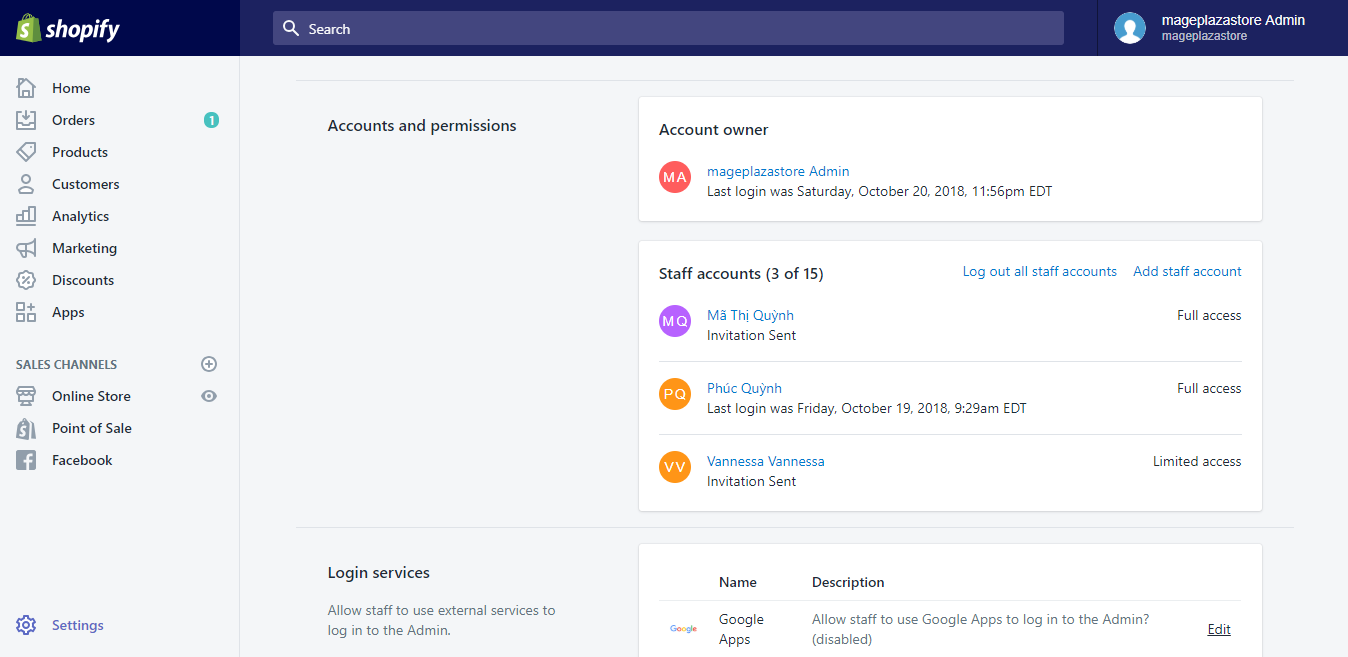
After directed to Account, scroll down to the Accounts and permissions section. Choose the new owner by clicking their name. You will be shown the account’s details.

Step 4: Make Account Owner
In the account details, scroll down to the Admin Access section. By clicking Make staff member the account owner, you confirm to agree that the chosen staff member will be the new account owner.
Step 5: Last Confirmation
Right after clicking Make staff member the account owner, you will be directed to the confirmation dialog. Entering your password and clicking Transfer account ownership are the last steps to give the chosen staff member the account ownership.
To choose a new account owner on iPhone (Click here)
- Step 1: Log in
Log into the Shopify app as the store account owner.
- Step 2: Go to Settings
In the app, find the Store button and tap on it. Scroll down to the Settings option. Choose the option for more account settings.
- Step 3: Go to Account
After tapping Settings, find the Store settings section. Tap on the Account option under that section to see the staff accounts list.
- Step 4: Choose the Owner
In Account, scroll to find the Accounts and permissions section in which the staff accounts list is displayed. Choose the person you want to be the new account owner by tapping their name.
- Step 5: Make Owner
After tapping on the staff member’s name, you will be showed their account’s details. Scroll down to find the Admin Access section. Tap on the Make staff member the account owner section to confirm your new account owner choice.
- Step 6: Confirmation
Same as in the Desktop, you will be directed to the confirmation dialog. Type your password and then tap Transfer account ownership and the process is finished.
To choose a new account owner on Android (Click here)
- Step 1: Log in
Log into your account of the shop owner.

- Step 2: Enter Settings
Go to the Shopify app, find and tap on Settings on the bottom right of your screen for more options about your account.

- Step 3: Go to Account
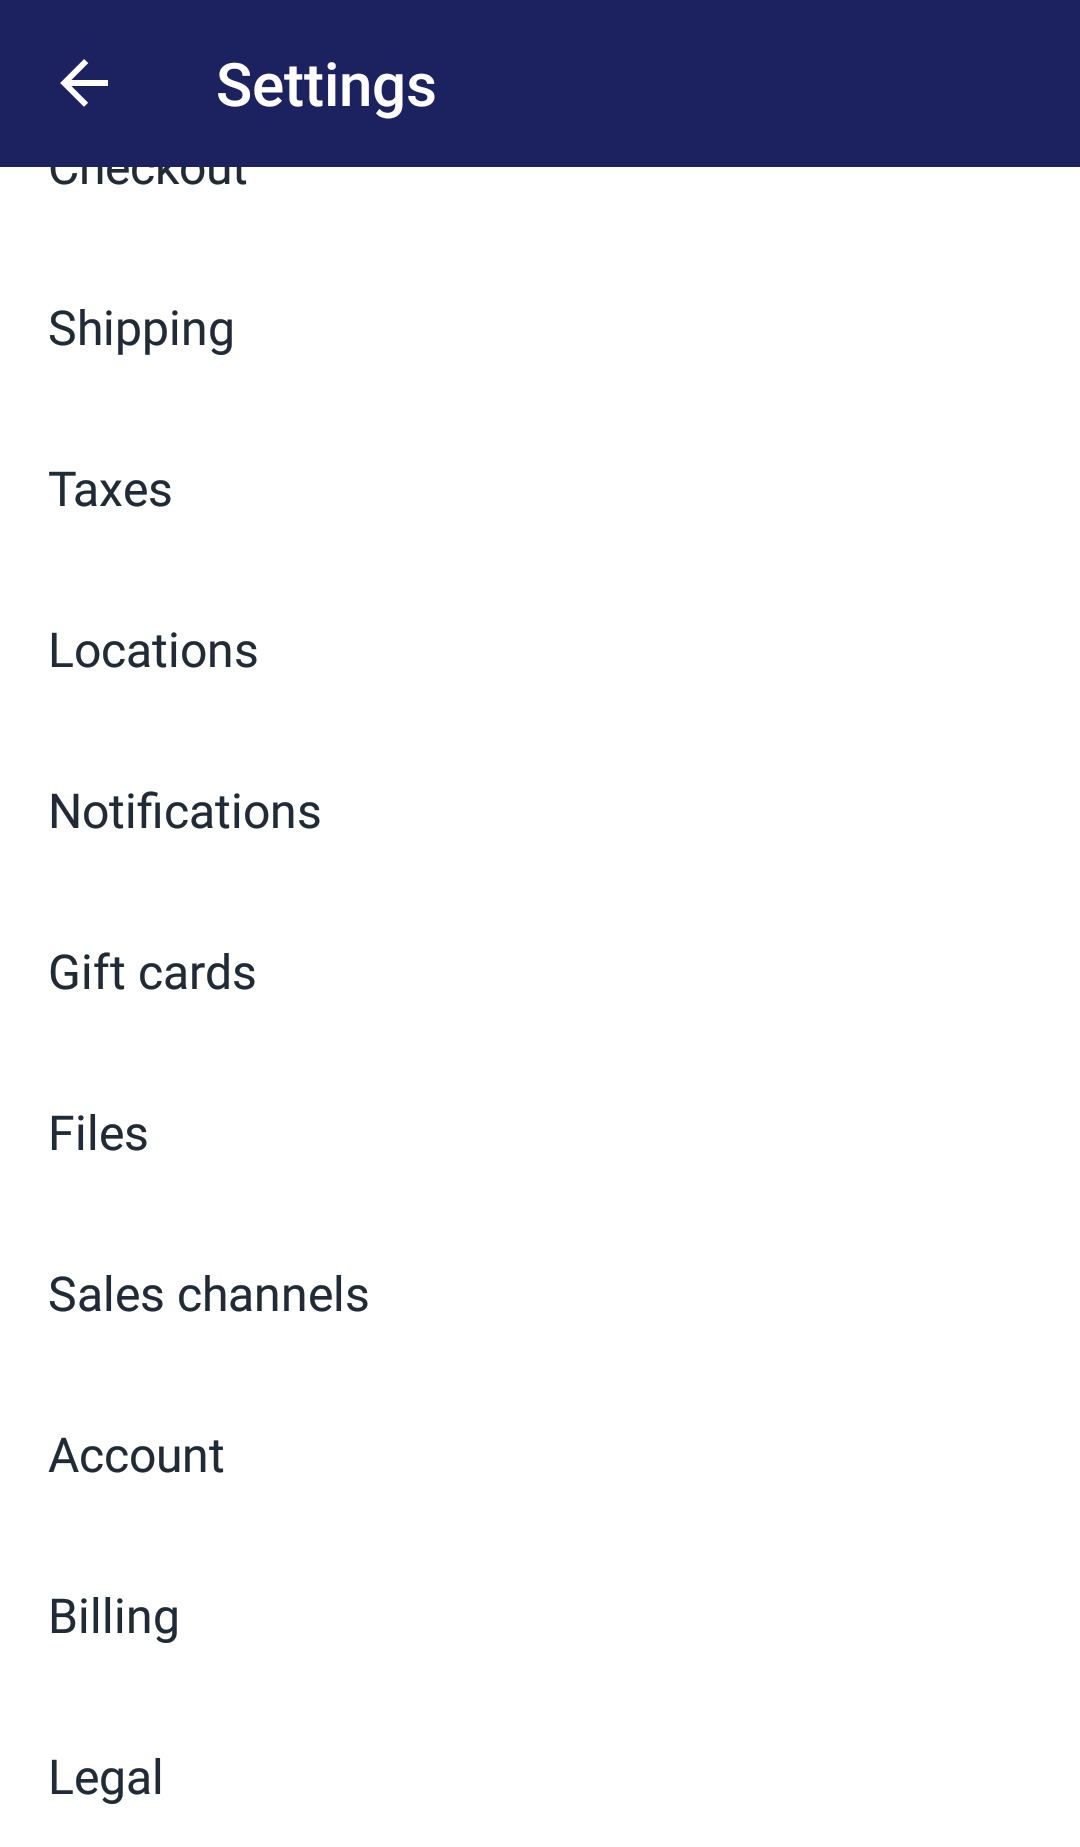
After entering Settings, scroll down until the Store settings section shows up. Choose the Account option under that section for more account options.

- Step 4: Choose New Owner
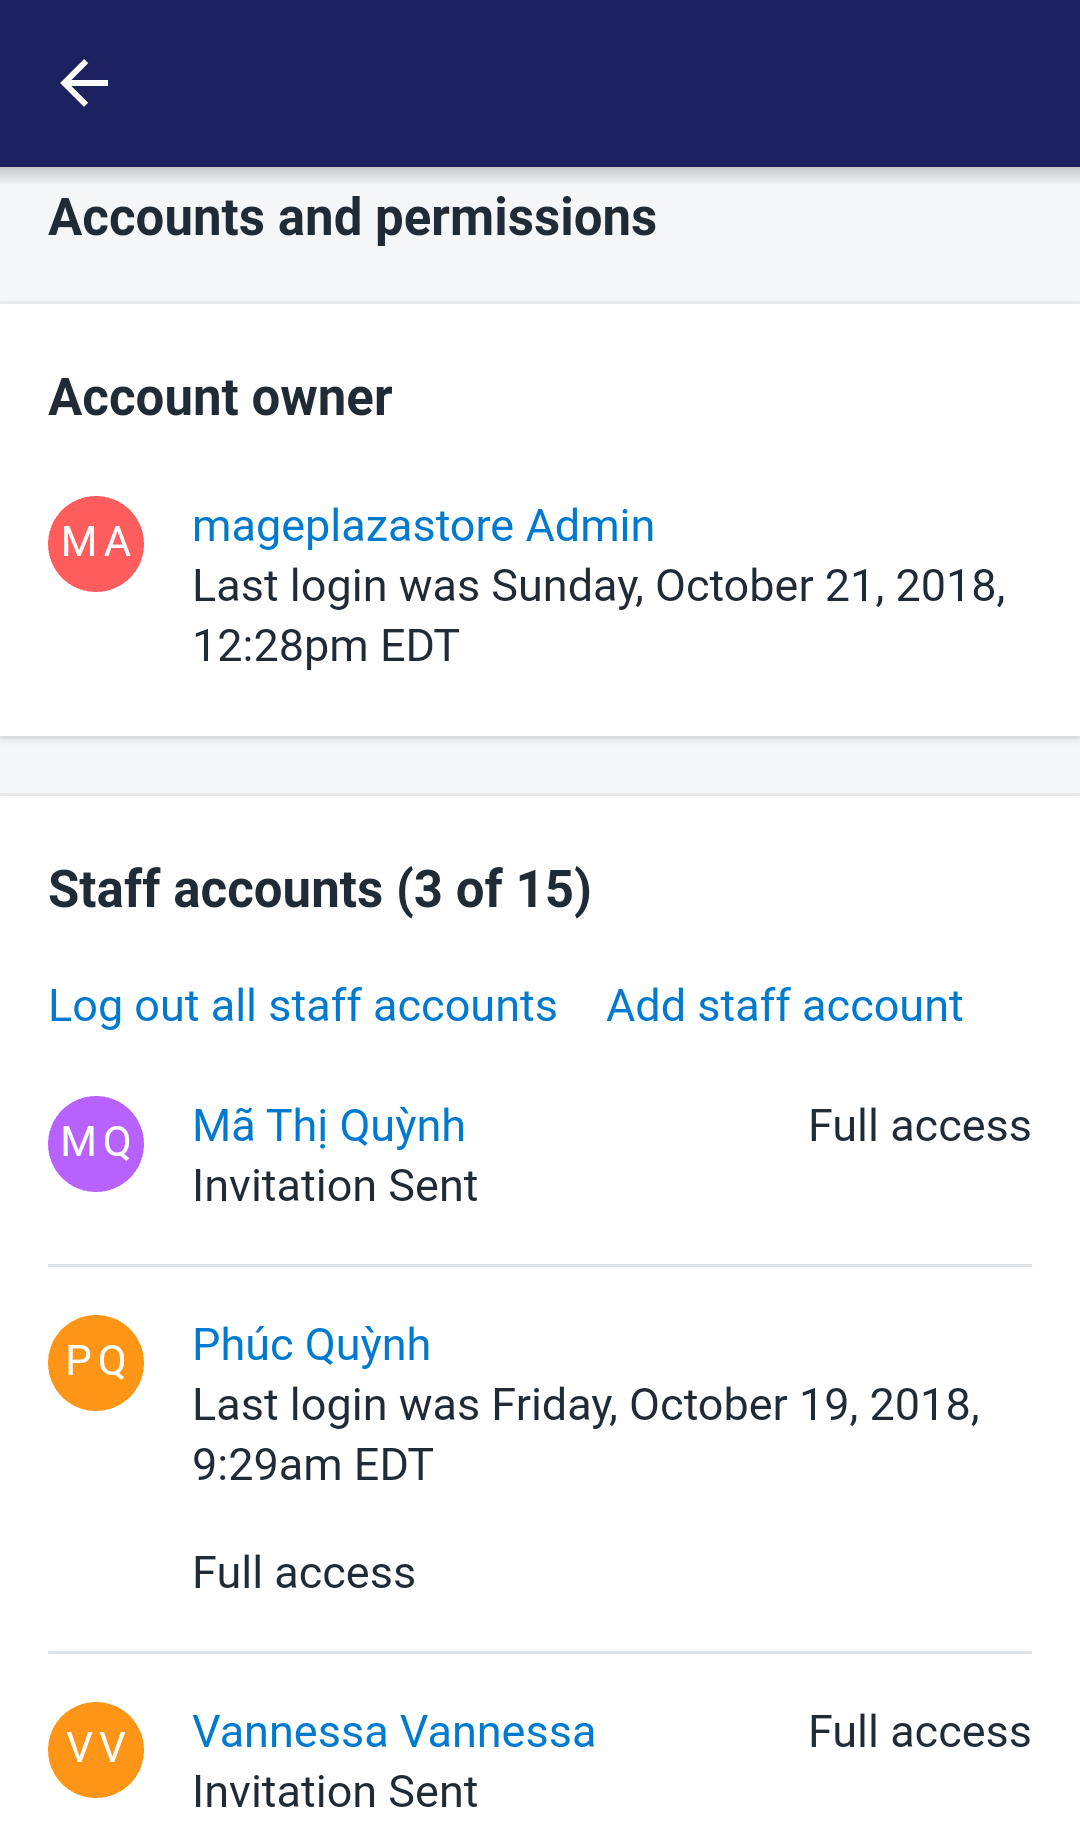
The Account button will lead you into more account options including the Accounts and permissions section. The section shows list of staff members. Tap to choose the member you want to make new account owner.

- Step 5: Make Account Owner
In the member’s account details page which shows up after you tap on the member’s name, scroll down until you see the Admin Access section. Tap Make staff member the account owner to make the member your new account owner.
- Step 6: Complete
After tapping Make staff member the account owner, a confirmation dialog will pop up. It requires your password to continue. Enter your password and tap Transfer account ownership and your account owner change is completed.
Conclusion
The given steps are How to choose a new account owner on Shopify. I hope you will easily make the change and continue running your shop effectively.
Related Posts:


