How to Change the List of Locations that Stock a Product
When running an online business on Shopify, you will have to create locations in order to the customers to get the products delivered. Any changes made with a location will also immediately change the inventory quantity of the products attached with the location. From the list of locations that stock a product, if you remove any of those locations, the inventory quantity will be deleted along with the location. In any circumtances where you want to change the list of locations, you better consider it thoroughly.
In case you need any help managing the locations, today I will show you How to change the list of locations that stock a product on Shopify.
Related Posts:
- How to Create and Modify Locations on Shopify (on Desktop and Mobile)
- How to Set the Priority of Locations For Fulfilling Orders on Shopify
- How to Change the Fulfillment Location on Shopify in 6 Simple Steps
Step 1: Open product
From your Shopify home page, click on the Products option from the managing column. In the Products page, choose your wanted product in the list displayed.
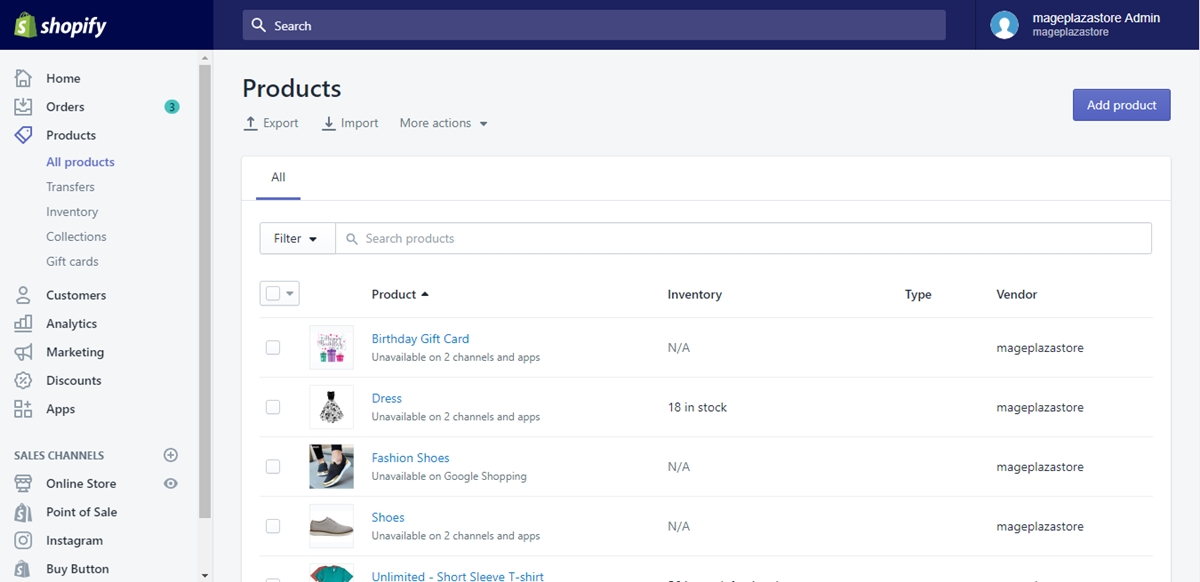
Step 2: Track this product’s quantity
In your chosen product’s details page, scroll down to the Inventory section. You have to make sure that the Track this product's quantity checkbox under that section is checked.
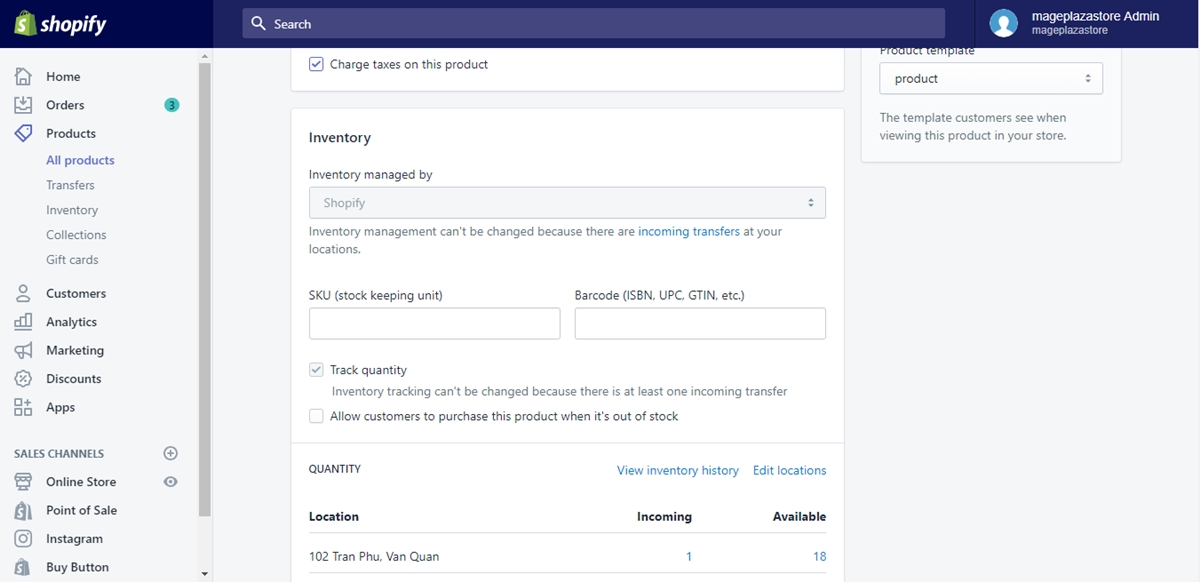
Step 3: Edit locations
After checking the checkbox, scroll down a bit to the Quantity section and choose Edit locations in the line right next to it so as to edit the product’s list of locations.
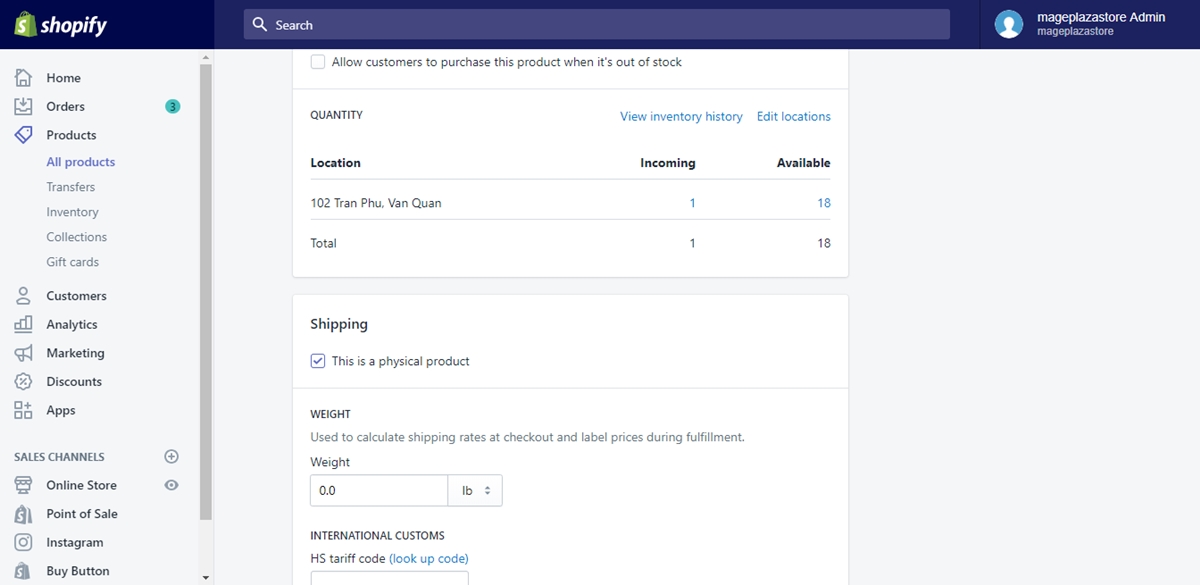
Step 4: Check and uncheck locations
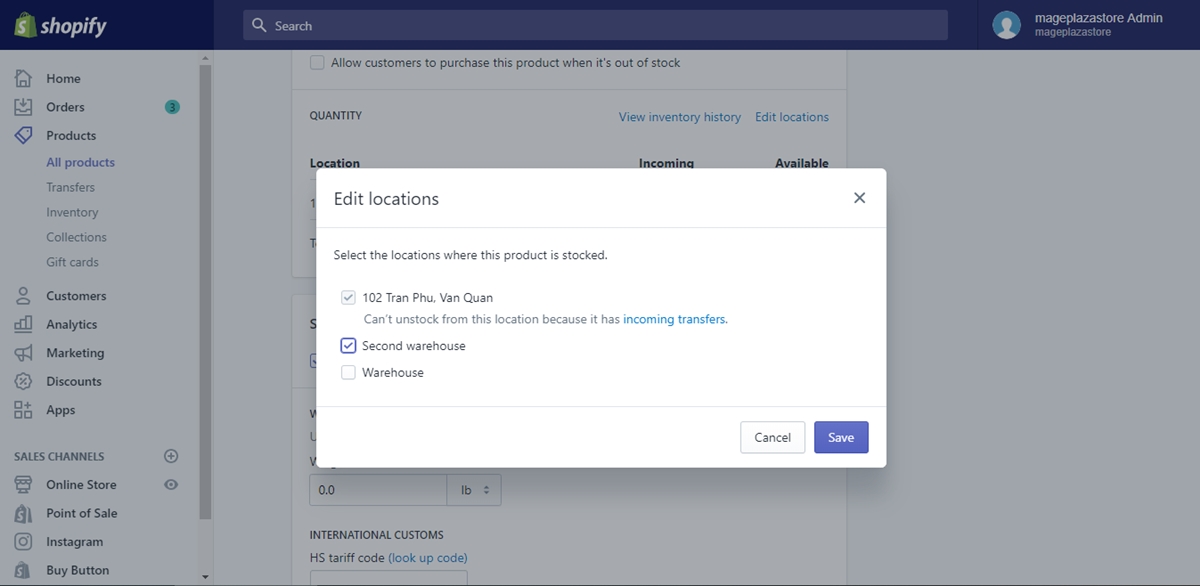
After clicking on the Edit locations option, you will see a Edit locations box with checkboxes next to locations pops up. Check the location that you want it to stock the product, and uncheck ones that you do not want to be on the product’s stock locations list anymore.
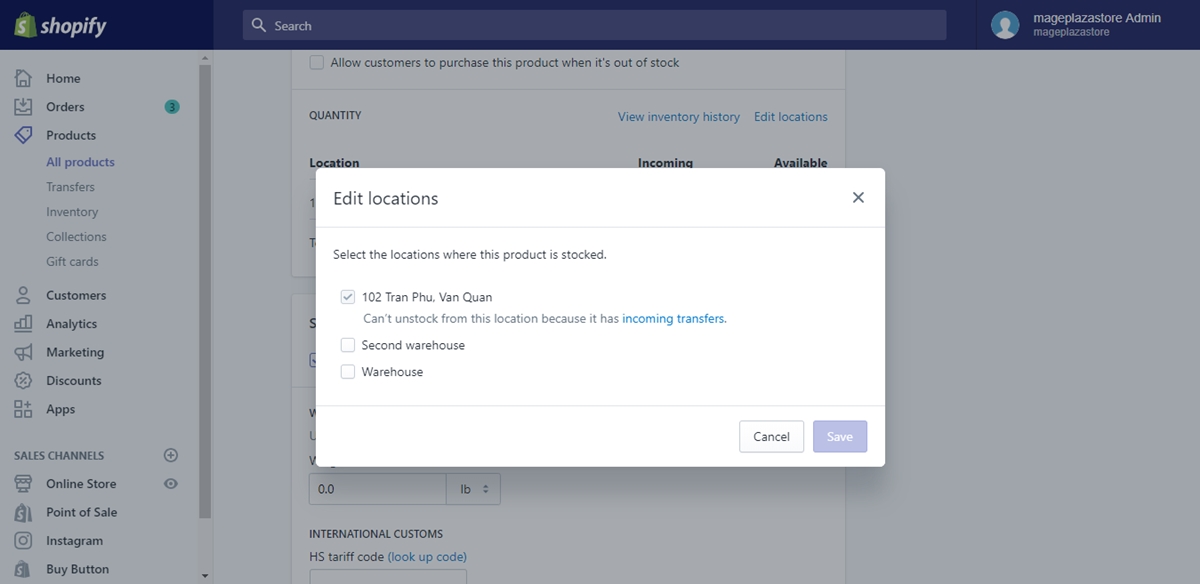
Step 5: Save changes
Click on the blue Save button on the bottom right of the box to save the changes that you made.
To change the list of locations that stock a product on iPhone (Click here)
- Step 1: Tap Products
After entering the Shopify app from your iPhone, tap on Products.
- Step 2: Choose product
In the Products page which shows you the available products, choose the product that you want by tapping on its title.
- Step 3: Tap variant
In case that your chosen product has any different version, as known as variants, you will have to tap on the variant selector, and choose the specific variant that you want to change its location.
- Step 4: Go to Inventory
Tap on the Inventory option for more information about locations changing.
- Step 5: Enable Track quantity
In the Inventory page, scroll down and check to make sure that the Track quantity function is enabled for further actions.
- Step 6: Tap Edit locations
After enabling the Track quantity function, you have to tap the Edit locations option in the Quantity section.
- Step 7: Edit locations
In the locations list shown, tap to check the location that you want to stock the product, and also tap to uncheck the location that you want otherwise.
- Step 8: Tap Save
Tap on the Save button so that your locations editing session is fully saved to your account.
To change the list of locations that stock a product on Android (Click here)
- Step 1: Enter Products
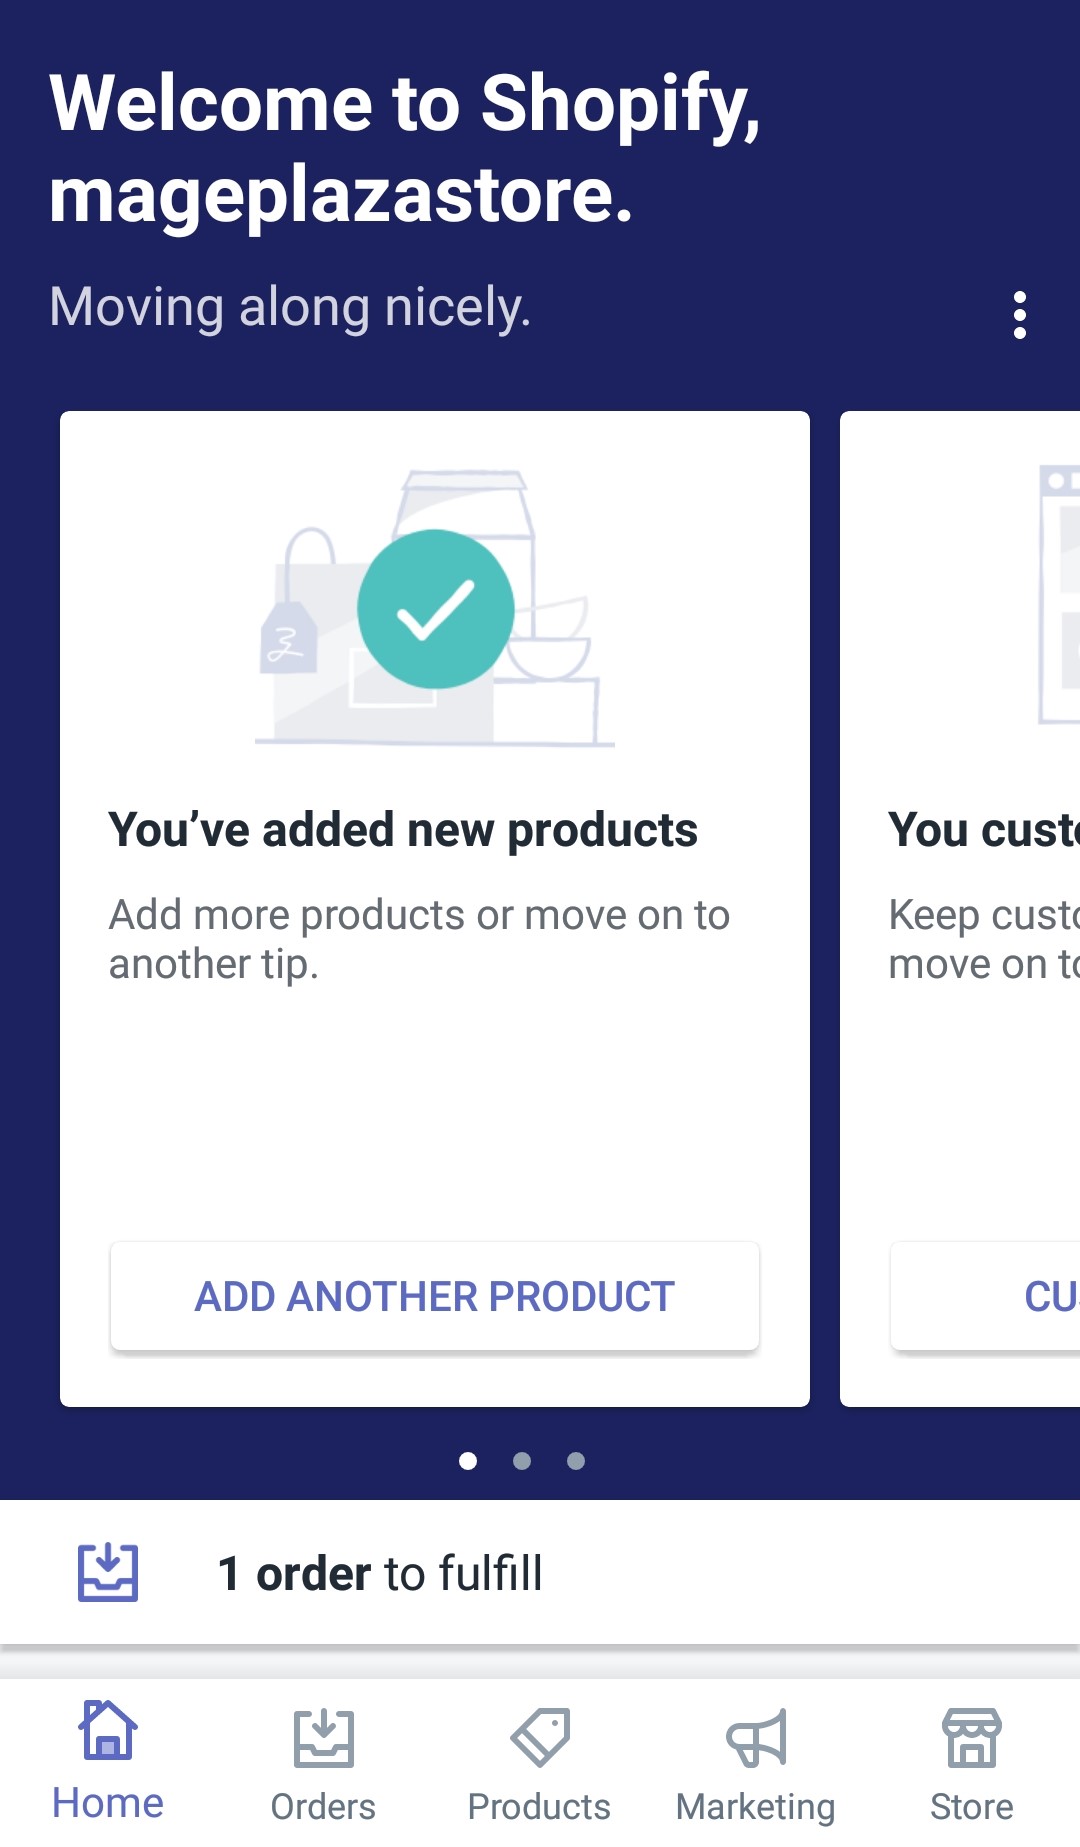
From your Android device, log into your Shopify shop owner account and once your are logged in, tap to enter the Products page in the middle of the bottom line on your screen.
- Step 2: Tap on product
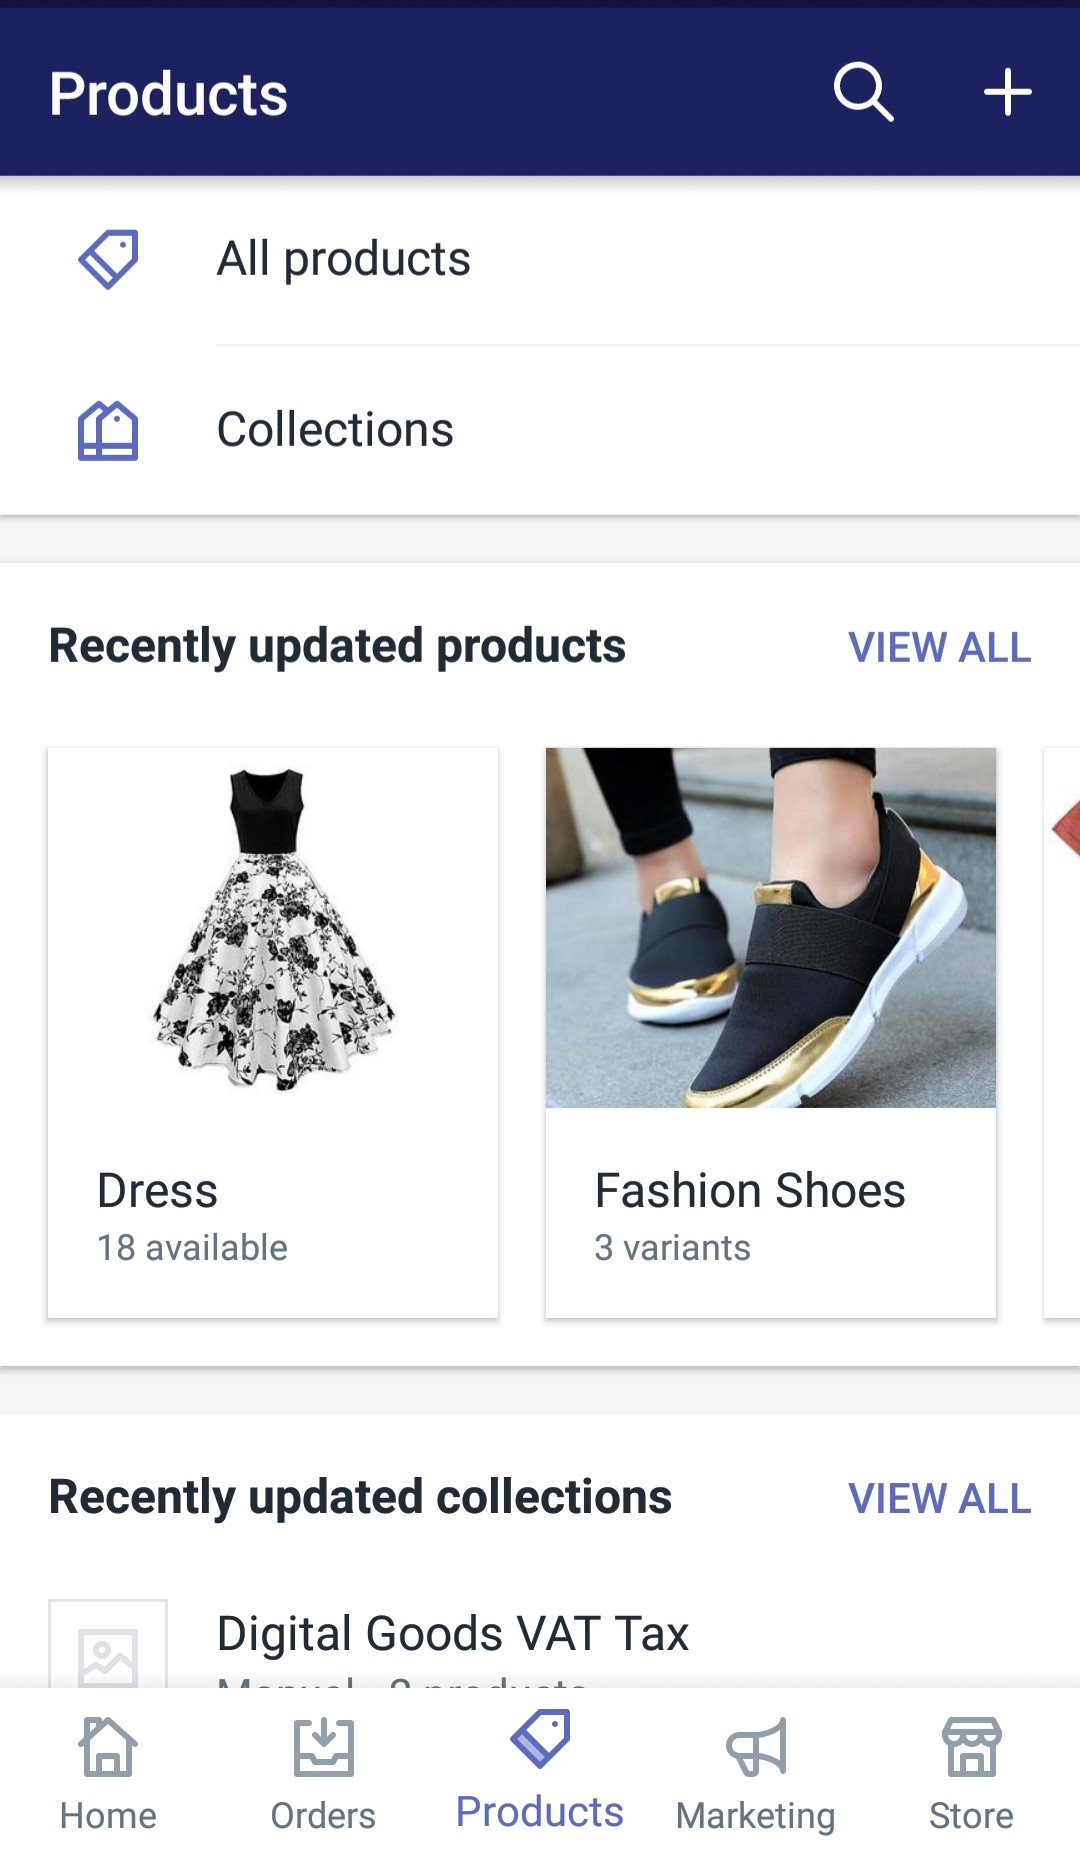
In the Products page, tap on the product that you want to make changes on on its name.
- Step 3: Choose variant
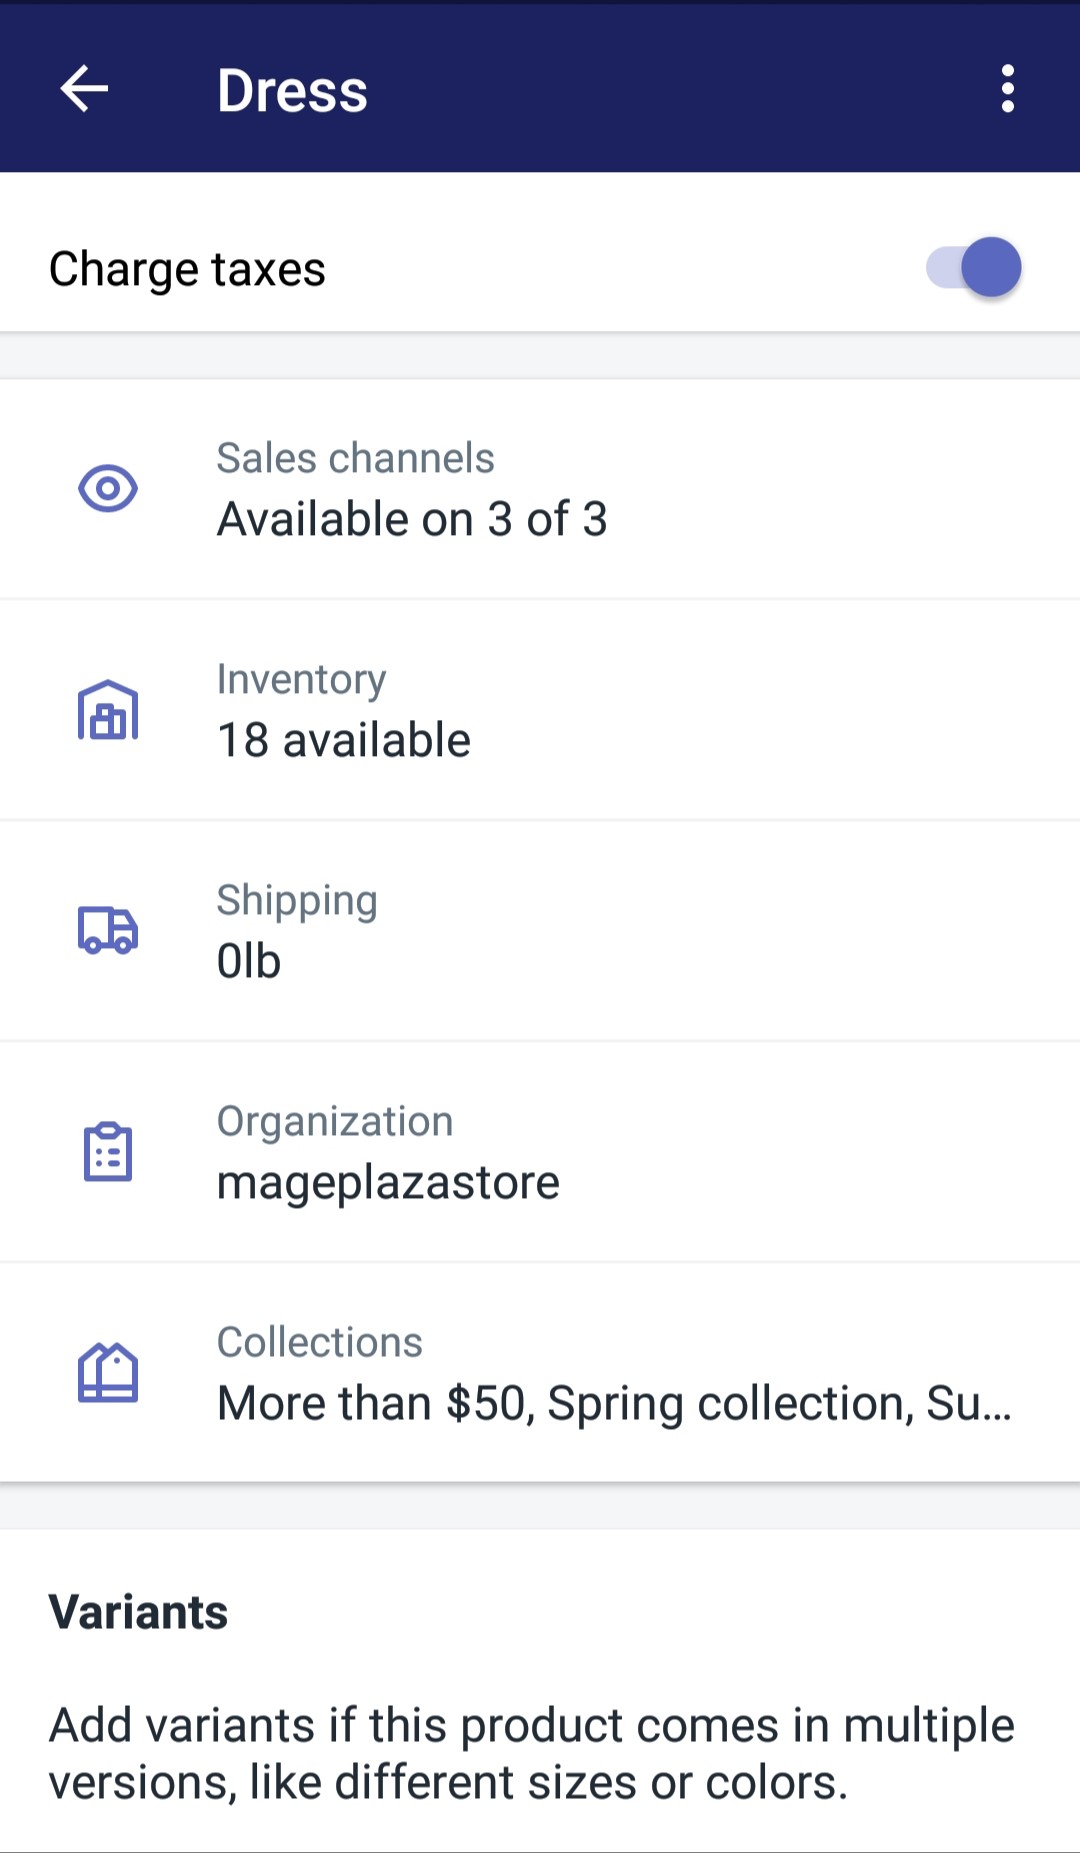
If your product has any variants created, you have to tap on the variant selector to choose the variant that you want to change its locations list that stock the variant.
- Step 4: Tap Inventory
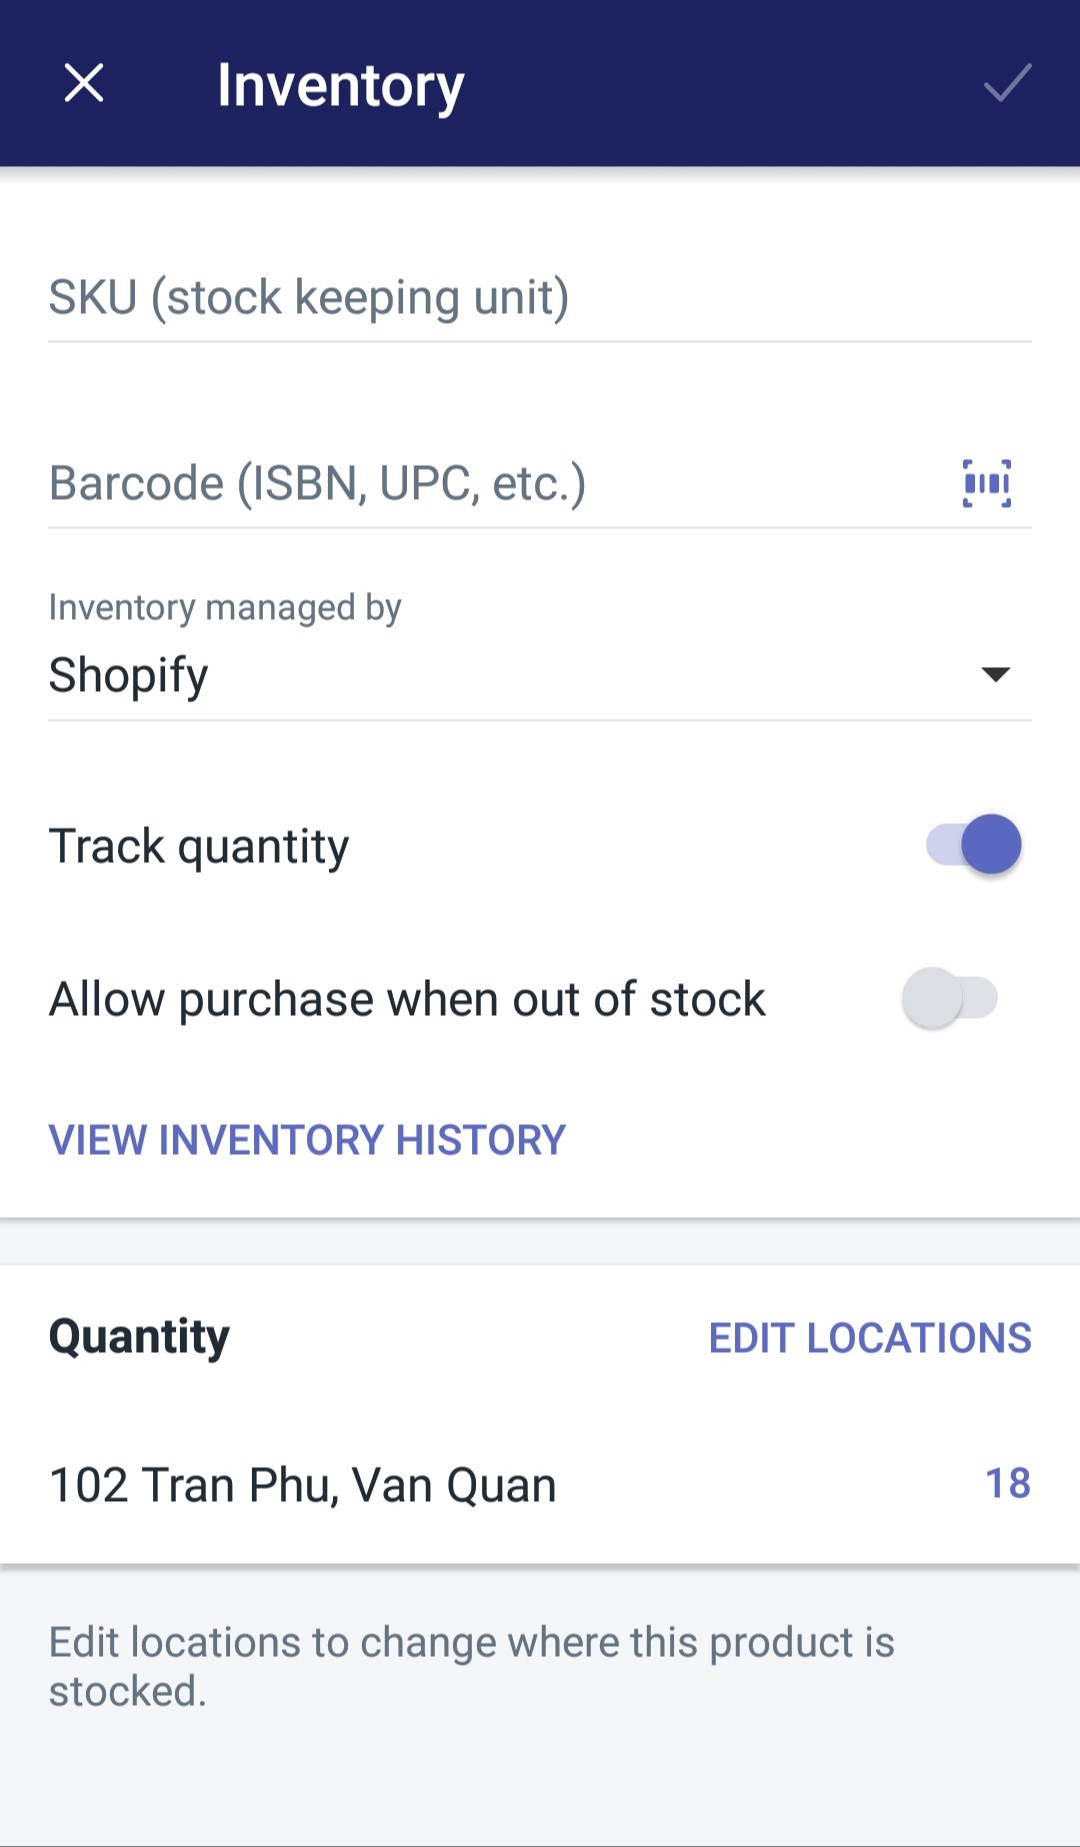
In the details page of the product you chose, scroll down a bit to find and tap on the Inventory button.
- Step 5: Track quantity enabling
If the Track quantity option haven’t been enabled, tap to enable it.
- Step 6: Tap Edit locations
Under the Quantity section on the Inventory page, tap on the Edit locations line to edit the locations list of your chosen product.
- Step 7: Edit locations list
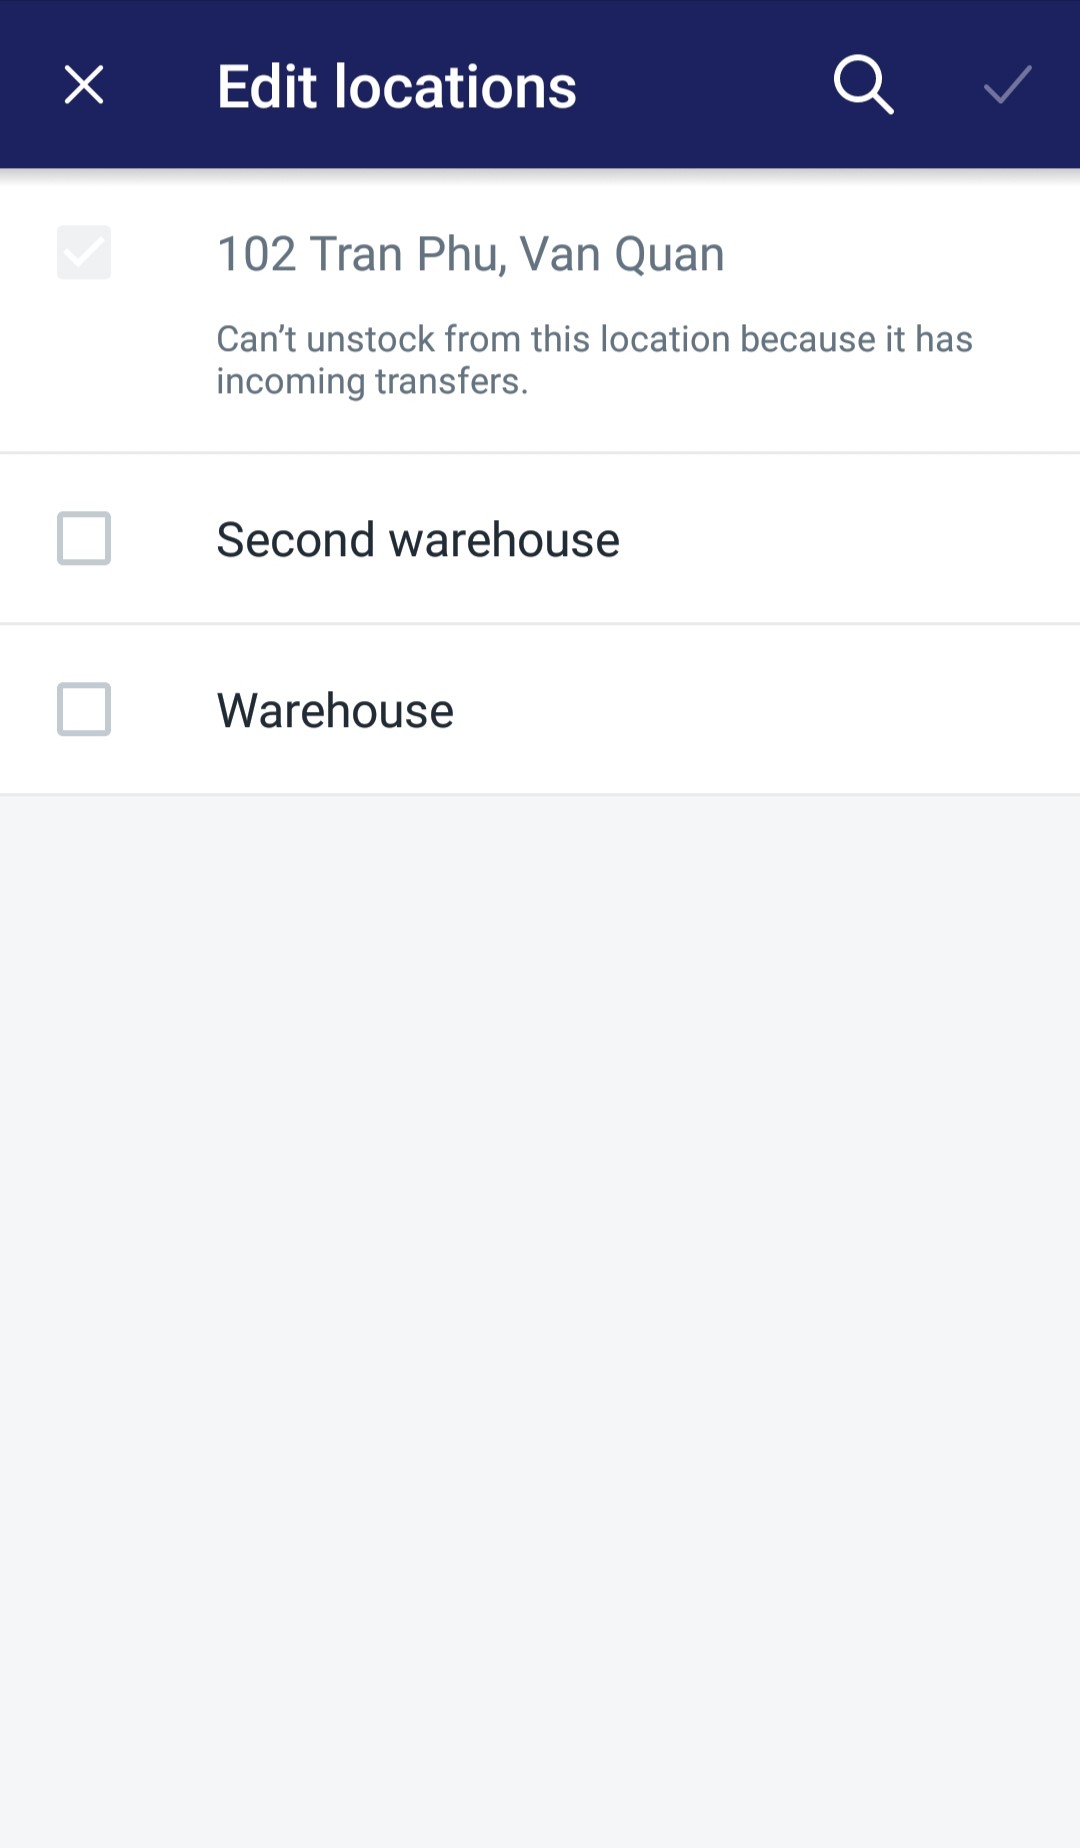
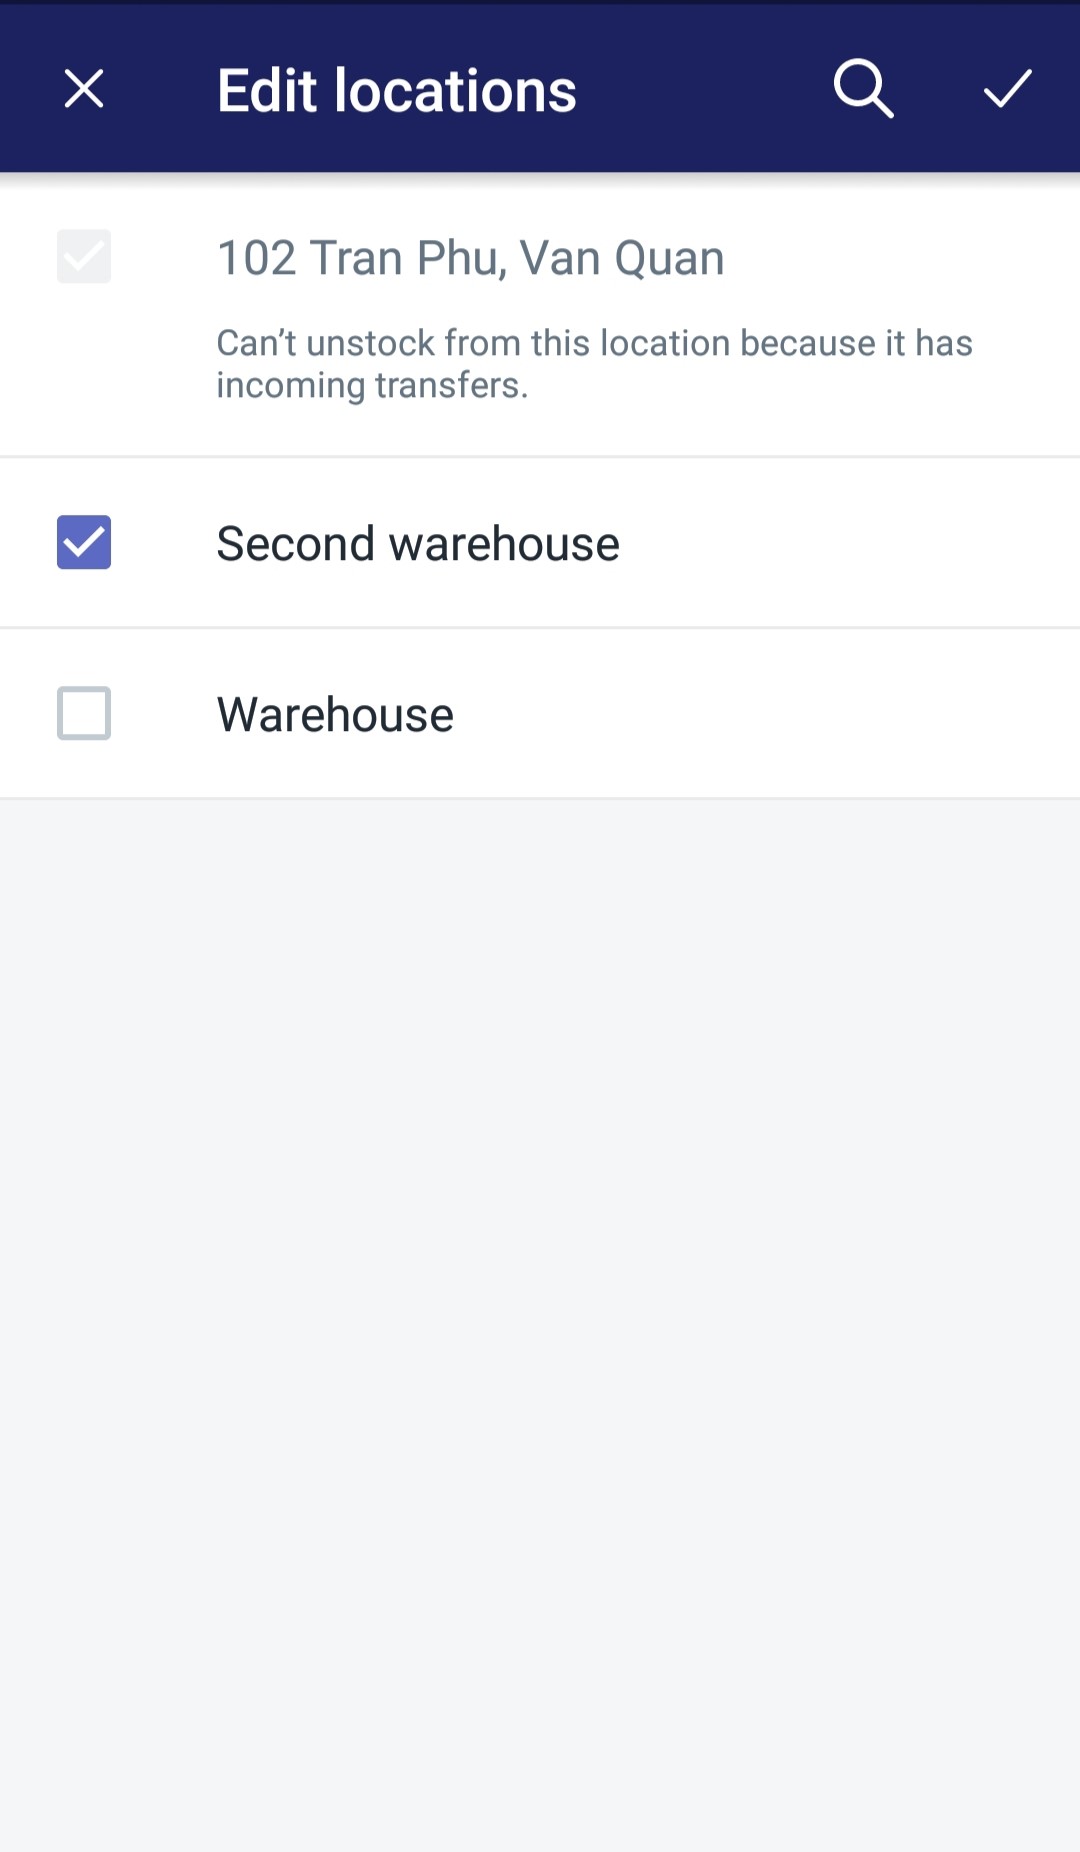
Upon entering the Edit locations page, tap on checkboxes next to locations displayed in the page to edit the locations list. Check to add it on the list and uncheck it if you do not want it to be on the product’s stock locations list.
- Step 8: Finshing
Finish your locations list editing session by simply tapping on the Save button.
Conclusion
Following this tutorial, with just some brief steps, you can master How to change the list of locations that stock a product on Shopify. I hope you will use the function effectively to manage your online store better. If you want more instruction, check out our Shopify tutorials.


