How to Change Inventory Quantities By The Same Amount For All Products
Managing the inventory quantities of all of your products is such an exhausting work. With each specific product, you will have to enter its own inventory details page, scroll to find its quantity managing section, type the available stock, check it again for several times, and repeat those long and tiring steps over and over again.
Have you ever wonder if you could merge those steps all into one for a better online business managing experience? All you want to master is a feature, which helps you to easily change the inventory quatities for all of your products on Shopify into the same amount, with just some steps that could be applied to every of your products.
Since many of the Shopify owners are still questioning about this problem, now we introduce you this function to solve the question of How to change inventory quantities by the same amount for all products on Desktop. With this feature, all of your problems are solved and you can run your online store in a quicker, and more effective pace.
Even when this tutorial only shows the steps applied to Desktop, you can still follow the below steps on the Shopify app from your iPhone or Android device to change inventory quantities by the same amount for all products, for a better online store of yours.
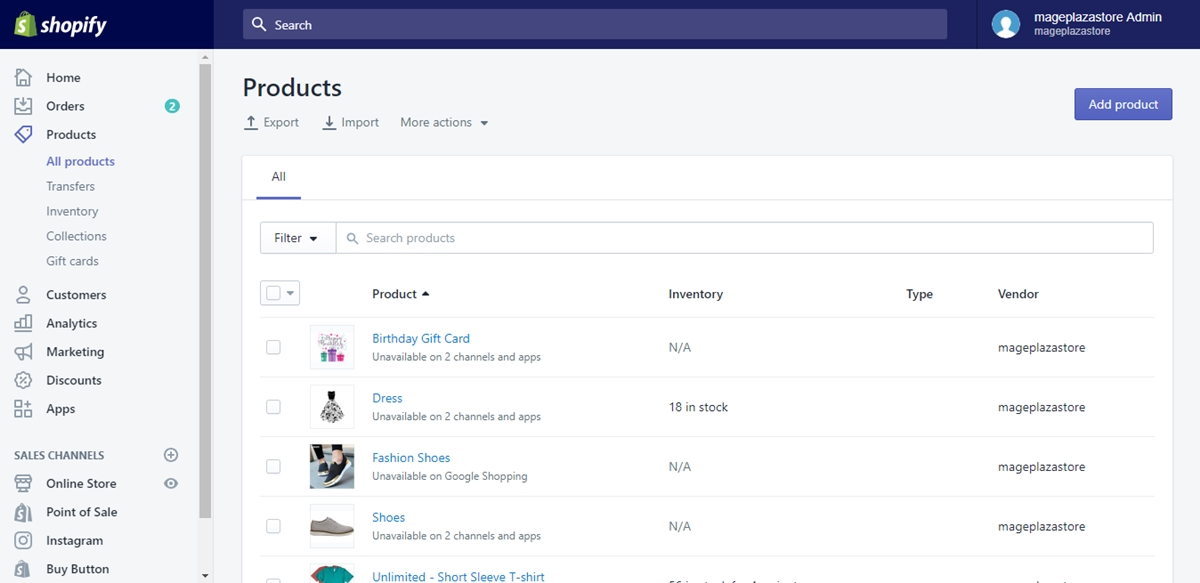
Step 1: Enter Inventory
After logging into your Shopify account from your Desktop, click to choose the Products option from the column in the left side of your page. Under the option, click to enter the Inventory page.
Step 2: Choose Location
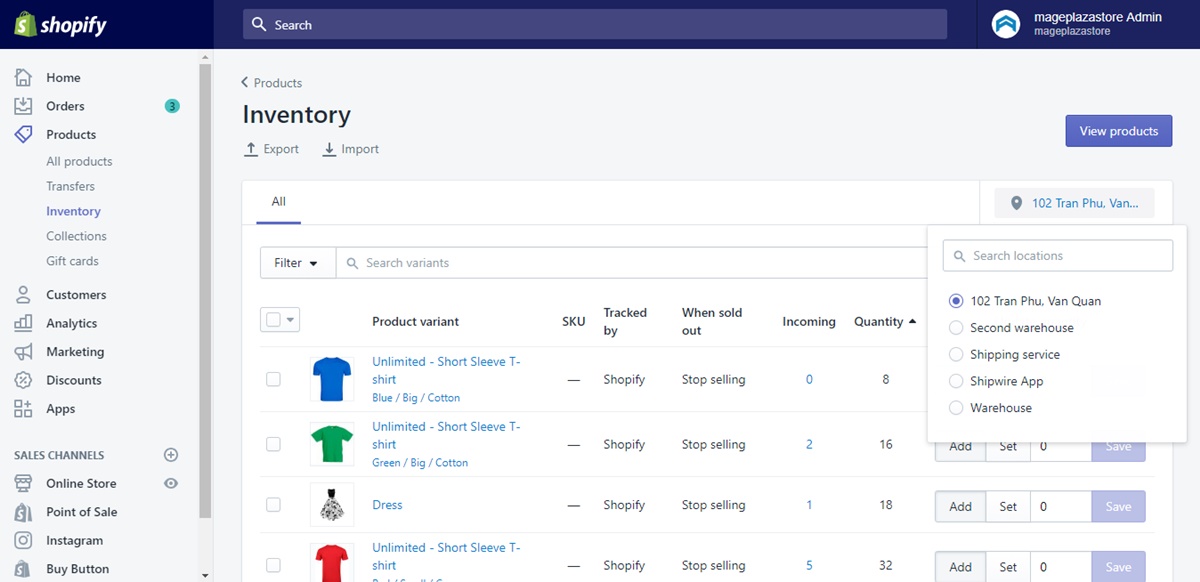
In the entered Inventory page, find the Location button and click on it to display its drop down menu. The drop down menu will show you the list of the locations that you already added before. Click to choose one location that you want to work with.
Step 3: Optional step
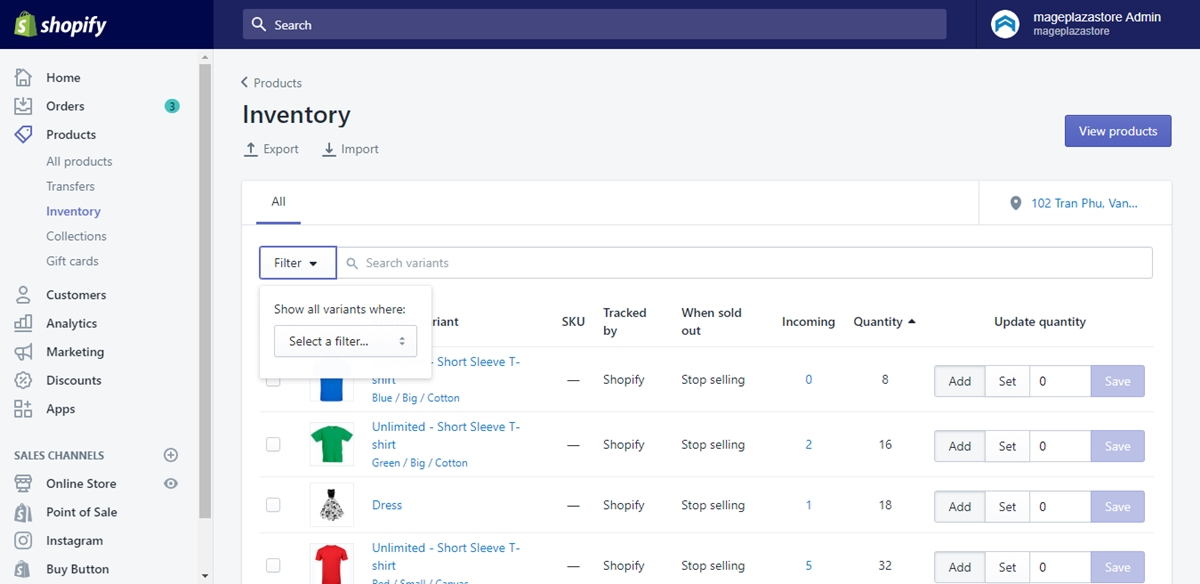
This is an optional yet recommended step for you to search for your wanted product faster and easier. Click on the Search bar and type the name of the product or click on the Filter button right next to the Search bar to filter the products so as to find it quicker. These two options are displayed upper from the products list.
Step 4: Checkboxes using
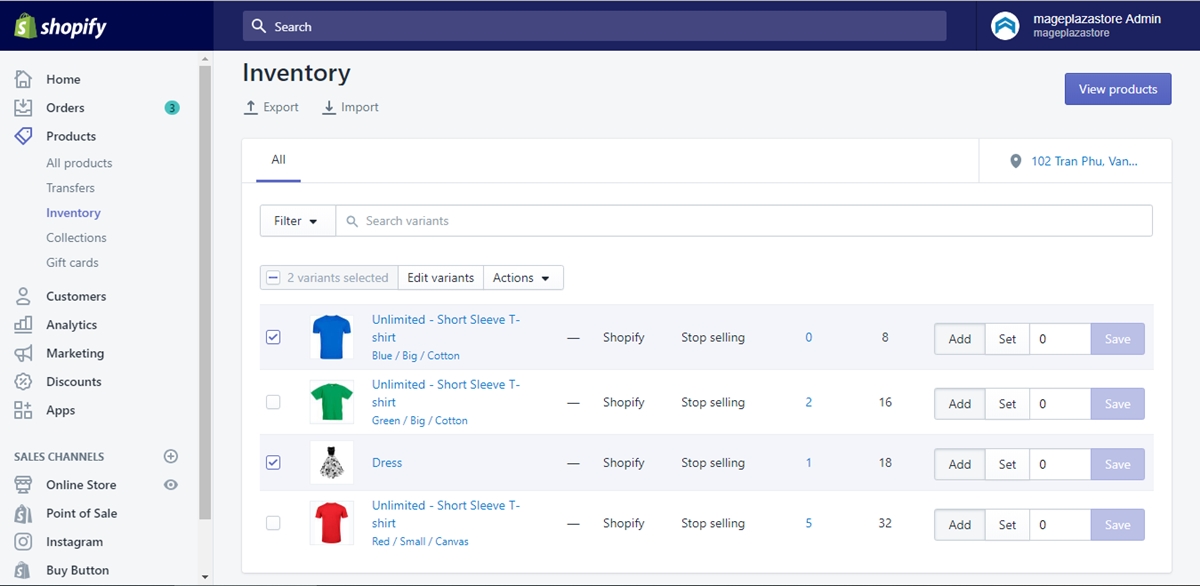
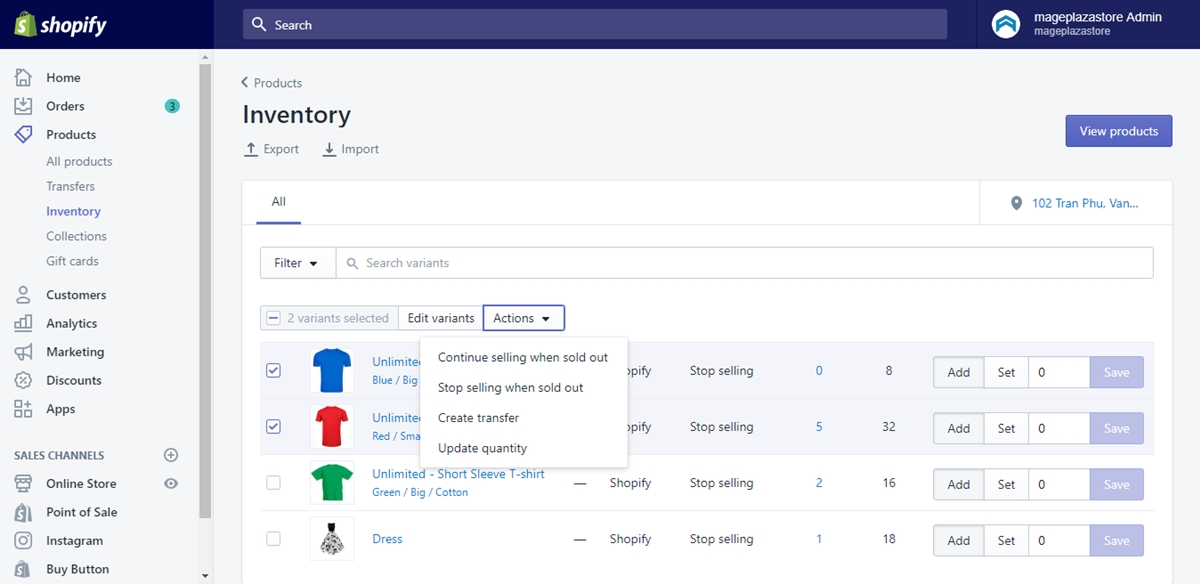
Next to each of the products displayed in the list is a checkbox. Click on those checkboxes to confirm that you choose to work with those products.
Step 5: Update quantity
After you are done chosing your wanted products, a Action button will shows up next to the Edit variants button. Click the Action button and in its drop down menu, click on the Update quantity choice to update the chosen products’ quantites.
Step 6: Change quantity
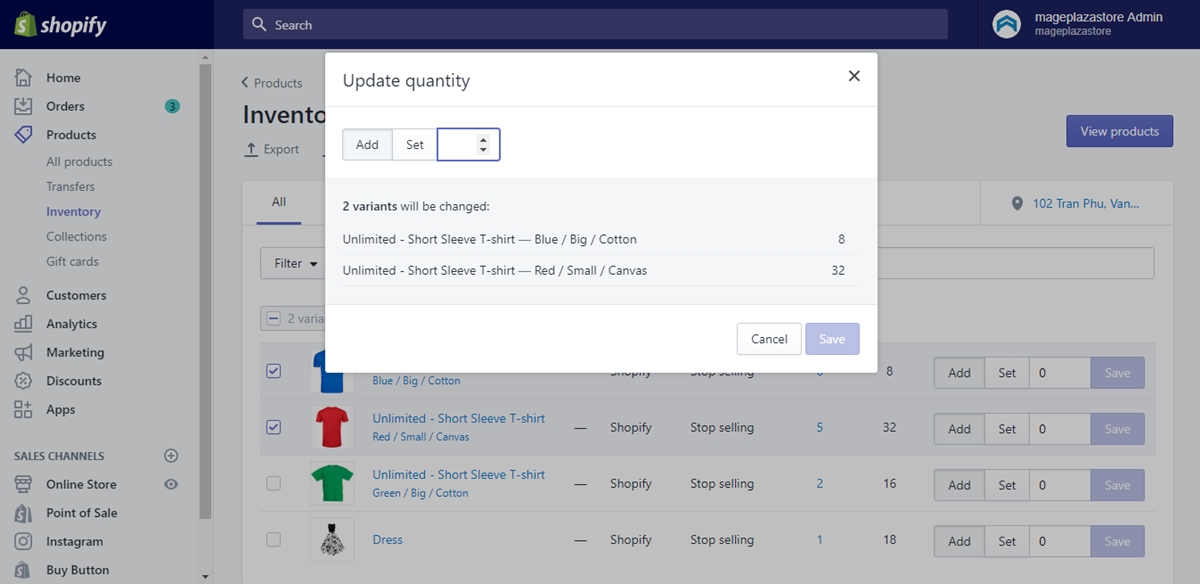
Upon clicking the Update quantity option, you will see a Update quantity box shows up. Type on the blank field to add the quantity change. Either positive and negative number, or zero are allowed.
Step 7: Wrap up
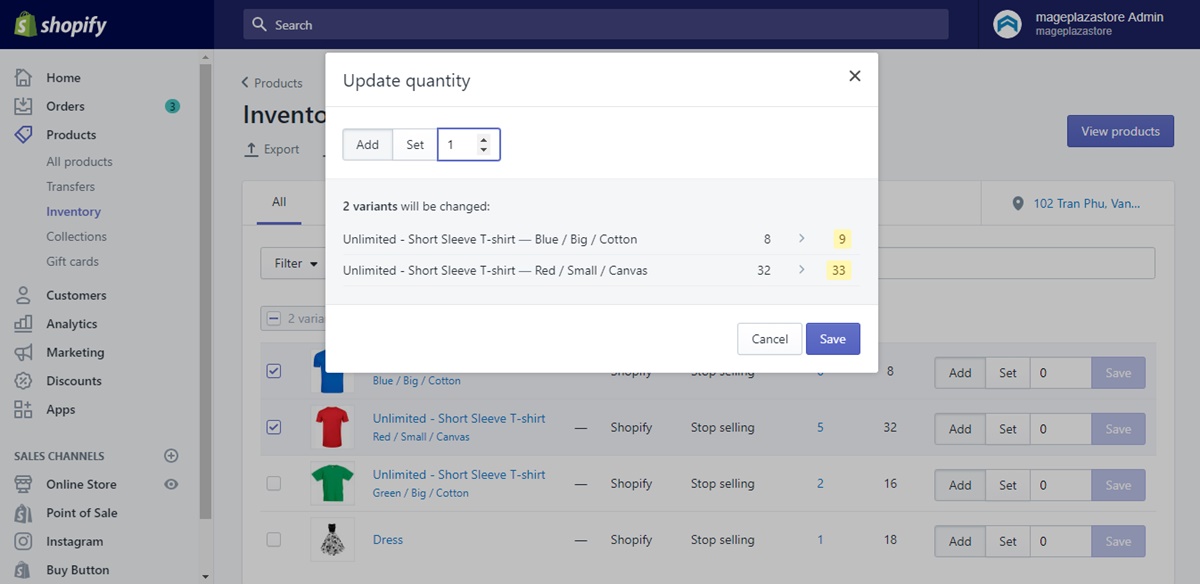
Next to the field, click on the Add or Set button, and click the blue Save button on the bottom right of the box when you are done. The changes will be saved to your chosen products’ quantities.
Conclusion
In this Shopify tutorial, now you can master the function to solve the problem of How to change inventory quantities by the same amount for all products on Shopify. I hope this feature will save you from all of the long and tiring processes to manage online store.


