How to Change Inventory Quantities At A Location For Selected Products
When running a Shopify online business, products quantity updating is one of the most essential step for your store to keep the customers informed and to manage your business condition better. If a product is purchased from a location, it will obiviously leads to the change in the inventory of the product at a specific location that being used to stock the product. Updating your products’ inventory quantities does not only help you to manage your online store better, but also makes it more convenient for the customers to order and receive the products they want as soon as possible.
But at the moment, there are many Shopify users still do not know how to update their inventory quantities at a specific location, which comes up with the result that the inventory quantities that displayed will be confusing to catch up for both the shop owners when providing the products and the customers who want to order those products.
Knowing that hardship, Shopify now introduce you the function to solve the question How to change inventory quantities at a location for selected products on Desktop. With this feature, you not only can dispose the problem of your quantities change, but can also update the available stock from a specific location effectively, which was a time and effort consuming work in the past.
In this tutorial, we will show you How to change inventory quantities at a location for selected products on Desktop, but you can also apply these below steps easily on your iPhone or Android device.
Step 1: Go to Inventory
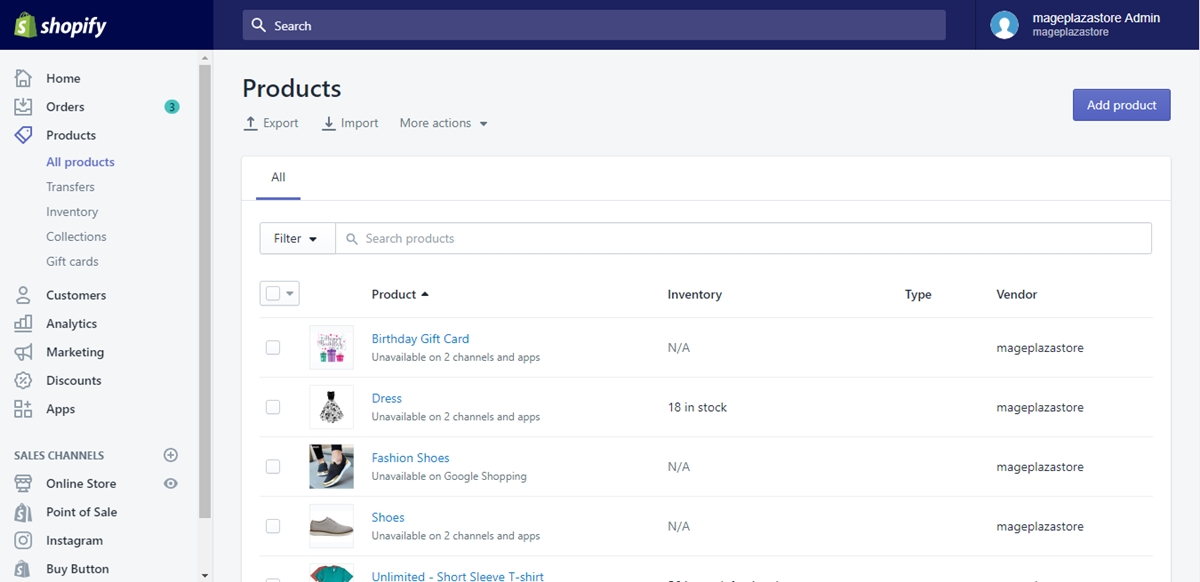
After entering the Shopify website, log into your Shopify online store owner account. Upon logged in, you will see a managing column with account adjusting options on the left side of your page. Click on the Products option on the column. When a drag down menu pops up, continue to click on the Inventory option to go to the Inventory page.

Step 2: Select location
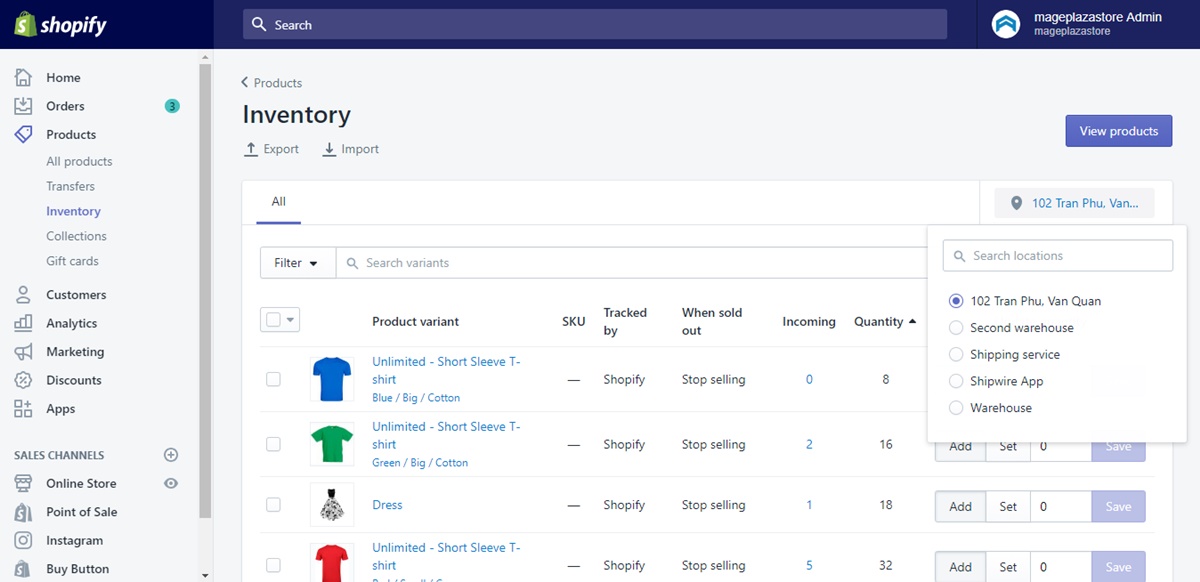
In the Inventory page, look on your right to see the locations drop down menu. Click on the menu and select the location you want from the displayed list.

Step 3: Filter or search
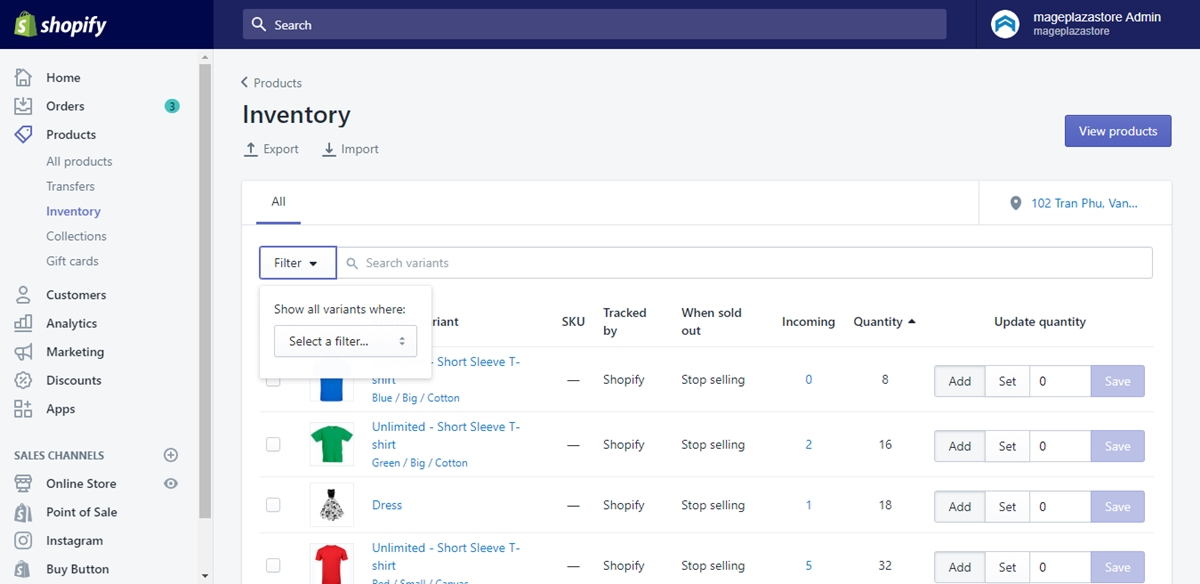
To find your wanted products easier, filter or search for product is an optional step recommended. Right on the top of the products list, you will the the Search bar and a Filter button right next to it. Click on the function that you want to choose and use it to catch the product that you want to make changes on.

Step 4: Updating
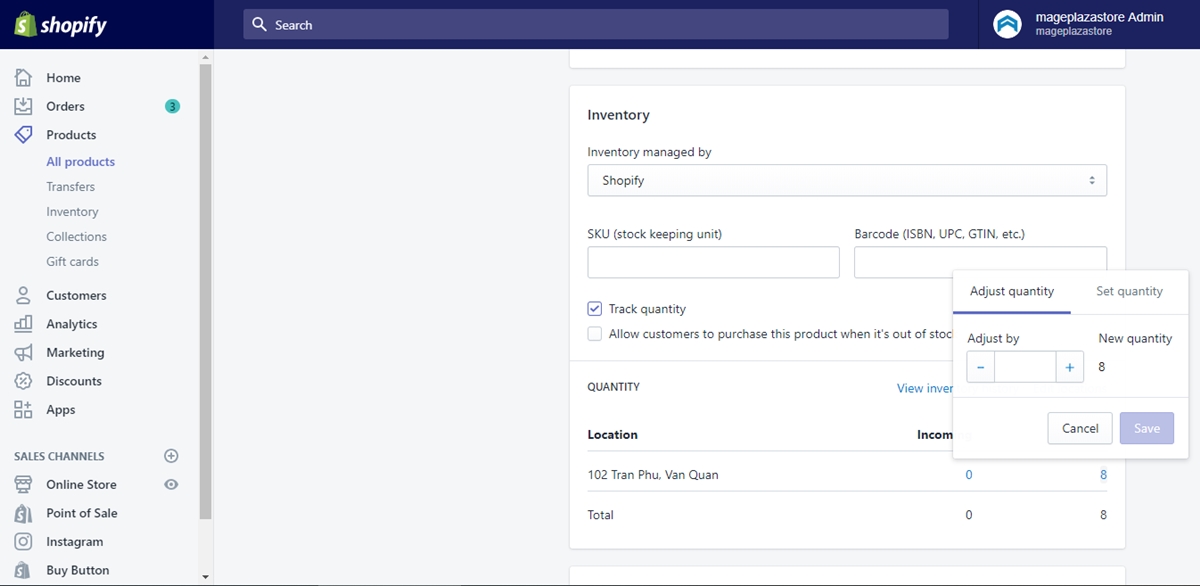
Upon entering your chosen product’s inventory details page, scroll down until you meet the Inventory section with the Update quantity column. After clicking on it, you will be provided a field to enter your product’s quantity. Type the number that refects your quantity changes, either a positive or a negative one, and even a zero. When you are done updating, click Add or Set, then save your changes by finding and clicking on the Save button.

Conclusion
Today, on this tutorial, I introduced you How to change inventory quantities at a location for selected products on Shopify. Known as a hard and time consuming work, but the quantity updating session will not torment you anymore with our very simple yet easy to apply and effective steps. I hope this tutorial will be helpful for your and your Shopify online career.


