How to Change the Default Name of the VAT Tax on Shopify
As your customers decide to buy any products from your store, they will see the VAT tax form on both the checkout page and the bills. Because the form will be displayed to the customers to view, you need to make sure that it is the most suitable one. Hence, this tutorial is prepared for you to change the default name of the VAT tax to make it better.
Follow the below simple steps to do this.
Related Posts:
- 3 Steps to Disable VAT Rates for Digital Goods on Shopify
- How to See the VAT Rates You’re Using on Shopify
- How to Apply the Digital Goods VAT Rates to a Different Collection on Shopify
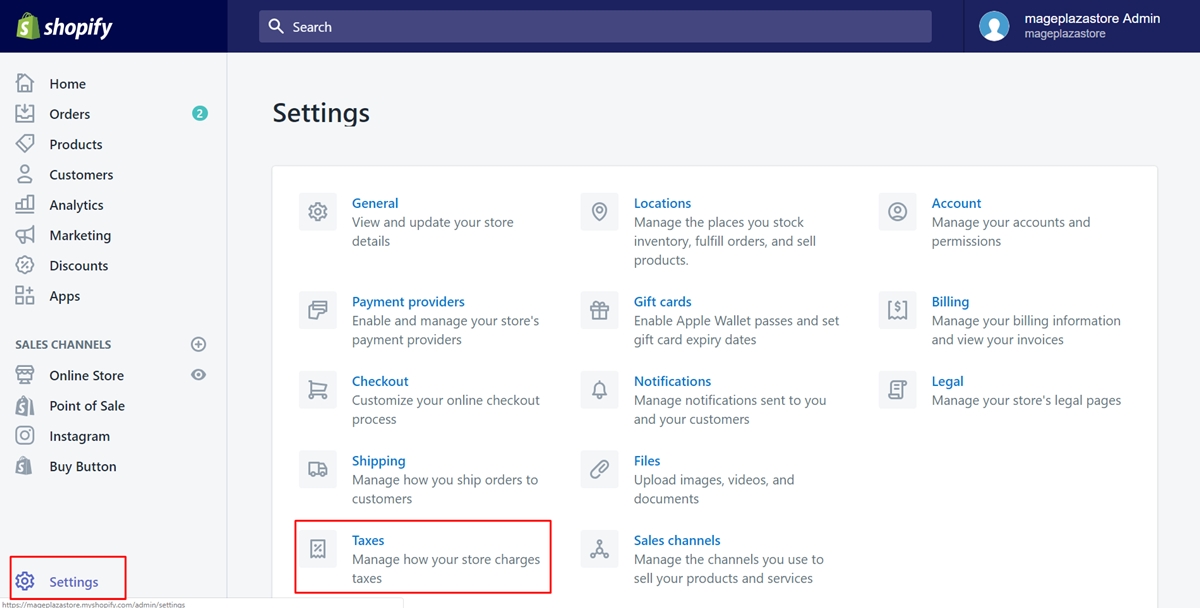
Step 1: Press on Settings and Taxes
Sign in your Shopify account to access the admin page. Then, look at the button list which shows the specific functional options. Make sure that you choose Settings in that list. Click on the Taxes section.
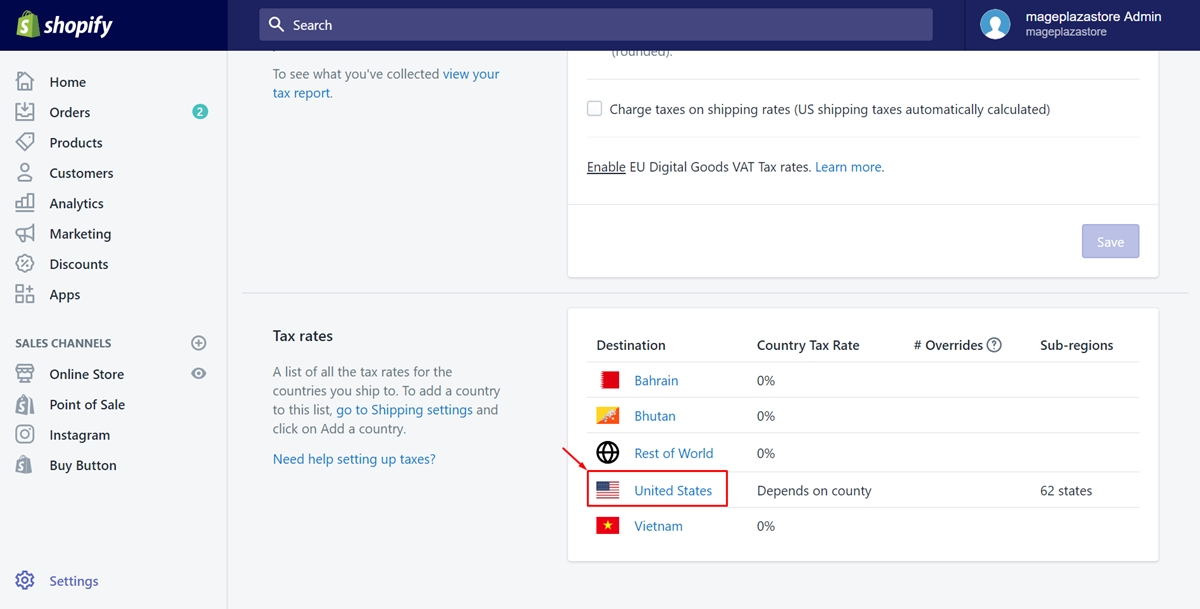
Step 2: Select the country
Take a view of the Tax rates field. Here are all the countries you’ve set up the tax rates. Choose one of those to change the default name of the VAT tax.
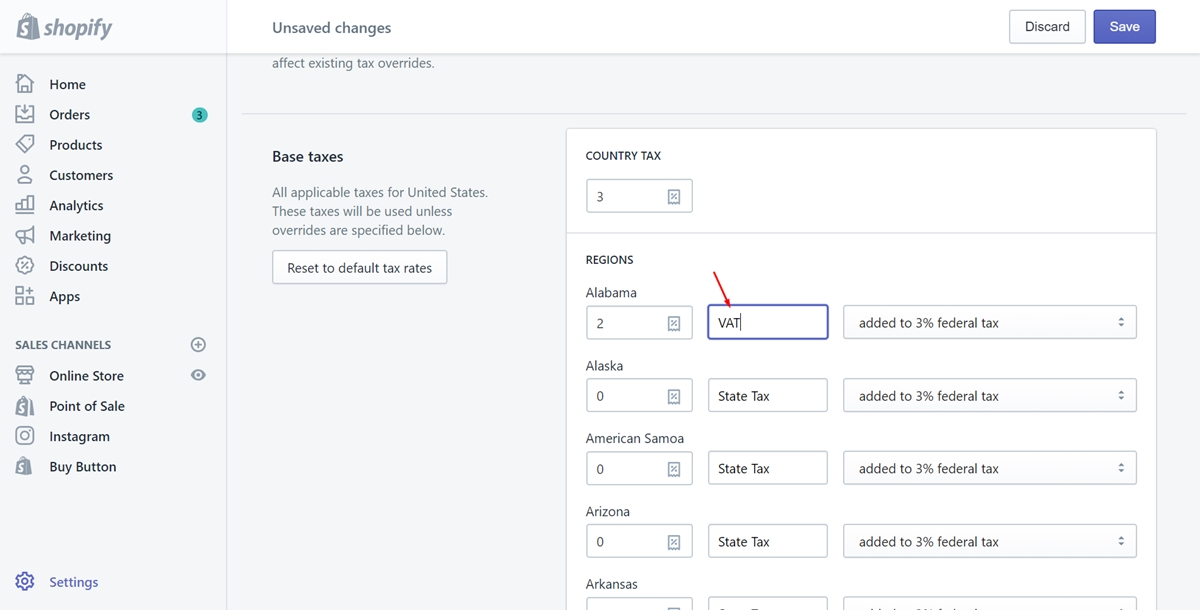
Step 3: Change the VAT form
There is a box next to each tax rate of the particular region which allows you to change the VAT form you expected. Customize it to suit your need.
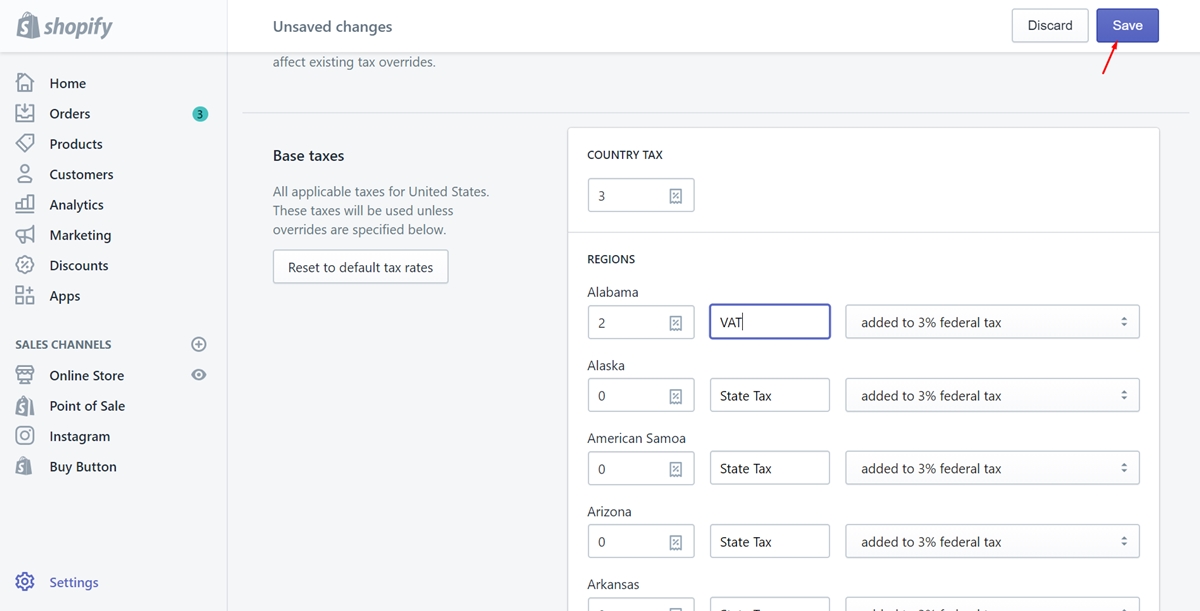
Step 4: Save
After you’ve done all the above steps, remember to tap on Save to complete your work.
To change the default name of the VAT tax on iPhone (Click here)
- Step 1: Choose Store and Settings
To access the admin page, sign in your Shopify account in the app. Then, take a view of the buttons at the bottom of the page and clickStore. Go to theSettingsoption.
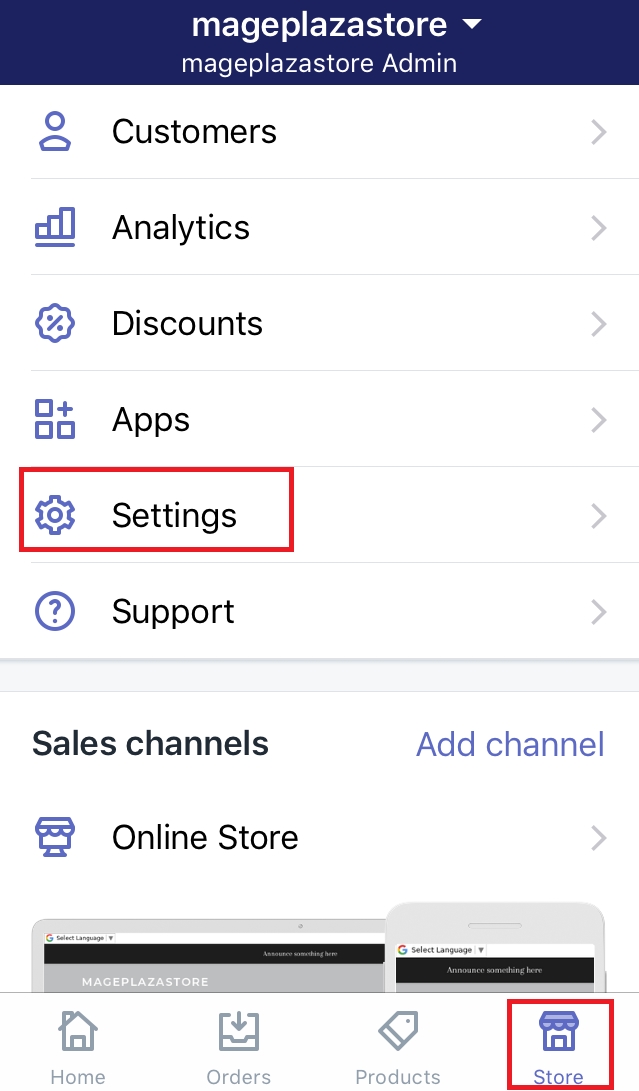
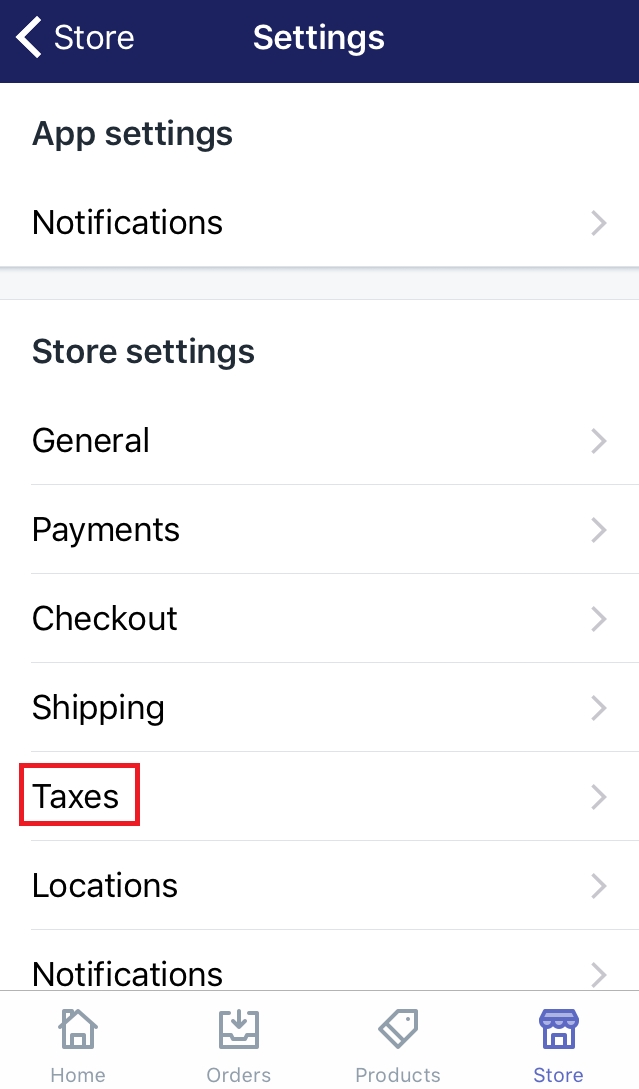
- Step 2: Select Taxes
Tap on theTaxesbutton which is under theStore settingsfield.
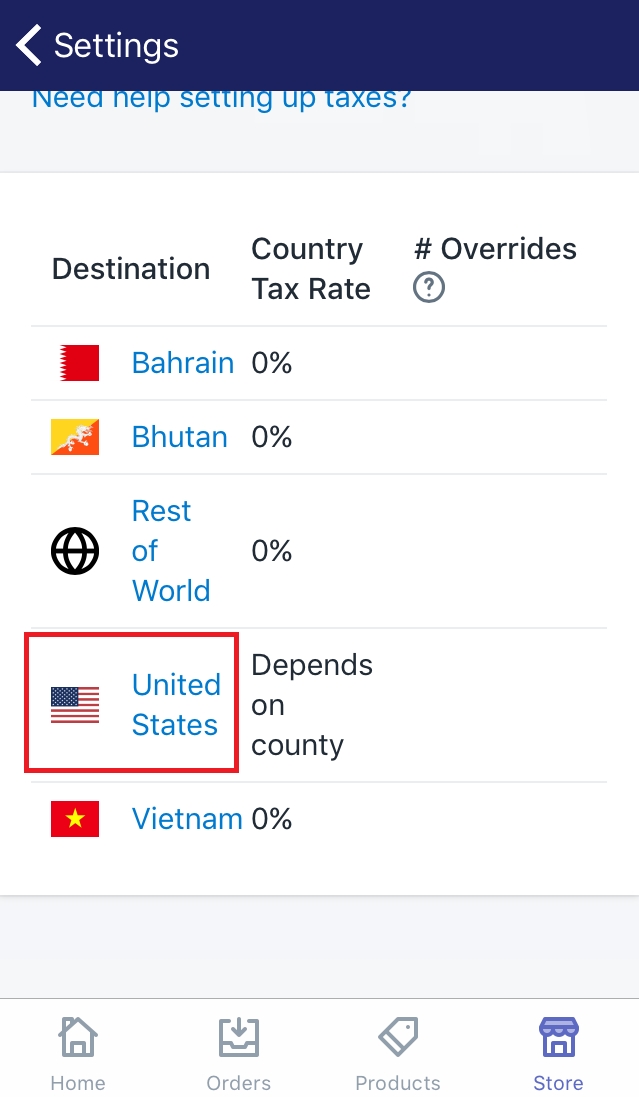
- Step 3: Choose the country
Look for theTax ratessection. You will see a destination list include all the countries you’ve set up the tax rates. Choose the country you wanted by pressing on its name.
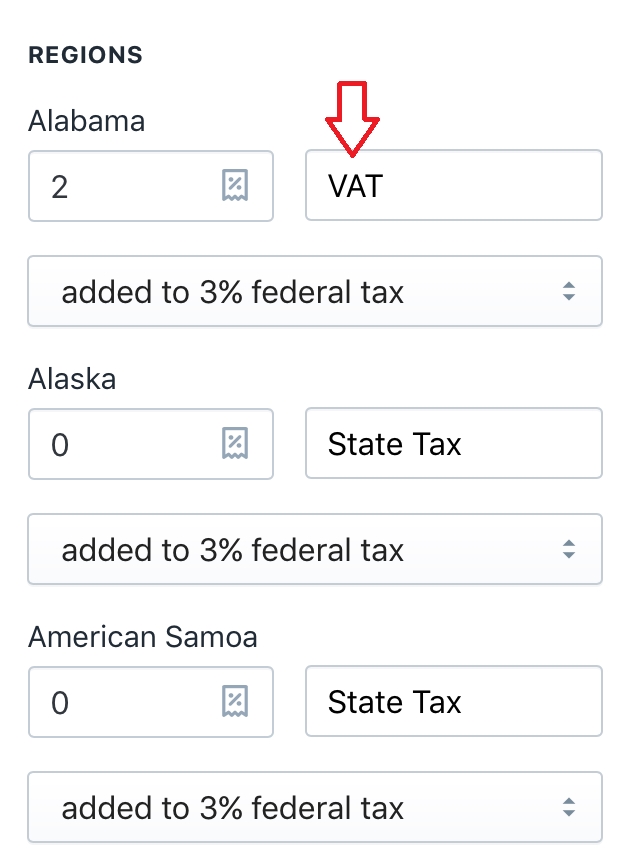
- Step 4: Change the VAT form
There is a textbox next to each tax rate of the particular region which allows you to change the VAT form you expected. Customize it to suit your need.
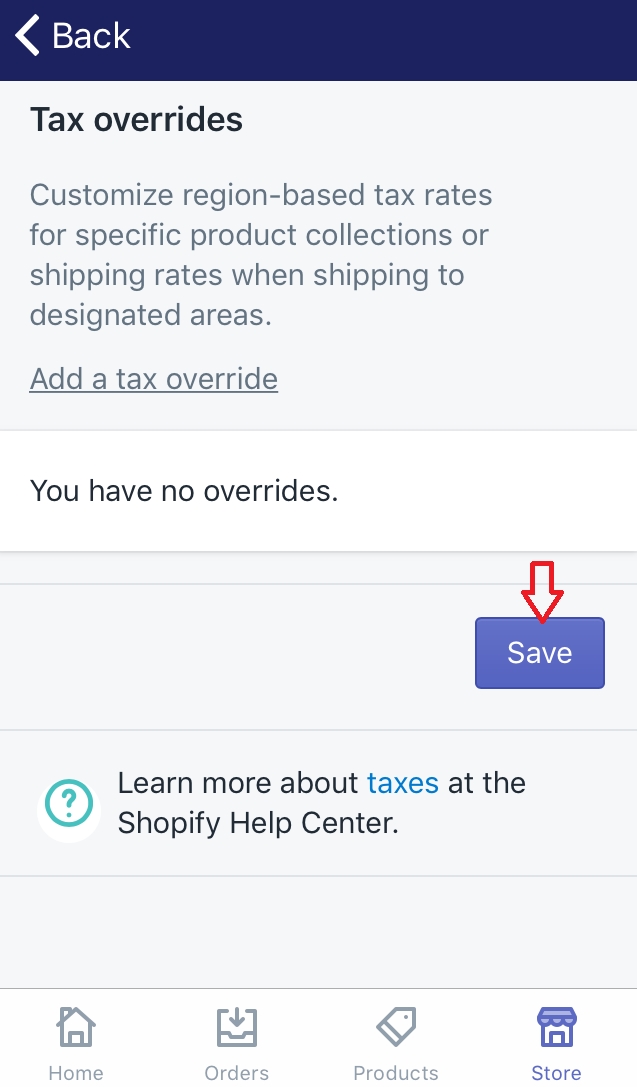
- Step 5: Save
After you’ve done all the above steps, remember to tap onSaveto complete your work.
To change the default name of the VAT tax on Android (Click here)
-
Step 1: Choose Store and Settings
To access the admin page, sign in your Shopify account in the app. Then, take a view of the buttons at the bottom of the page and clickStore. Go to theSettingsoption. -
Step 2: Select Taxes
Tap on theTaxesbutton which is under theStore settingsfield. -
Step 3: Choose the country
Look for theTax ratessection. You will see a destination list include all the countries you’ve set up the tax rates. Choose the country you wanted by pressing on its name. -
Step 4: Change the VAT form
There is a box next to each tax rate of the particular region which allows you to change form you expected. Customize it to suit your need. -
Step 5: Save
After you’ve done all the above steps, remember to tap onSaveto complete your work.
Summary
Above is the step by step tutorials about how to change the default name of the VAT tax. Hope you find it easy and convenient to follow. If you do care about set the tax rate for a new POS location, click on how to set the tax rate for a new POS location.


