How to Attach Files to your Timeline on Shopify in 2 Minutes
By following the post about how to add comments to Timeline, you would know how to do it. However, if the word comment is quite difficult to understand, which leads to a lack of information to those who read it, you are highly recommended to attach files to your Timeline. You can make the comment more clear and full information by the file attached. It can be the product’s photo before shipping to your customer or a copy of the inventory transfer receipt.
The below steps will go to the details.
Related Posts:
- How to link and embed orders, transfers, customers, or products on Timeline on Shopify
- How to Mention Staff Members on Timeline on Shopify
- Use Emojis on Timeline on Shopify - A Simple Guide
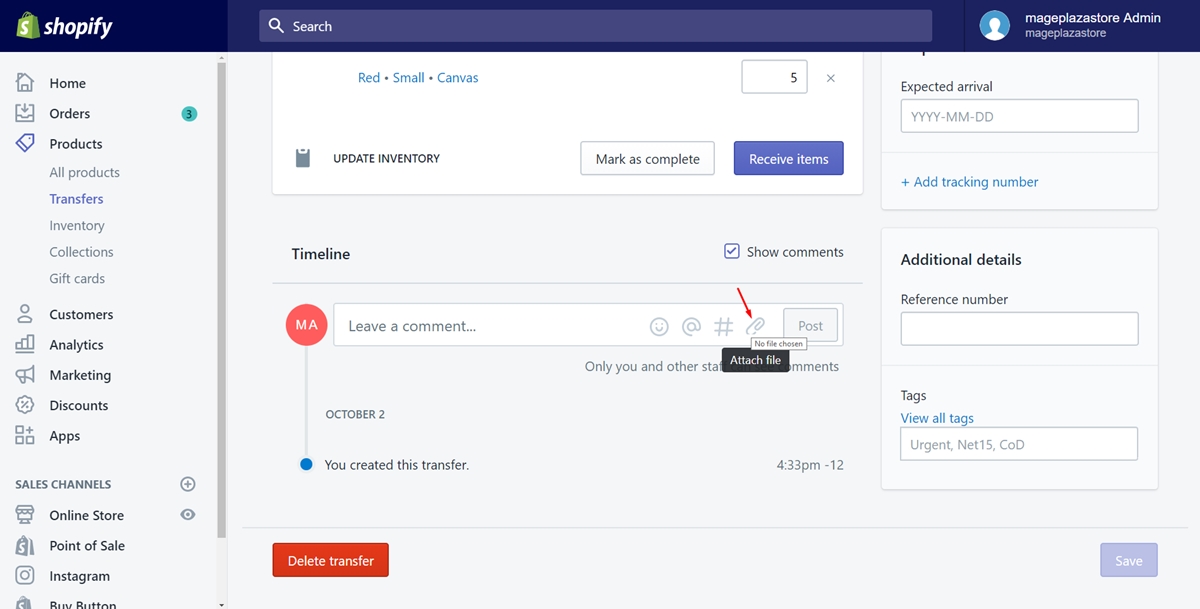
Step 1: Tap on the paper clip icon
After you’ve done with the carefully worded comment, it’s high time to attach a file to it. Above the textbox which allows you to type the comment, there is a paper clip icon. It’s to look for the file you want. Hence, make sure to press on it to continue.

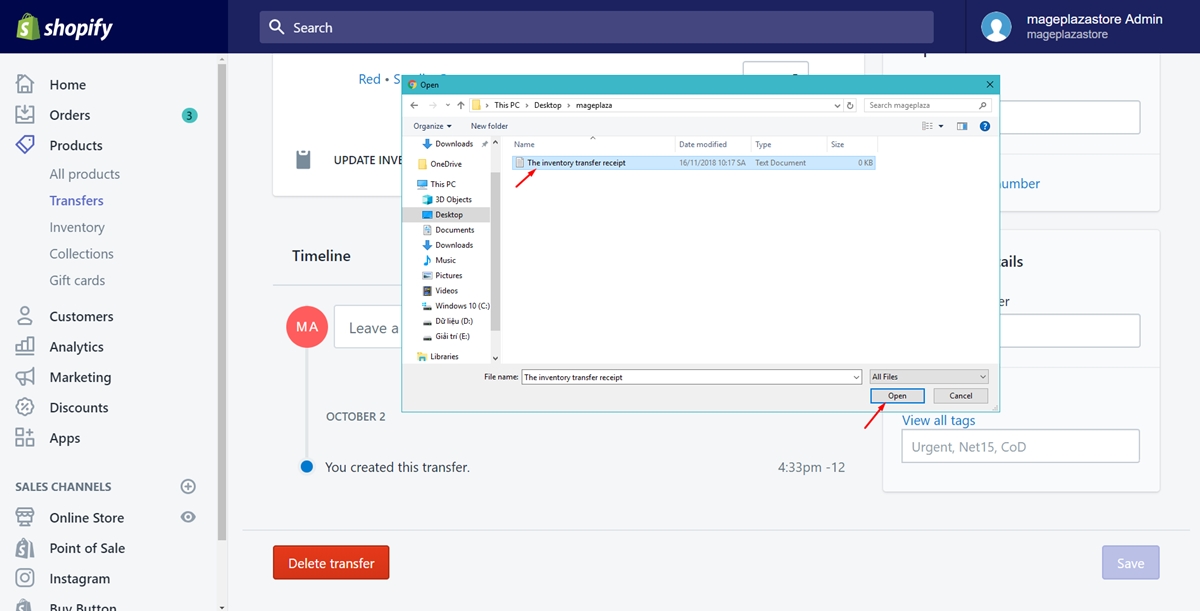
Step 2: Choose the file
A small dialog will come out. A lot of files from your desktop are displayed. You must have remembered where the expected file is. Follow the path and find that one. Afterward, click to it to choose the file and tap on the Open button to open and attach it to your comment. It will become a part of the comment right away.

There is another tip for you to do this step. You can also drag and drop the file into the comment box without choosing any button.
Summary
Finally, you’ve done with the process to have the best comment. Hope this writing about how to attach files to your Timeline will help you and those who read the comment have useful information. We also have a lot more tips on Shopify Timeline and productivity tools in general, check it out if you’re interested.


