How to Add or Change Favicon on Shopify
You might be surprised at the word favicon. Well, this word sounds interesting since it is combined between the word favorites and icon. Favorites icon or a favicon is known as a small logo or square appearing next to your web address. You can easily find favicons on the browser tabs and on the browser pages listing the web addresses like the book mage page.Adding a favicon can aid in boosting your brand online. In this writing, you will be shown how to add a favicon to Shopify store on Shopify on Desktop, iPhone, and Android.
Related Posts:
- How to add an updated version of your theme to your online store on Shopify
- How to set a title and description for your online store on Shopify
- How to add a new webpage to your online store on Shopify
- How to upload an image file to your online store content on Shopify
- How to remove an unpublished theme on Shopify
- How to download Shopify theme files?
- How to find the right theme on Shopify?
7 Steps to add a favicon to your Shopify stores:
Step 1: Select Themes section.
After logging in your Shopify admin, you can select Online Store > Themes.

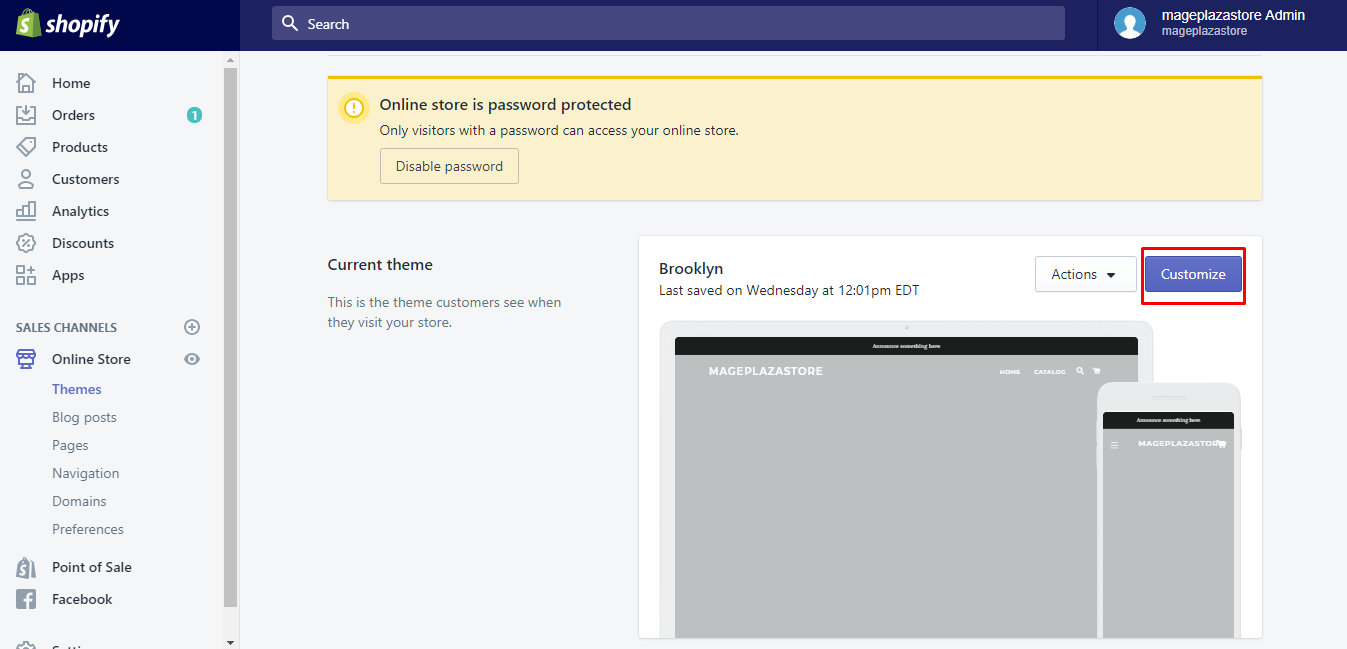
Step 2: Click Customize.
Choose the theme you want to have it edited and then click Customize next to the Actions area.
Step 3: Go to Theme settings tab.
From the theme editor toolbar, you can go to Theme settings tab.

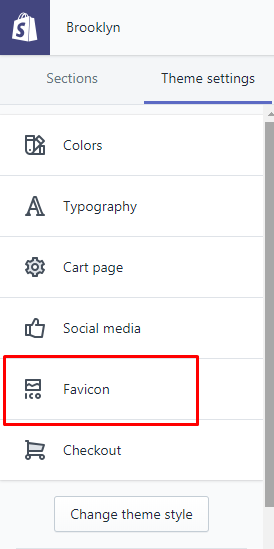
Step 4: Choose Favicon.
Scroll down to see the Favicon section.
Step 5: Go to Select image.
Select image for your Favicon image section.

Step 6: Click the favicon pictures.
-
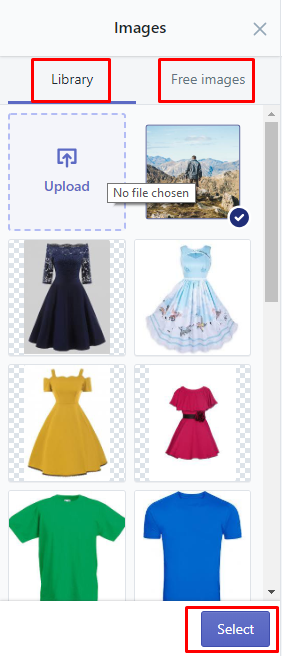
You can choose a picture you uploaded already to the Shopify admin at the
Librarytab. If you want to choose a picture from your computer, you can clickUploadto post your picture on Shopify. Choose the one you like and clickSelect. -
In addition, next to the
Librarytab, there are some free pictures at theFree imagestab. Choose the one you like and clickSelect.
Step 7: Save favicon picture.
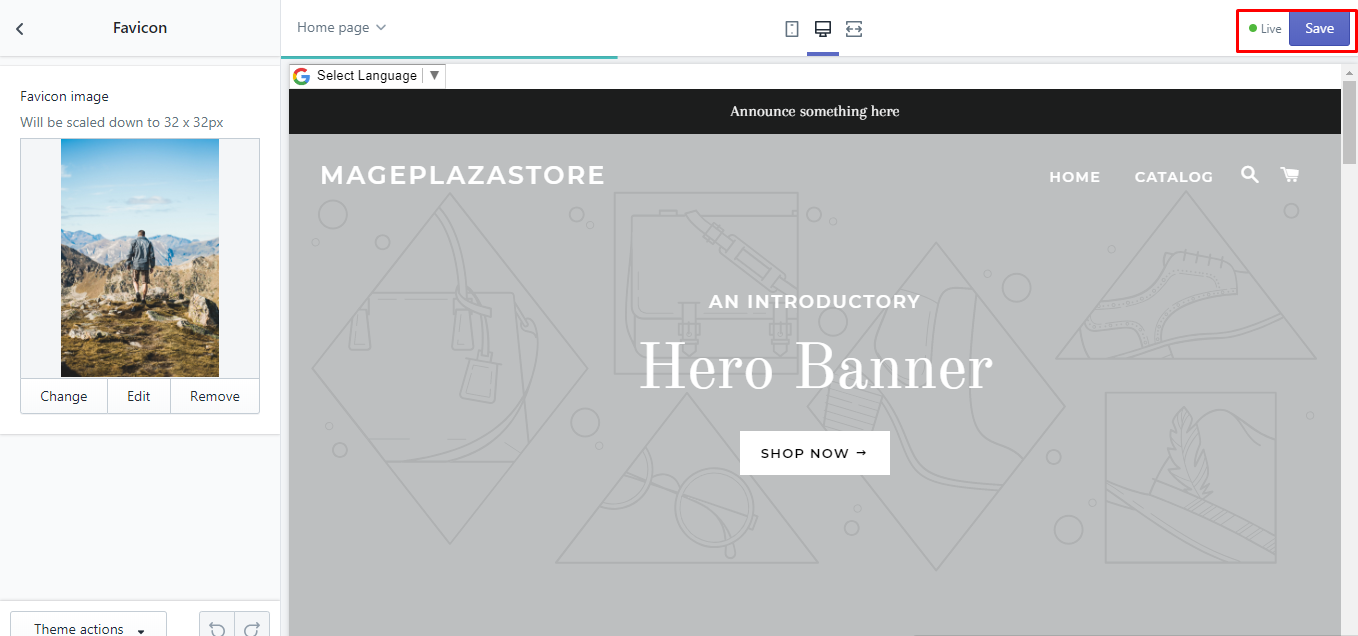
Don’t forget to click Save to complete your finish work.
To add a favicon to your online store on iPhone (Click here)
-
Step 1: Tap Store. Tap
Storeat the bottom of the page after logging in. -
Step 2: Touch Online Store > Manage themes. From the
Sales channelsarea, you can touchOnline Store > Manage themes.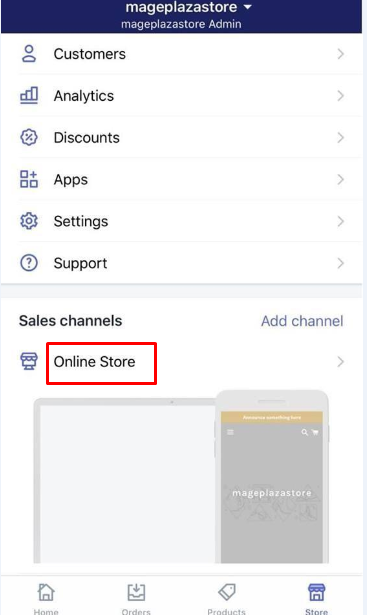

-
Step 3: Touch Customize. Select the theme you want to edit and touch
Customize.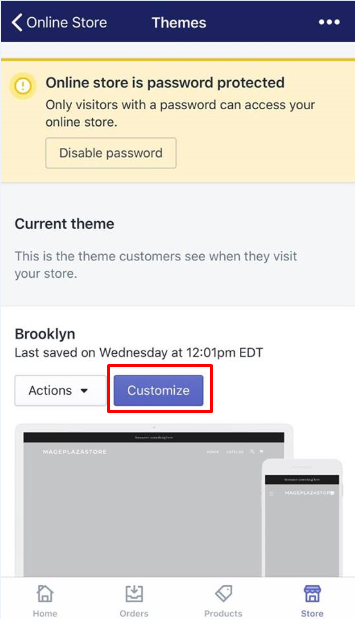
-
Step 4: Touch Theme settings tab. As you can see, from the theme editor toolbar, select
Theme settingstab. -
Step 5: Choose Favicon. Tap
Faviconto continue.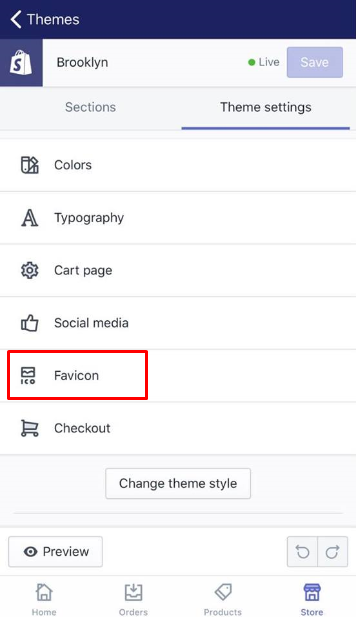
-
Step 6: Touch Select image. From the
Favicon imagesection, chooseSelect image.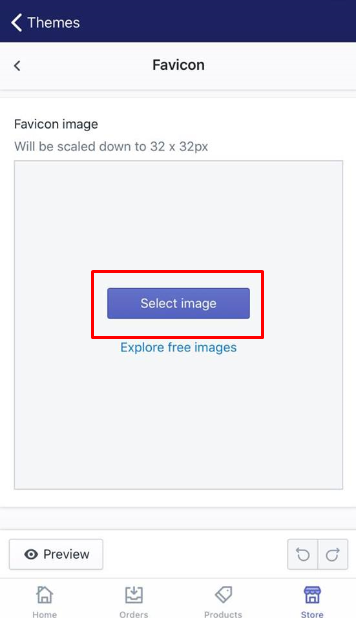
-
Step 7: Touch a picture. You can choose to touch a picture that is already uploaded to the Shopify admin at the
Librarytab or upload a new one from your computer. There are also free images fromFree imagetab. After choosing, touchSelect.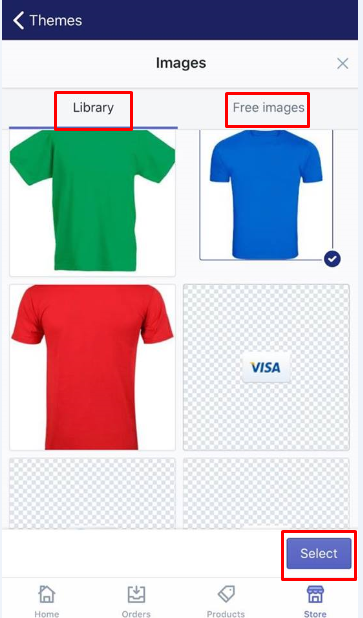
-
Step 8: Touch Save. Touch
Saveto finish your current work.
To add a favicon to your online store on Android (Click here)
-
Step 1: Go to Store. Go to
Storeat the bottom of the page. -
Step 2: Touch Online Store. Touch
Online Store > Manage themesfrom theSales Channelssection. -
Step 3: Choose Customize. Choose
Customizenext to theActionssection. -
Step 4: Touch Theme settings tab You can go to
Theme settingsto add your new favicon. -
Step 5: Click Favicon. Tap
Faviconto continue. -
Step 6: Opt for Select image. From the
Favicon imagesection, you can opt forSelect image. -
Step 7: Choose pictures. You can choose the pictures from the
Librarysection orFree imagesone. TapSelectto finish. -
Step 8: Touch Save. To complete your work, touch
Save.
Conclusion
Hopefully this article has given you a hand in manipulating steps on 7 Steps to add a favicon on Shopify store. Those above instructions are easy for any store owners or merchants to follow.


