How to Activate Authorize.net on Shopify in 6 Simple Steps
You may know about Shopify payment, the payment provider recommended by Shopify because of its convenience and easy-to-use characteristic. Besides it, Shopify also allows online store owners to use payment services from other parties, one of them is Authorize.net. For detailed information, keep reading and you will know how to activate Authorize.net on Shopify.
How to activate Authorize.net on Shopify
Step 1: Head to Payment providers
After sign-in your Shopify account, click on the Settings with a gear icon at the left end of the page then go to Payment providers.
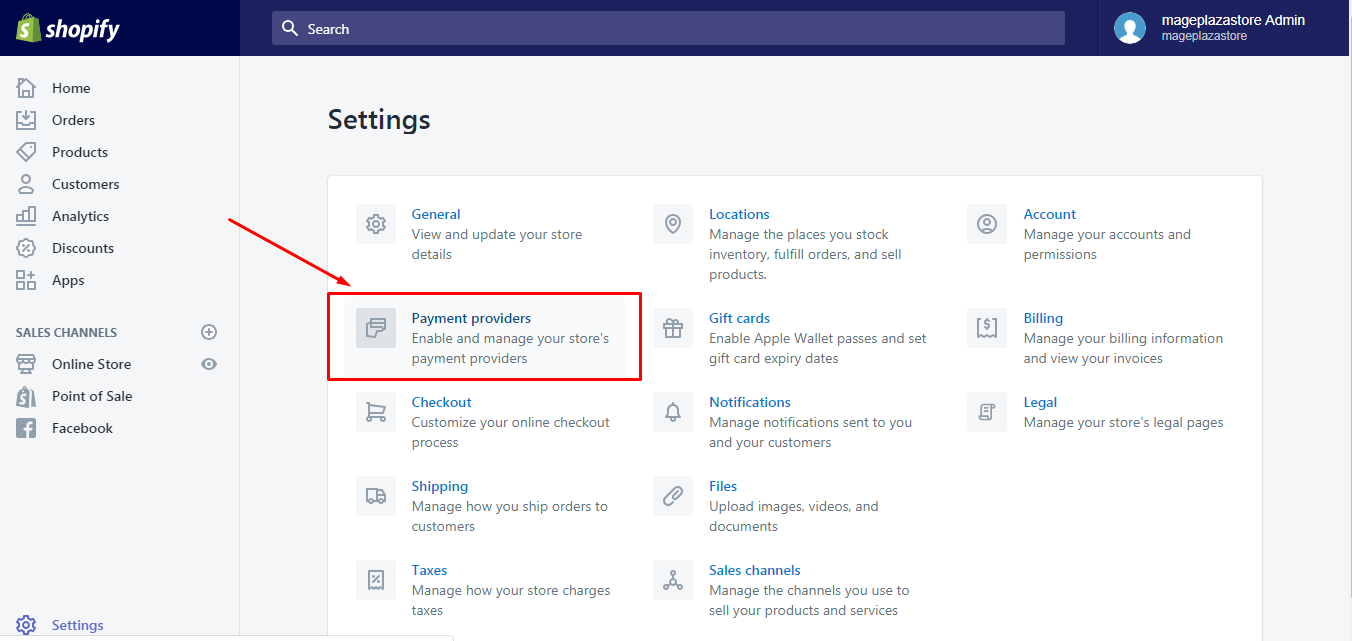
Step 2: Select Change provider
There are two sections in the Payment providers, which are Accept payments and Payment authorization. Press on the Change provider button in the Accept payment part.
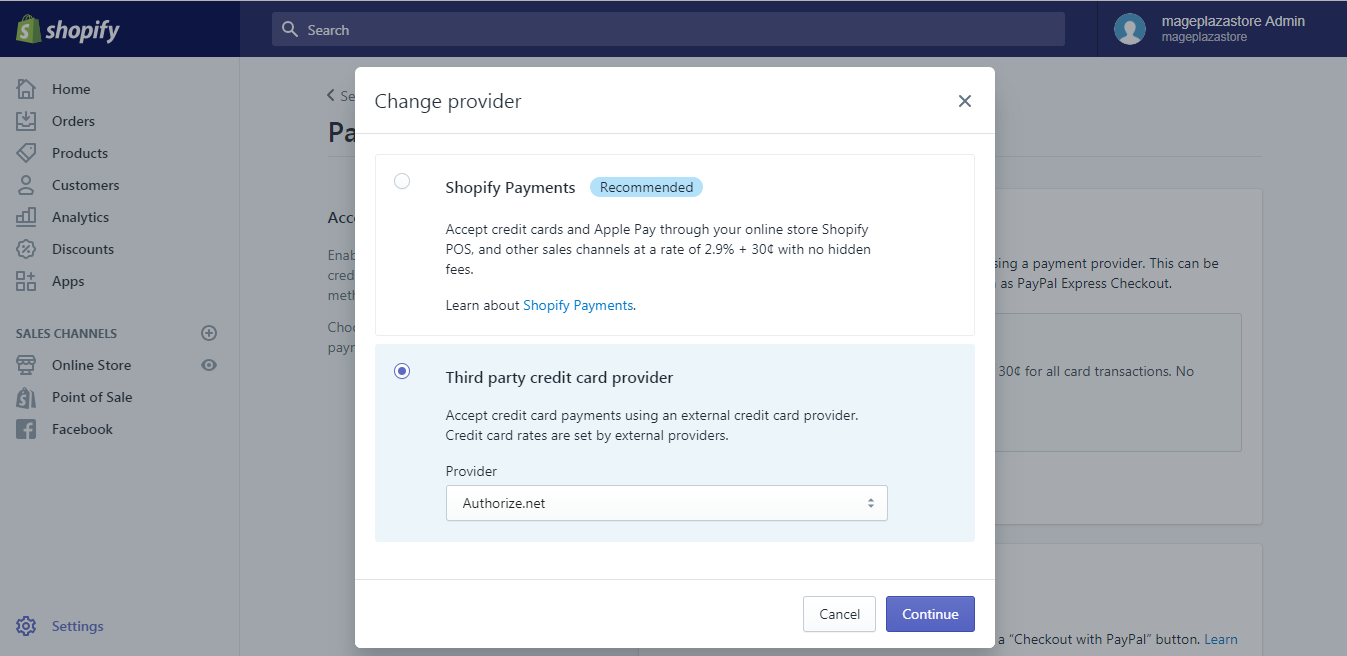
Step 3: Click Third party credit card payment provider
Another box will appear then choose Third party credit card payment provider which means the second choice in the options list.
Step 4: Choose Authorize.net
You will see Provider and a drop-down menu below the title of the option. Click on the menu and select Authorize.net at the top of the list. After that, the Continue button will light-up that you can click on it to move on to the next step.
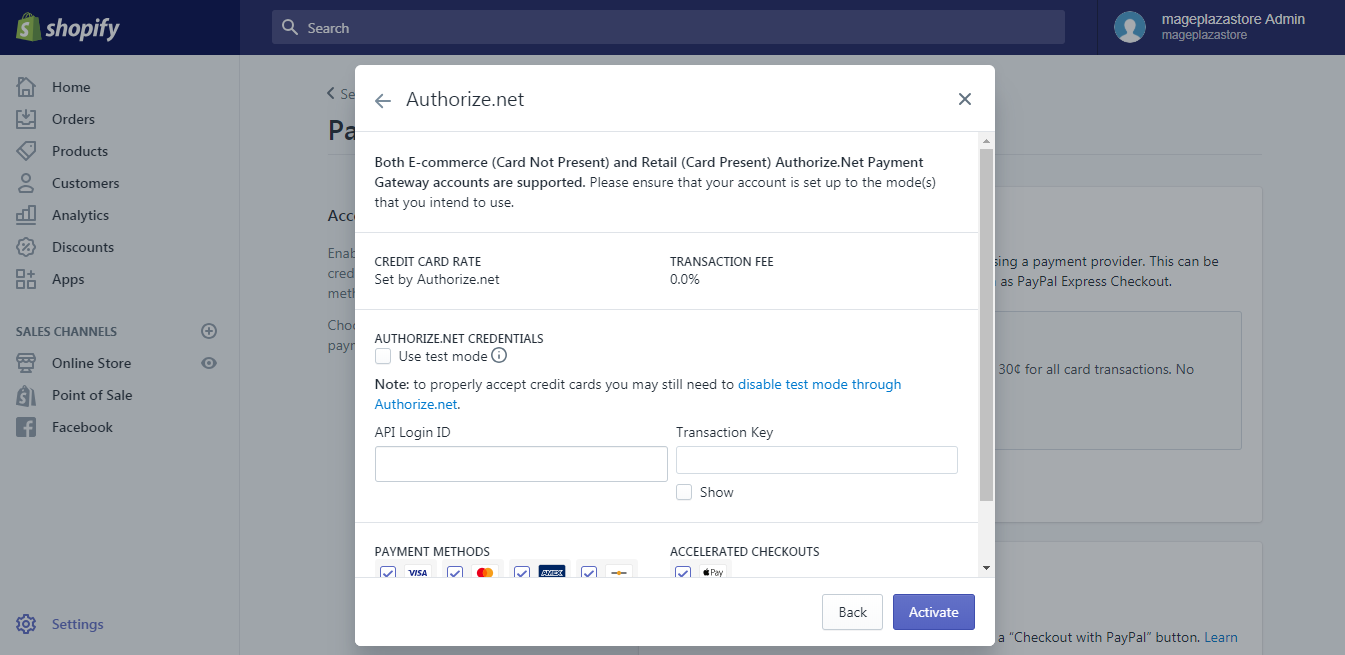
Step 5: Fill-in ID and Transaction key
There are two small boxes for you to add API Login ID and Transaction Key. Enter the needed information there.
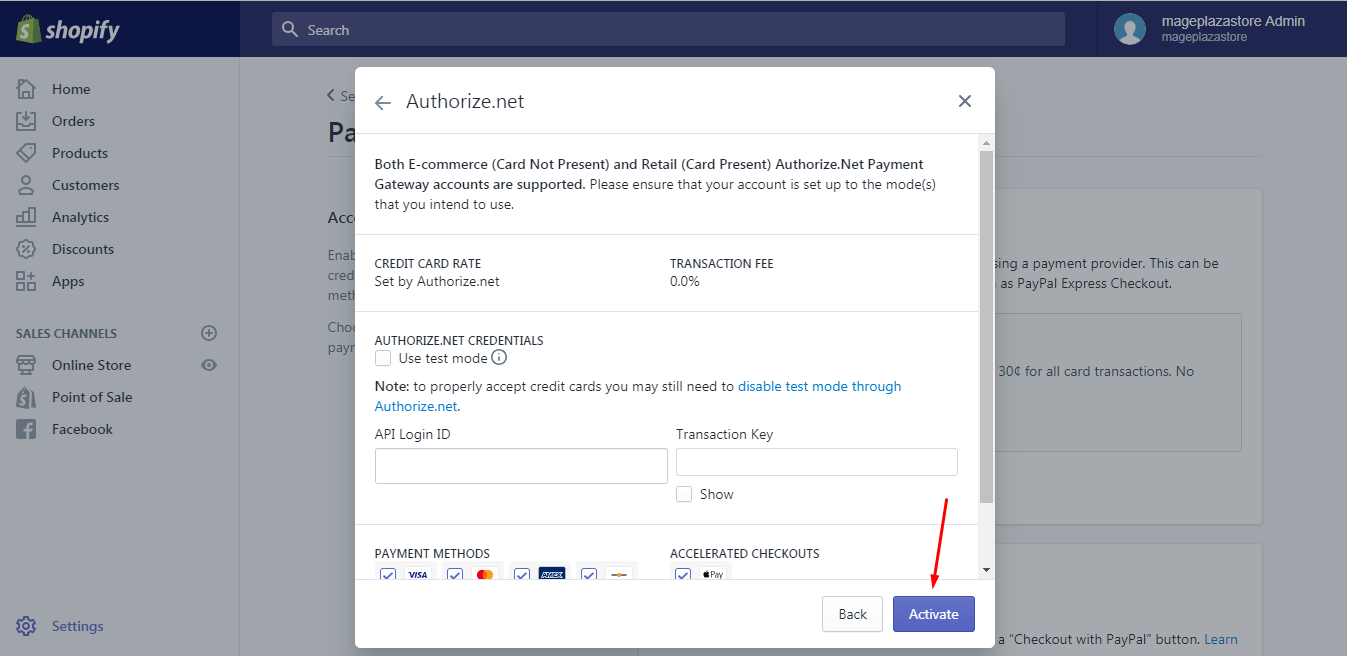
Step 6: Activate Authorize.net
After filling all your credential information, click on the blue Activate button to end the process.
To activate Authorize.net on iPhone (Click here)
-
Step 1: Go to Settings Firstly, log-in to the Shopify app. Next, head to
Storeat the bottom bar and pressSettings. -
Step 2: Select Payments In the list of
Store settings, choose the second option which isPayments. -
Step 3: Choose Change provide In the
Accept payment, tap on the button namedChange provider -
Step 4: Tap Third party credit card payment provider In the
Change providerbox, there are two options which areShopify paymentsandThird party credit card payment provider. Click on the second one. -
Step 5: Select provider as Authorize.net There is a short description of
Third party credit card payment providerand a list of providers. TapAuthorize.netin the list. -
Step 6: Add ID and Transaction key Allowing the use of credit cards means you will receive payments from customers through your bank account. Therefore, you need to add your
API Login IDand theTransaction Key. -
Step 7: Click Activate After completing all the above steps, tap
Activateto finish. If you press onCancelor reload the page before saving, everything will be meaningless that do not skip this step.
To activate Authorize.net on Android (Click here)
-
Step 1: Go to Settings Open the app and tap on the
Storeat the bottom bar. After that, chooseSettings.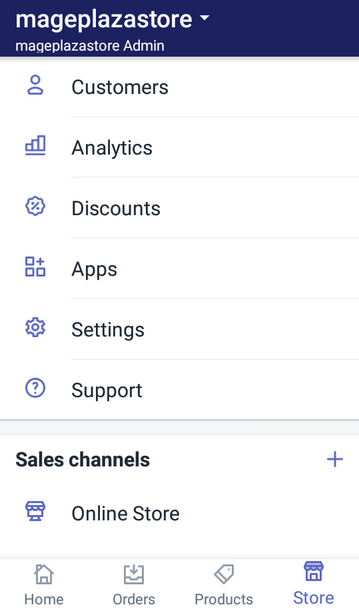
-
Step 2: Select Payments Under
Settings, there are three categories which areApp settings,Store settingsandAbout. Head to thePaymentsin theStore settings.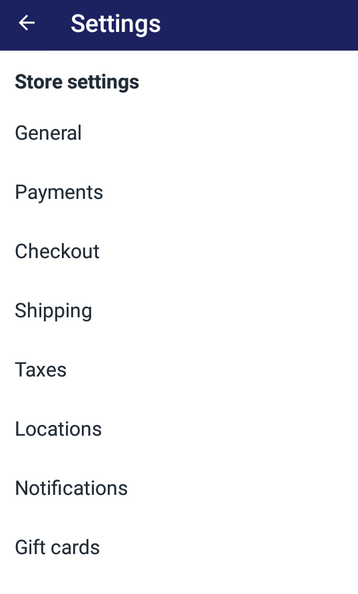
-
Step 3: Choose Change provider Click on the
Change providerin theAccept paymentsection. -
Step 4: Tap Third party credit card payment provider Shopify may recommend you to choose
Shopify paymentsas your provider. However, in this case, you want to use the service from another organization so click on theThird party credit card payment provider. -
Step 5: Select provider as Authorize.net There is a list of providers in the drop-down menu. You can find
Authorized.netat the top of the list then tap it.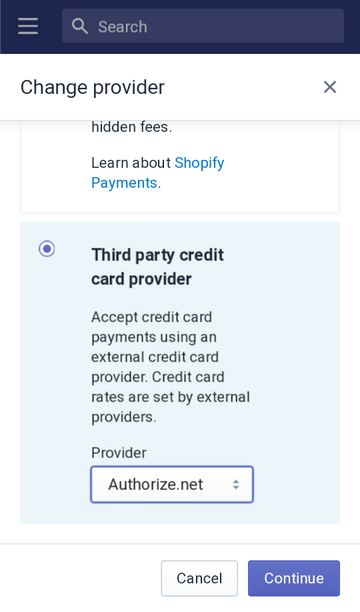
-
Step 6: Add ID and Transaction key Fill in the information of
API Login IDandTransaction Keyin the space under its title.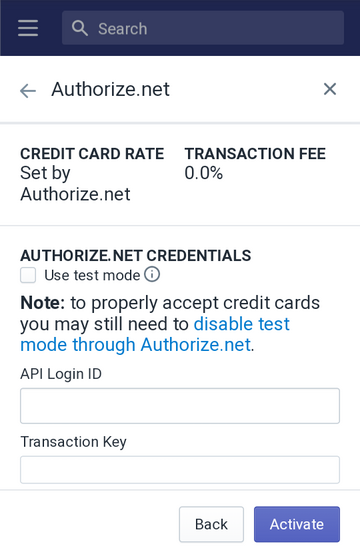
-
Step 7: Click Activate If you have completely entered all the needed information, press
Activateto enable this setting.
Conclusion
In short, this writing has provided you with the process to activate Authorize.net on Shopify. With my effort to bring you an easy-to-understand and informative content, hope that it can benefit you. You can also refer to the writing about How to set up Shopify Payments on Shopify to compare the two methods then decide which one to use for your store.
Related Posts:


