How to display a featured image on a product page by editing your theme code for non-sectioned themes in Shopify
When a customer comes to a product page on your online store website, the first available variant is always selected by default, and the image for that variant is displayed instead of the featured image. In case you have a featured image that you would love to show instead of that first available variant image, then you are able to use this customization to disable the auto-selecting of the first available variant. As a result, the customer will be prompted to manually select a variant before one is displayed.
However, please keep reading our instructional writing on How to display a featured image on a product page by editing your theme code for non-sectioned themes to know more deeply about this topic.
Free 1:1 Shopify consultation & 30-day all-app trial FREE
- Shopify Plus Strategy and Consultation
- Personalized E-commerce Solutions
- Conversion Rate Boosting Techniques
- Inventory Management Hacks
How to display a featured image on a product page by editing your theme code for non-sectioned themes
- What is the featured image?
- Display a featured image on a product page by editing your theme code for non-sectioned themes
What is the featured image?
To go deeper into details, we would like to get you to know that a featured image is a product image that belongs to the whole product, not to just any specific variant. For instance, if you are selling an item that has variants in several different colors, then you may have a featured image that can show many different color options in just a picture.
Please note that your theme may not show the price of the product until after the customer chooses a variant because this customization does prevent a variant from being selected by default. This is expected behavior since products with variants do not have a featured price. The price which is shown is determined by the variant that is selected.
Display a featured image on a product page by editing your theme code for non-sectioned themes
Step 1:
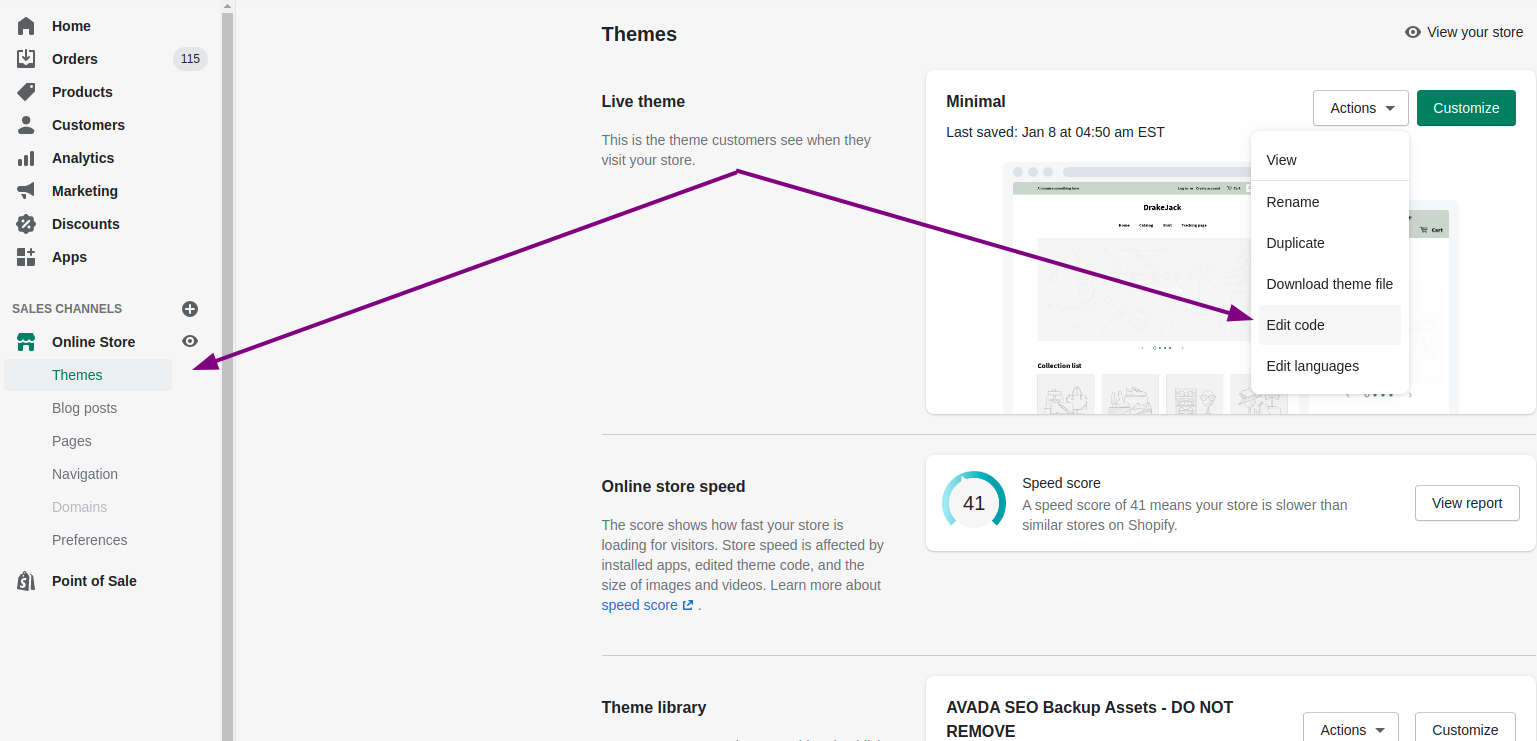
Go to Online Store > Themes from your Shopify Admin panel.
Step 2:
Choose the theme you want to edit and click Actions > Edit code.
 Note
Note
Please move to step 10 if you use the Brooklyn theme.
Step 3:
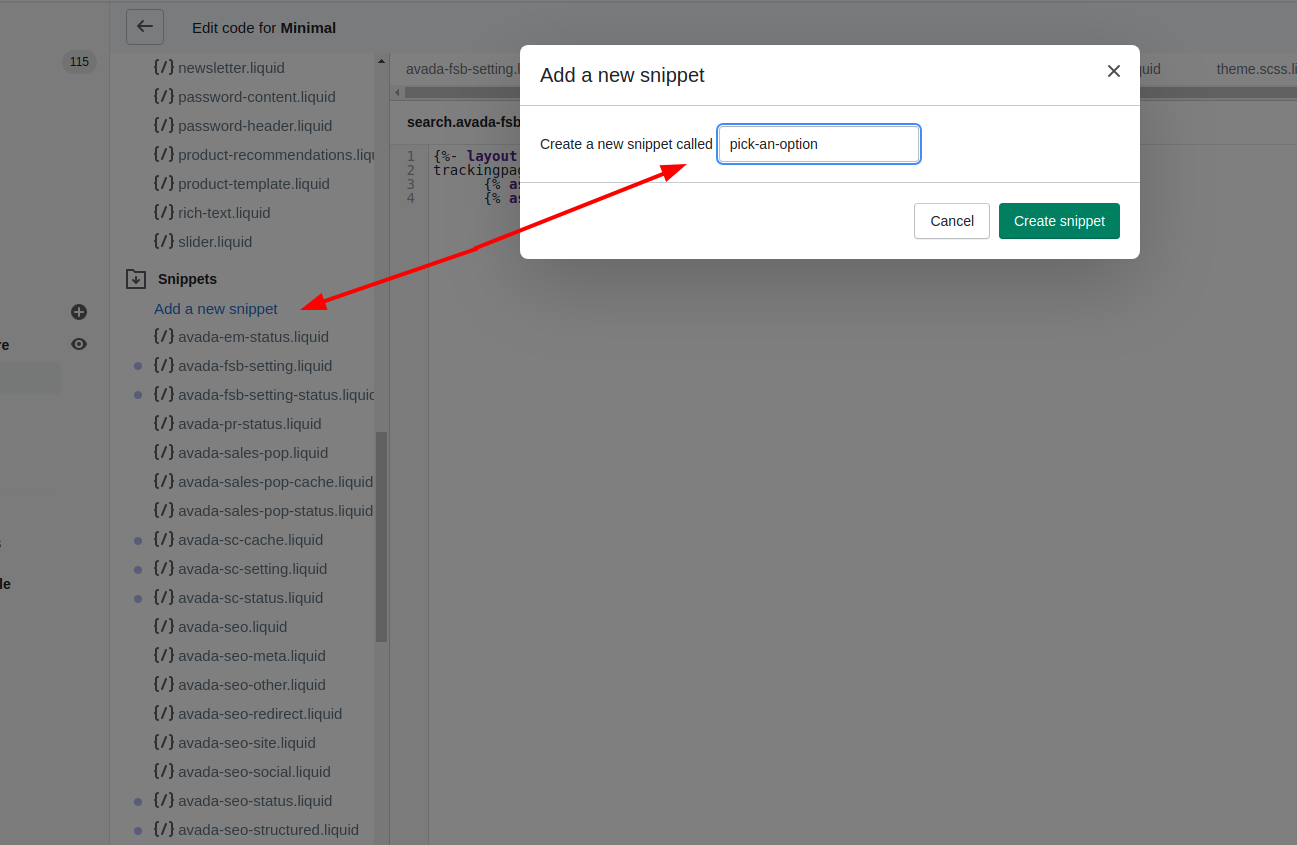
Click Add a new snippet in the Snippets directory.
Step 4:
Name your new snippet “pick-an-option”.

Step 5:
Paste this code hosted on GitHub in your new snippet file.
Step 6:
Choose Save.
Step 7:
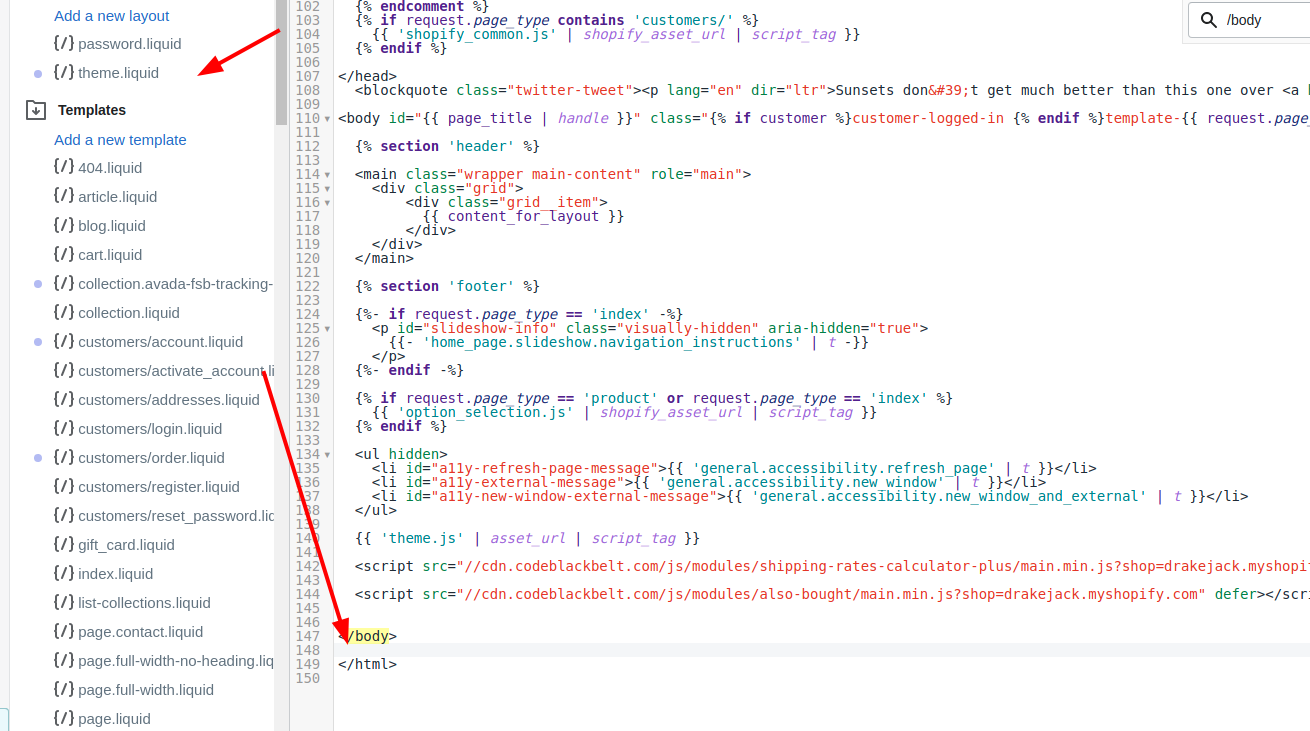
Choose theme.liquid in the Layout directory.
Step 8:
Search for the closing </body> tag near the bottom of the file. Paste the following code on a new line right above the closing </body> tag:

{% include 'pick-an-option' %}
Step 9:
Click Save.
Step 10:
Search for the file which contains the Add to cart form. It will have an action attribute set to /cart/add.
It should be in one of these following files:
- the
product.liquidtemplate under Templates - the
theme.liquidlayout under Layout - the
product.liquidsnippet under Snippets - the
single-product.liquidsnippet under Snippets
Step 11:
Search for this code inside the form:
<option {% if variant == product.selected_or_first_available_variant %} selected="selected" {% endif %} data-sku="{{ variant.sku }}" value="{{ variant.id }}">{{ variant.title }} - {{ variant.price | money_with_currency }}</option>
or
<option {% if variant == current_variant %} selected="selected" {% endif %} data-sku="{{ variant.sku }}" value="{{ variant.id }}">{{ variant.title }} - {{ variant.price | money_with_currency }}</option>
And replace it with:
<option {% if forloop.length <= 1 and variant == product.selected_or_first_available_variant %} selected="selected" {% endif %} data-sku="{{ variant.sku }}" value="{{ variant.id }}">{{ variant.title }} - {{ variant.price | money_with_currency }}</option>
Step 12:
Find and replace the following code:
Minimal, Pop, or Supply
If you use Minimal, Pop, or Supply, search for all occurrences of this code:
{% assign featured_image = product.selected_or_first_available_variant.featured_image | default: product.featured_image %}
And replace it with:
{% assign featured_image = product.selected_variant.featured_image | default: product.featured_image %}
Other Shopify theme which are free
If you use any other Shopify theme, search for this code:
{% assign current_variant = product.selected_or_first_available_variant %}
And replace it with:
{% assign current_variant = product.selected_variant %}
Step 13:
Tap Save
Conclusion
We hope that this instruction has brought to you partly necessary information about how to display a featured image on a product page by editing your theme code for non-sectioned themes that you may need to develop your website!


