How to Add or Custom Countdown timer on Shopify
When running a business, merchants always research and find out as many methods as possible to sell their products. They might use a sense of urgency to make shoppers come to a quicker decision on an order they’re considering. Using countdown timers will take effect then.
Countdown timers help to limit the period of time that shoppers can make a purchase. This could be a countdown until the end of a sales off season, or for a specific offer such as free shipping.
This article today would like to provide you some useful knowledge on how to Add or Custom Countdown timer on Shopify. Can’t wait to show you now!
Learn more:
- How to Create & Customize Shopify Coming Soon Page?
- How to Add Password Protection to your Online Store on Shopify?
- How to Hide Store Name on Password Page on Shopify?
Countdown timer in eCommerce store
Using a countdown timer means that you let a clock tick down on a product to add more urgency in the buyer’s mind. The fact that time is running out will somehow affect their purchase decision.
When utilizing countdown timers as well as urgency, merchants provide helpful information to shoppers - that they have to make a choice in more one or two hours if they want to enjoy free shipping. And eCommerce stores and product pages are the ideal places for these timers work.
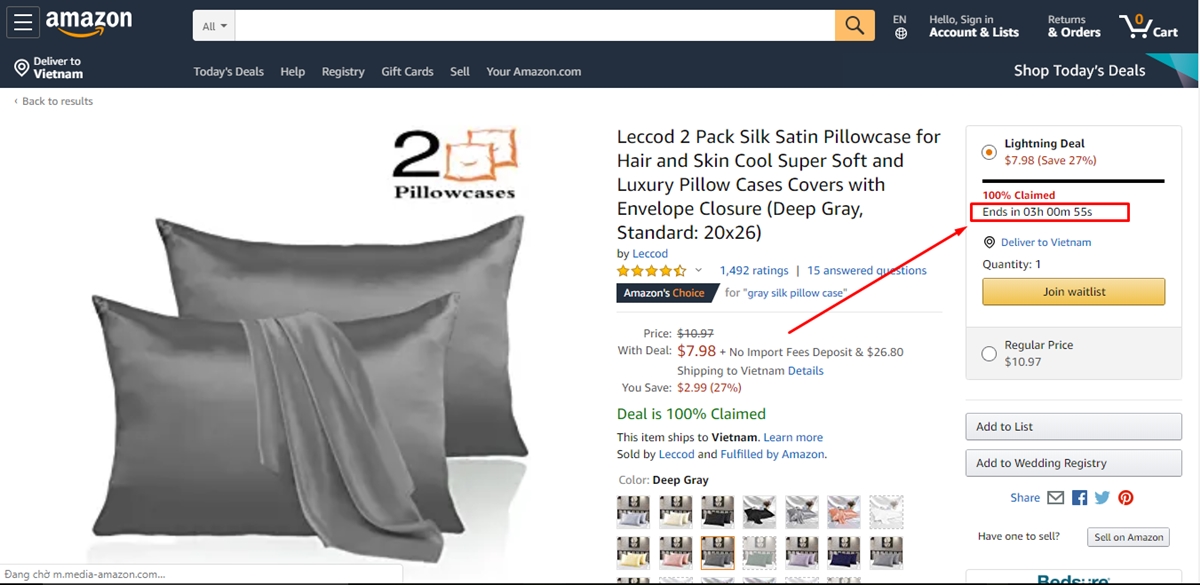
For example, Amazon adds a countdown to a discount to make its product more attractive and increase its chances of being sold.
In addition, you can set a timer on checkout completion with the aim of reminding customers to finish their orders, especially when stock is limited.
You also can take advantage of countdown timers in writing advertising emails to customers who have abandoned carts.
How to add a countdown timer on Shopify?
Countdown timer has gradually become a powerful feature on almost online stores. So how to set up a countdown timer on Shopify? There are actually two ways: one using code and other using apps. Let’s explore them in details below:
Add countdown timer using code
Step 1: Add Countdown timer theme snippet
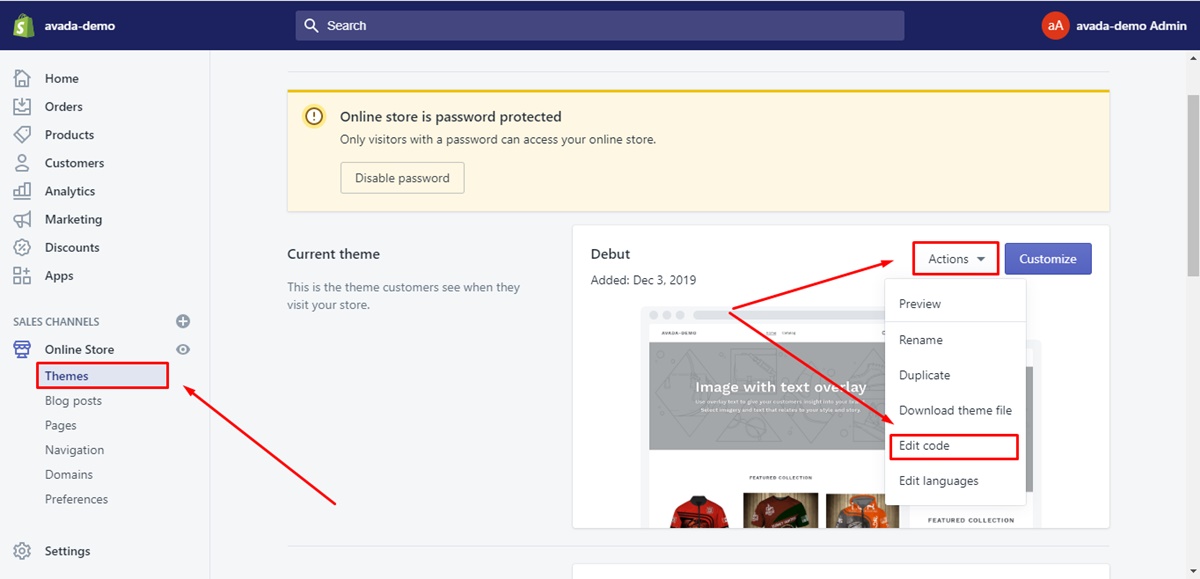
First, add a new snippet to your theme. In Shopify Dashboard, navigate to your Theme editor.
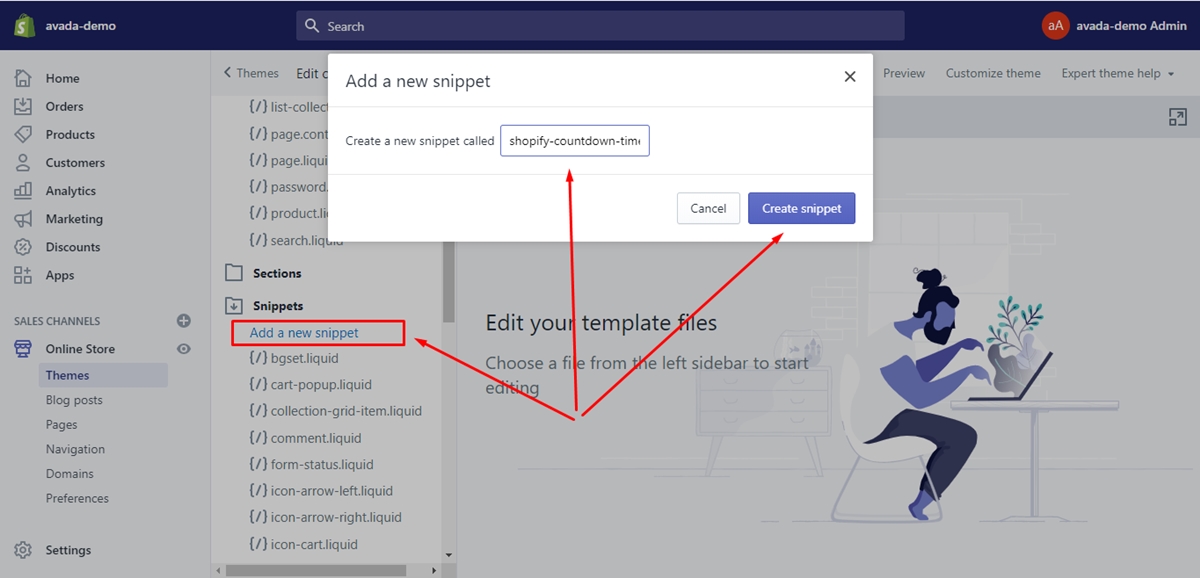
Name the new snippet shopify-countdown-timer.
Like this screenshot below:
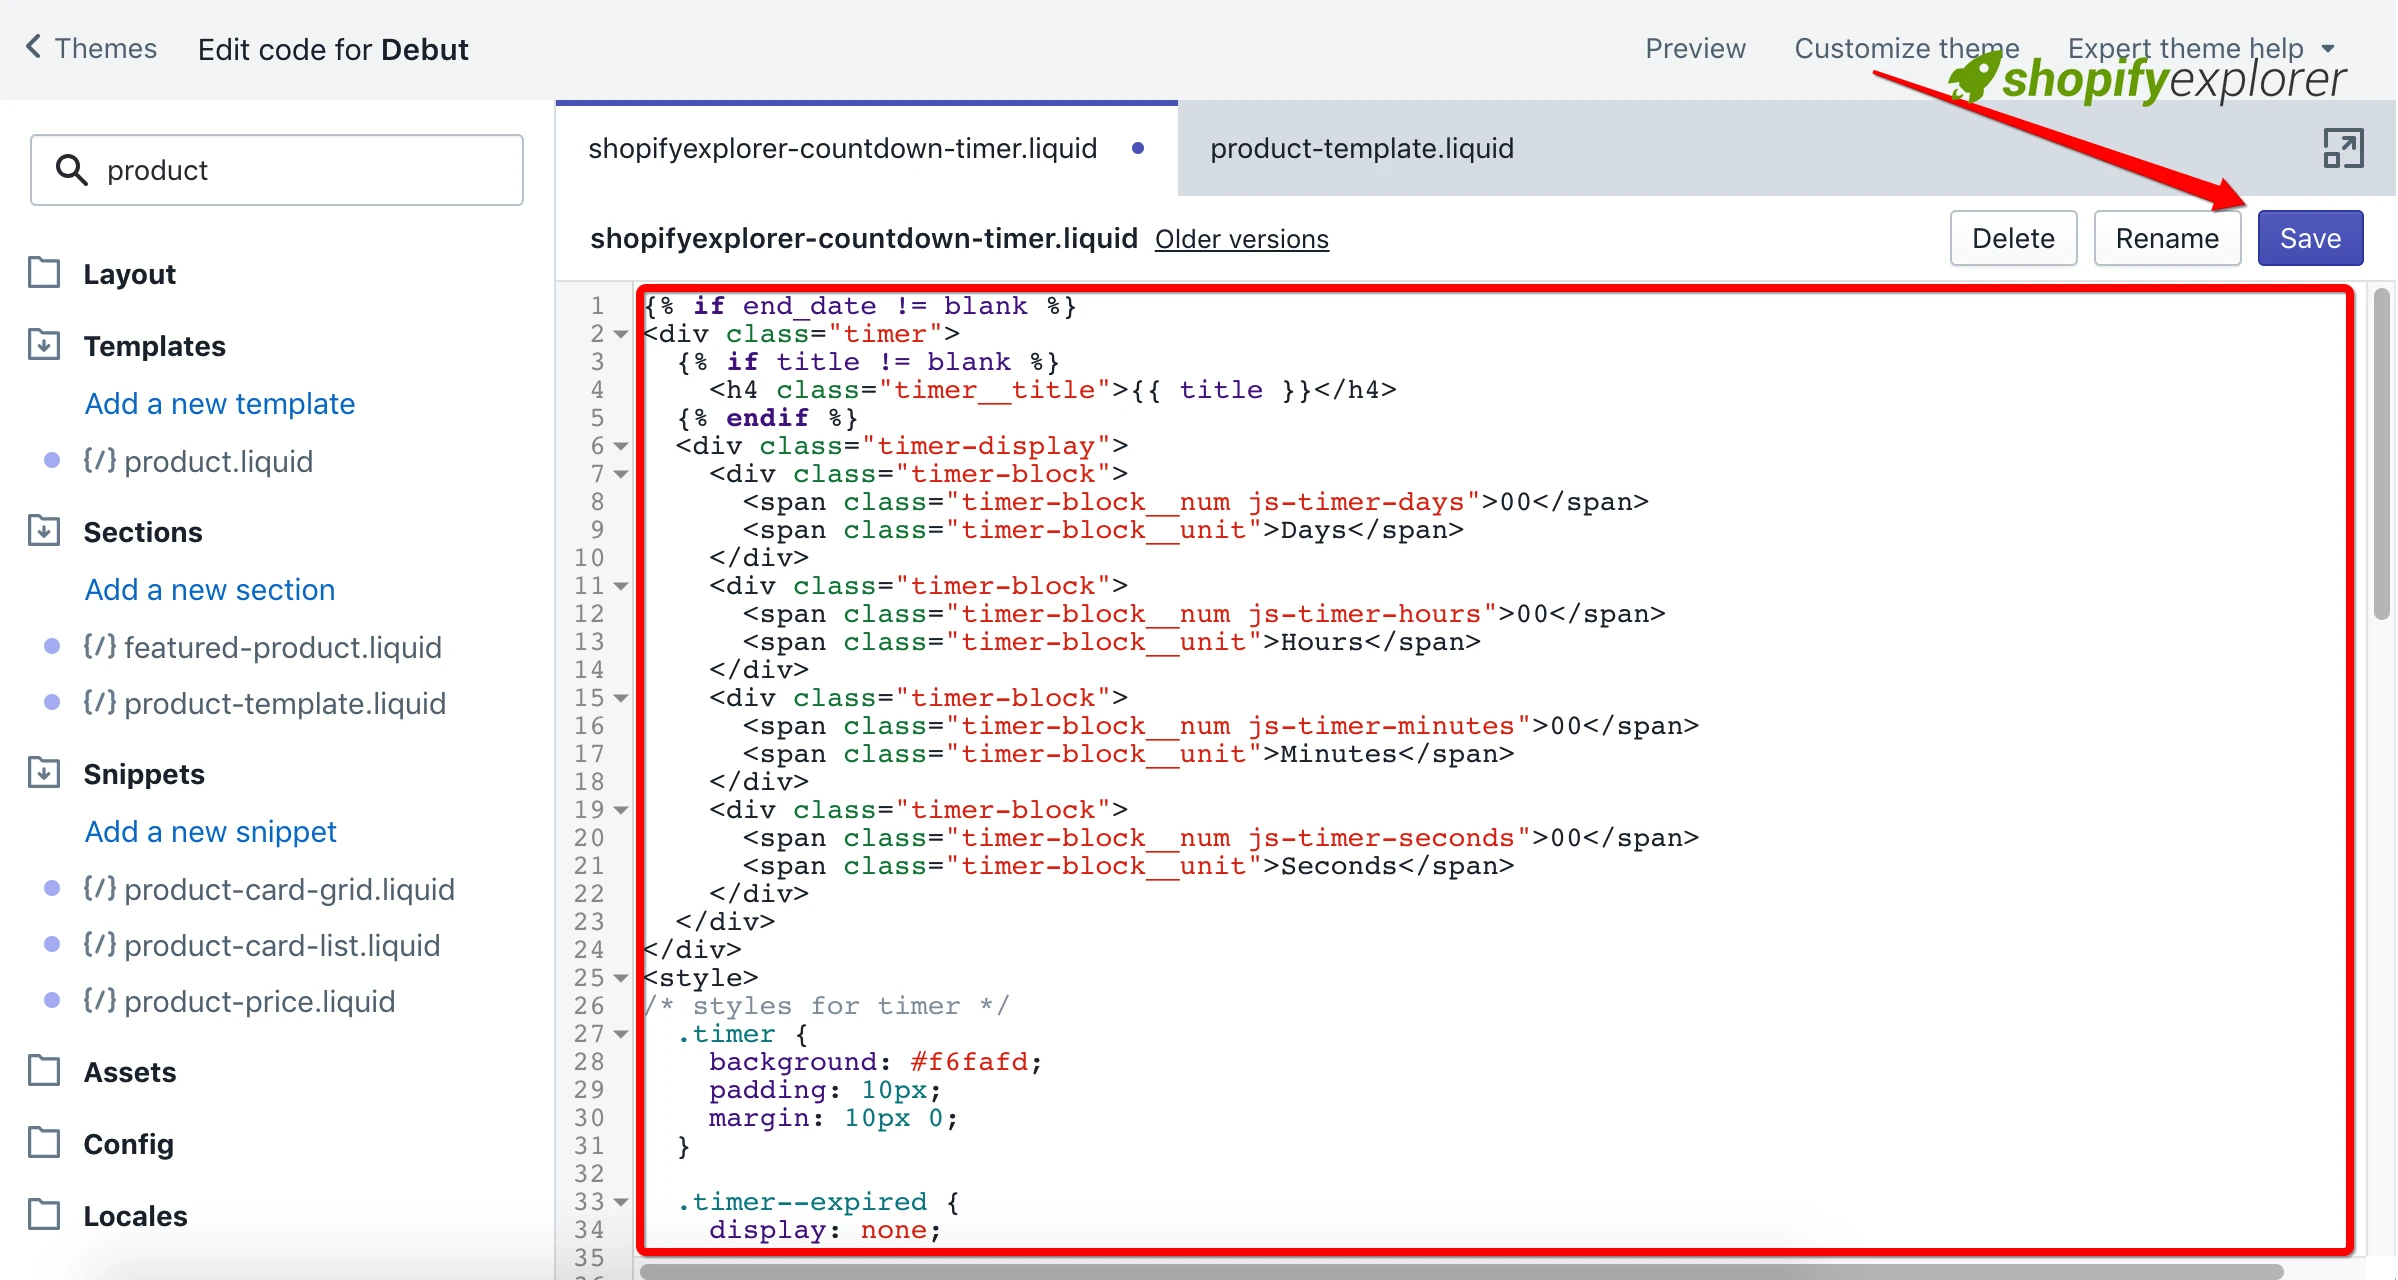
Then paste the following code into it and click Save.
{% if end_date != blank %}
<div class="timer">
  {% if title != blank %}
    <h4 class="timer__title">{{ title }}</h4>
  {% endif %}
  <div class="timer-display">
    <div class="timer-block">
      <span class="timer-block__num js-timer-days">00</span>
      <span class="timer-block__unit">Days</span>
    </div>
    <div class="timer-block">
      <span class="timer-block__num js-timer-hours">00</span>
      <span class="timer-block__unit">Hours</span>
    </div>
    <div class="timer-block">
      <span class="timer-block__num js-timer-minutes">00</span>
      <span class="timer-block__unit">Minutes</span>
    </div>
    <div class="timer-block">
      <span class="timer-block__num js-timer-seconds">00</span>
      <span class="timer-block__unit">Seconds</span>
    </div>
  </div>
</div>
<style>
/* styles for timer */
  .timer {
    background: #f6fafd;
    padding: 10px;
    margin: 10px 0;
  }
  .timer--expired {
    display: none;
  }
  .timer__title {
    @extend .paragraph;
    text-align: center;
  }
  .timer-display {
    display: -webkit-box;
    display: -ms-flexbox;
    display: flex;
    -ms-flex-wrap: wrap;
        flex-wrap: wrap;
    -webkit-box-pack: justify;
        -ms-flex-pack: justify;
            justify-content: space-between;
    margin-top: 5px;
  }
  .timer-block {
    position: relative;
    width: 25%;
    padding: 0 10px;
    &:not(:last-child):after {
      content: ':';
      position: absolute;
      right: 0;
      top: 3px;
    }
  }
  .timer-block__num,
  .timer-block__unit {
    display: block;
    text-align: center;
  }
</style>
<script type="text/javascript">
  var second = 1000,
      minute = second * 60,
      hour = minute * 60,
      day = hour * 24;
  var countDown = new Date('{{- end_date -}}').getTime(),
      x = setInterval(function() {
      var now = new Date().getTime(),
          distance = countDown - now;
      document.querySelector('.js-timer-days').innerText = Math.floor(distance / (day)),
        document.querySelector('.js-timer-hours').innerText = Math.floor((distance % (day)) / (hour)),
      document.querySelector('.js-timer-minutes').innerText = Math.floor((distance % (hour)) / (minute)),
      document.querySelector('.js-timer-seconds').innerText = Math.floor((distance % (minute)) / second);
    }, second)
</script>
{% endif %}
Like this screenshot below:
Step 2: Put recently added snippet to product page
Use the line below to put the added snippet:
{% include 'shopify-countdown-timer',
  title: "Special Offer End In",
  end_date: "Sep 30, 2021"
%}
Note:
-
It’s easy for you to change title param to any content.
-
In end_date params, you must enter it correctly with the format: Month (shorten) Date, Year and MUST be in the future. For instance, today is February 08, 2021, you can enter: February 10, 2021.
Add countdown timer using apps
Besides, a lot of amazing apps are available to help you add your countdown timer on Shopify, such as Timer Panda or Timer Plus. Using these applications, you can have a timer quickly without making any effort. For more choices, please see the list of Shopify Countdown Timer Apps on our AVADA website.
Conclusion
That’s all the methods to add or custom Countdown timer on Shopify. Hope that this information can help you a little in driving your business.
Do not hesitate to contact us by leaving a comment below. We’re always willing to assist you in any issue relating to this. Thank you all for reading!


