How to add a collection to a page in Shopify?
While seeing Shopify stores, customers normally enjoy looking at a specific product’s page after clicking on a product image of the collection page. That’s why keeping products organized and easy-to-find for customers is always the thing that merchants want their store to have. In order to do this, there is an effective way to bring this pleasing experience, which is Collections.
Today, in this time article, I will not only instruct you on how to add a collection to a page in Shopify, but also a clear tutorial in every corner of this aspect.
Exclusive Offer: Get Shopify 33 days for just $1 + The Online Store Starter Kit
Start your 3-day free trial, and enjoy your first month of Shopify for 1$ plus the premium package designed especially for new Shopify merchants!
What is collection on Shopify?
On Shopify, they allow you to group your products into collections with a view to making things easier for customers to find products by category. There are some examples below that can help you understand more:
- Collection of clothes for girls, boys, or ladies
- Collection of items that are on sale
- Collection of items in a certain size or color …
In some cases, when you want to display product recommendations on your product pages, Shopify totally allows you to insert a section for recommended products to your online store theme. That is also a circumstance of a Collection.
When a collection is already created, there will be a gallery of products in the collection form shown on your online store as a webpage. Just simply by clicking on a product image on the Collection page, your customers can totally visit a specific product’s page. Also, customers can find and view their collections if you add links to the collections in a menu in your store’s navigation.
As an owner of your online store, you can choose your theme to bring your best layout and appearance of collection pages and also to view, create, and edit collections that are shown on the Collections page from your Shopify admin.
Collection types
There are two types of collections created on Shopify. And you can not change the type once you create your collection.
Automated collection
In this type of collection, it will utilize the selection conditions and automatically include matching products. Additionally, you are able to create up to 60 selection conditions and specify what conditions that your products need to meet or any of the conditions to be included.
In automated collection, you are able to add a new product that matches the selection conditions for a collection. After that, the product will be automatically added to your collection. Automated collections are usually preferred by customers because future products are often added automatically after you set up the conditions. That’s why it can save you a big amount of time if you have a large selection of products or seasonal or rotating inventories.
However, there is one disadvantage of this collection, which is the inability to remove particular products from the collection unless you change the collection’s conditions or edit the product details while creating an automated collection.
Manual collection
In this type of collection, it provides the products that you can choose individually and this always contains the same products unless you specifically insert or remove products. Normally, manual collections take more work to maintain. This will be a great match for small or specialized collections that work personally.
How to add a collection to a specific page?
Of course, you need to create a product collection first to make a collection appear on certain pages of a Shopify store. Just simply go to the Products page in the Shopify admin and click on Create Collection on the collection page. Choose the title and the type that you want to set up and follow 4 other steps below.
Assign products to a collection
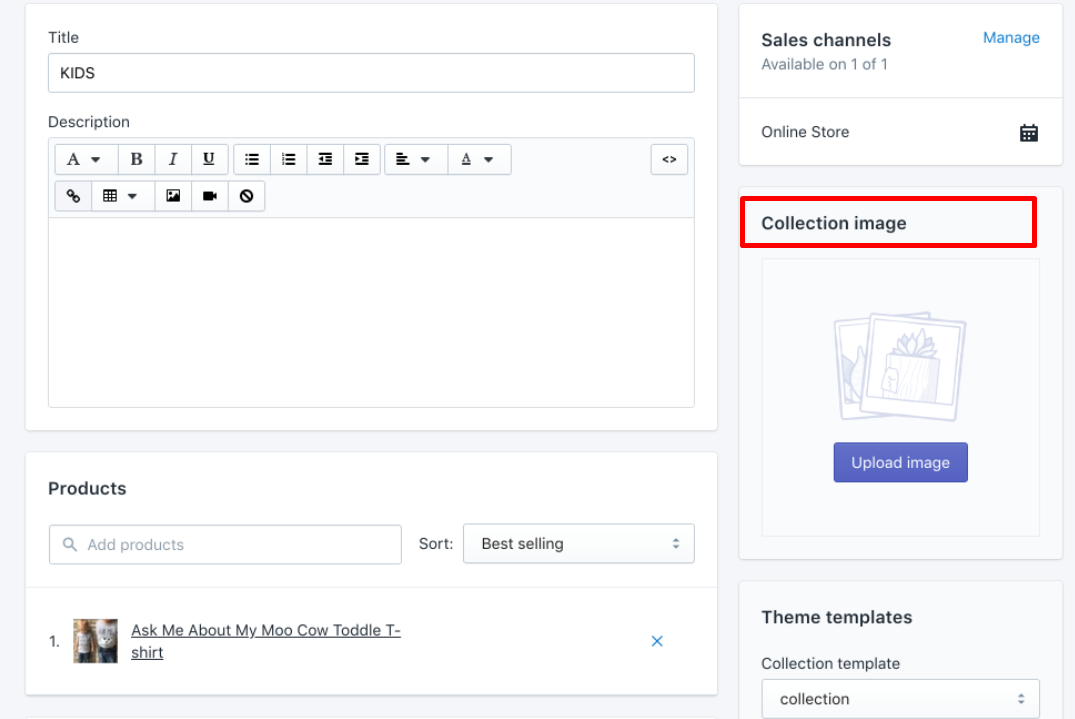
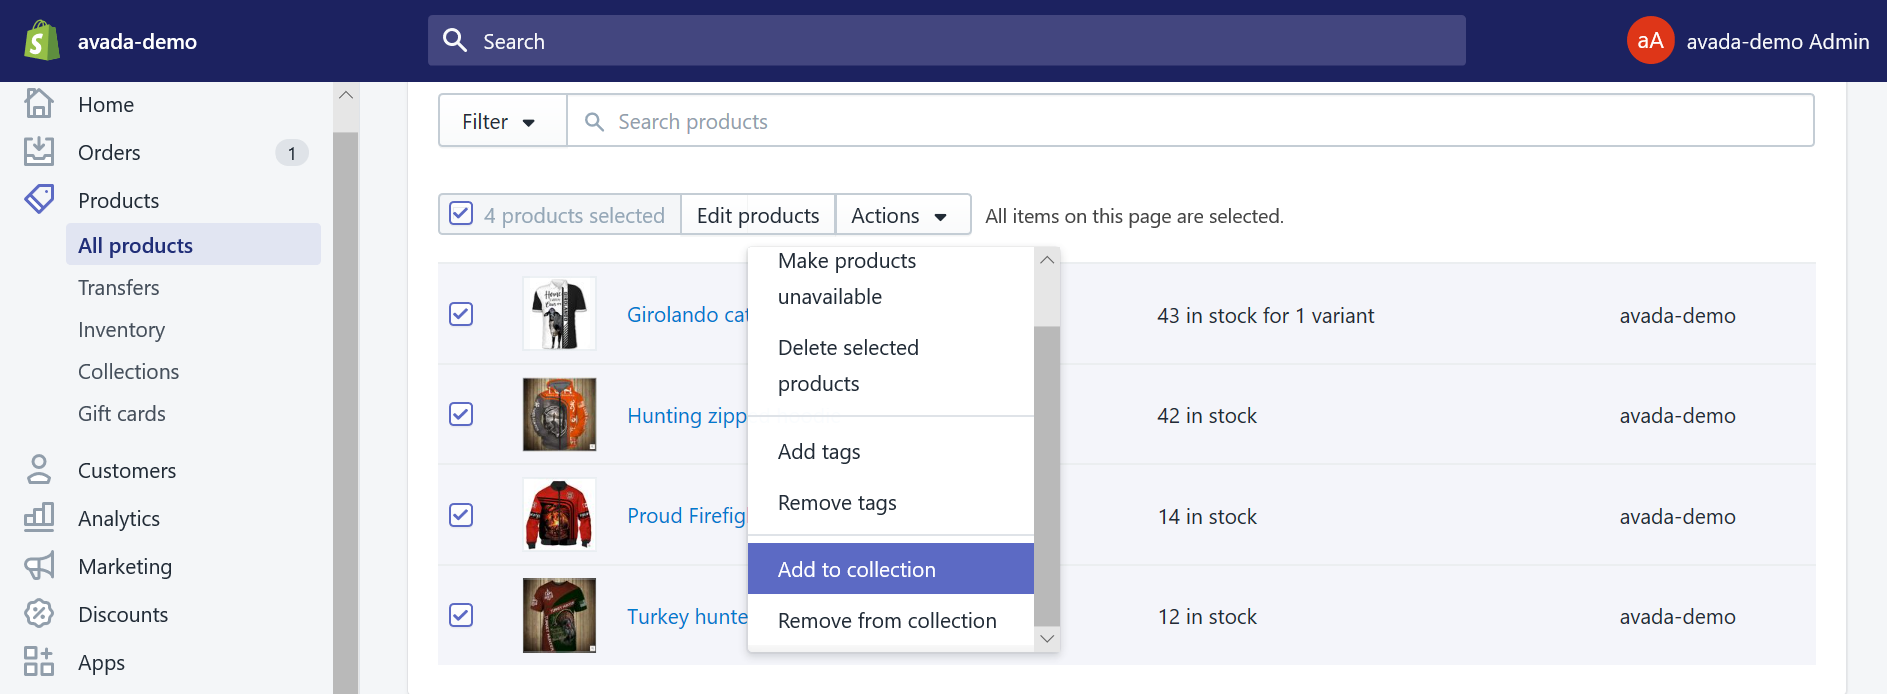
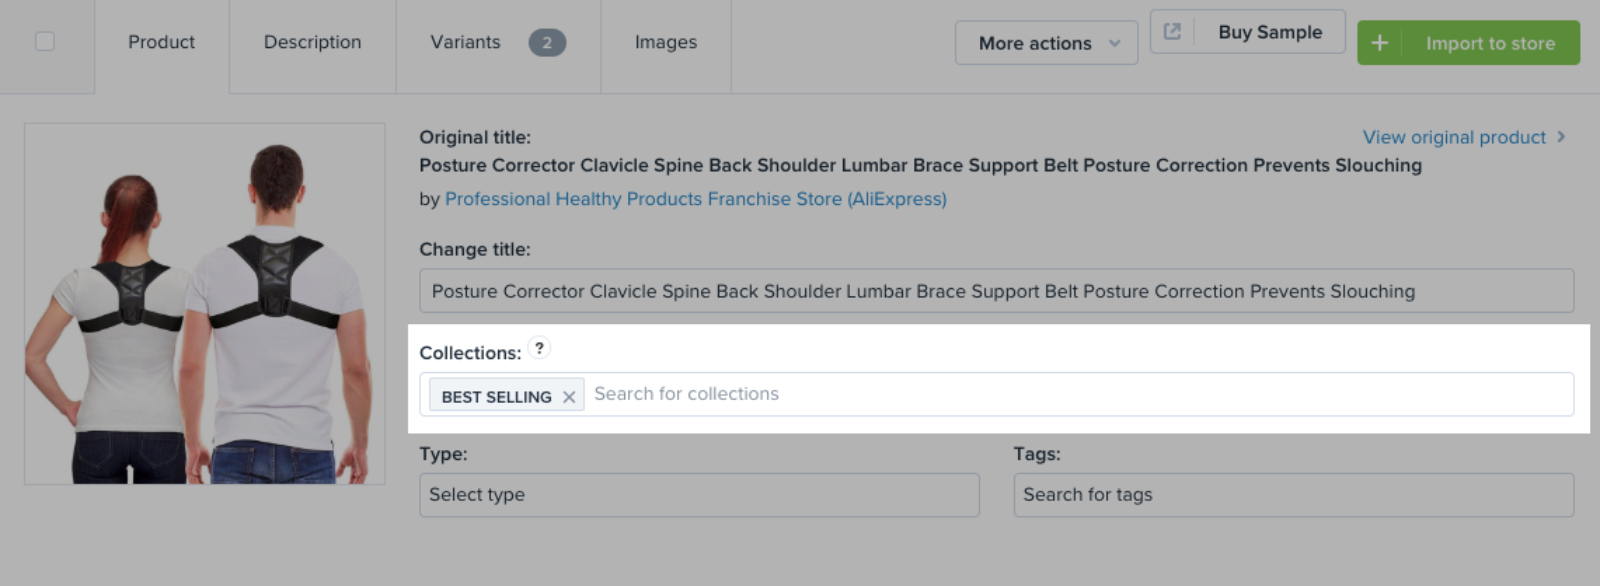
In order to assign products to the manual collection, you can choose to do one of these three ways:
- Assign products one by one from the Collection page.
- Assign products in bulk from the Products page.
- Assign products one by one in the Oberlo Import List before importing them to the Shopify store.
Remember that when you are in the automated collections, the fact that products will be assigned to an automated collection based on the selected conditions.
Create new page template
A new template is needed to assign to pages on which you will feature collections.
On Desktop
-
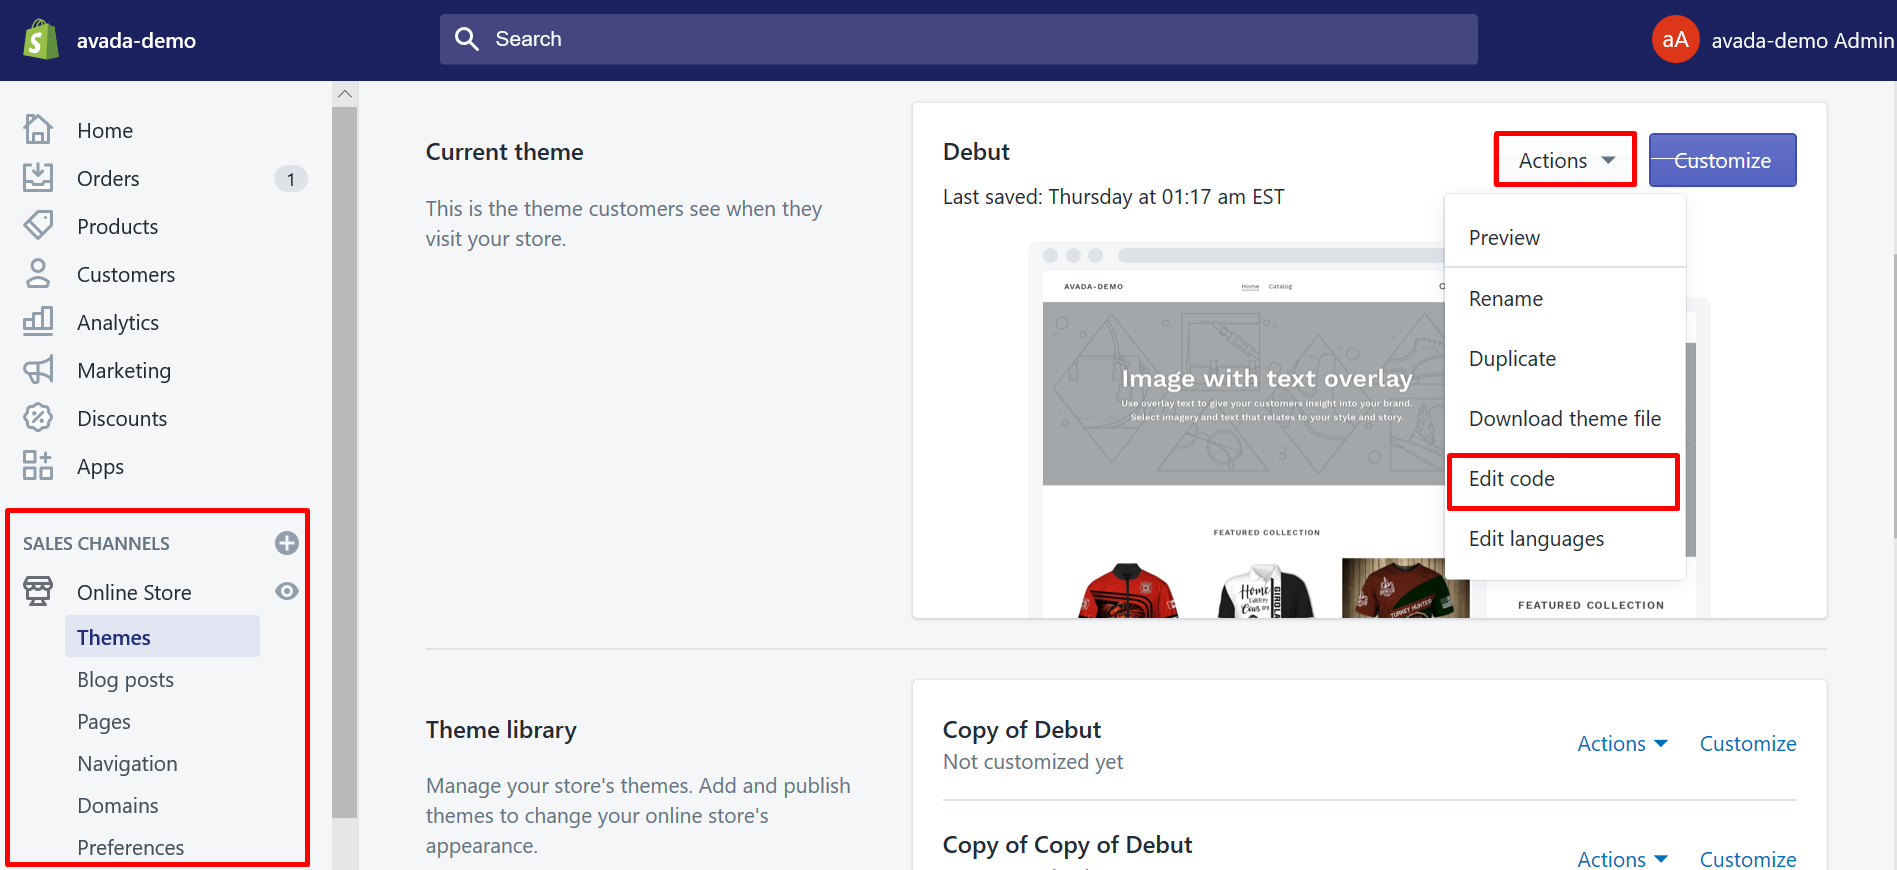
Step 1. From your Shopify admin, direct to the
Online Storeand then go forThemes. -
Step 2. After that, find the theme you want to edit, and then click for
ActionsandEdit code.
- Step 3. You will see an option
Add a new templateon theTemplates directory. Click it.
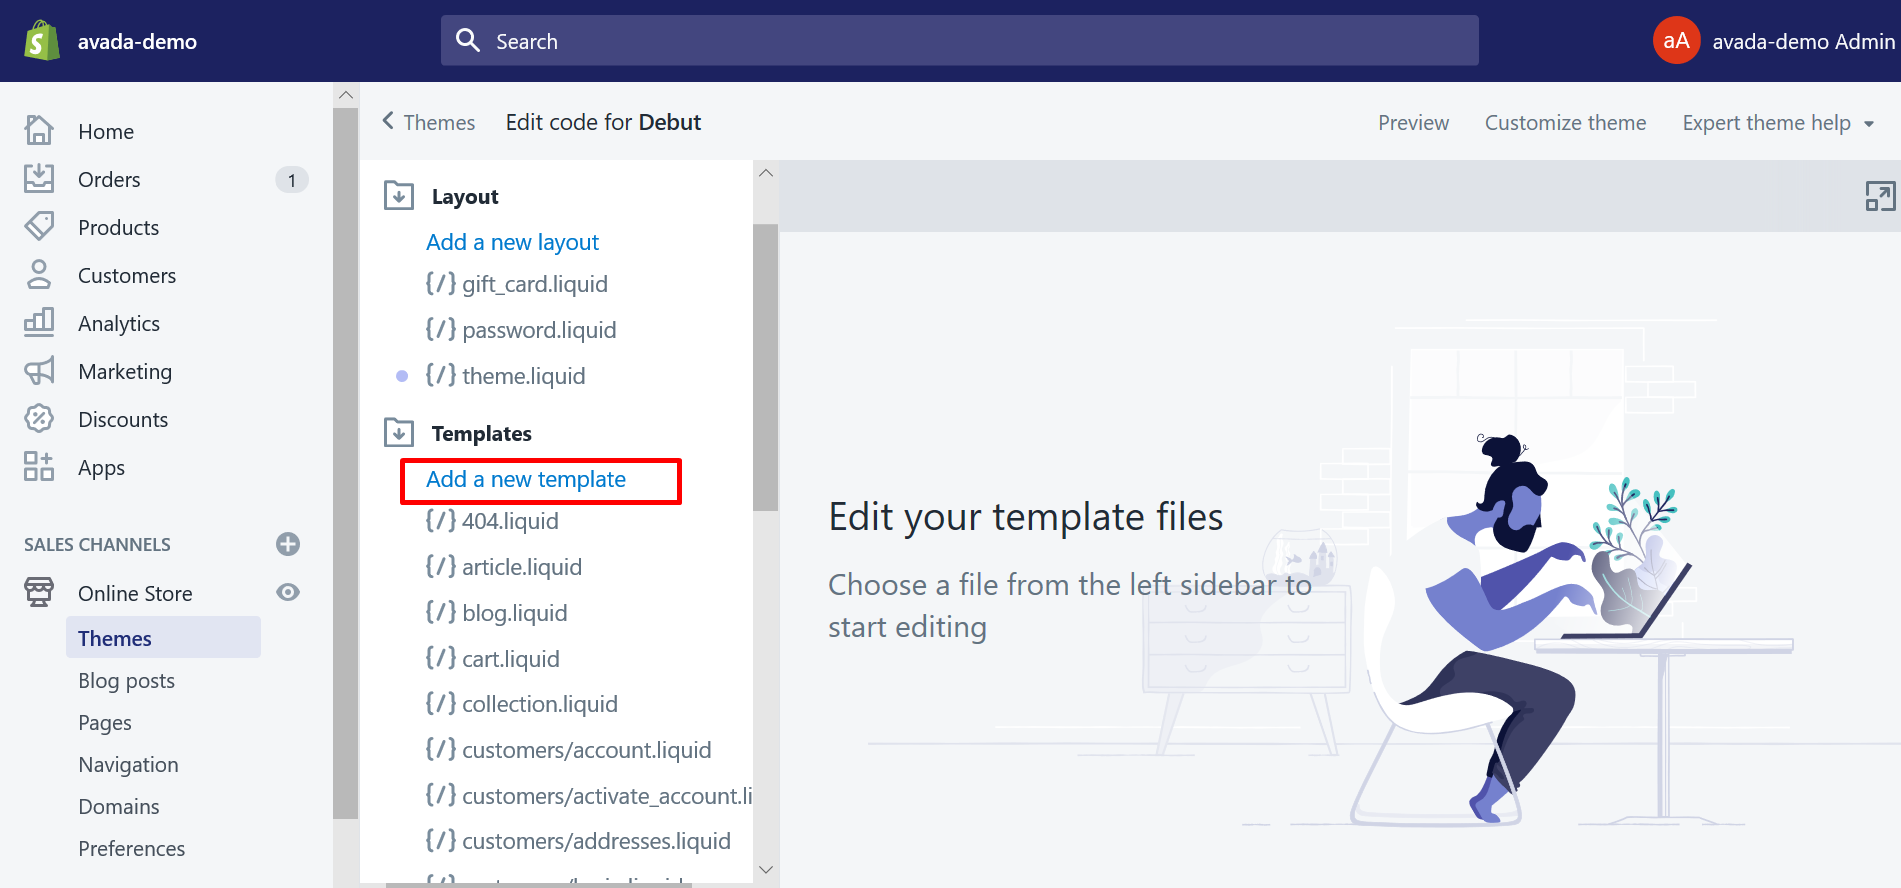
- Step 4. Then, it’s your job to form a new template for page called list-collections
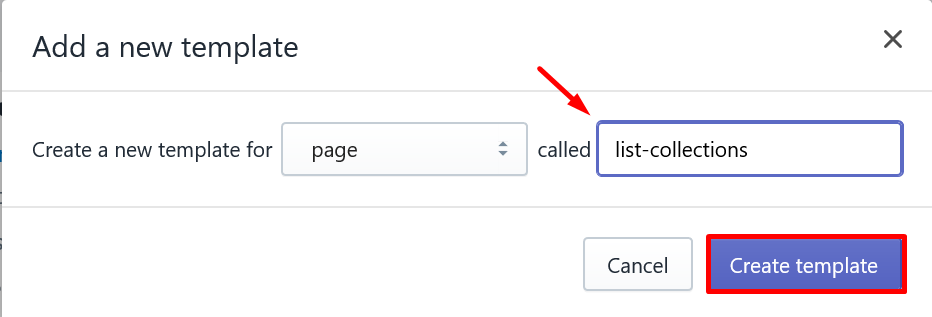
-
Step 5. At the bottom of your new
page.list-collectionsfile, copy and paste the codeline on GitHub . -
Step 6. Finally, click Save.
On iPhone and Android
-
Step 1. Open the Shopify app, then tap
Store. -
Step 2. You will see in the
Sales channelssection, there is an optionOnline Store. Just tap it. -
Step 3. Tap on
Manage themes. -
Step 4. After that, find the theme that you want to edit and click
ActionstoEdit code. -
Step 5. Open the
Templates directoryand then tapAdd a new template. -
Step 6. From here, you need to create a new template for page called list-collections
-
Step 7. At the bottom of your new
page.list-collectionsfile, copy and paste the codeline on GitHub . -
Step 8. In the end, click
Save
Create a page to add collection
On Desktop
- Step 1. From your Shopify admin, navigate to
Online Storeand choosePages.
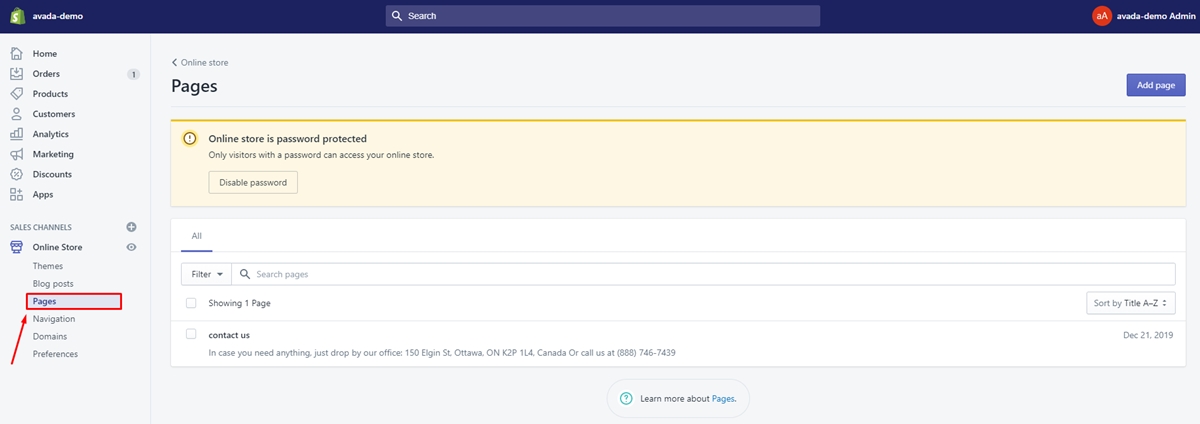
- Step 2. Then click
Add page.

- Step 3. You will see the page editor, just enter one
Titleat your wish in the text box provided. This title must be the same as the menu that you’ll create in the next steps.
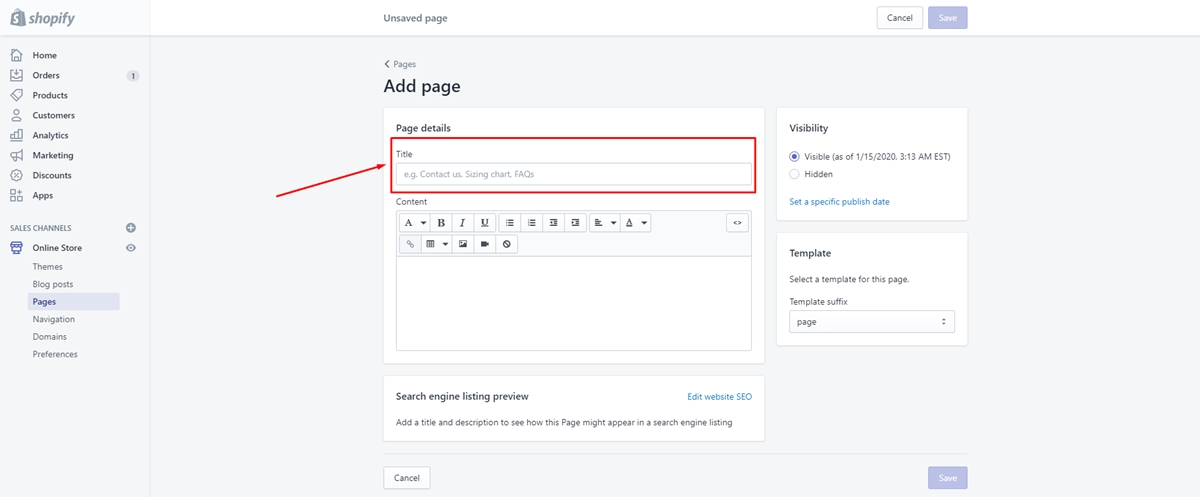
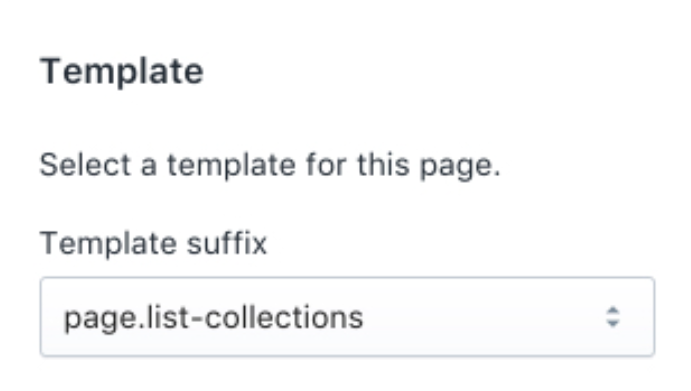
- Step 4. You need to assign your new template to the page. Just simply select the
page.list-collectionsthat you have on the Template suffix drop-down menu in the Template section.
- Step 5. Finally, click
Save.
On iPhone and Android
-
Step 1. Open the Shopify app, then tap
Store. -
Step 2. From the Sales channels section, tap
Online Store. -
Step 3. Then, hit on
Pages. -
Step 4. After that, go for
Add page. -
Step 5. You will see the page editor, just enter one
Titleat your wish in the text box provided. This title must be the same as the menu that you’ll create in the next steps. -
Step 6. Your new template need to be assigned to the page. Just simply select the
page.list-collectionsthat you have on the Template suffix drop-down menu in the Template section. -
Step 7. Finally, tap
Save.
Collections control menu
In this step, you will create a menu controlling which collections are displayed on your new page.
On Desktop
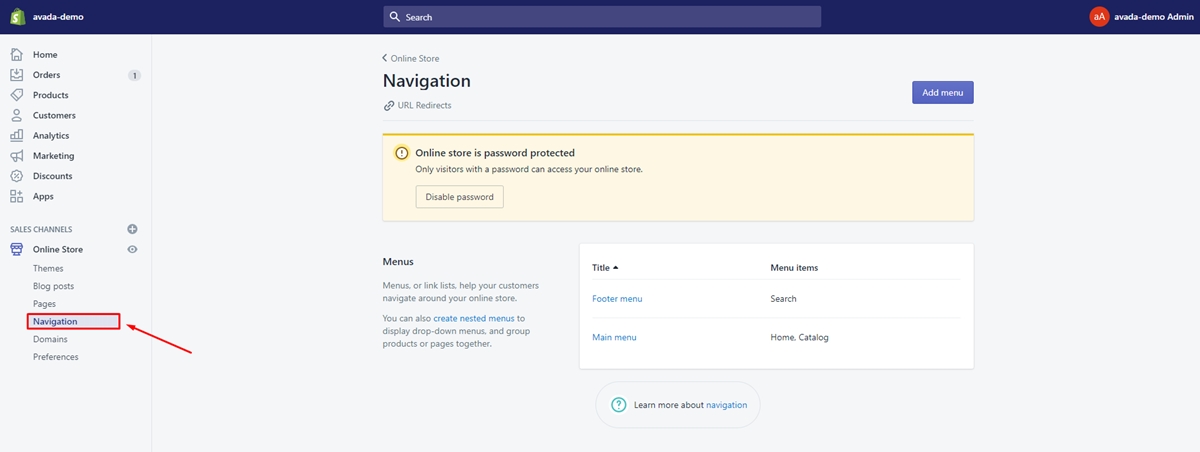
- Step 1. Open your Shopify admin, and then go to the
Online Storeand chooseNavigation.
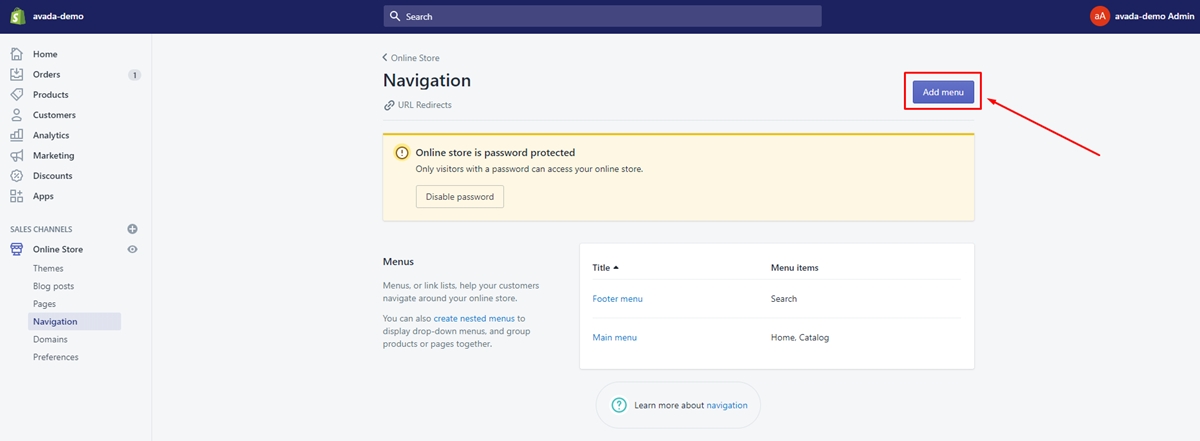
- Step 2. After that, click on the
Add menubutton on the screen.
-
Step 3. Then, you need to choose the same Title as the title that you gave the page that will feature your collections for your menu. For example, if the page you created has the title Mushrooms, then you must set your menu name is Mushrooms.
-
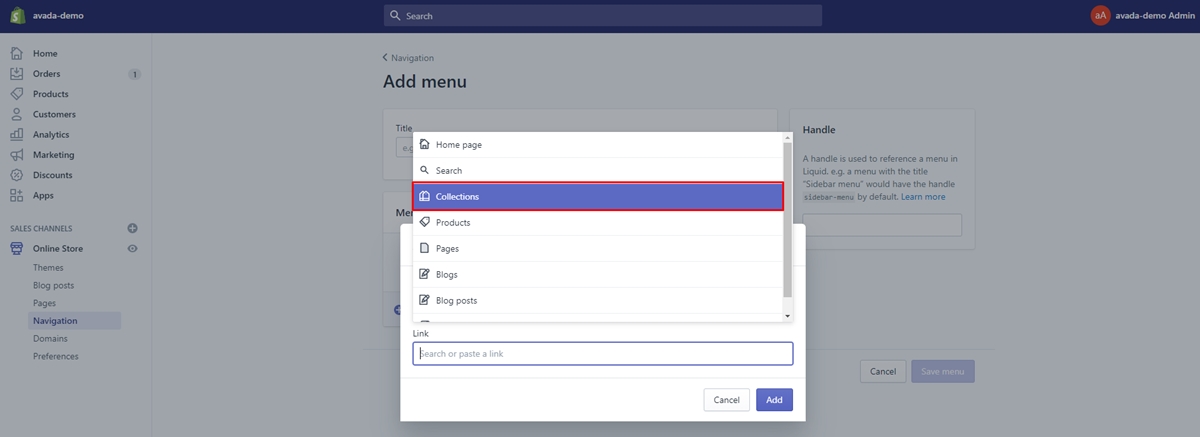
Step 4. In this step, click on
Add menu itemas you need to add links to your menu for each collection that you want to feature. After that, just choose the collections from your store by clicking onCollections, which is shown in the drop-down menu for theLinktext box. You need to focus on this way, as it is important to link to your collections instead of adding a URL to the text box.
- Step 5. Finally, Click
Save menu.
On iPhone and Android
-
Step 1. Open the Shopify app and then tap for
Store. -
Step 2. You will see the
Online Storeoption in the Sales channels section, tap it. -
Step 3. Next, tap
Navigation. -
Step 4. Just opt for the
Add menubutton after that. -
Step 5. Then, you need to choose the same Title as the title that you gave the page that will feature your collections for your menu. For example, if the page you created has the title Mushrooms, then you must set your menu name is Mushrooms.
-
Step 6. In this step, click on
Add menu itemas you need to add links to your menu for each collection that you want to feature. After that, just choose the collections from your store by clicking onCollections, which is shown in the drop-down menu for theLinktext box. You need to focus on this way, as it is important to link to your collections instead of adding a URL to the text box. -
Step 7. Finally, click
Save.
Conclusion
That’s all the information that you need to know when you want to add a collection to a page in Shopify. I hope this tutorial will contribute a great help to you in understanding this aspect more clearly and bring your customers the most convenient in your Shopify business career.
Also, remember to contact us if there are any troubles happening during your practicing, we are always willing to help you.
Related Posts:


